Scheduling Jobs
- 15 Apr 2026
- 2 Minutes to read
- Contributors

- Print
- PDF
Scheduling Jobs
- Updated on 15 Apr 2026
- 2 Minutes to read
- Contributors
- Print
- PDF
Article summary
Did you find this summary helpful?
Thank you for your feedback
Applies to: Lasernet Core 11
Rather than continuously sending jobs out of Lasernet Core, scheduling can be used for sending them out at predefined times. When a module supports scheduling, its Properties window contains a Scheduling tab.
Note
All times are specified in local time (not UTC).
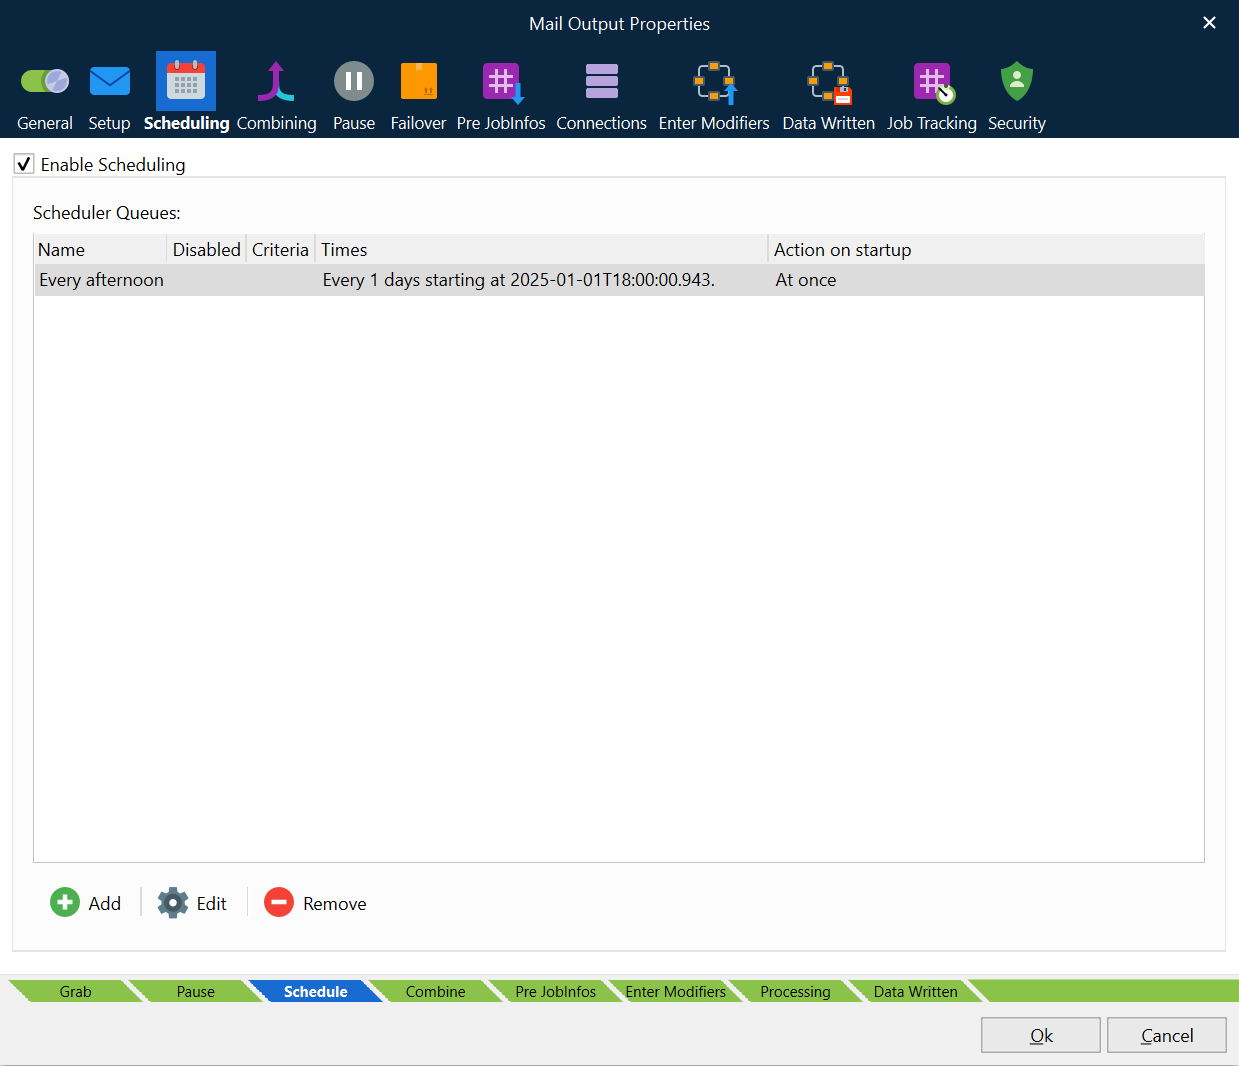
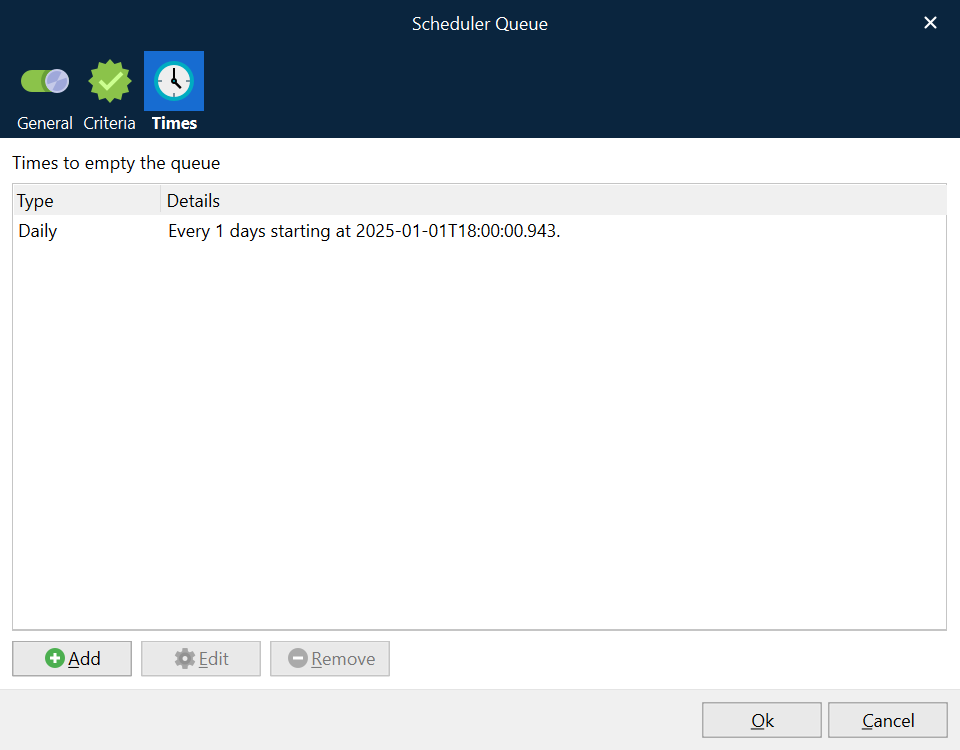
Double-click an entry on the Scheduling tab or click Edit or Add to configure a scheduler queue.
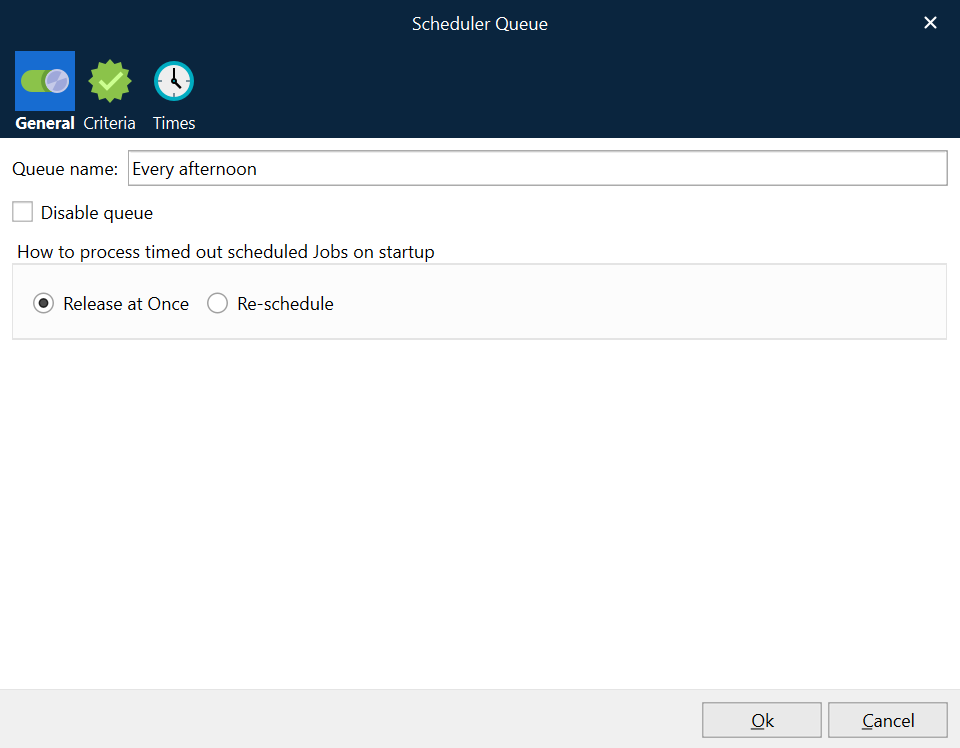
On the General tab, enter a unique Queue name. When a queue is emptied by Lasernet Core, the SchedulerQueue JobInfo is set to this name.
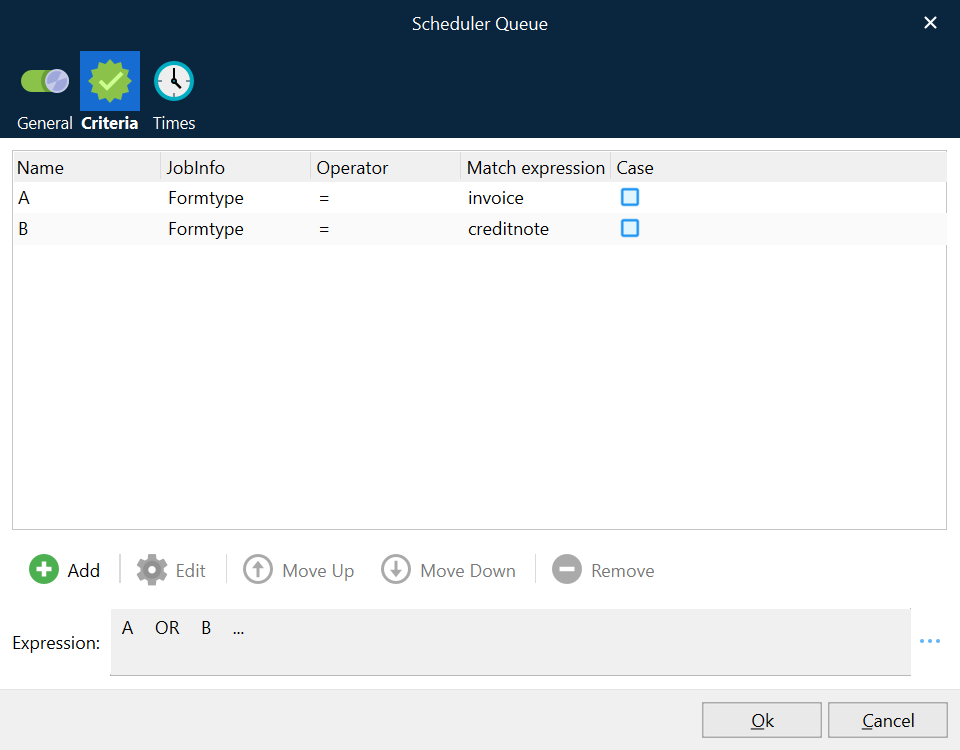
On the Criteria tab you can specify criteria that must be fulfilled for a job to be entered into the queue. If no criteria are met for a job, it is executed immediately.
On the Times tab, you specify when Lasernet Core empties the job queue. You can create one or more scheduler events here. Click Add to add a new scheduler event.
Specify a Schedule
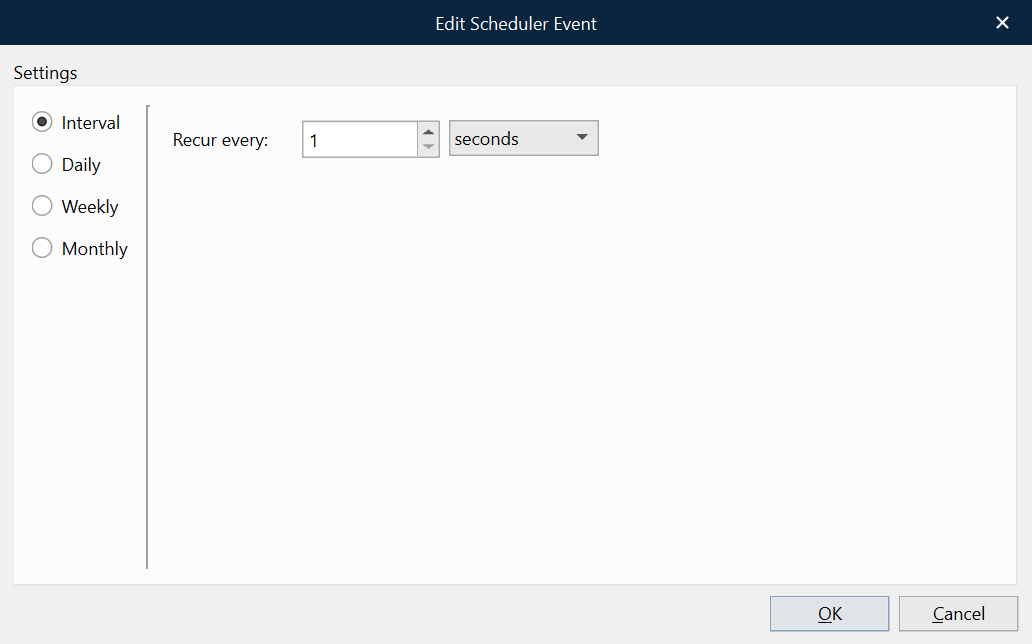
You can specify scheduling based on time intervals (seconds, minutes, or hours) or based on a daily, weekly, or monthly schedule.
Interval
Empty the queue every time that the specified amount of time passes. You can specify a schedule based on a specific number of seconds, minutes, or hours. For example, you can set a module to process jobs every 10 minutes.
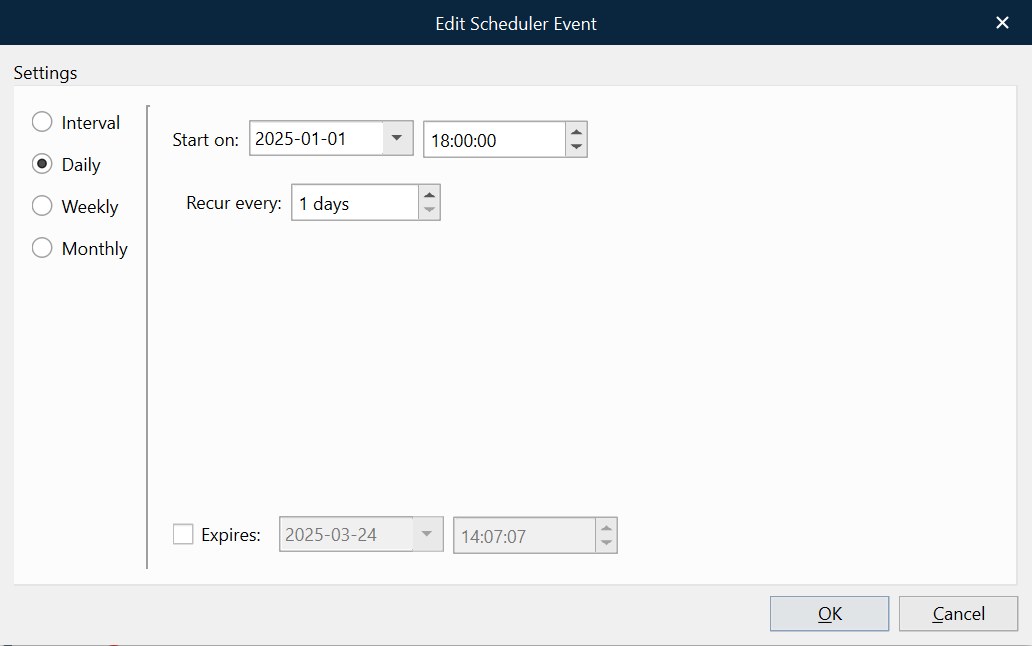
Daily
Empty the queue at the specified time of day. Use Recur every to control whether this happens daily or at a multiple-day-based interval. The schedule begins on the specified date. Use the Expires controls to specify when this schedule will end.
For example, you can set a module to process jobs at 2 AM on alternate days (00:02:00 and set Recur every to 2 days).
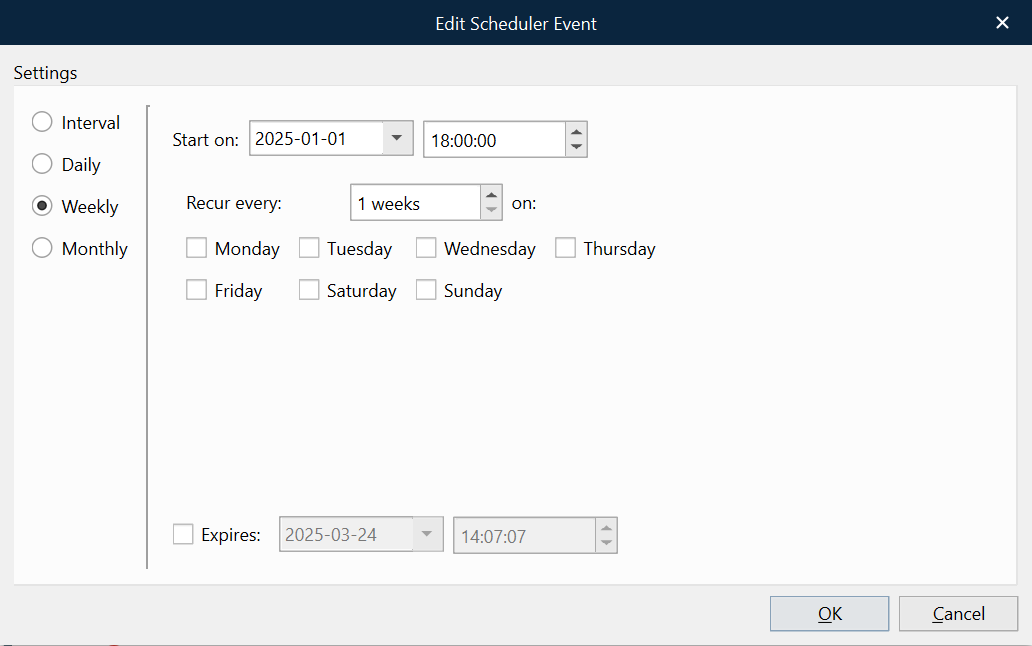
Weekly
Empty the queue at the specified time on the selected days of the week. Use Recur every to specify how often (in weeks) the schedule runs. The schedule begins on the specified date. Use the Expires controls to specify when this schedule will end.
For example, you can set a module to process jobs at 10 AM on the Monday and Wednesday of every second week (10:00:00, set Recur Every to 2 weeks, and select Monday and Wednesday).
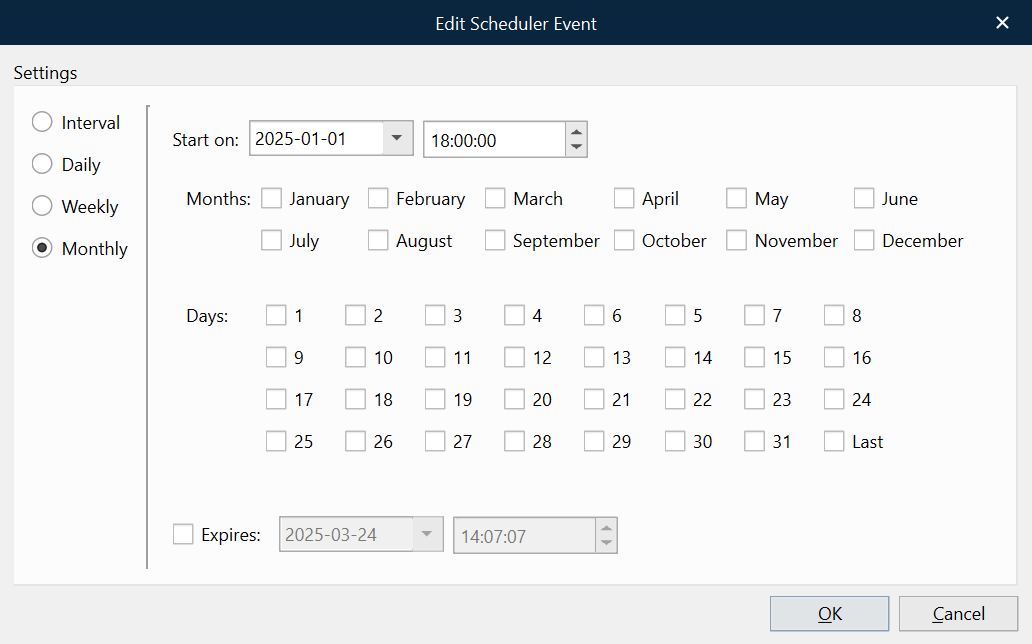
Monthly
Empty the queue at the specified time, on the selected days of the selected months. The Last checkbox specifies the last day of the month (regardless of its date). The schedule begins on the specified date. Use the Expires controls to specify when this schedule will end.
For example, you can set a module to process jobs at 2 PM on the 14th day and the last day of every month (14:00:00, select every checkbox in the Month area, select 14 and Last in the Days area).