PDF Form Filler
- 13 Apr 2026
- 2 Minutes to read
- Contributors

- Print
- PDF
PDF Form Filler
- Updated on 13 Apr 2026
- 2 Minutes to read
- Contributors
- Print
- PDF
Article summary
Did you find this summary helpful?
Thank you for your feedback
Applies to: Lasernet Core 11
The PDF Form Filler Engine is used to manage PDF Form Filler forms. The forms are designed to merge metadata with PDF filler fields created, for example, in Adobe Acrobat.
Each PDF Form Filler Engine has its own forms listed on the Forms tab.
PDF Form Filler Editor
PDF files may contain interactive elements such as text boxes, check boxes, combo boxes, and so on. PDF Form Filler Editor is used for working with such PDF files.
To add values for interactive fields available in the PDF file, follow the steps listed below:
Create a form and open it for editing.
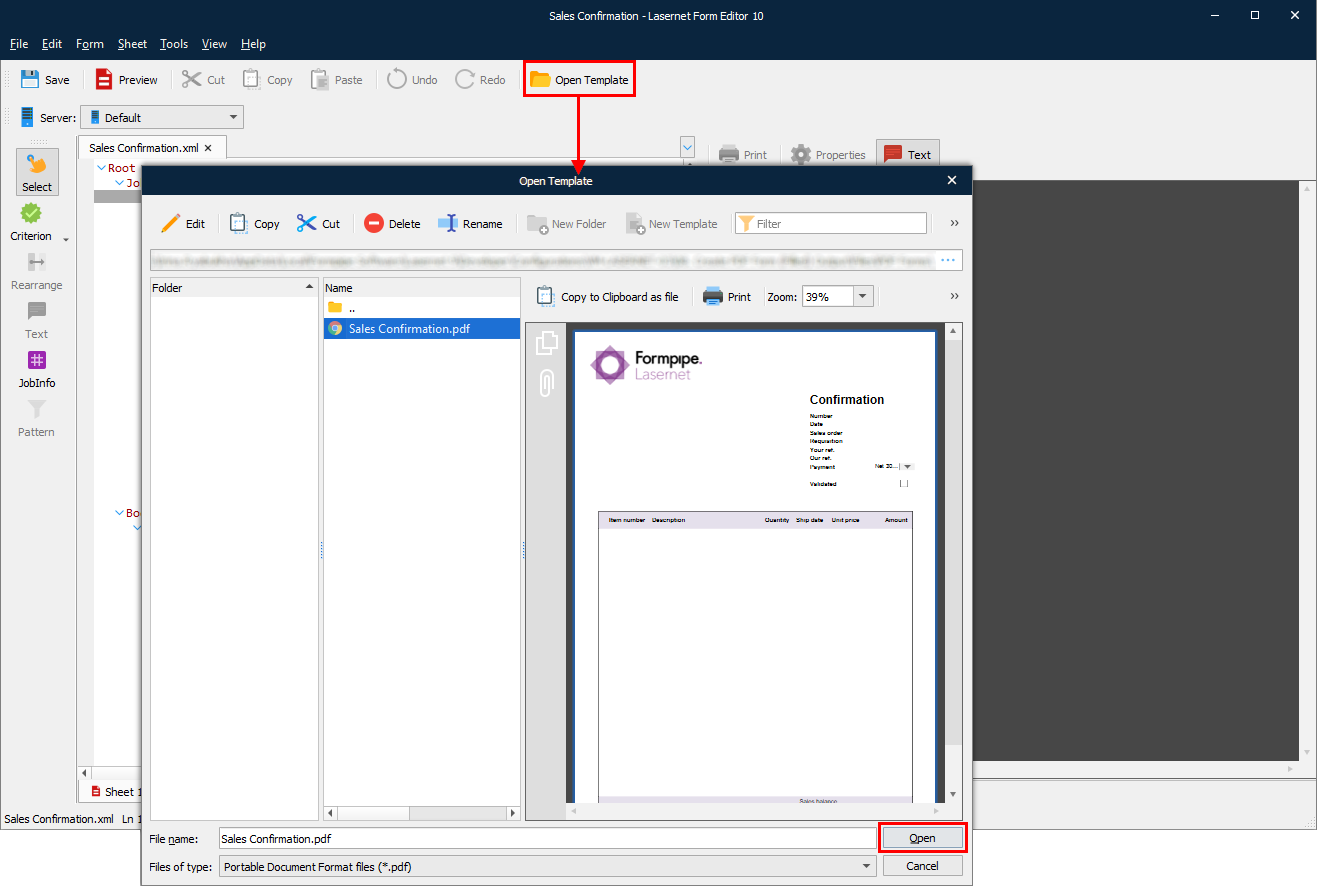
In the form that opens, click the Open Template button to open a template.
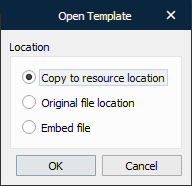
Once you click the Open button in the Open Template dialog box, you are prompted to select whether to embed a file into the form or just to refer to that file:
Copy to resource location: Copies a file you select to the PDF Forms folder of the Configuration Resources location. As a result, the form refers to the file which has been copied to the resource location.
Original file location: Allows the form referring to the selected file directly on disk, making it possible to change that file on disk without having to open a configuration, load a new template, as well as commit and deploy. If any changes to the template file imply adding interactive elements which are supposed to be used in Lasernet Core, the template shall be re-opened.
Embed file: Enables the user of a template embedded with the form.
Once you open a template, a list of fields available in the template is automatically generated on the Fields pane in the PDF Form Filler Editor.
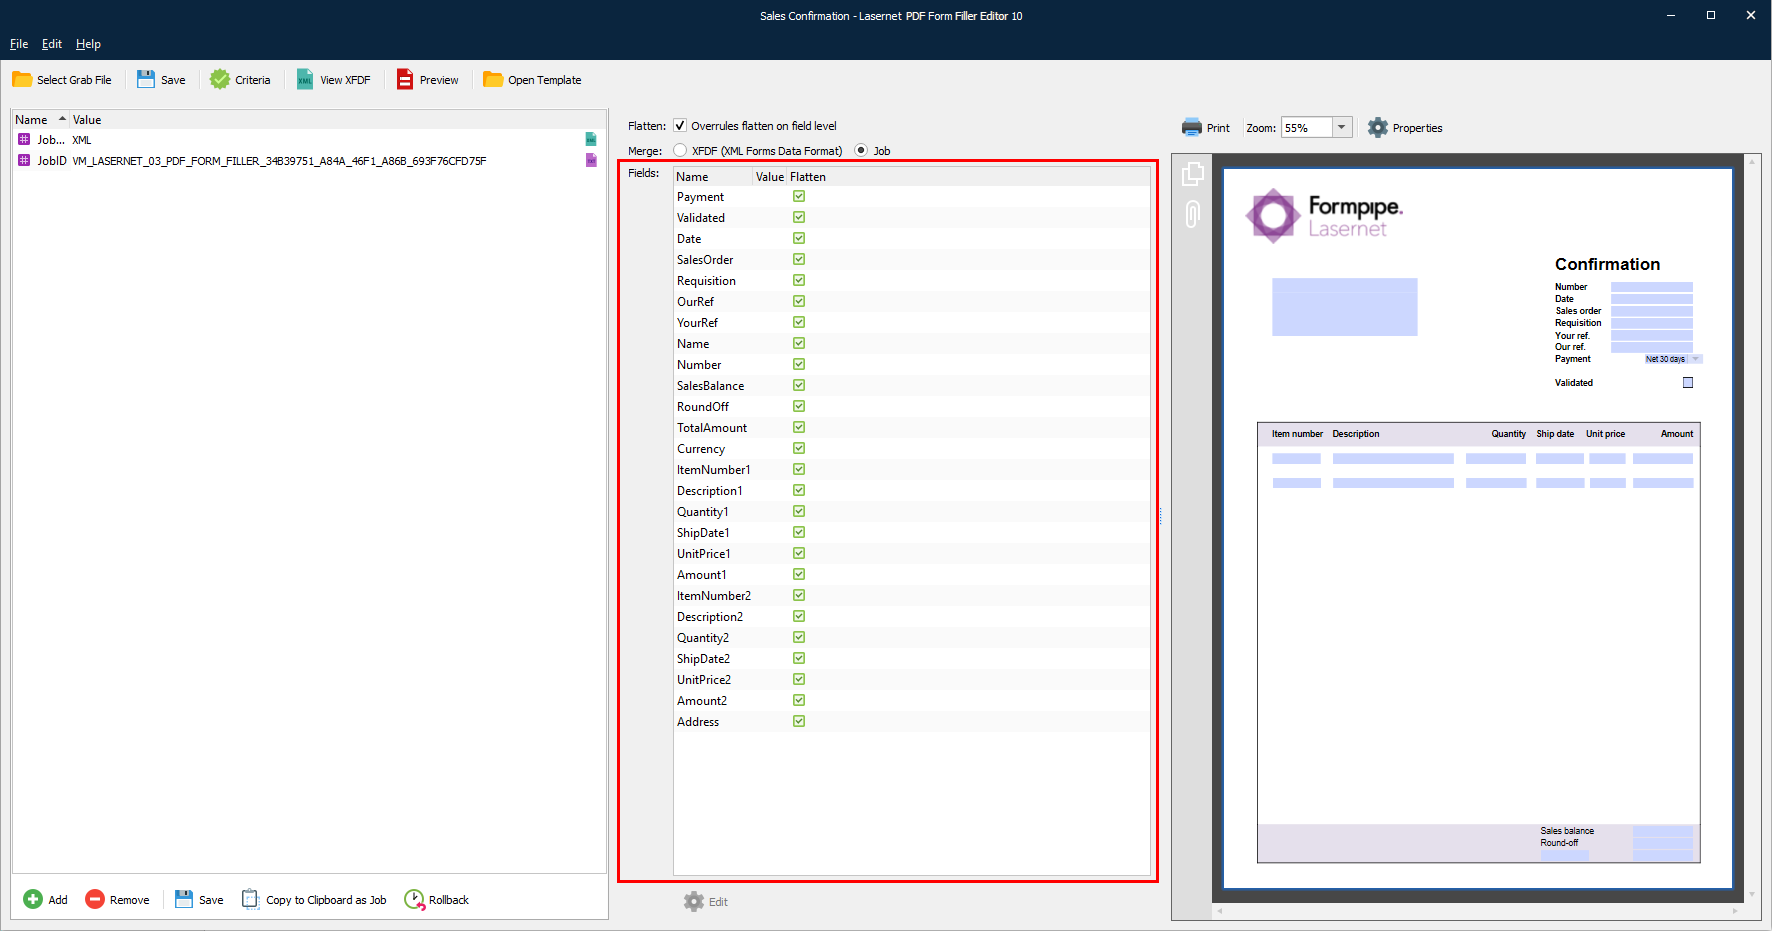
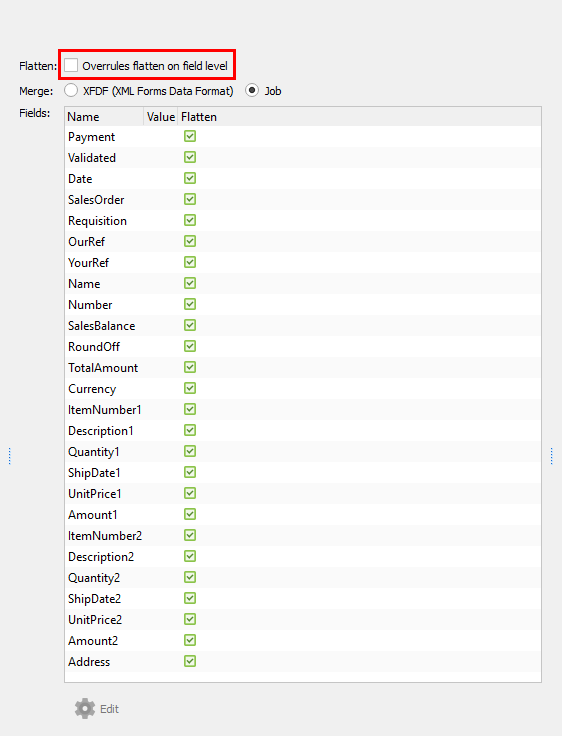
By default, all the fields are added as “flatten”, meaning that a generated document contains fields filled with corresponding values, but it is locked for changing those values. However, you can disable the Flatten option to make interactive fields editable. To this end, follow the steps listed below:
Clear the Overrules flatten on fields level checkbox. This enables manipulating the fields.
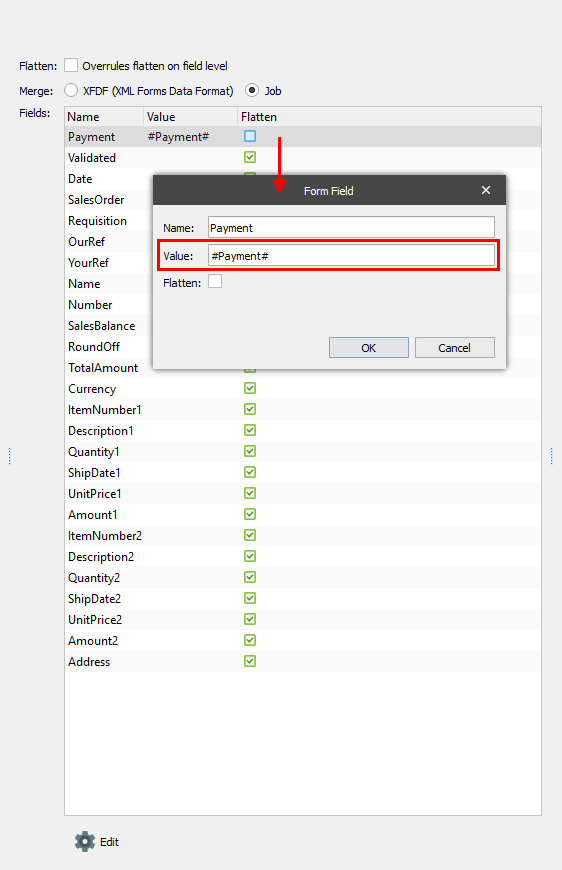
Additionally, you can clear the Flatten checkbox for the field that you want to unlock for manipulating. To do this, select the field record in the list, and then click the Edit button, or double-click the field record. In the Form Field dialog that appears, clear the Flatten checkbox.

Use the Form Field dialog to add a value to a field. To this end, specify the required value in the Value text box. You can define any JobInfo value using the JobInfo substitution mechanism (for example, #Payment#).
By default, all available interactive fields are merged as a job (the Job radio button is selected under Merge). For this mode, you are supposed to add values and flatten type (true/false) of each field manually. If you have the XFDF (XML Form Data Format) file, select the XFDF (XML Form Data Format) radio button under Merge and open the file by clicking the Select Grab File button. For this mode, field values as well as a flatten type (true/false) of each field are taken from this file.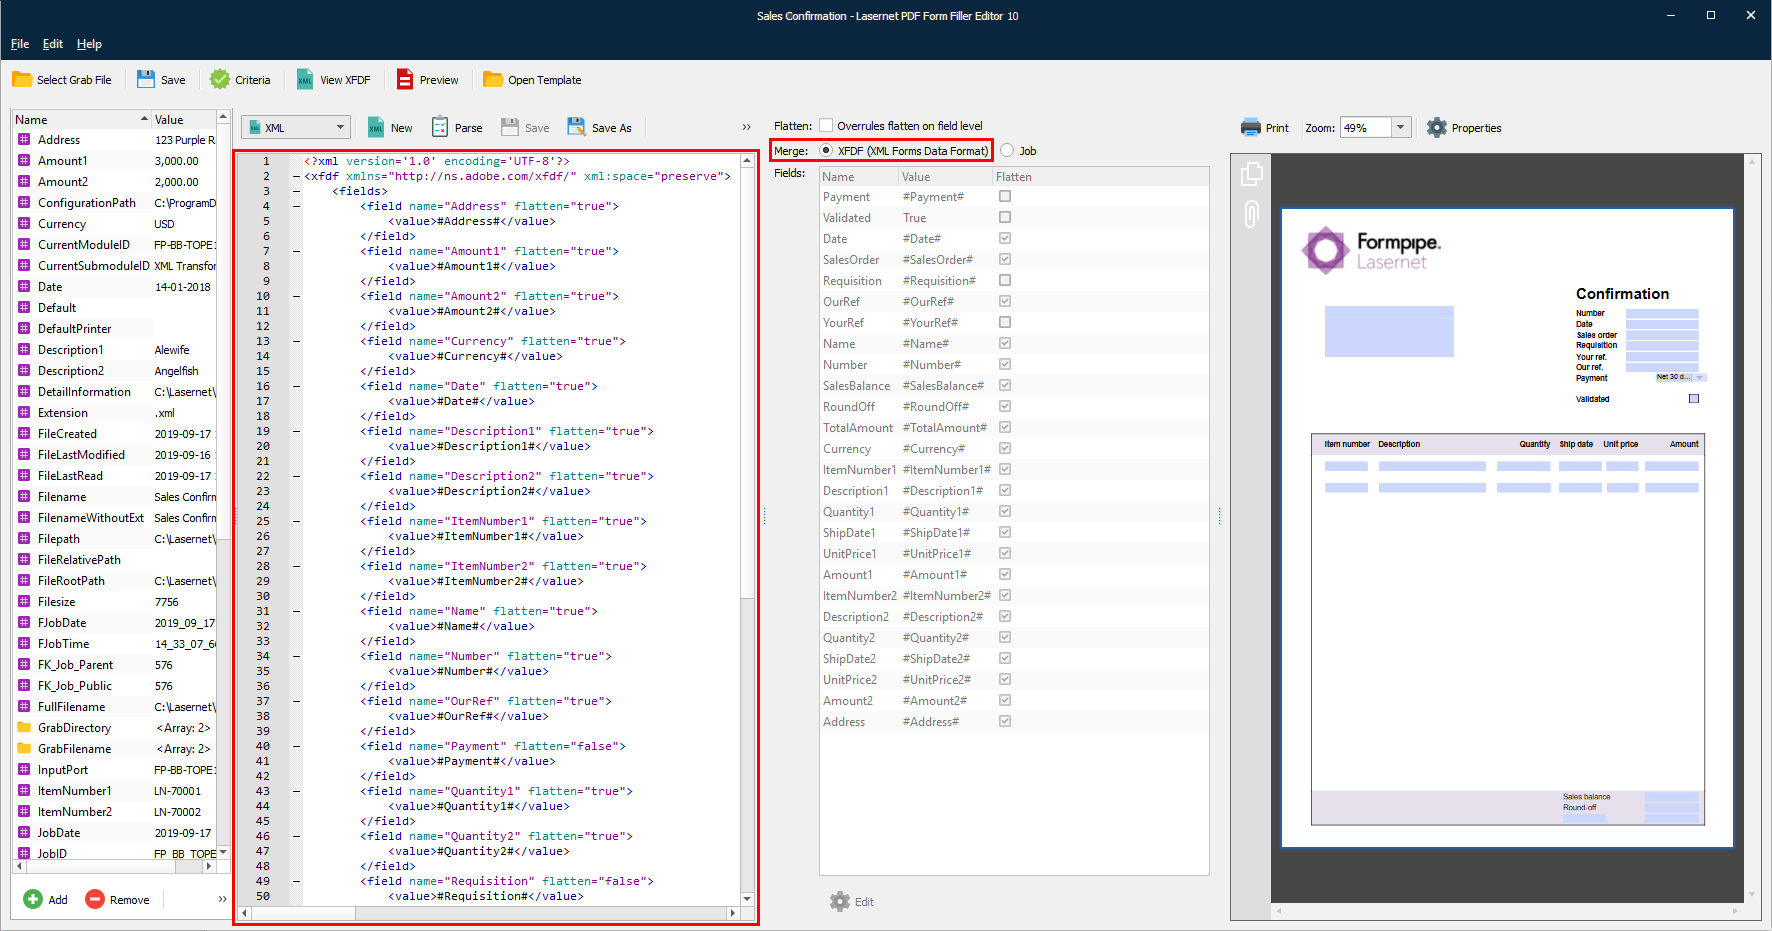
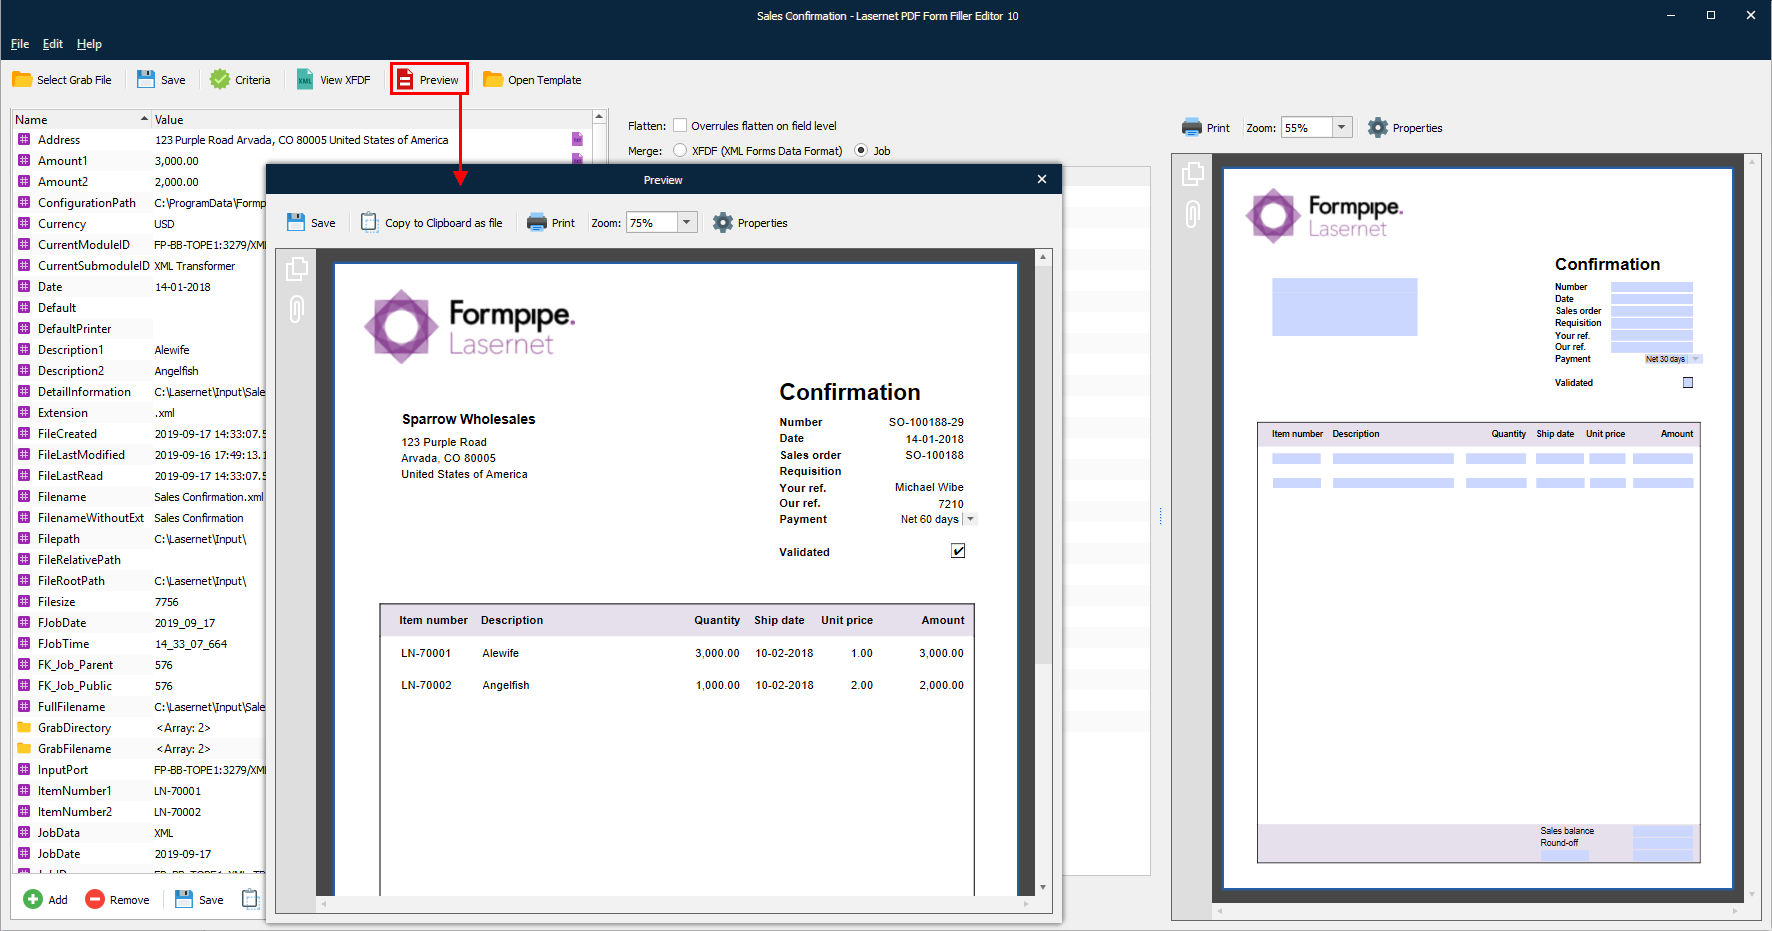
Once you are done, you can preview the final version of your document containing fields with specified values by clicking the Preview button.