Lasernet Keep Server Settings
- 16 Mar 2026
- 3 Minutes to read
- Contributors


- Print
- PDF
Lasernet Keep Server Settings
- Updated on 16 Mar 2026
- 3 Minutes to read
- Contributors
- Print
- PDF
Article summary
Did you find this summary helpful?
Thank you for your feedback
The Server Settings page enables you to view and change a range of Lasernet Keep system settings.
Navigate to the Server Settings Page
To access the Server Settings page, click Settings in the admin menu, then click Server Settings.
.png)
The Server Settings page is organised into three tabs:
General
Password
Archive Path
.png)
Update Server Settings
To update server settings, change the settings on the tabs of this page and then click Save Changes.
Protected Settings
Some settings (such as Lock Server) are protected by an additional confirmation step. To apply changes to protected settings, review the advice and settings change summary in the Updating protected settings window, then click Confirm.

General Settings
This page contains miscellaneous settings and some security settings.
Miscellaneous Settings
Setting | Description |
|---|---|
Maximum Search Results | The maximum number of results that a search can return. |
Maximum Results Per Page | The maximum number of results that a search results page can contain. |
Startup Message | If text is entered, it is displayed on the Keep login page. |
Security Settings
Server Lock Setting | Description |
|---|---|
Lock Server | Prevents all non-administrative users from logging into Keep. |
Lockout Bypass Group | Users who are in the selected group can log in to Keep when the server is locked. If No group is selected, no non-administrative users can log in. |
Server Locked Message | This message is displayed on the Keep login page when the server is locked. |
User Log-in Setting | Description |
|---|---|
Single IP Login | Prevents users from simultaneously logging to Keep from more than one IP address. |
Login Lockout | Disables a user’s account after multiple failed login attempts. The number of failed attempts allowed is controlled by Login Lockout Threshold. |
Login Lockout Threshold | Specifies how many failed login attempts a user can make before their account is disabled. |
Document Access Control Setting | Description |
|---|---|
Document Access Control | If selected, Keep applies document access verification to user requests to access documents (through the Keep web application and REST API). In general, document access verification ensures that a user can retrieve only the documents that are available to them through the searches that they have access to. |
Document Sharing Setting | Description |
|---|---|
Document Sharing |
If selected, users can create secure links to documents they find through search and share them with external users (through the Keep web application or REST API).
|
Password Settings
This page contains password settings.
Setting | Description |
|---|---|
Password History Count | Specifies how many passwords from the user’s password history (from most recent to older) the user cannot use as their new password. |
Minimum Password Length | The minimum password length. |
Maximum Password Length | The maximum password length. |
Repeated Character Usage | Specifies a limit on how many times any character can appear in a password. To disable this restriction, enter 0. |
Character Requirements
Use the following checkboxes to impose particular types of character-based password rules.
Character Requirements Checkbox | Description |
|---|---|
Alphabetic and Numeric | The password must contain alphabetic and numeric characters. |
Uppercase and Lowercase | The password must contain uppercase and lowercase characters. |
Starts with Alphabetic | The password must start with an alphabetic character. |
Password Expiration Settings
Setting | Description |
|---|---|
Password Expiration | If selected, each user’s password expires a specific number of days after it is set. Password lifetime is controlled by Days Until Expiration.
|
Days Until Expiration | Specifies the lifetime of a password. After a user’s password expires, they must change it. |
Expiration Warning | Specifies how many days after setting their password a user is shown an upcoming expiration warning. |
Archive Paths
Document files and application data are stored as files. The location is configurable on the Archive Paths tab.
Under the default configuration, document files and application data are stored in a directory on a file system. However, for Microsoft Azure Cloud deployments, Keep stores document files and application data as Blobs in Azure containers.
The Available Archive Paths area lists the currently specified file locations. You can create archive path items here and then assign them to one of the following settings (to specify the file location used for each of them):
Documents Path
Chunks Path
If you change Documents Path or Chunks Path, click Save Changes.
To create an archive path:
Click Create New Path (see 1 in the image below).
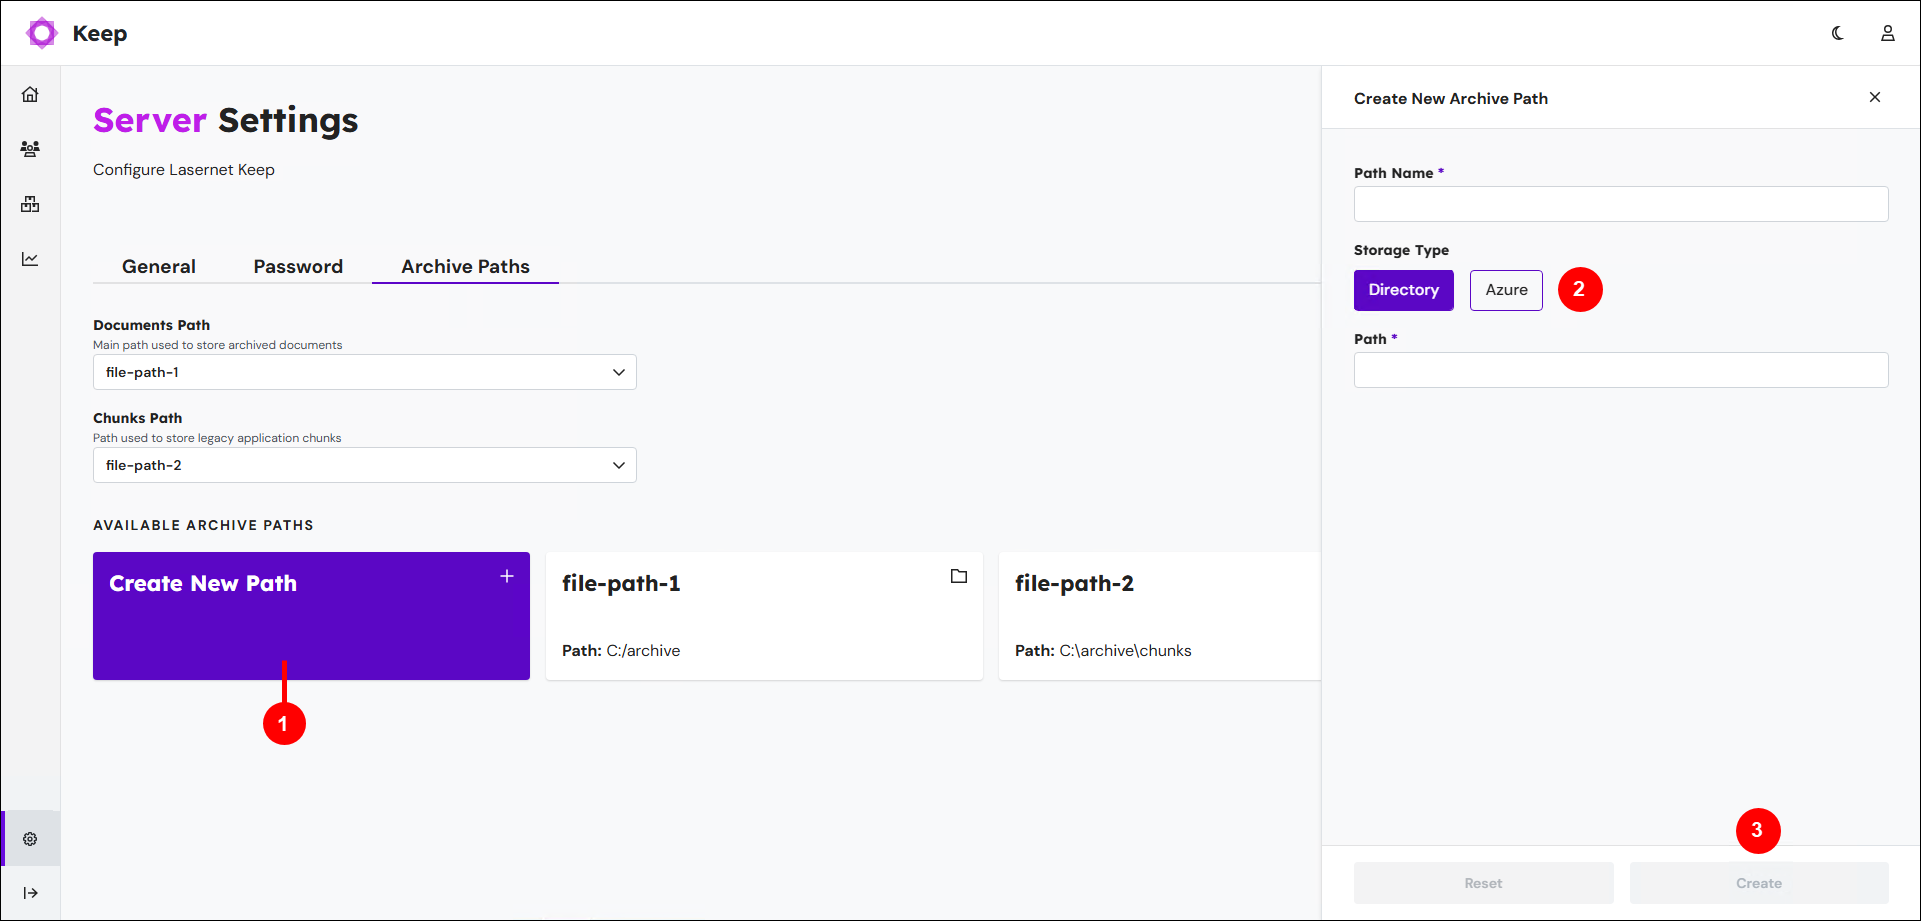
In the Create New Archive Path pane, select the Storage Type (2) of the path (Directory or Azure).
Enter the properties of the archive path:
Directory
Path Name
Path
Azure
Path Name
Account Name
Account Key
Container
Click Create (3).