- Print
- PDF
Language Texts are a Lasernet FO Connector functionality that enables users to create custom labels or translations when the existing system labels do not work well for their requirements.
Users can create Language Texts as part of the Lasernet Configuration for each entity and then migrate this configuration to other entities as required.
Once Language Texts have been created, they can be added to specific reports so that the translations in the Language Text appear in our outputs.
How Does It Work?
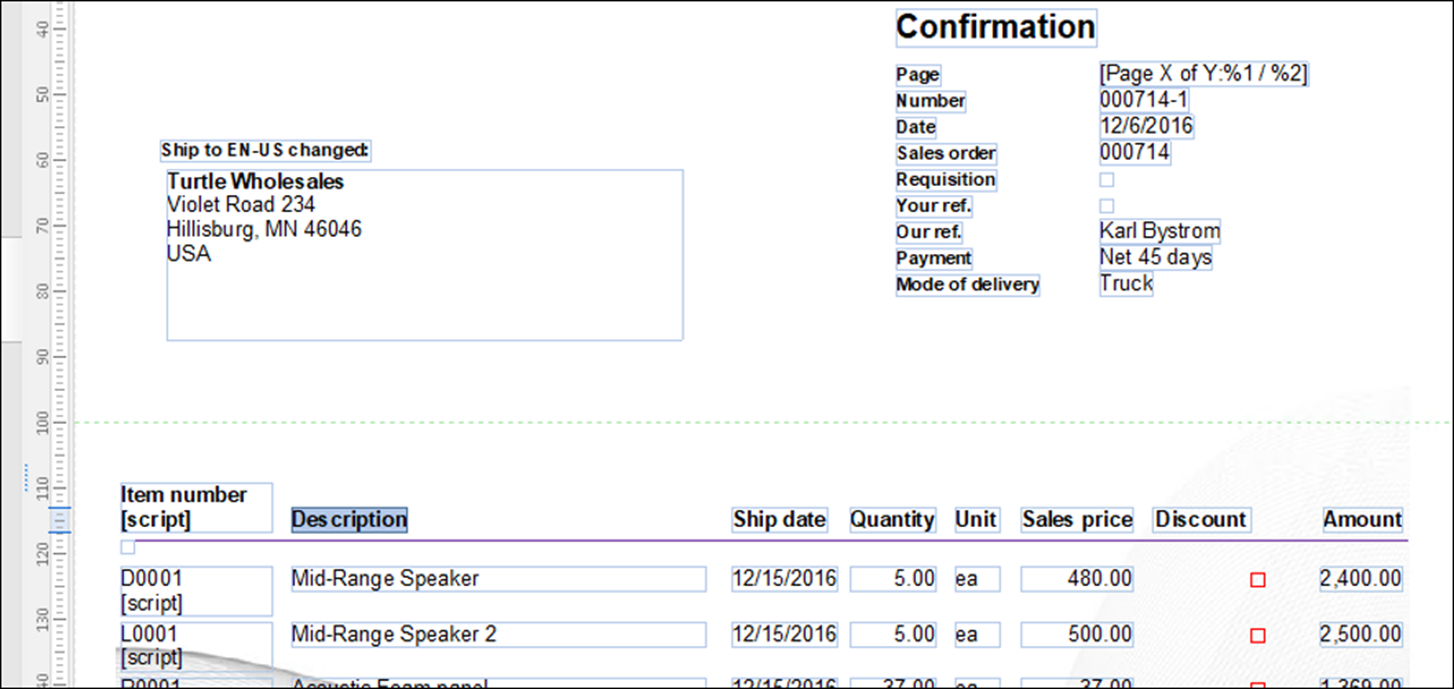
Language Texts enable users to create their own labels and translations in the system. For example, the following is a Sales Confirmation report shown in Lasernet Developer, run in the language en-us:
The report language in the XML under the JobInfo node is ReportLanguage:
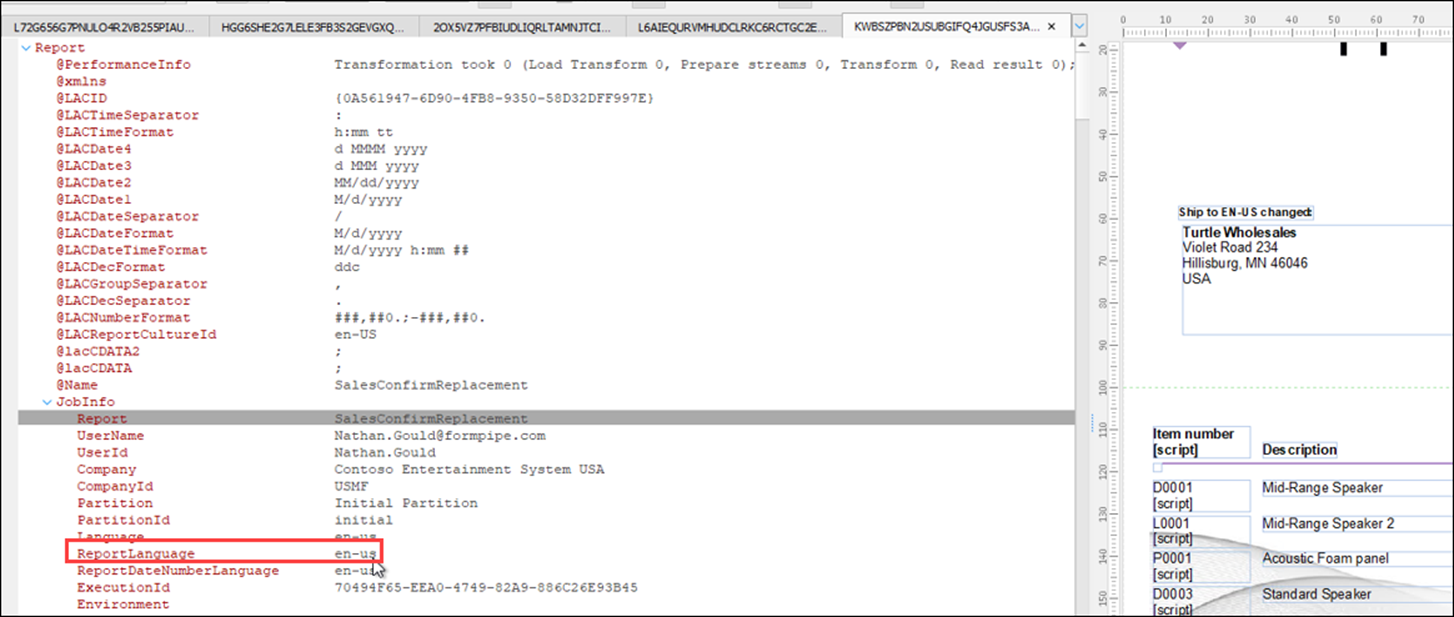
In this report, the output for the label in the second column is Description.
If you open FO and run the report in another language, such as French, although the other labels are updated, the label for Description remains the same.
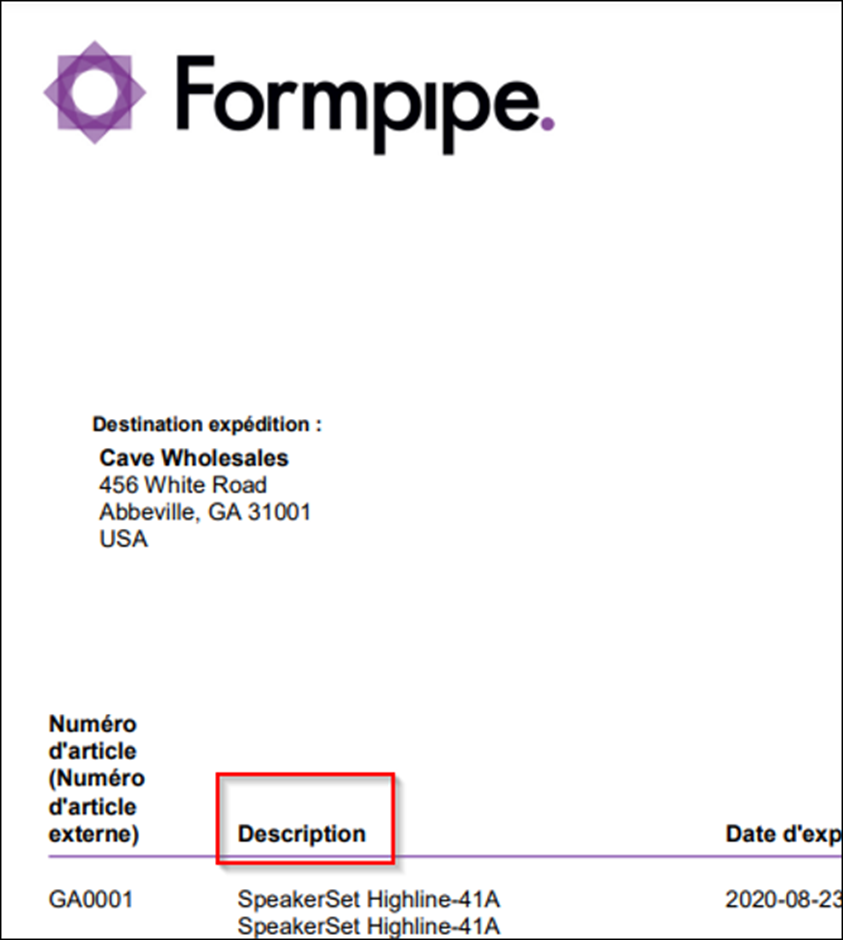
This may not be the label that the customer wants to use in the French language version of their report. Language Texts are the tool you can use to fix this issue.
Language Text Configuration
In order to control the output of a report in Lasernet Developer, you need to navigate back to FO, where Language Texts are configured within the Lasernet module itself. To do this, follow these steps:
Navigate to Lasenet > Setup > Language text.
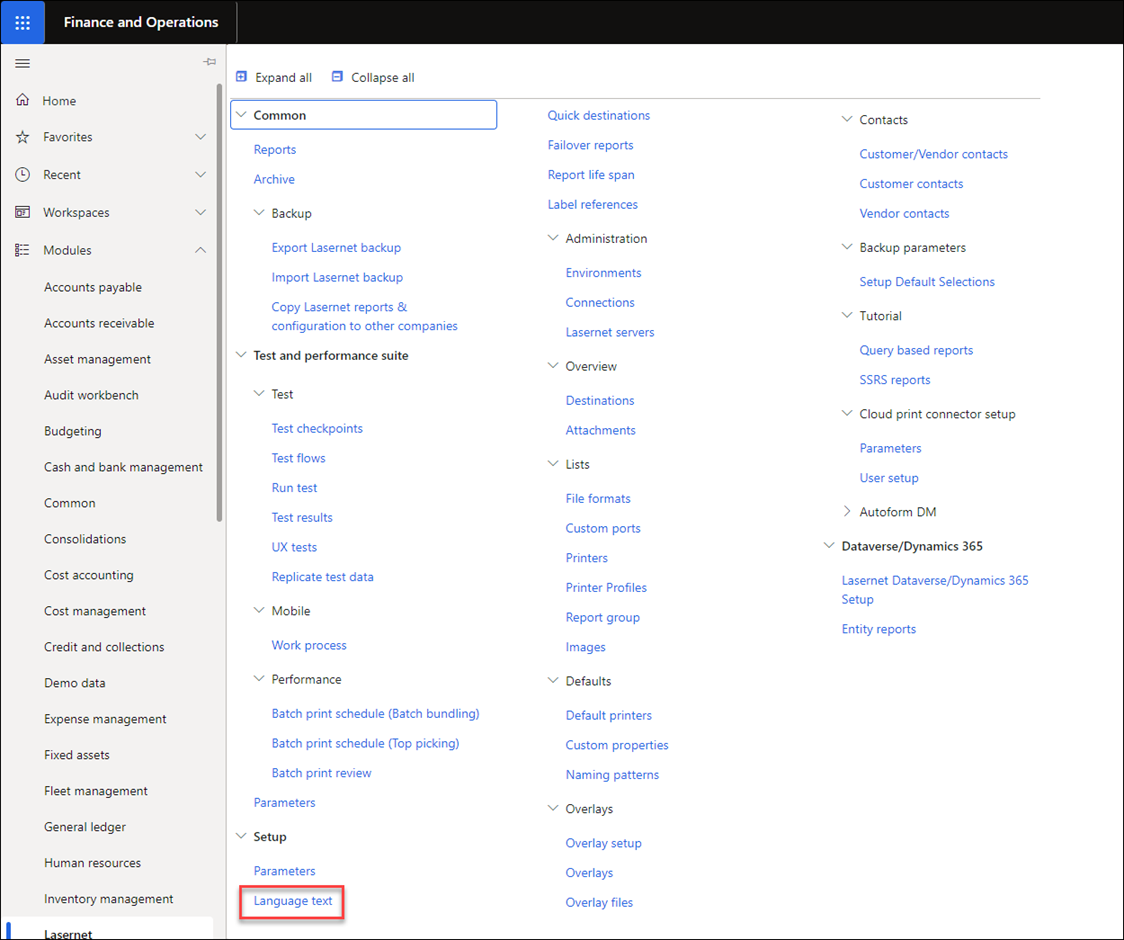
This will open the Language text form.
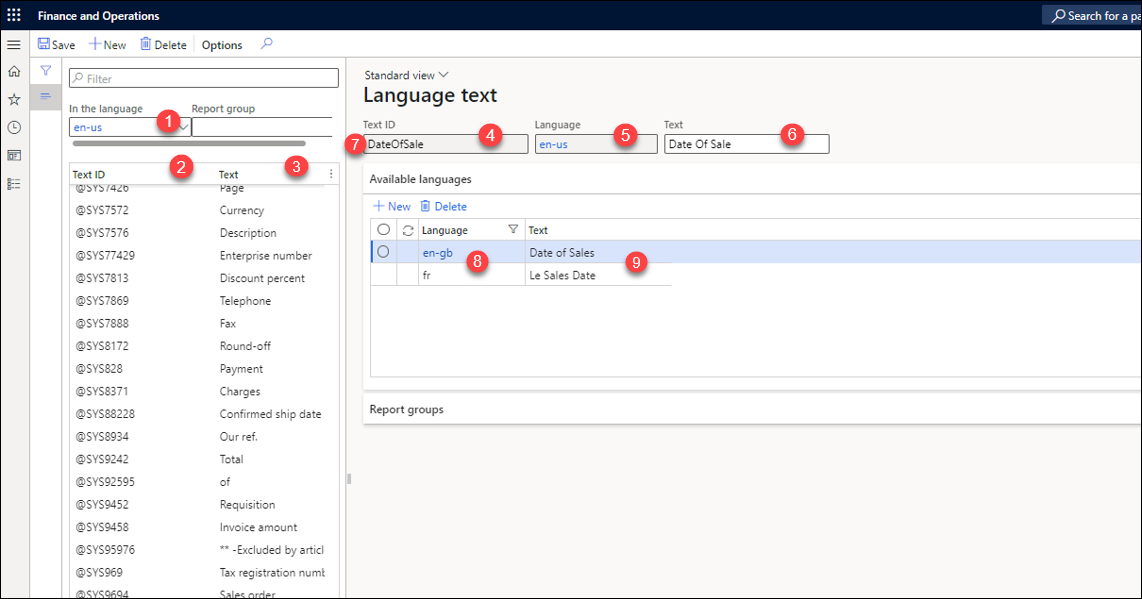
The description of the elements of the form is as follows:
Element no. and name | Description |
|---|---|
1 - Default Language | This is the basis for all of the configuration you are doing in Language Texts. It is usually set to en-us and acts as our baseline for converting from. |
2 - Text ID | This is an ID field used by the system to identify the Language Text. The system IDs will be in the @SYSXXX format. For any custom Language Texts, the ID can be defined as something more obvious, such as in point 7. |
3 - Text | The text in the default language set in point 1 also counts as a translation for that language, so it is the label that will be used if the report is run in the default language, which is en-us in this example. |
4 - Text ID | This is an ID field used by the system to identify the Language Text. The system IDs will be in the @SYSXXX format. For any custom Language Texts, the ID can be defined more clearly, as in point 7. |
5 - Default Language | This is the basis for all of the configuration you are implementing in Language Texts. It is usually set to en-us and acts as our baseline for converting from. |
6 - Text | The text in the default language, which was set in point 1, also counts as a translation for that language, so it is the label that will be used if the report is run in the default language, which is en-us in this example. |
7 - Custom Text ID | The same as point 2, but created with a label that is easier to recognize. |
8 - Translation language | This is the language you want to translate to. |
9 - Translated text | This is the actual text in the translated language. |
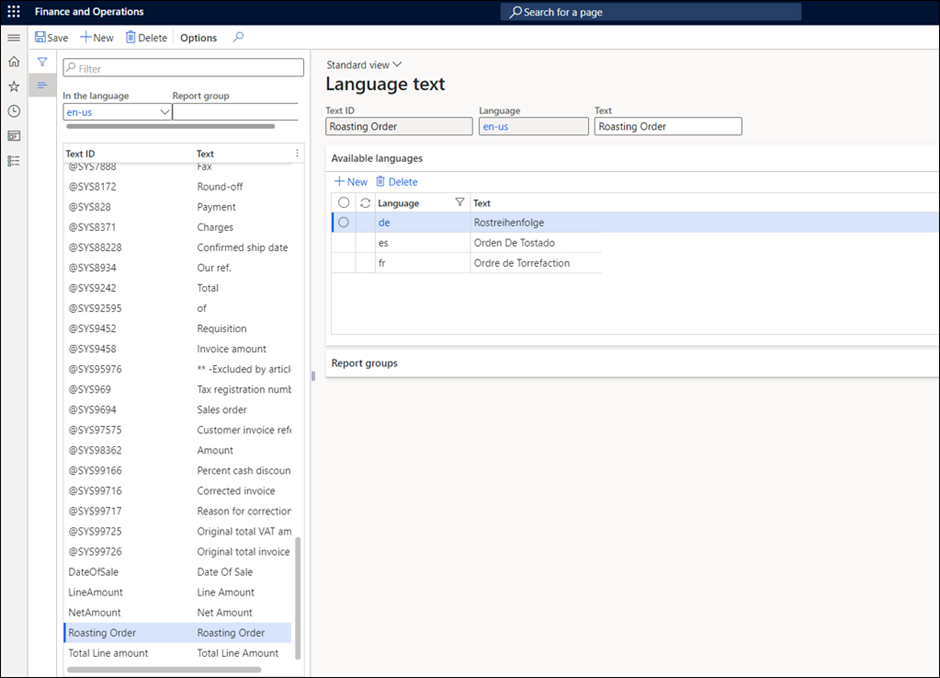
For example, you could receive a requirement to create a new label for a custom Roasting Order report for a chocolate producer. The producer is based in the United States but roasts cocoa in three different locations - Spain, Germany, and France. The new report is for a roasting order for cocoa and needs to be printed in the local language at each location.
You need to create a new “Roasting Order” label and three translations for their new report. To do this, you would navigate to the Language text form using the previous steps and create the following setup:

The description of the elements of the form is as follows:
Element no. and name | Description |
|---|---|
1 - Text ID | The text ID that was created for this Language Text is the same as the text in the default language, for simplicity. |
2 - Text default language | This is the text in the default language (en-us). |
3 - German translation | This is the German translation. |
4 - French translation | This is the French translation. |
5 - Spanish translation | This is the Spanish translation. |
If several custom labels need to be created, you must obtain a list of all the labels and translations at the start of the project and create them with the Language Text functionality. Whilst it is possible to add these Language Texts later on in the form structure, it is easier to do so in the Language text form.
Add a Language Text to a Report
In this example, you will be adding the label to the Sales Confirmation report:
Navigate to Lasernet > Common > Reports.
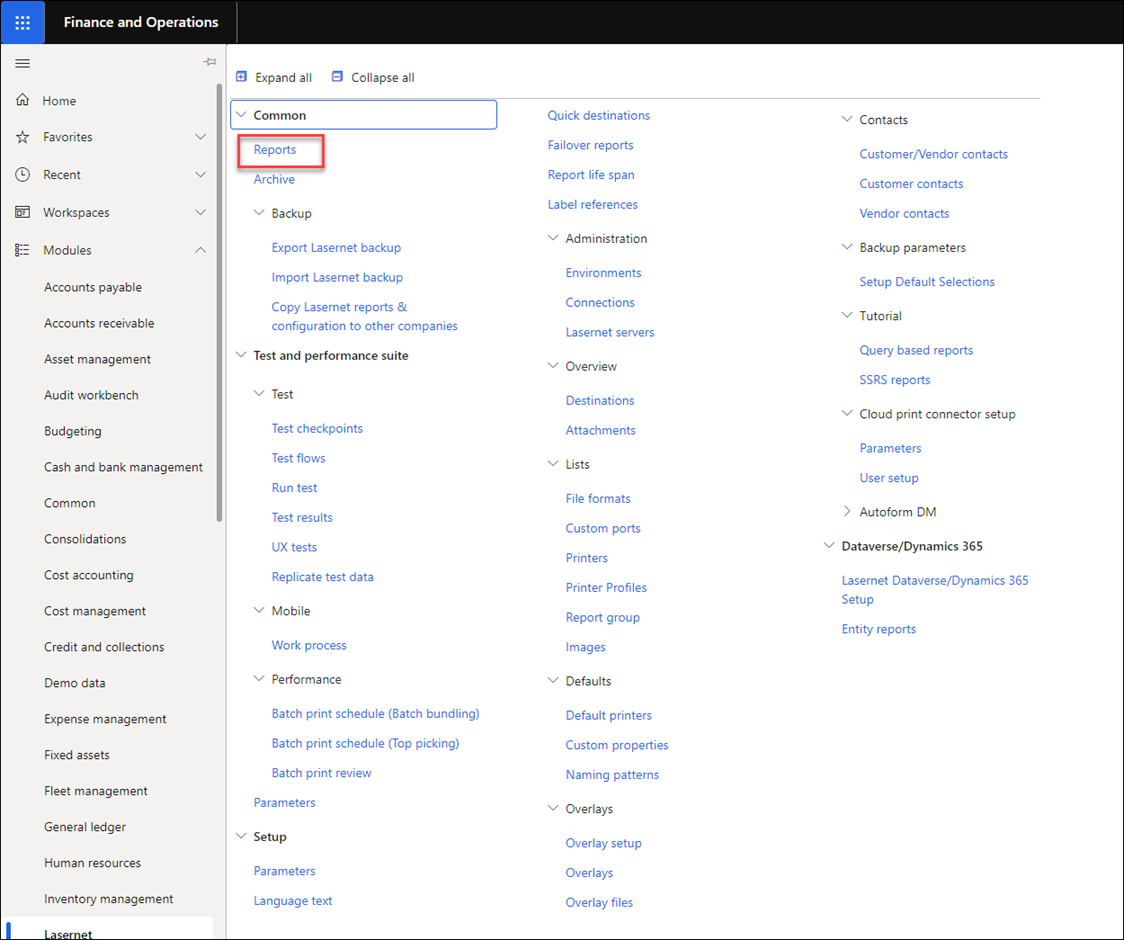
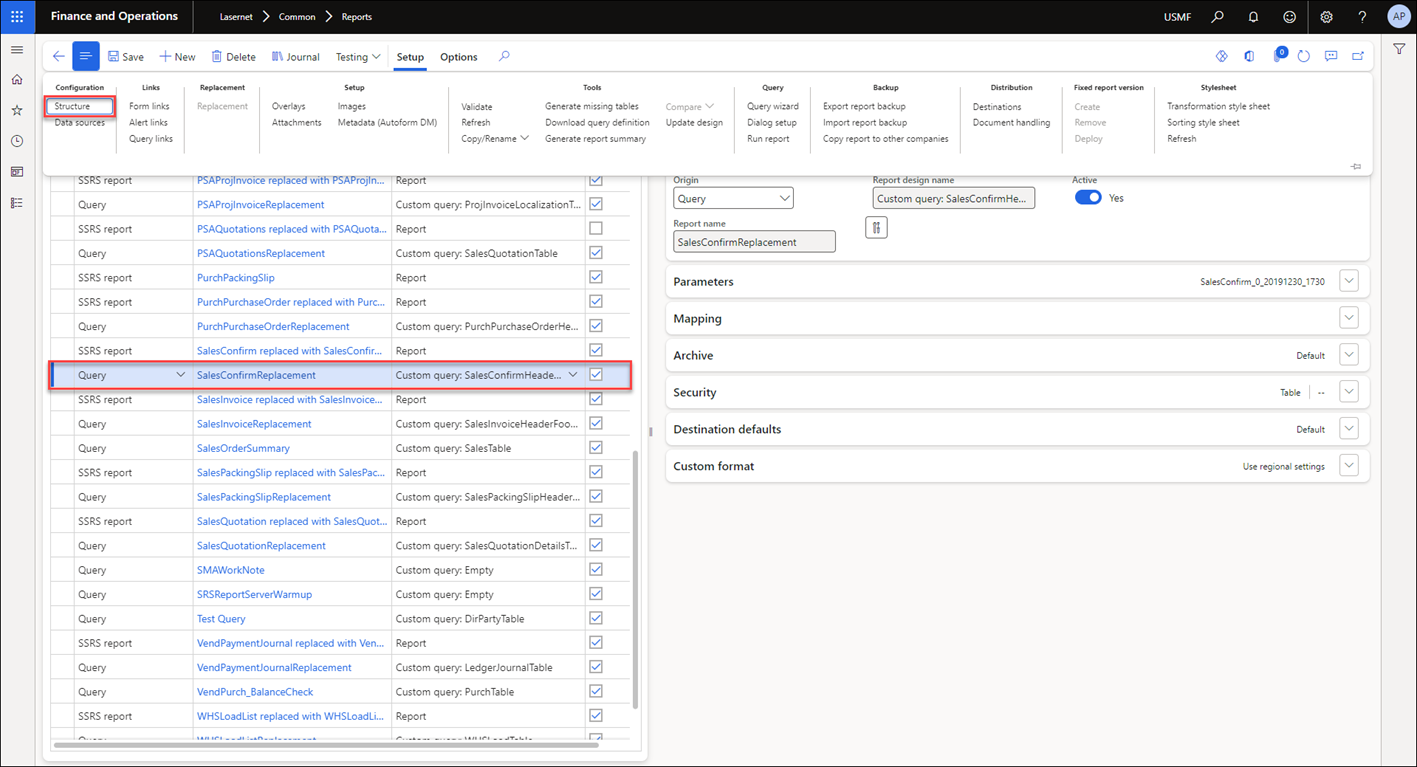
Search in the list or use the Filter functionality to search for the SalesConfirmReplacement report:

Select the report, then click Setup > Structure.
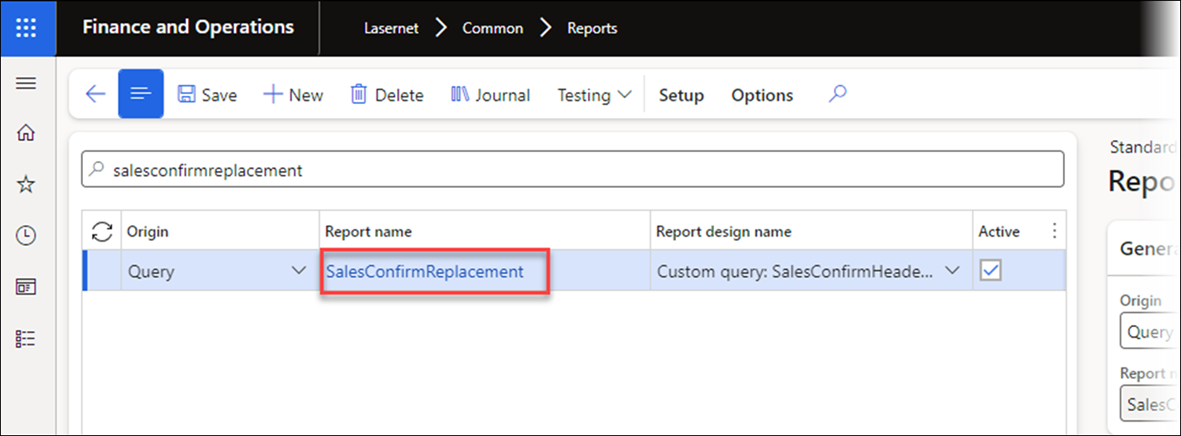
Alternatively, to open the Structure form, click the blue highlighted link on the Reports list page.
Once in the Structure form, the report structure is visible on the left, which mimics the structure of the XML message sent to Lasernet Developer. On the right are the contents of the structure node that you selected.
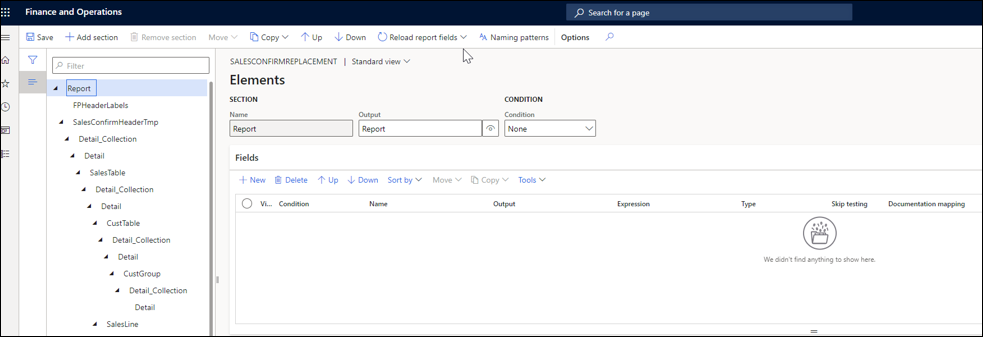
Usually, the report templates will have a part of the structure already created for labels. Here, it is called FPHeaderLabels.
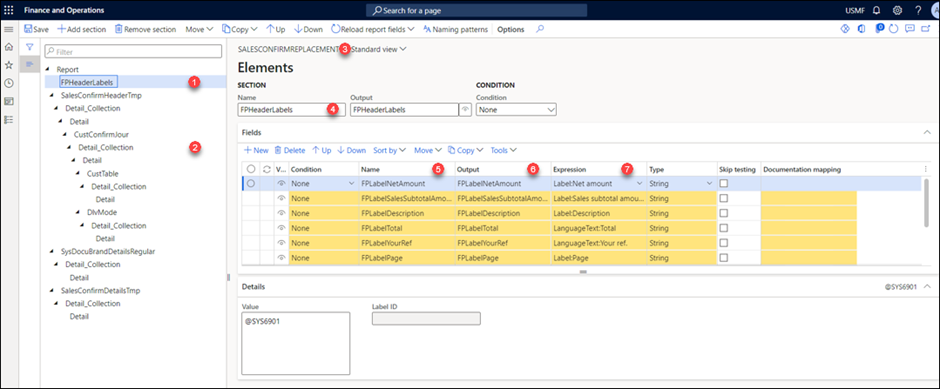
Element no. | Description |
|---|---|
1 | This is the breakdown of the report structure, which should mimic the query structure and will define the eventual structure of the XML that is produced. |
2 | This is a node within the structure. In the example here, the Sales table is the name of the node and will contain the labels. The detail collection is a list of all the detail sections, and the detail section is where the field values will be. |
3 | The name of the report. |
4 | This is the name of the section of the structure you are in. |
5 | This is the name of the field in the structure. It is just a reference. |
6 | This is the name that the field will be referred to in the XML output. |
7 | This is the expression that defines what is in the field. |
Once you have selected the correct section, you can add a new field for the Language Text.
Click the New button.

Fill in the Name and the Output. Then, in the Expression column, click the drop-down menu and select LanguageText.
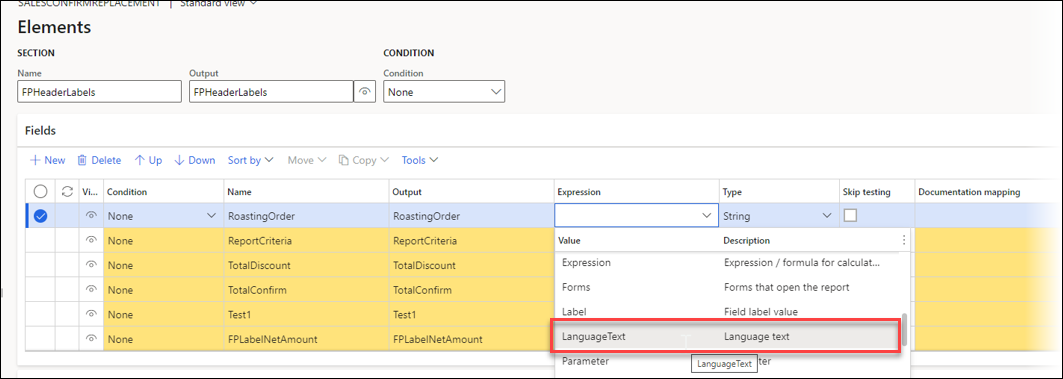
Click the dropdown again, and the following screen will appear:

Here, you can see a list of the Language Texts for this legal entity with the Text ID, Text, and Translations that were seen earlier.
Select the appropriate Language text (Roasting Order in this case) and click Use Language text.
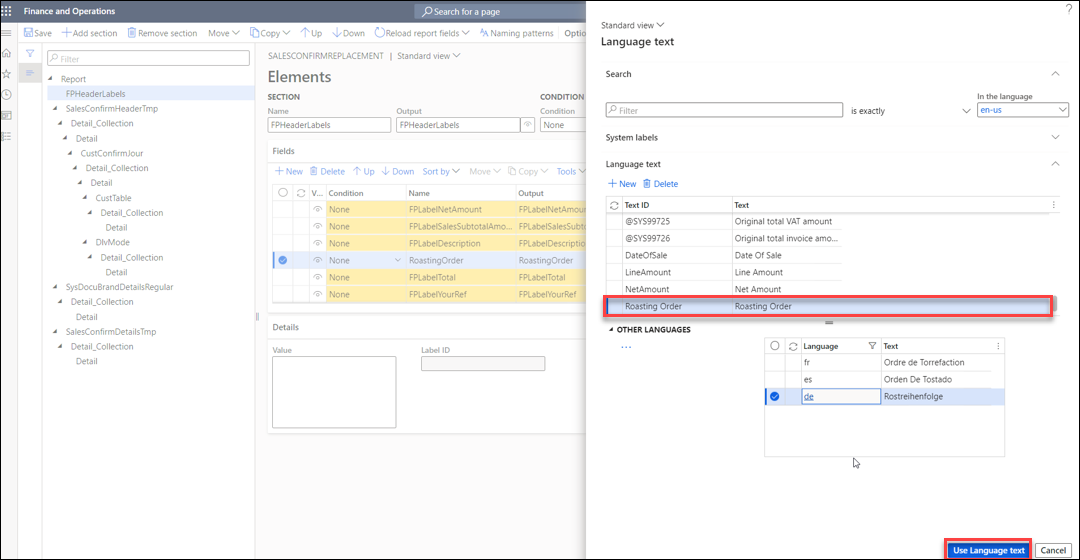
The report structure form will be updated with the new Language Text.

In order for these changes to take effect, click Save in the top left-hand corner, then exit the report structure form. This takes you back to the reports list page, where you should see a notification that the style sheet has been updated, which means the changes have been applied.

If the report is run, a label in that new field in the FPHeaderLabels section of the XML will have the correct translation based on the report language.
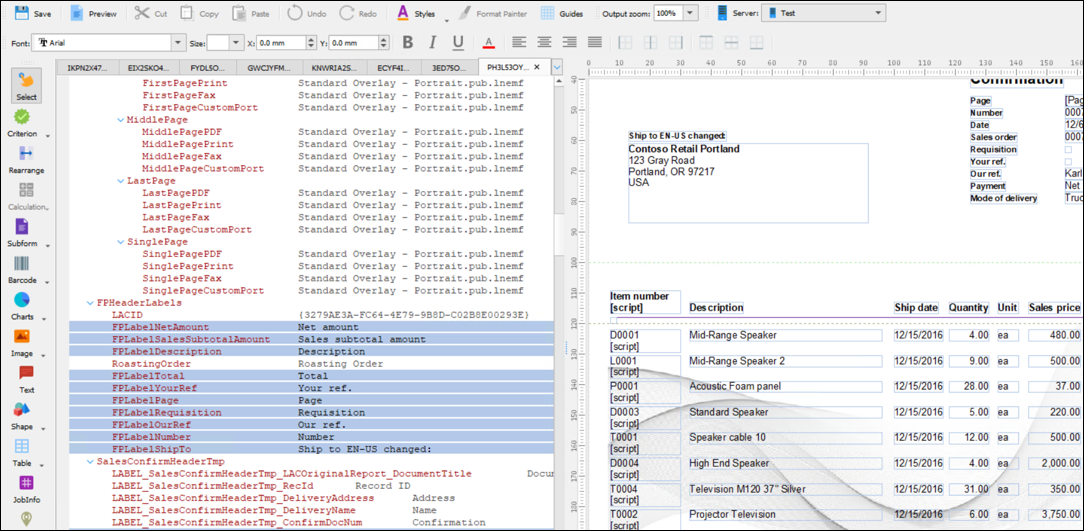
The following is the XML generated in Lasernet Developer after the report is run. Since the report is written in English, the English translation is provided.
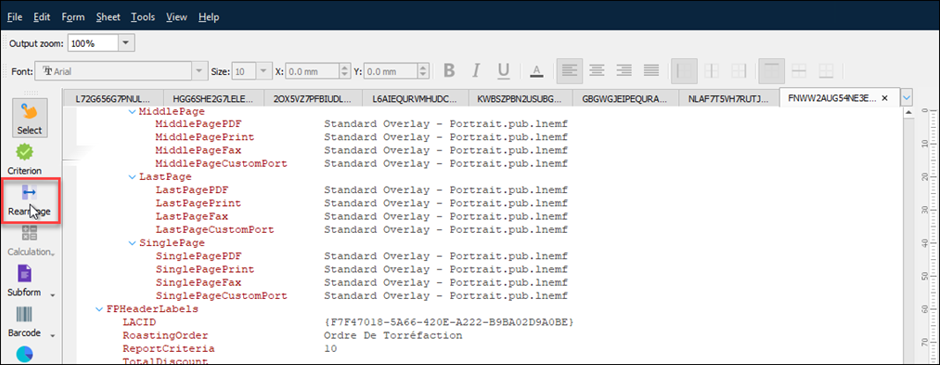
Click Rearrange to add this data to the form output as a rearrange.
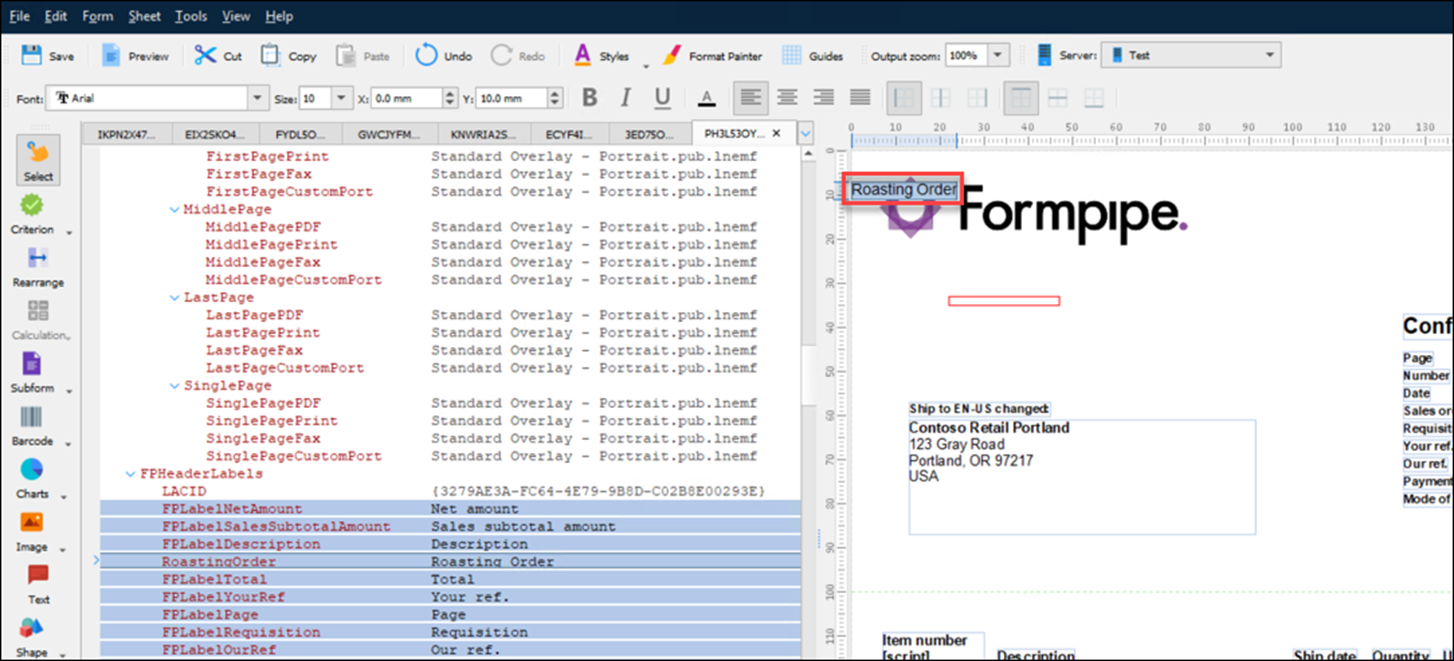
Select the XML node where the new Language Text is. The new rearrange will appear on the right-hand side of the screen, where you can click and drag it to wherever you want it to appear.
Here, the new label has been positioned next to the Roasting Order number in the header of the report:
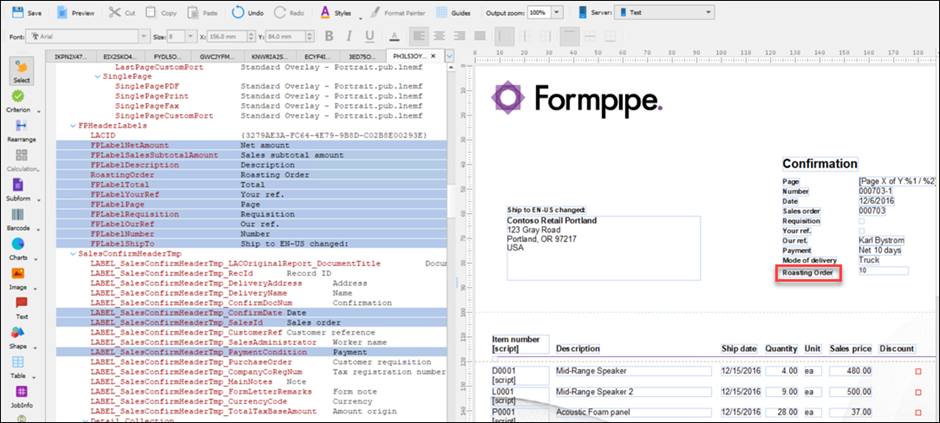
If the ReportLanguage changes to German, then when the report is run, the label also updates.

This is the same for the other language, Spanish.

This process is used to create custom labels on report formats that automatically update based on the language.
Overview
Below is an outline of the steps covered above:
Create a new Language Text:
Create the text.
b. Add the translations.
Add the Language Text to the report query:
Find the correct part of the structure.
Add in the Language Text expression.
Add the Language Text to the report form:
Run the report to generate the Grab file.
Find the Language Text in the XML.
Place the rearrange on the form output.
Change report language to update labels:
a. Change the language of the report and see the label update automatically on the form.
Copy Configuration to Other Companies
The configuration above is company-specific: the Language Text setup is carried out on a company-by-company basis. The queries are company-specific as well. Therefore, if you create a Language Text in company A and refer to it on a query in company A, then copy that query to company B, the link to the Language Text will be lost.
To avoid this, copy your Language Text configuration across companies. Once your Language Texts have been configured in one company, follow these steps:
Navigate to Lasernet > Common > Backup > Copy Lasernet Reports and Configuration to Other Companies.
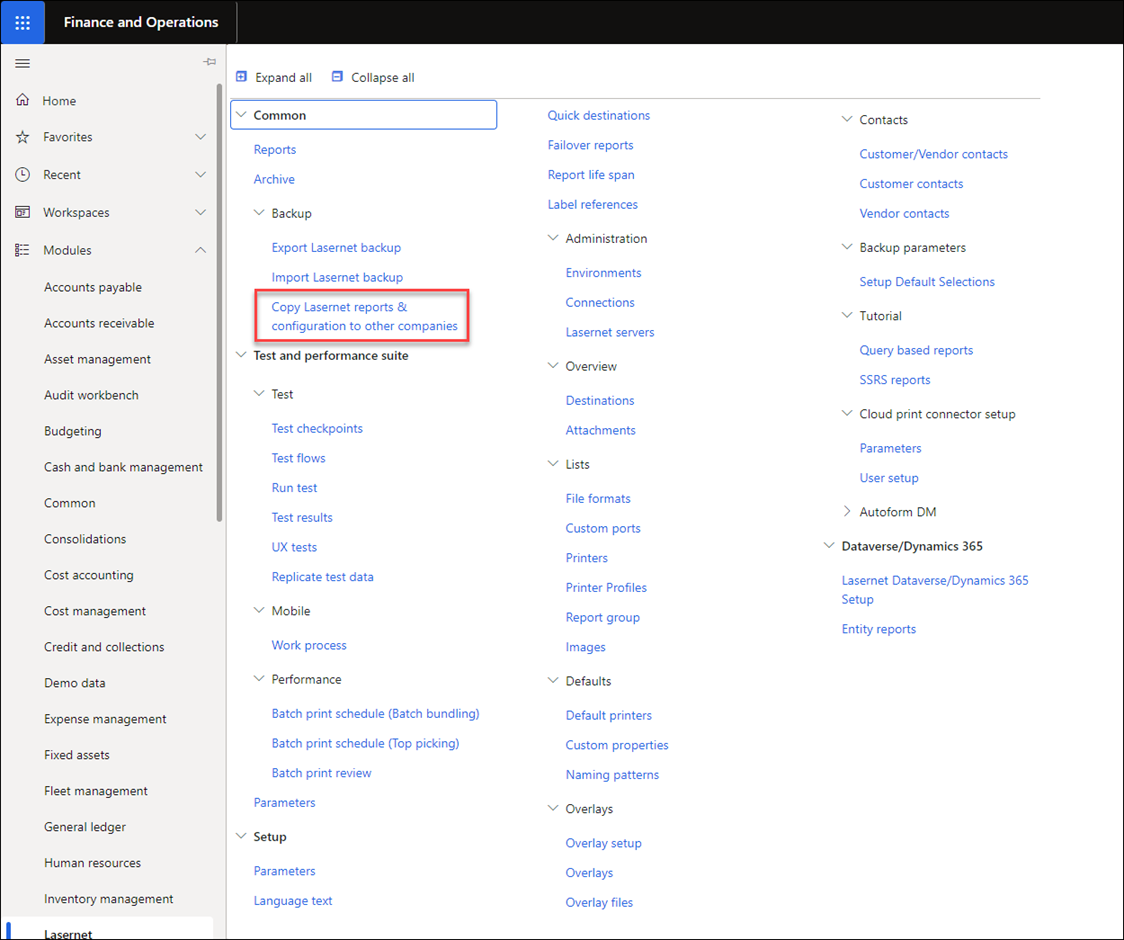
Select the option highlighted in the following image.
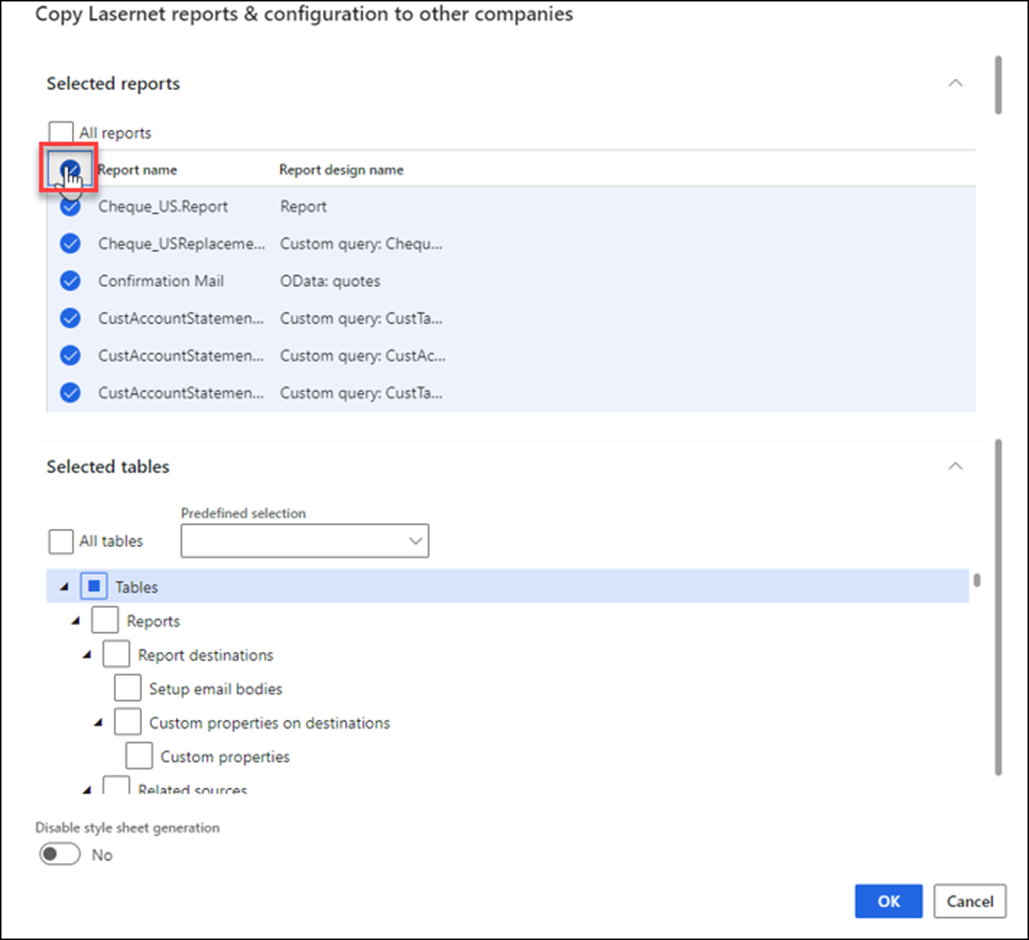
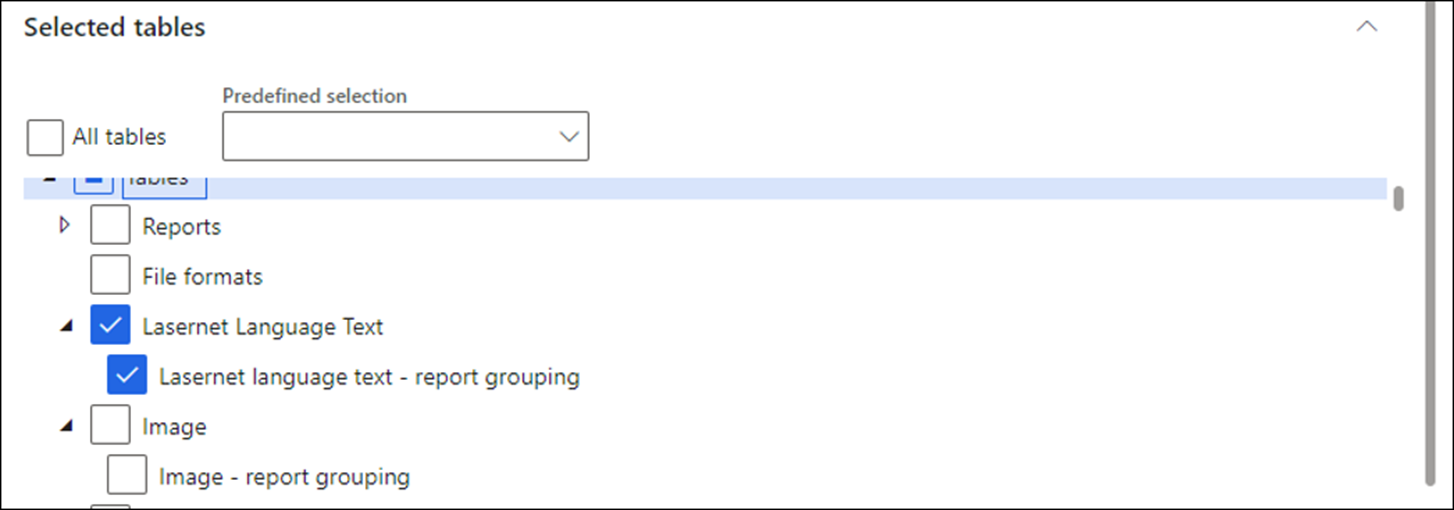
In the form, all the reports and none of the tables are selected by default. Deselect all the reports and select the Lasernet Language Text and Lasernet language text - report grouping tables.
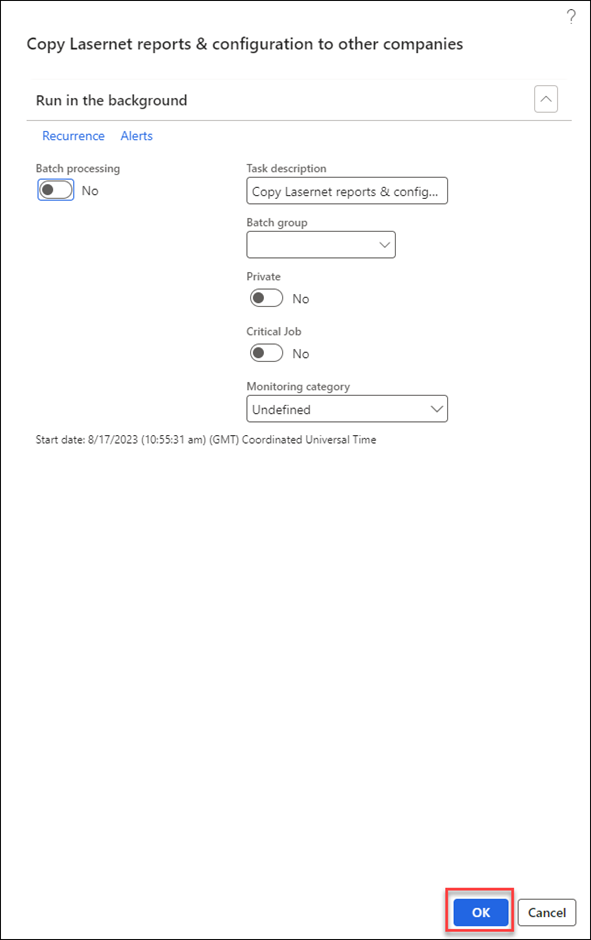
Click OK, and in the next form, select the companies to which you wish to copy the Language Texts. If there are many companies, it is recommended that you do no more than ten at a time.
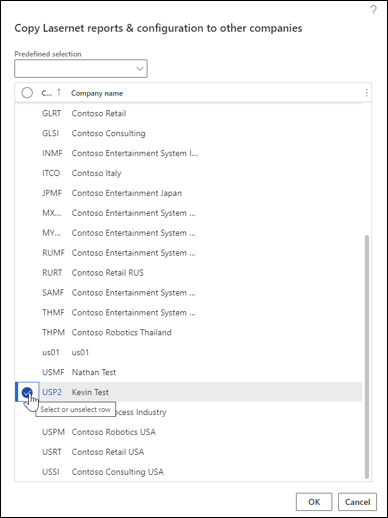
Click OK > OK.
The configuration will be copied to the selected company. If you open the company to which the configuration was copied, you can see our Language Text setup available there.
For further information, watch these videos:

