Job Events
- 01 Apr 2026
- 7 Minutes to read
- Contributors


- Print
- PDF
Job Events
- Updated on 01 Apr 2026
- 7 Minutes to read
- Contributors
- Print
- PDF
Article summary
Did you find this summary helpful?
Thank you for your feedback
Applies to: Lasernet Core 11
In some workflows, third-party systems that send jobs to Lasernet Core might require information about the progress, success, or failure of those jobs. They might display this information to users, store it for reporting, or use it to trigger other processes.
Lasernet Core can be configured to generate job event XML when a job’s status changes as it passes through modules. Job event XML contains status information for a job, along with other job metadata such as the name of the module that was processing the job when its status changed.
About Job Events
Job events enable the status of a Lasernet Core job to be tracked. Job event XML is generated when a job’s status changes.
For example:
When a job starts at an input module, its status is
Running.If it reaches a module that has a schedule configured, the job pauses there and its status becomes
Scheduled.When the schedule on that module causes Lasernet Core to release the job, its status becomes
Runningagain.When the job reaches the output module and successfully completes, its status becomes
Done.
Modules that do not affect job status do not generate job events. For example, between the input module and the module that has a schedule configured, there could be two modules that process the job and pass it on to their destination modules. These modules will not generate job events because the job’s status remains Running.
The Content of Job Event XML
Job event XML contains a standard set of information about the job. You can also configure job events to include the data from specified JobInfos.
Each change of job status generates job event XML that Lasernet Core outputs individually. You can use job combining to combine all the job event XML generated for a job into a single document.
However, the data structure expected by third-party systems will likely differ from the structure of job event XML. You can use the data manipulation capabilities of Lasernet Core to modify the job event data before it is delivered to the third-party system.
Configure Job Events at the Correct Module
You can configure job events at any module in the Lasernet Core workflow (except for output modules). Lasernet Core will generate job event XML when the module where job events are configured (or any later module in the workflow, including the output module) changes the job’s status.
For example, if the workflow is File Input module > Form engine > File Output module, and you configure job events on the File Input module, then any module can generate job event XML. However, if you configure job events on the Form engine module, only the Form engine and the File Output module can generate job events.
It can be helpful to remember that Lasernet Core’s processing of a job is distinct from the generation, manipulation, and distribution of job event XML for that job. Producing job event XML is essentially a separate Lasernet Core job that generates an XML output document.
JobInfo Criteria
If necessary, you can apply JobInfo criteria to job events. When a job’s status changes, Lasernet Core will generate job events only if the specified criteria are met.
For example, to generate job events only if the job fails, set Status = Failed Jobinfo criteria on the job event. Whenever the job’s status changes, Lasernet Core will evaluate whether to generate job event XML, and due to the criteria, it will not generate job event XML unless the job failed.
Job Event XML Structure
Job event XML contains information about the job at the time that its status changed.
<JobEvents>
	<JobEvent>
		<Date>
            <!-- ISO8601 timestamp of the job event -->
		</Date>
		<CurrentID>
            <!-- The JobID of the job that triggered the job event -->
		</CurrentID>
		<Status>
            <!-- The status of the job that triggered the job event -->
		</Status>
		<CurrentSubmoduleID>
            <!-- The Name of the module that triggered the job event -->
		</CurrentSubmoduleID>
		<OriginatingModule>
            <!-- The Name of the module that enabled job event tracking on the job. -->
		</OriginatingModule>
		<SourceJobs>
            <!-- One or more JobIDs of the job (or jobs) that were tagged with job event tracking by the “OriginatingModule” module -->
			<JobID>
				<!-- A JobID -->
			</JobID>
		</SourceJobs>
		<JobInfos>
            <!-- JobInfos that the job event is configured to include as part of this XML. -->
            <!-- Type can be "text" or "binary". -->
			<JobInfo Name="JobInfoName" Index="0" Type="text">
				<!-- The value of the JobInfo identified by the Name attribute  -->
			</JobInfo>
		</JobInfos>
	</JobEvent>
</JobEvents>
For example:
<JobEvents>
	<JobEvent>
		<Date>
			2026-03-17T15:22:58.216+00:00
		</Date>
		<CurrentID>
			FILE_OUTPUT_1_35E2932C_C43A_4842_B817_2CEDD6AA19E6
		</CurrentID>
		<Status>
			Done
		</Status>
		<CurrentSubmoduleID>
			File Output 1
		</CurrentSubmoduleID>
		<OriginatingModule>
			File Input 1
		</OriginatingModule>
		<SourceJobs>
			<JobID>
				FILE_INPUT_1_60CBE6D7_BEB4_4E4D_998F_3AD3B246099A
			</JobID>
		</SourceJobs>
		<JobInfos>
			<JobInfo Name="DataFormat" Index="0" Type="text">
				PDF
			</JobInfo>
		</JobInfos>
	</JobEvent>
</JobEvents>
Job Event Statuses
The <Status> element of job event XML can have one of the following values:
RunningThe job has started.
The job has been released after it was scheduled or paused.
DoneThe job was successfully completed at the stated output module.
FailedThe job failed at the stated module.
PausedThe job is paused.
ScheduledThe job is paused and will be automatically released according to the schedule on the stated module.
CombinedThe job was combined with other jobs.
Job Event JobInfos
Job events set the following JobInfos:
JobInfo Name | Description |
|---|---|
CurrentID | The JobID of the job that triggered the event. |
CurrentSubmoduleID | The name of the module that triggered the event. |
Status | The status of the job that triggered the event. Possible values are:
|
OriginatingModule | The name of the module that enabled job event tracking on the job. |
OriginatingJobID[] | One or more JobIDs of the job (or jobs) that were tagged with job event tracking by the “OriginatingModule” module. Relevant when job combining is enabled. |
Configure Job Events
To configure job events, follow these steps:
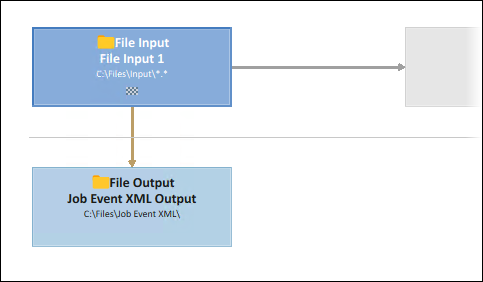
Create the output module that will receive job event XML. This could be:
A dedicated output module for job event XML. The image below depicts a dedicated output module (see 1 in the image).
An output module that the workflow already contains for generated documents.
Identify the module to configure job events at. Lasernet Core will generate job event XML when this module (or any later module in the workflow, including the output module for generated documents) changes the job’s status. In the image below, job events are generated from the File Input 1 module onwards (see 2 in the image).
Double-click the module that you want to configure job events for. Its Properties window opens.
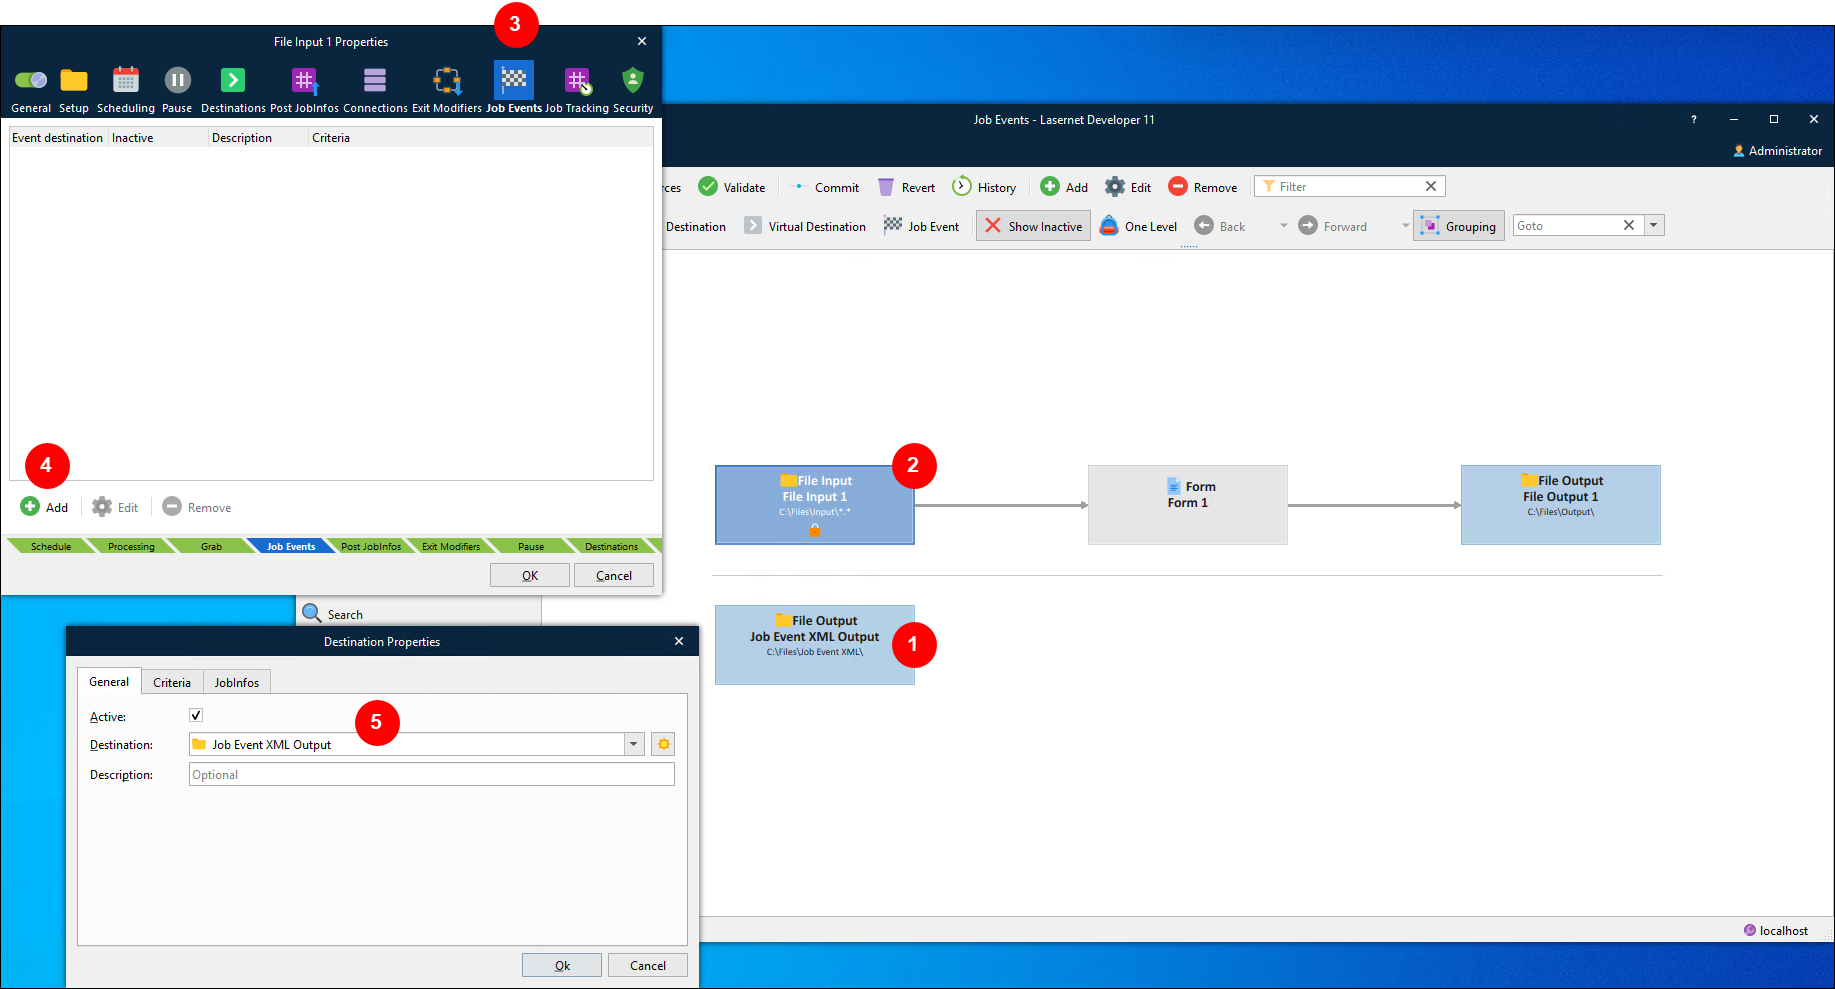
Click the Job Events tab (see 3 in the image above).
Click Add (4).
On the General tab of the Destination Properties window:
From the Destination list (5), select the output module that will receive job event XML.
Optional: Add a Description for this job event destination.
Optional: On the Criteria tab, add JobInfo criteria. Lasernet Core will write job event XML to the selected Destination only if the criteria specified on this tab are met.
Tip
You can use the job’s Status JobInfo to write job event XML to the selected Destination only when jobs have specific statuses. For example, if the JobInfo criteria is
Status = Failed, Lasernet Core writes job event XML only if the job fails.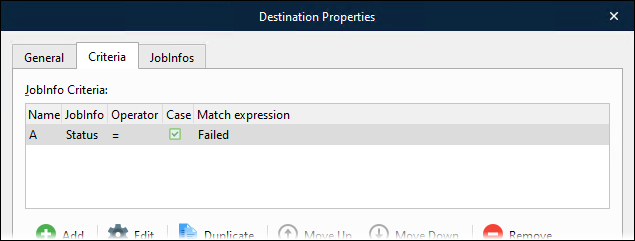
To route job event XML to different outputs depending on the job’s status, you could create two job event destinations (on the module’s Job Events tab) and give them different JobInfo criteria.
Optional: On the JobInfos tab, specify which JobInfos to include in job event XML.
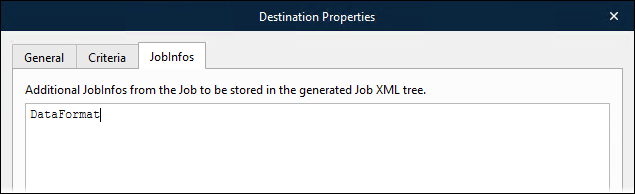
Note
You can specify any JobInfo, including JobData.
However, JobData is not included in the job event XML generated by output modules. To work around this, you can use a JobInfo Manipulation modifier (on a module in the workflow) to copy JobData to a custom JobInfo and include that JobInfo in job event XML instead.
Click Ok to close the Destination Properties tab. Lasernet Core adds the job event destination to the Job Events tab.
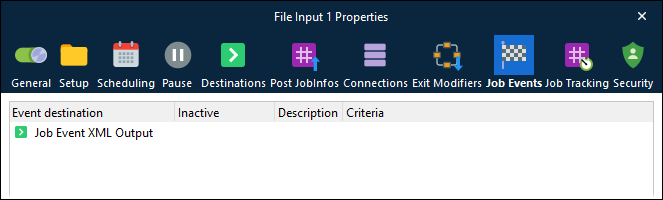
Click OK to close the module’s Properties window. Lasernet Core adds an arrow to the workflow diagram to represent the job event destination.
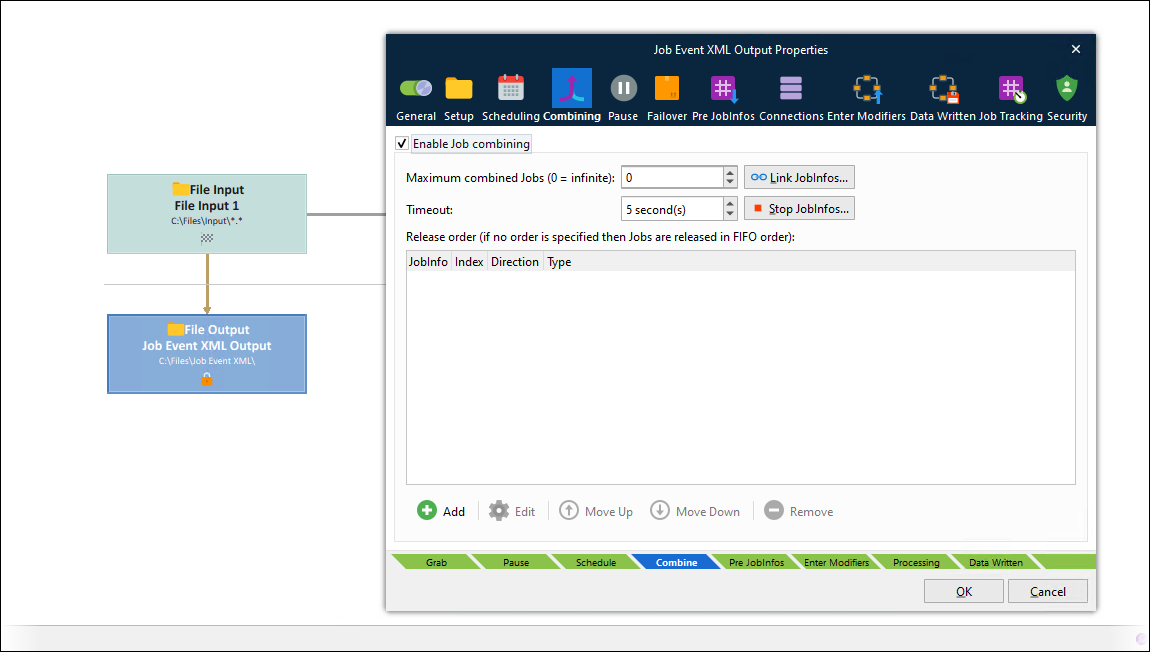
To combine all the job event XML generated for a job into one document, enable job combining on the job event XML output module. If you do not do this, each item of job event XML is generated and output individually, and depending on the output type, some job event XML output could overwrite XML that was already output.
If the job event workflow uses a File Output module, set the FileName JobInfo on that module to specify the file name for the job event XML file.
Project-Specific Considerations
It is likely that the third-party system that will receive job event information will require it in a specific format. You can add XML transformation or a form engine to your workflow to manipulate the job event XML as required.
The third-party system will also require that Lasernet submits the job event information in a particular way. For example, sent through a web service, or written to a specific location. Configure the Lasernet Core workflow to send job event information in the required way.
The Job Event Toolbar Button
The Job Event button in the toolbar enables you to drag between modules to create job event destinations:
Click Job Event in the toolbar.
Drag the mouse pointer from the module at which job event creation will begin to the module that will receive the job event XML.
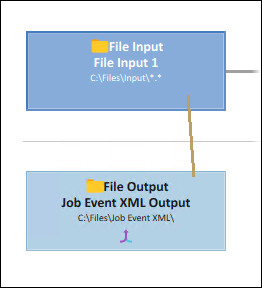
Lasernet Core adds the job event destination. By default, it is active and only its Destination is configured.