Configure Microsoft Entra ID for Lasernet User Authentication
- 30 Jan 2026
- 3 Minutes to read
- Contributors

- Print
- PDF
Configure Microsoft Entra ID for Lasernet User Authentication
- Updated on 30 Jan 2026
- 3 Minutes to read
- Contributors
- Print
- PDF
Article summary
Did you find this summary helpful?
Thank you for your feedback
Applies to: Lasernet 11
To enable Lasernet to authenticate users against Microsoft Entra ID, you must configure an app registration.
Create a Microsoft Entra ID App Registration
Follow these steps:
Log in to the Azure Portal.
Navigate to Microsoft Entra ID.
Click Add and then select App registration in the dropdown menu.
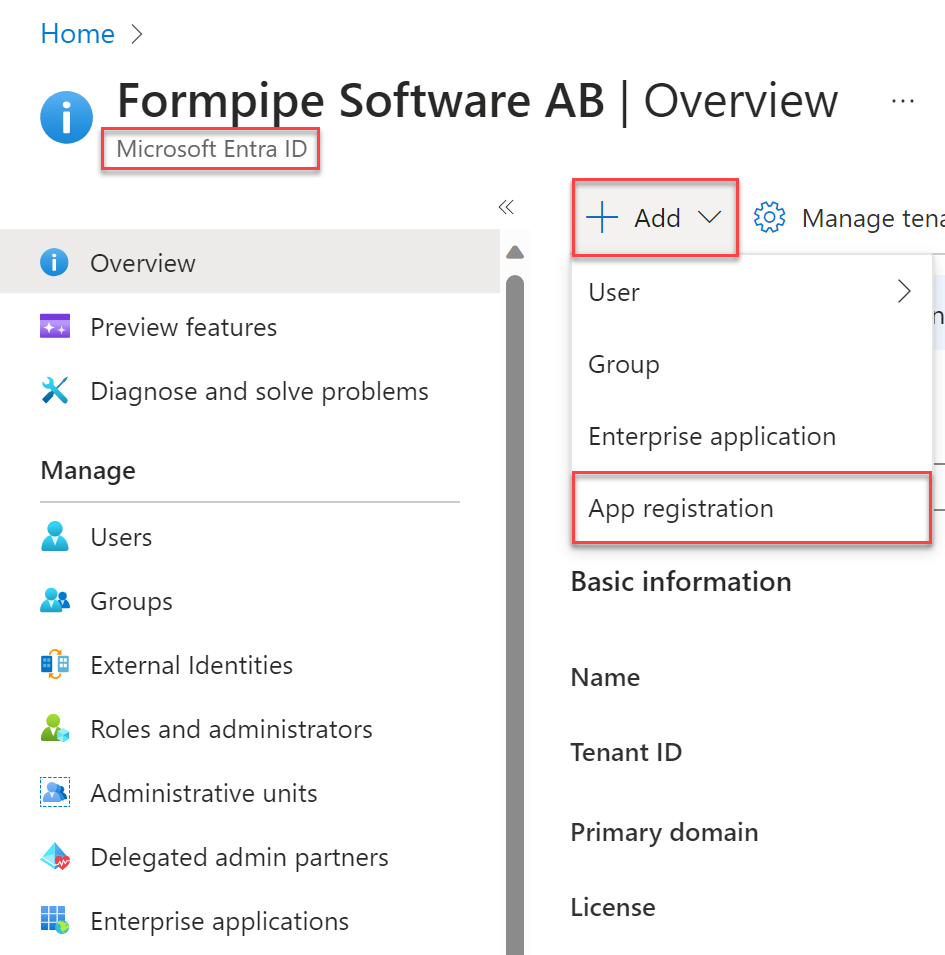
Enter a Name. The Name is shown to users if they log in to Azure.
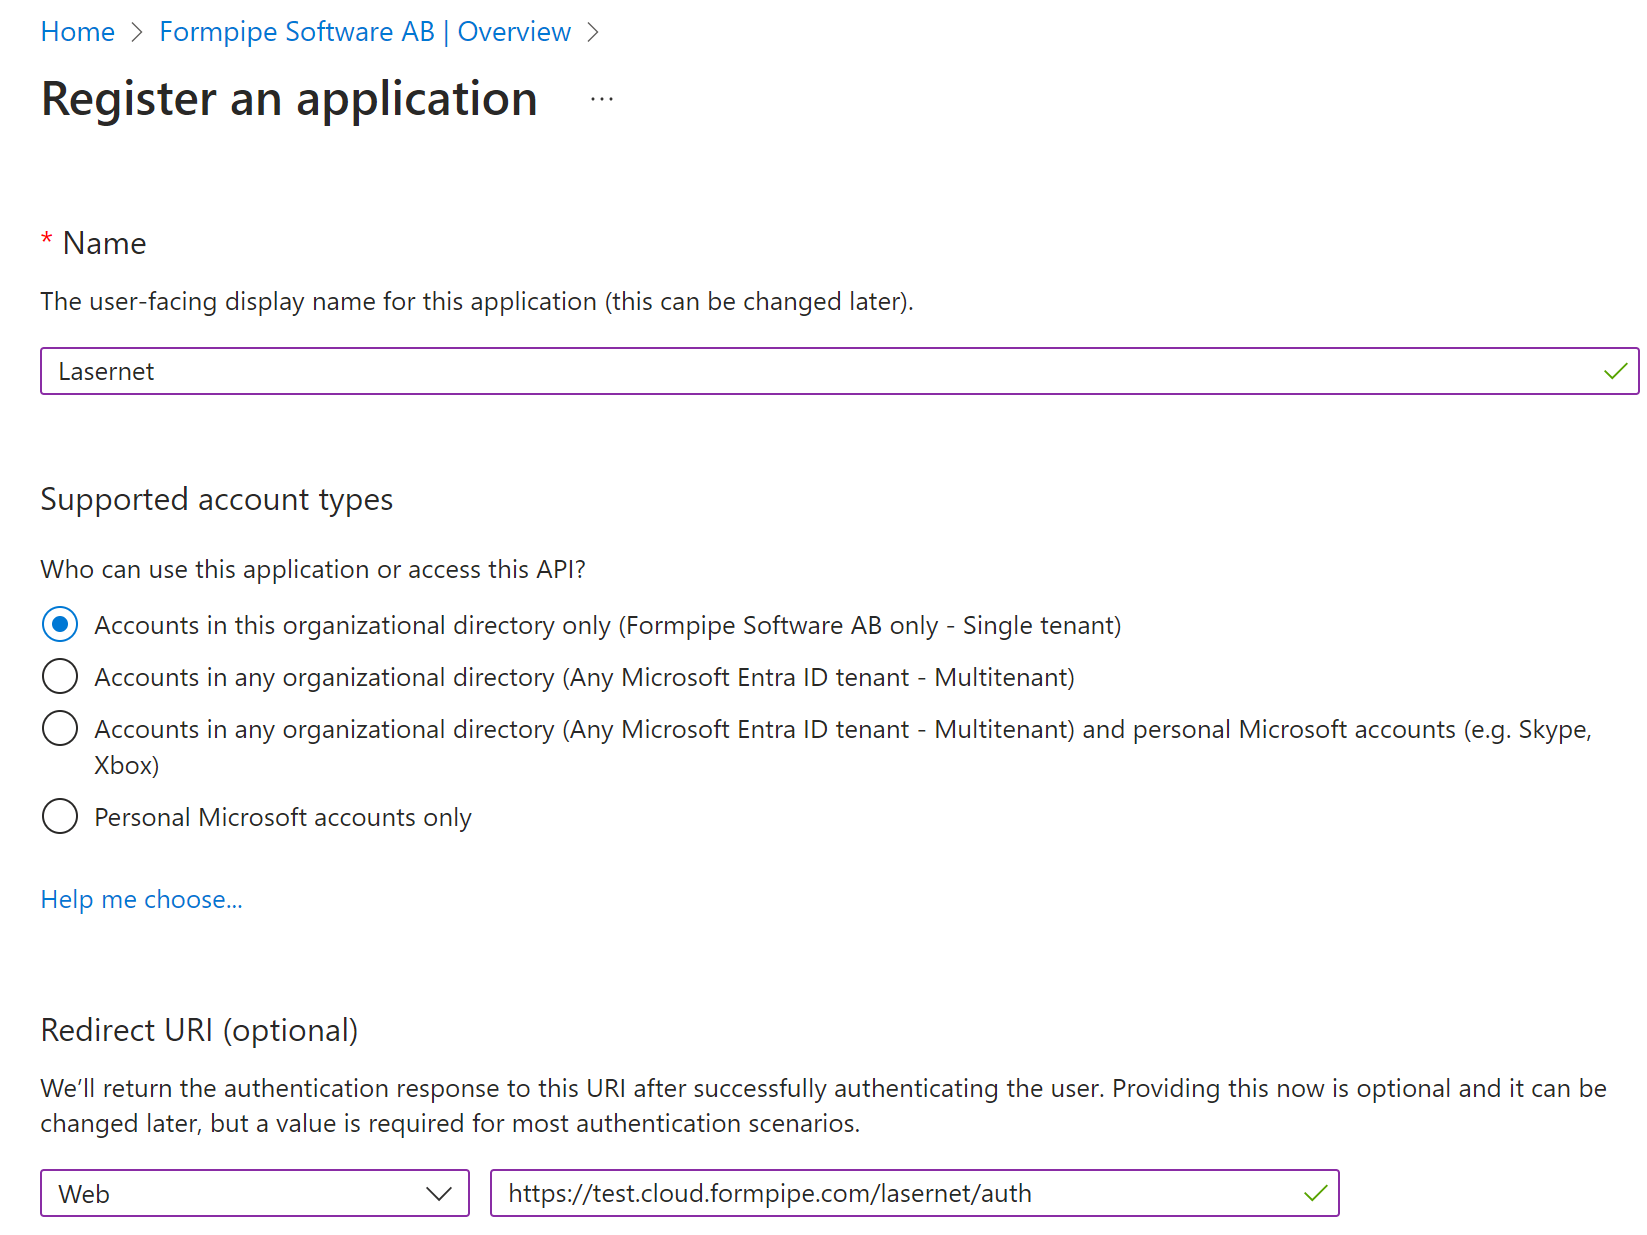
Select Accounts in this organizational directory only.
Enter a Redirect URI. The Redirect URI must be set to
https://<FQDN-of-Lasernet-Server>/lasernet/auth(appropriately substitute<FQDN-of-Lasernet-Server>). If Lasernet Config Server is running on a port other than 443, appropriately modify Redirect URI (for example:https://lasernet.mydomain.com:33443/lasernet/auth).Click Register.
Configure Authentication Settings
Follow these steps:
After creating the app registration, navigate to the Authentication page in the left-side menu.
Select the ID tokens checkbox.
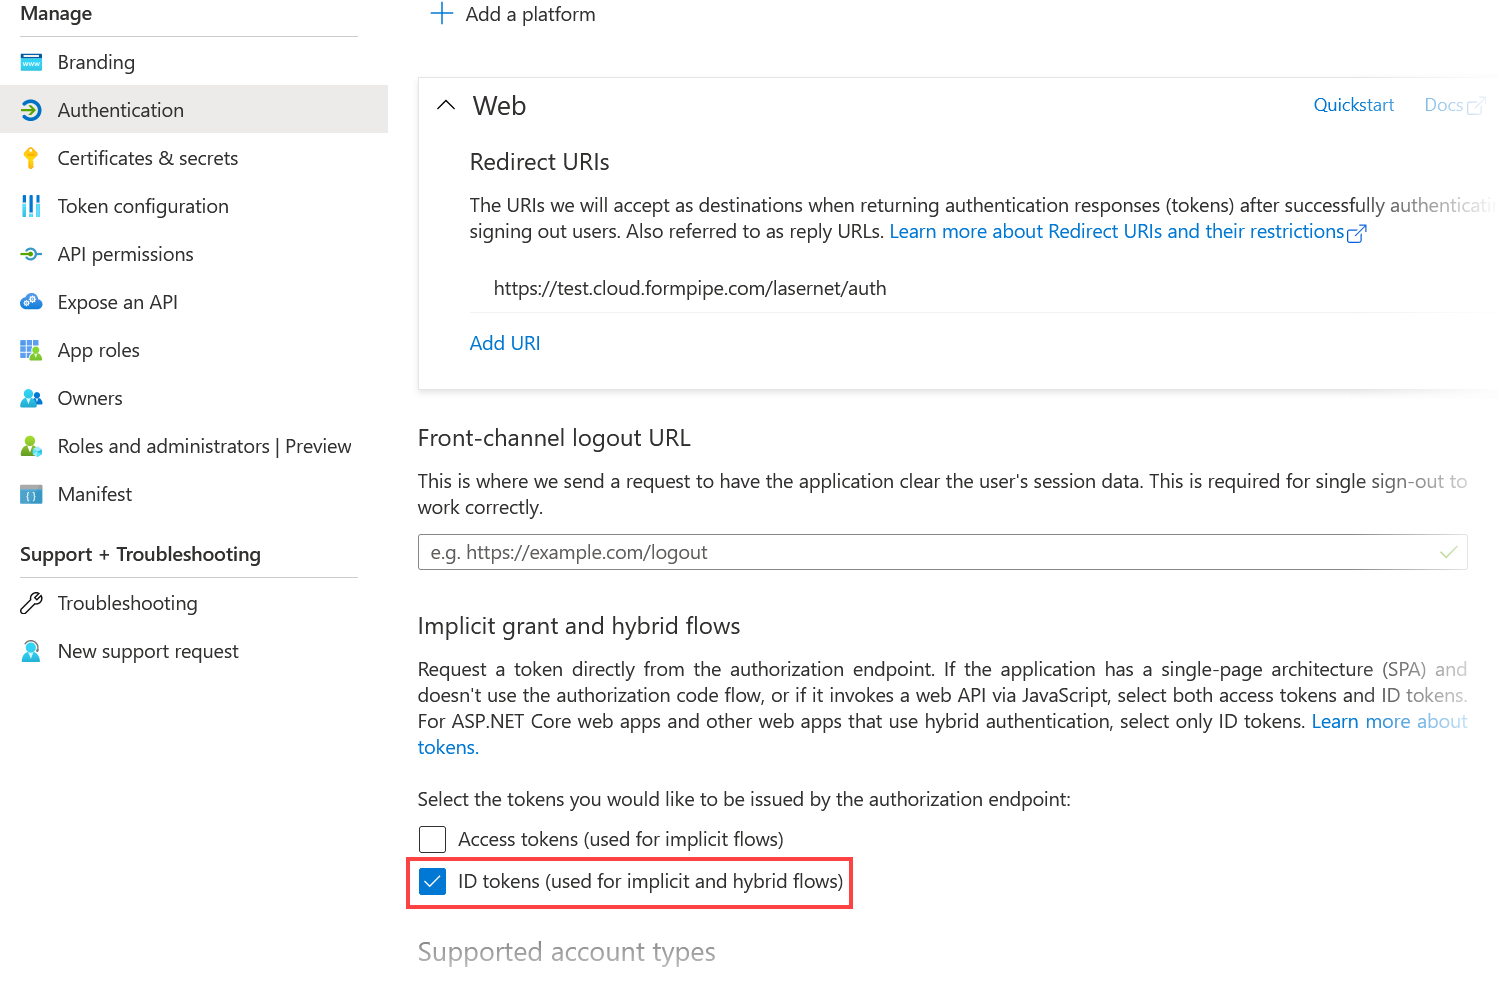
Optional: Add additional Redirect URIs to the list if required.
Click Save.
Note
Add a Redirect URI for each FQDN you use to access Lasernet (including localhost).
Note
For access to the Lasernet Web Client, you must add a Redirect URI for
https://<FQDN>/lasernet/client(appropriately substitute<FQDN>).
Configure App Roles
Microsoft Entra ID users are granted access to Lasernet through their membership of app roles. These roles will determine a user’s permissions in Lasernet.
Lasernet includes a built-in “external role” for administrative access called Admin.Global. You must create a corresponding app role in Entra ID, which you will assign to the appropriate Entra ID users. Entra ID users who have this app role will be given the Admin.Global external role by Lasernet, which will grant them administrator-level access when they sign in to Lasernet.
On the app registration’s Entra ID page, click the App Roles tab.
Click Create app role.
In the Display Name box, enter Global Administrators (or similar).
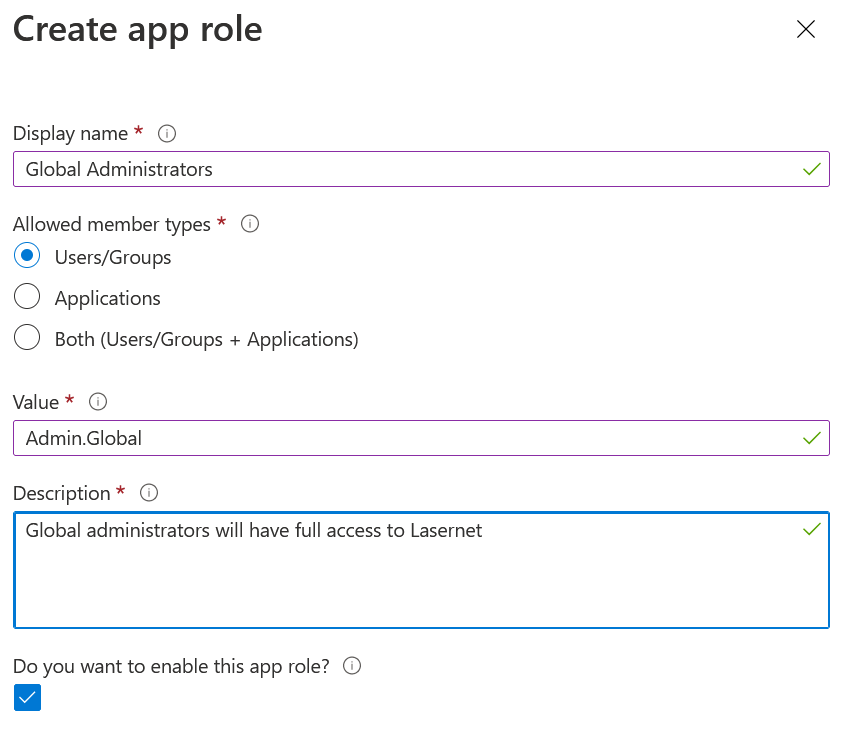
For Allowed member types, click Users/Groups.
In the Value box, enter Admin.Global
In Description, enter Global administrators will have full access to Lasernet (or similar).
Click Apply.
Note
You can create and configure additional app roles if necessary.
Configure the Lasernet Enterprise Application
Follow these steps:
Navigate to Microsoft Entra ID.
Click the Enterprise applications tab.
Search for the Lasernet enterprise application (using the name you provided when creating the app registration).
Select the Lasernet enterprise application in the search results.
Click Properties in the left-side menu.
Set User assignment required to Yes.
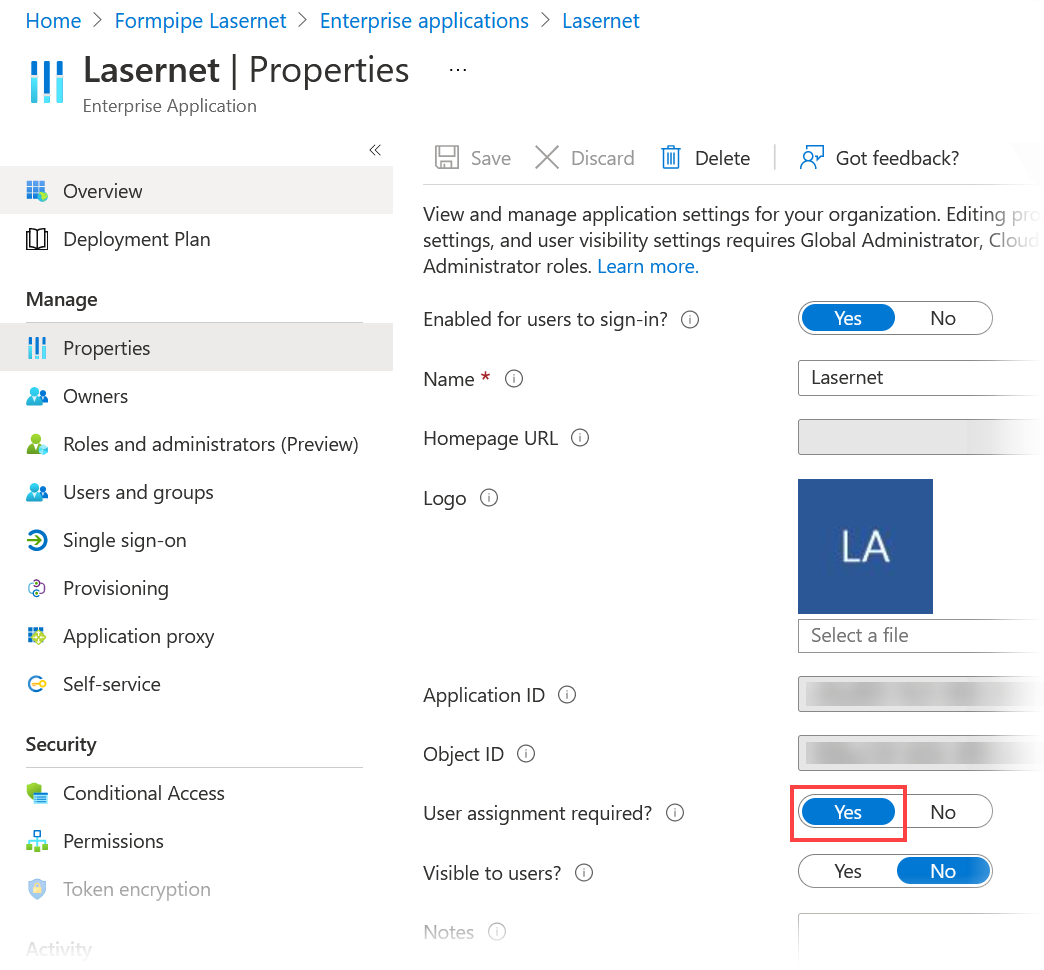
Click Save.
Assign Users and Groups to the Admin.Global App Role
To enable users to access Lasernet, use Microsoft Entra ID to assign one or more users or groups to the administrative role.
User assignment is done through Azure Portal > Microsoft Entra ID > Enterprise Applications.
Navigate to Microsoft Entra ID.
Click the Enterprise applications tab.
Search for the Lasernet enterprise application (using the name you provided when creating the app registration).
Select the enterprise application in the search results.
Click Manage > Users and groups in the left-side menu.
Click Add user/group.
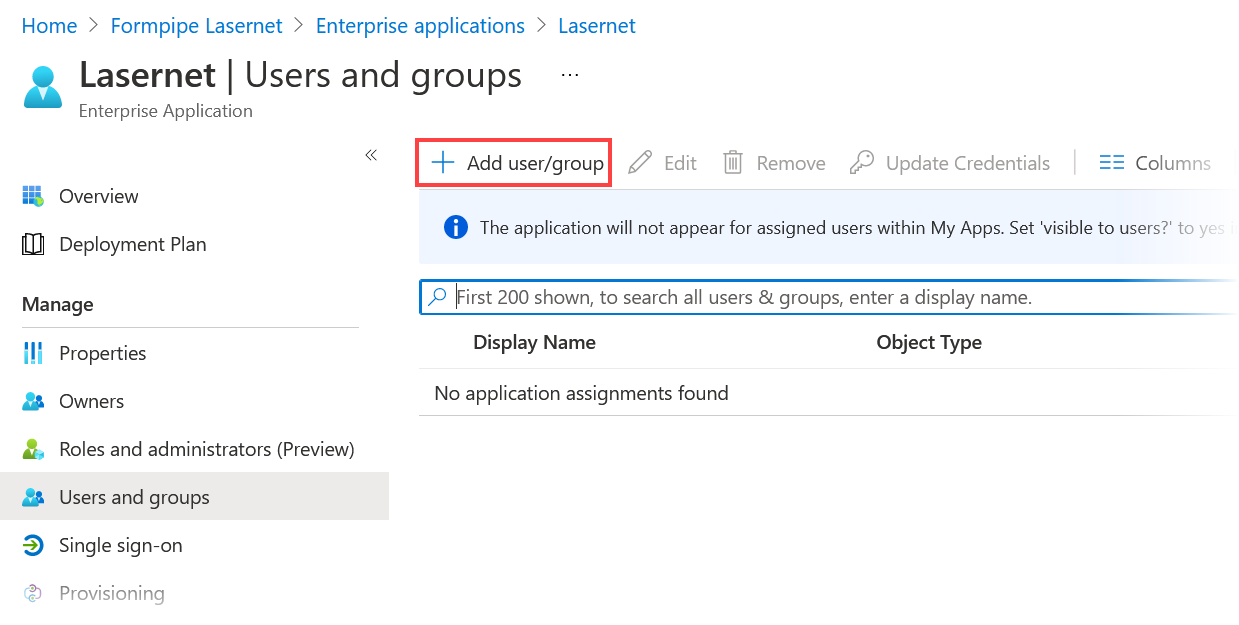
Select a user or group.
If the user isn’t assigned the Global administrators role, you must select it manually.
Note
If no other app roles are configured, the role assignment will default to Global administrators.
Click Assign.
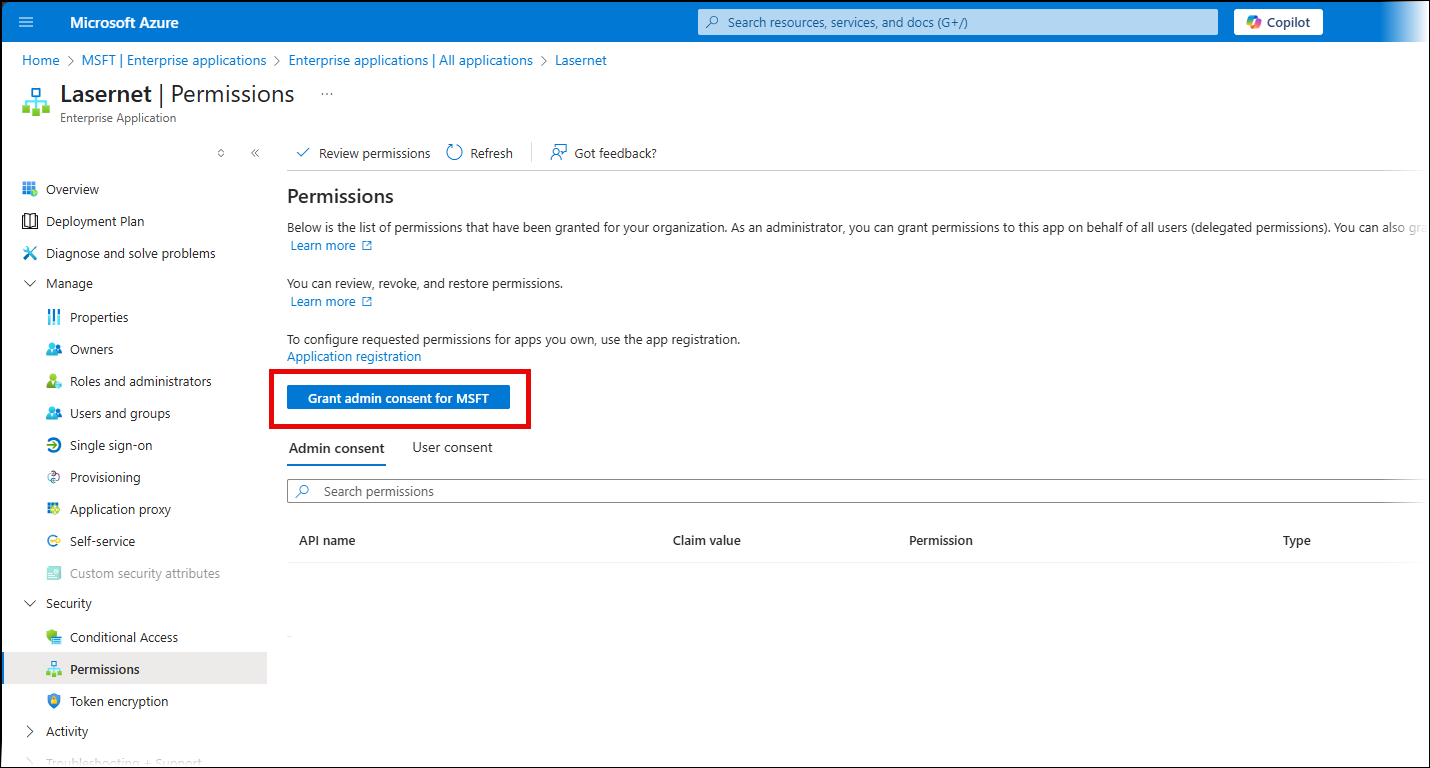
On the Security > Permissions page, click Grant admin consent. This step enables the users that you assigned to the enterprise application to access Lasernet without requiring further administrator approval.
Collect the Information Required to Configure Lasernet
In order to configure Lasernet for Microsoft Entra ID authentication, you must collect some information about the app registration that you created.
Navigate to Microsoft Entra ID.
Click the App registrations tab.
Search for the Lasernet app registration using the name you provided when creating the app registration.
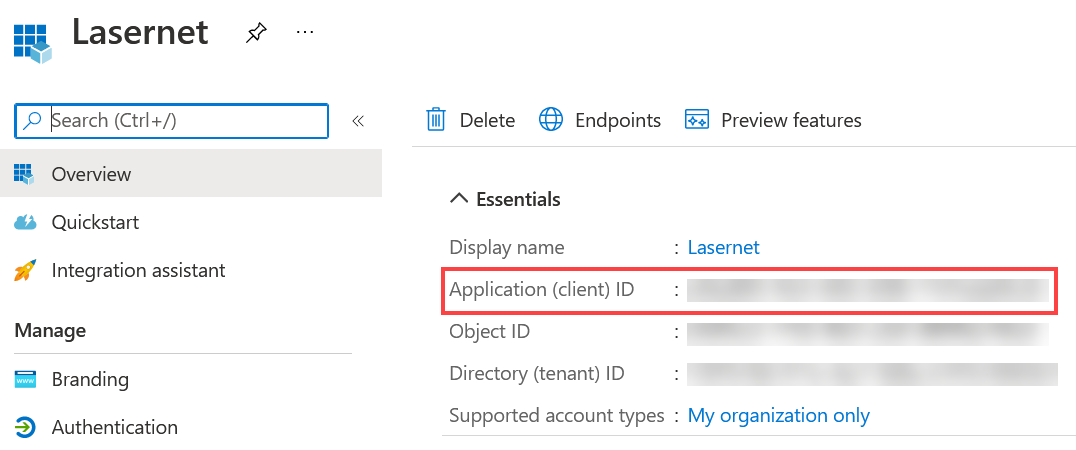
Select the app registration in the search results.
On the Overview pane, copy the Application (client) ID value and make a note of it for later use.
Click the Endpoints tab.
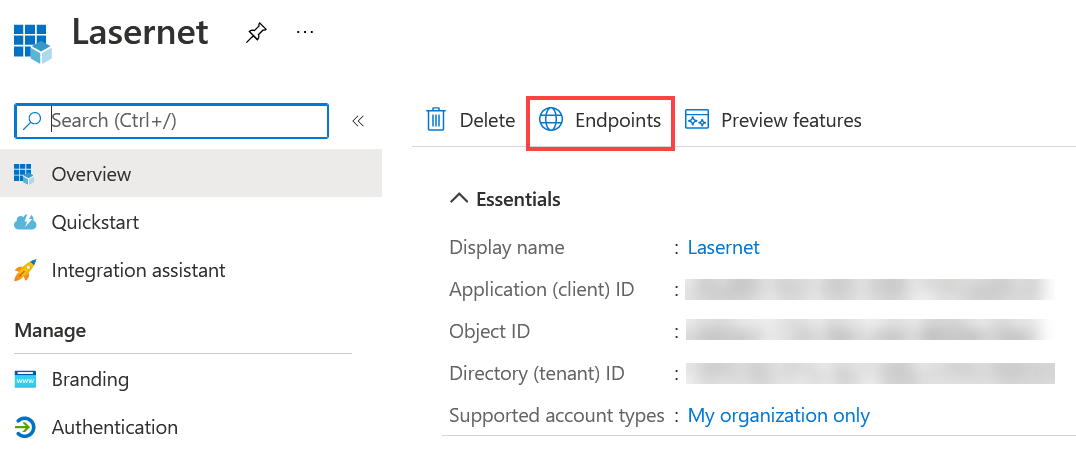
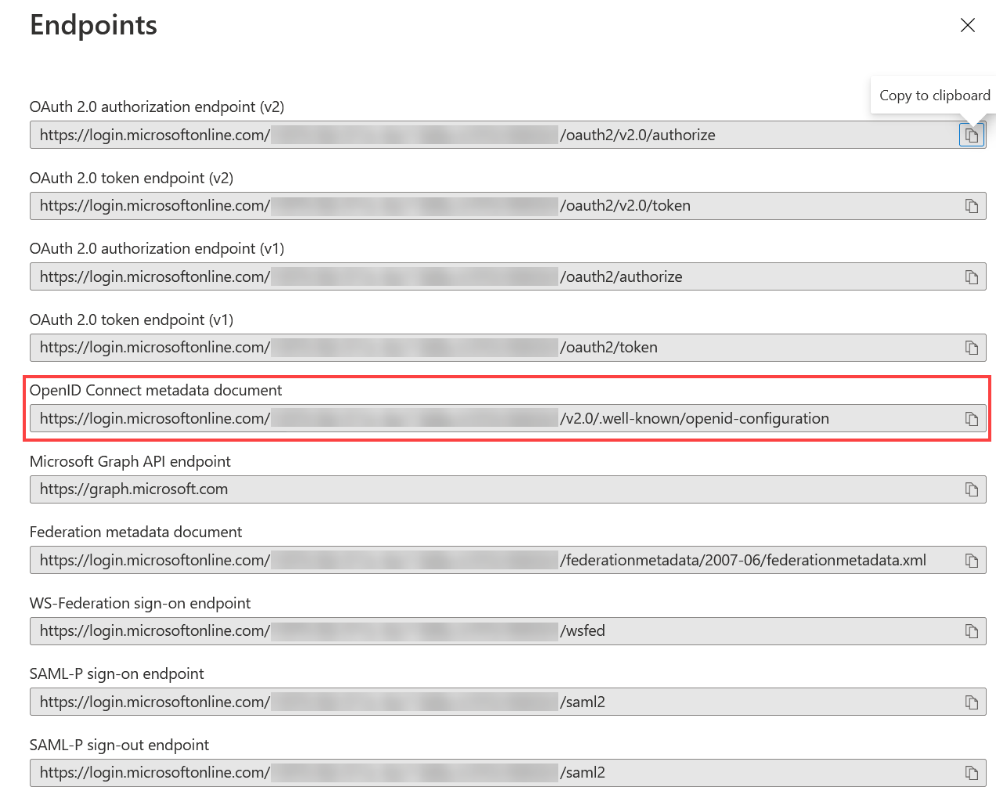
Copy the OpenID Connect Metadata document endpoint value and store it for later.
Next Steps
The next part of the process is to configure external authentication for Lasernet Config Server.