Configure Autoform DM to Use LDAP
- 20 Mar 2026
- 6 Minutes to read
- Contributors


- Print
- PDF
Configure Autoform DM to Use LDAP
- Updated on 20 Mar 2026
- 6 Minutes to read
- Contributors
- Print
- PDF
Article summary
Did you find this summary helpful?
Thank you for your feedback
Autoform DM can be configured to use the Windows Active Directory to obtain user login credentials and allocate group access. After LDAP is set up correctly, all user management can be done externally to Autoform DM. As a result, if users are in the relevant Active Directory groups, they can enter their Windows login credentials to access Autoform DM.
Some options may appear differently depending on your Autoform DM version. Most settings will be managed by the Windows Active Directory administrator.
Note
In some scenarios, you might need to disable LDAP. For more information, and for steps, see Disable LDAP.
Enable LDAP
To configure Autoform DM to use LDAP, follow the process described below.
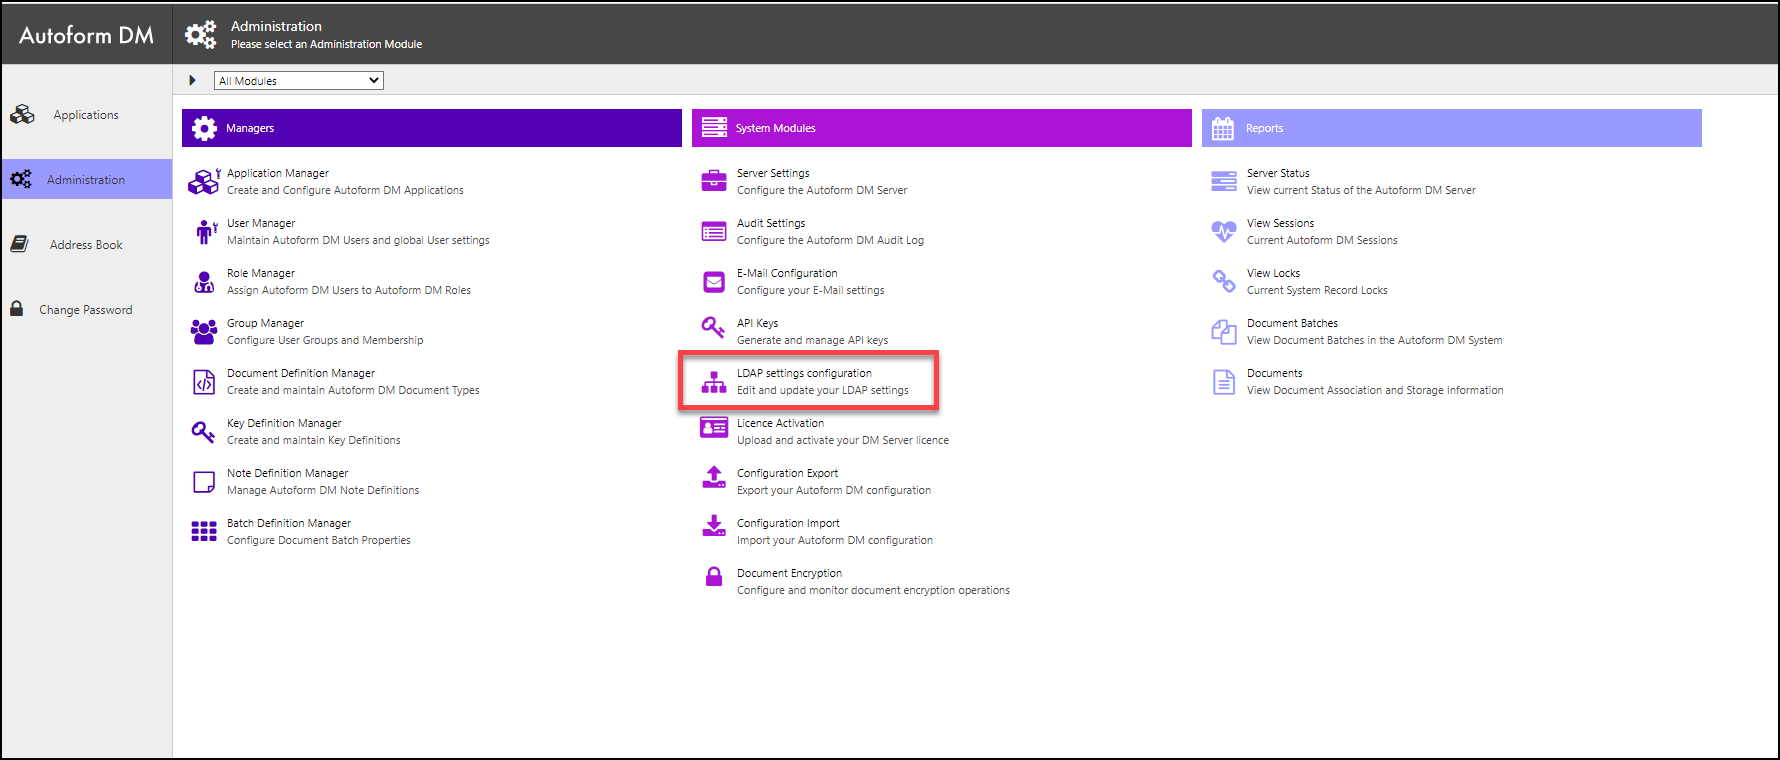
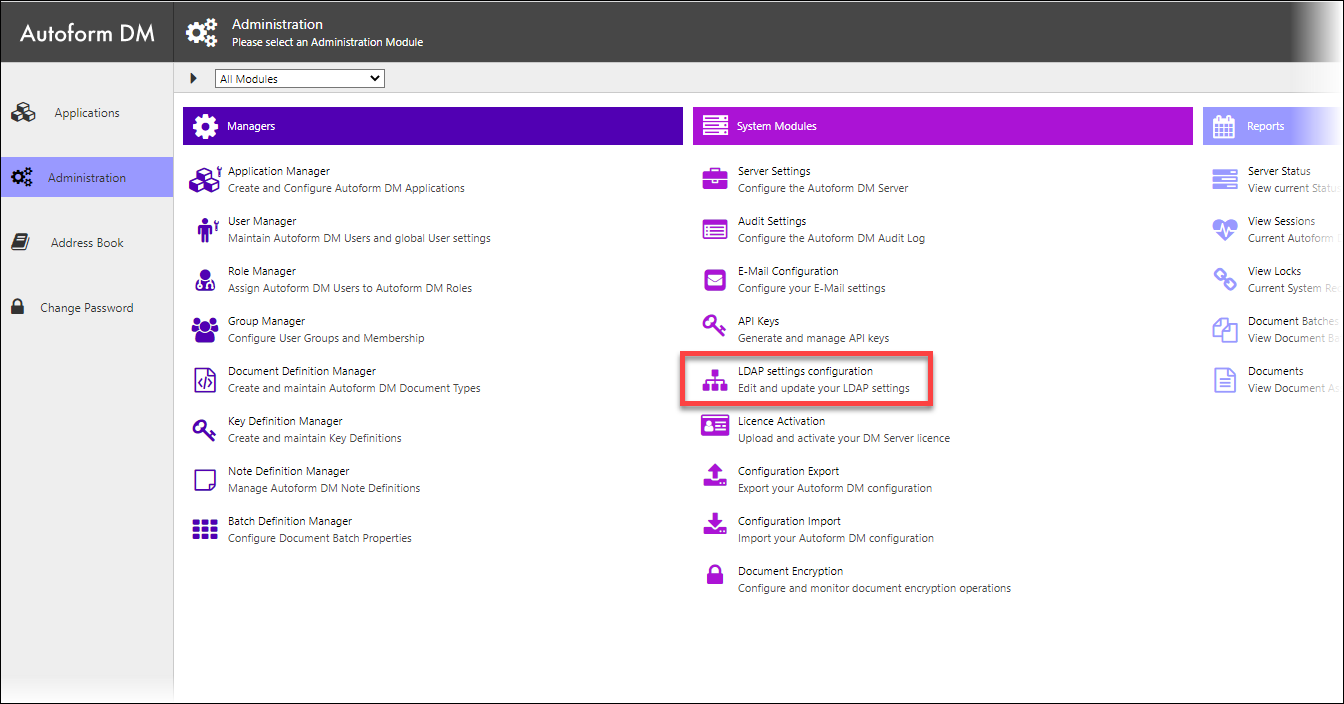
1. Navigate to the LDAP Settings Configuration Page
Click Administration in the Autoform DM menu, then click LDAP settings configuration.
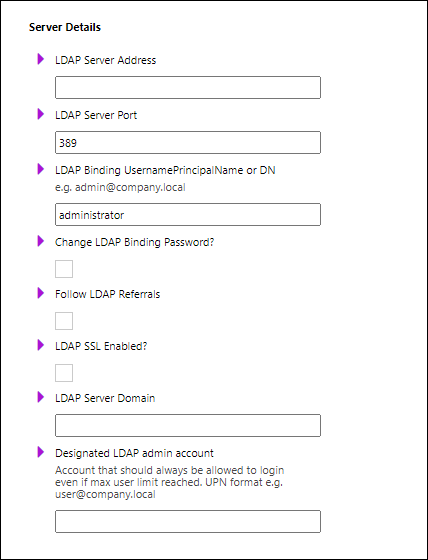
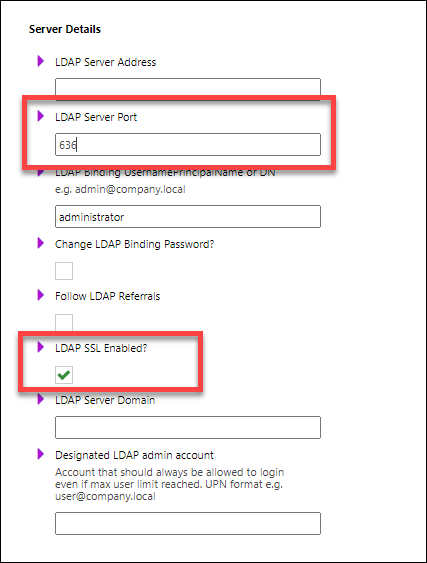
2. Set LDAP Server Settings
In the Server Details area of the page, supply information about the Active Directory.
Setting | Description |
|---|---|
LDAP Server Address | The name or IP address of the Active Directory server.
|
LDAP Server Port | The port of the Active Directory Server. |
LDAP Binding Username | The binding of the client (Autoform DM) to the LDAP server (Active Directory) requires authentication. This connection is made under the identity of a user in Active Directory who has authenticate, read, and search permissions, and full access to the LDAP tree being searched. In the LDAP Binding Username box, enter the username of an appropriate user in Active Directory. |
Change LDAP Binding Password | Select to change the password used for the binding user. If you select this checkbox, enter the correct password in the New LDAP Binding Password and New LDAP Binding Password Confirm boxes. |
Follow LDAP Referrals | Determines whether Active Directory referrals are followed. |
LDAP SSL Enabled | Secure LDAP communication with SSL. See LDAPS. |
LDAP Server Domain | Default login domain. If a user logs in without specifying a domain, this domain is appended to form a UPN (user@domain). |
Designated LDAP admin account | Account to bypass license limitations. Used for emergency access. |
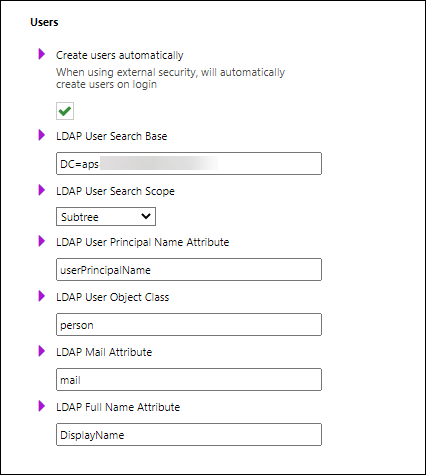
3. Set LDAP User Settings
In the Users area of the page, provide the Active Directory settings for users.
Setting | Description |
|---|---|
Create users automatically | Automatically create Autoform DM users when users successfully log in to Autoform DM via LDAP. |
LDAP User Search Base | Specifies the tree location of the usernames in Active Directory. For example: CN=Users,DC=mydomain,DC=local |
LDAP User Search Scope | Specifies which levels to search for users beyond the LDAP User Search Base. |
LDAP Username Attribute | The field within Active Directory that holds the login name (UID attribute) for a user. In Autoform DM 6.919 and later, only UPN can be used (SamAccountName can't be used anymore). |
LDAP User Object Class | The Active Directory class name for user objects. For example, |
LDAP Mail Attribute | The field within Active Directory that contains the email address of a user. |
LDAP Full Name Attribute | The field within Active Directory that contains the full name of a user. |
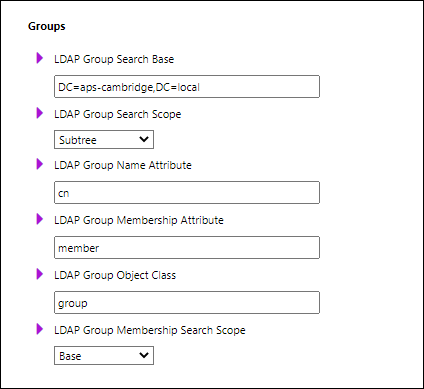
4. Set LDAP Group Settings
In the Groups area, provide the Active Directory settings for groups.
Setting | Description |
|---|---|
LDAP Group Search Base | Specifies the tree location of the group names in Active Directory. For example: CN=Groups,DC=mydomain,DC=local |
LDAP Group Search Scope | Specifies which levels to search for groups beyond the LDAP Group Search Base. |
LDAP Group Name Attribute | The field within Active Directory that holds the group name. |
LDAP Group Membership Attribute | The field within Active Directory that holds the member list of a group. |
LDAP Group Object Class | The Active Directory class name for group objects. |
LDAP Group Membership Attribute Search Scope | Specifies which levels to search for group members beyond the base. |
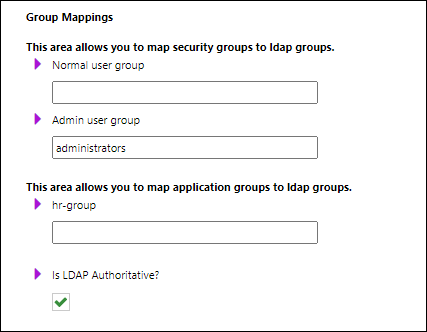
5. Specify Group Mappings
In the Group Mappings area, map Autoform DM groups to Active Directory groups.
Setting | Description |
|---|---|
Normal user group | The name of the Active Directory user group that contains Autoform DM users. |
Admin user group | The name of the Active Directory user group that contains Autoform DM administrators. |
LDAP groups area | This area lists the groups that currently exist in Autoform DM. You can map these groups to Active Directory user groups. |
Is LDAP Authoritative | Specifies whether Autoform DM relies completely on Active Directory data to set Autoform DM security group and application group membership or whether role and application access for users can be set manually within Autoform DM when necessary.
|
5. Test the LDAP Connection Settings and Enable LDAP
Before you enable LDAP, Autoform DM must pass an LDAP connection test:
Find the Test LDAP Connection Settings area on the page.
In the LDAP Test Username box, enter the username of a user that exists in Active Directory.
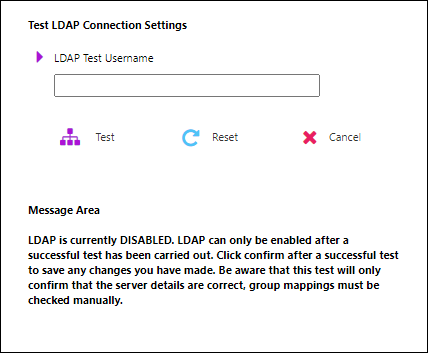
Click Test. Autoform DM will display the result of the test. If successful, the page will display the groups that the user belongs to.
To enable LDAP, select LDAP integration enabled (in the LDAP test area), then click Confirm. Autoform DM displays this option only after a successful LDAP connection test.
Implement LDAPS
Autoform DM supports LDAPS. To implement LDAPS, follow these steps:
Configure LDAP as described above.
Import a root certificate from the LDAP Server Certificate Store into the JDK Certificate Store:
Export the LDAP server certificate to a file (X.509) and copy it to a local folder on the Autoform DM server.
On the Autoform DM server, open a command prompt as an administrator.
Navigate to the
binfolder of the JDK in the Autoform DM installation folder:C:\Program Files\Formpipe Software\Autoform DM\Server_<Autoform DM version number> - <node name>\jdk-<JDK version number>\bin. Appropriately substitute<Autoform DM version number>,<node name>and<JDK version number>.Run the following command.
Substitute
<path to certificate>for the path to the LDAP server certificate that you copied to the Autoform DM server.Substitute
<domain name>for the domain name. This part of the command provides the alias to apply to the new key in the keystore. In this procedure, the domain name is used as the alias by convention.
keytool.exe -importcert -file <path to certificate> -alias <domain name> -keystore ..\lib\security\cacertsWhen you run this command, you will be prompted for the Java cacerts password. Enter the password; the default password is
changeit.
Restart Autoform DM.
After Autoform DM starts, log in and then navigate to the LDAP configuration screen.
Disable LDAP (to reveal the LDAP configuration).
Change LDAP Server Port to 636 and select the LDAP SSL Enabled checkbox.
To enable LDAPS, follow the Test the LDAP Connection Settings and Enable LDAP instructions.
Disable LDAP
In some scenarios, you might need to log in to Autoform DM as a local user. For example:
Scenario 1: You need to disable LDAP to update the LDAP settings.
Scenario 2: Your LDAP server is down or unreachable, and you need to disable LDAP without logging into Autoform DM.
Scenario 1: LDAP is Currently Running But You Need to Disable It
To turn off LDAP, follow these steps:
Click Administration in the Autoform DM menu, then click LDAP settings configuration.
Clear the LDAP integration enabled checkbox.
Warning
Ensure the next step is performed out of hours, or that all users are aware that they will be logged out automatically.
Click Yes to proceed.
Scenario 2: Your LDAP Server Is Down or Unreachable
It is possible to disable LDAP authentication by editing a setting in the Autoform DM database. This method is necessary if the LDAP server is down or unreachable and you need to disable LDAP without logging into Autoform DM.
In this scenario, contact Lasernet Support.