Configuration for Email Tracking on a Lasernet Report
- 03 Mar 2026
- 6 Minutes to read
- Contributors


- Print
- PDF
Configuration for Email Tracking on a Lasernet Report
- Updated on 03 Mar 2026
- 6 Minutes to read
- Contributors
- Print
- PDF
Article summary
Did you find this summary helpful?
Thank you for your feedback
Prerequisite Setup
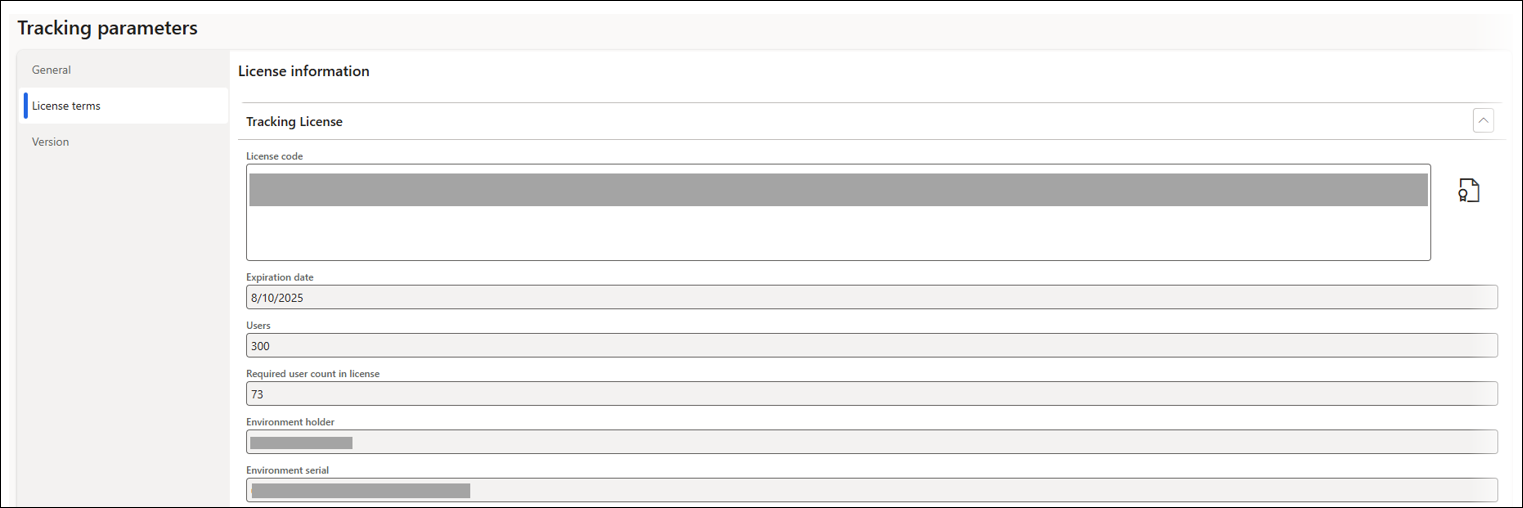
For Email Tracking to work, a tracking license must be purchased and entered in a specific field, which can be found by navigating to Lasernet > Workspaces > Tracking > Tracking parameters button > License terms tab > License code field.
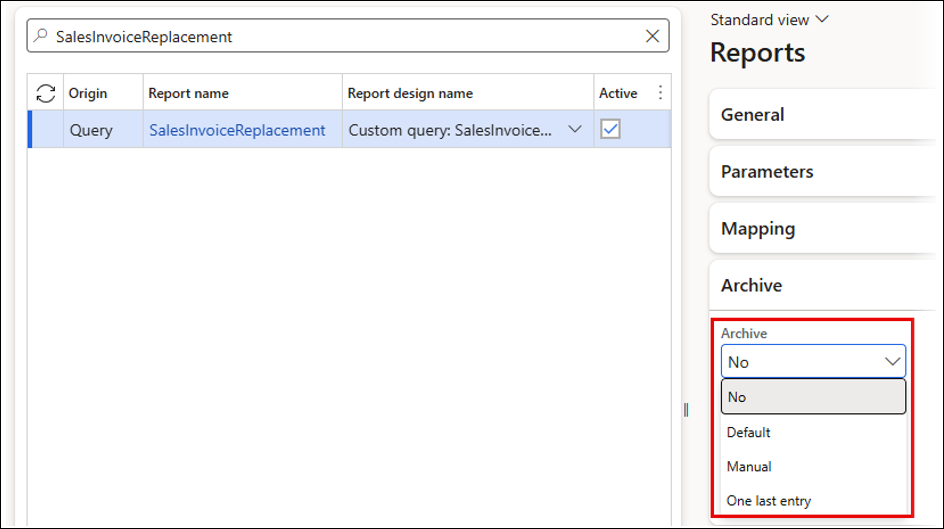
Email Tracking can only be used when Archive is not set to No.
To do so, navigate to Lasernet > Common > Reports, select the report, open the Archive FastTab, where you can find the Archive field.
Email Tracking Configuration
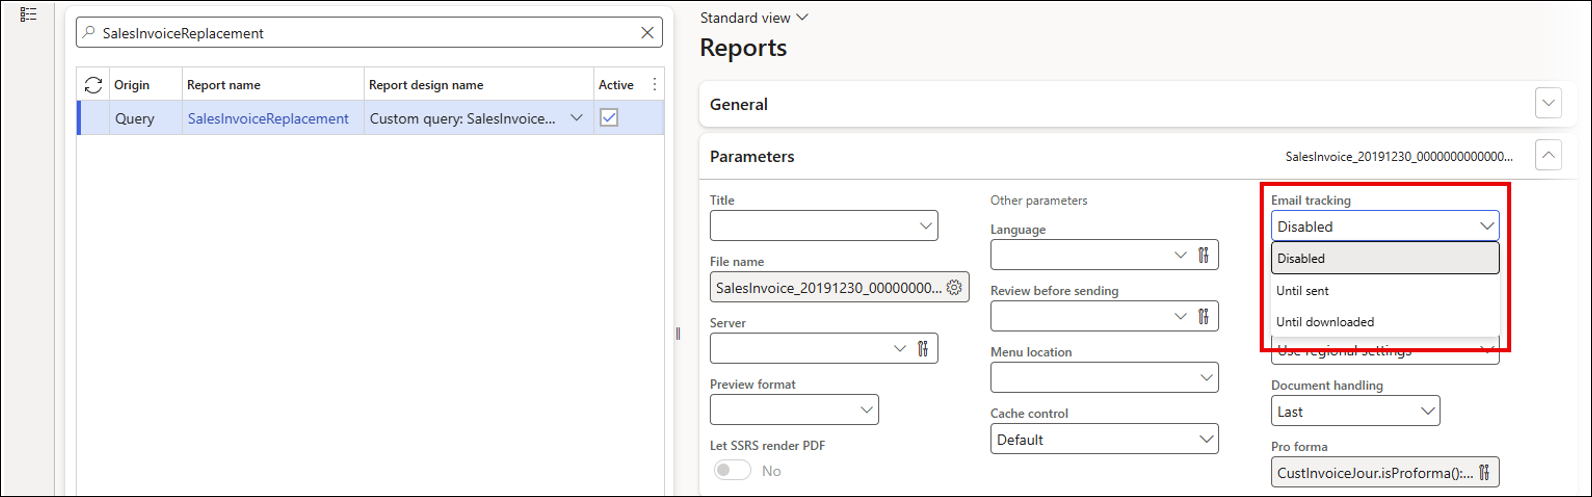
Email Tracking can be activated for a Lasernet report by navigating to Lasernet > Common > Reports, selecting a report, and then setting Email tracking to Until sent or Until downloaded in the Parameters FastTab.
Disabled: Email Tracking is not active.
Until sent: Emails are tracked until they are sent.
Until downloaded: Emails are tracked until they are downloaded by using a URL in the email.
After choosing an Email tracking option, click the Tracking button on the Action pane.
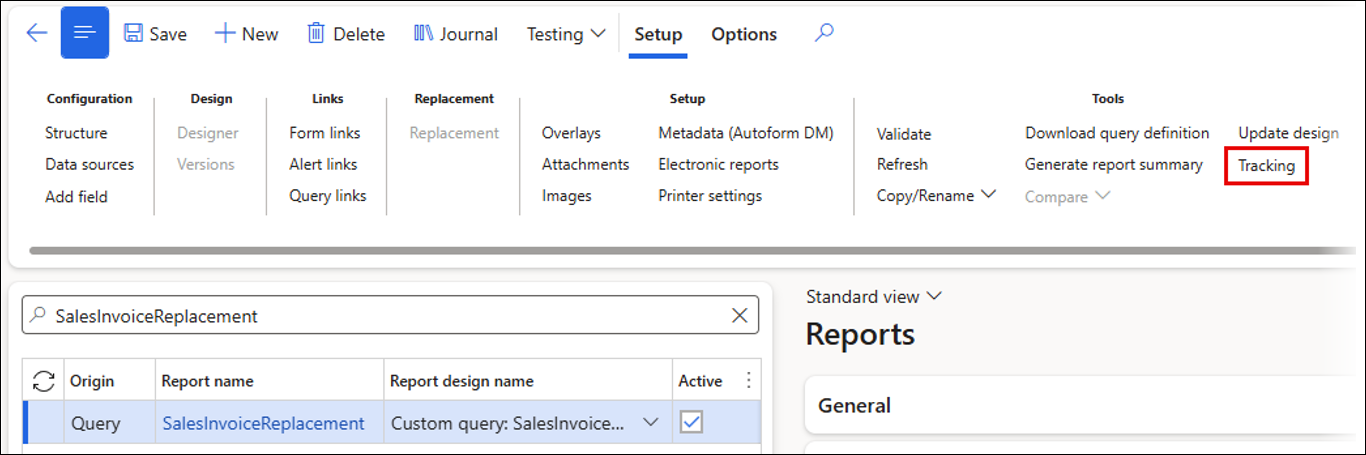
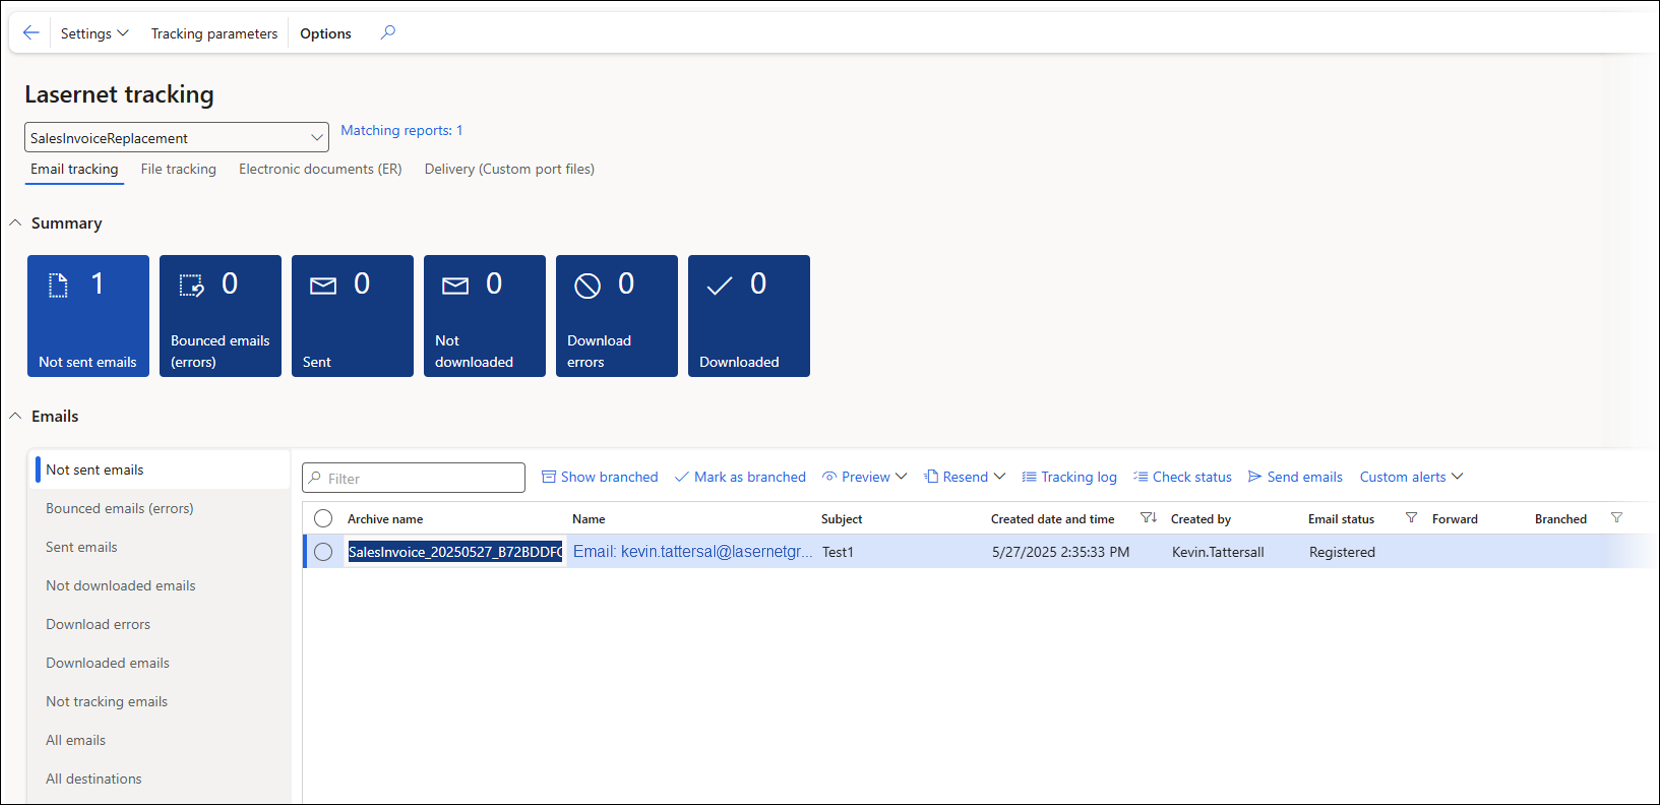
An Email tracking tab will be visible in the Lasernet tracking workspace.
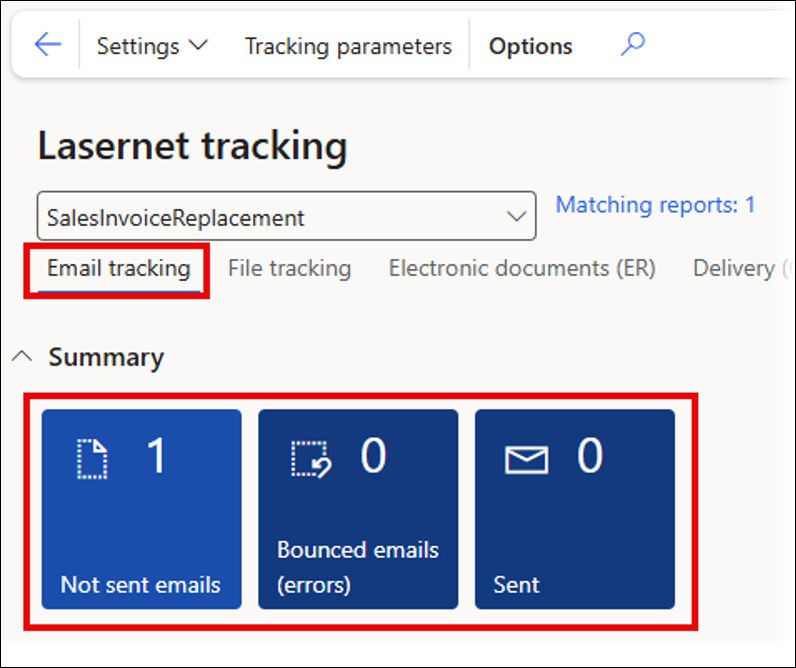
If Until sent was selected, three tiles will be visible: Not sent emails, Bounced emails (errors), and Sent.
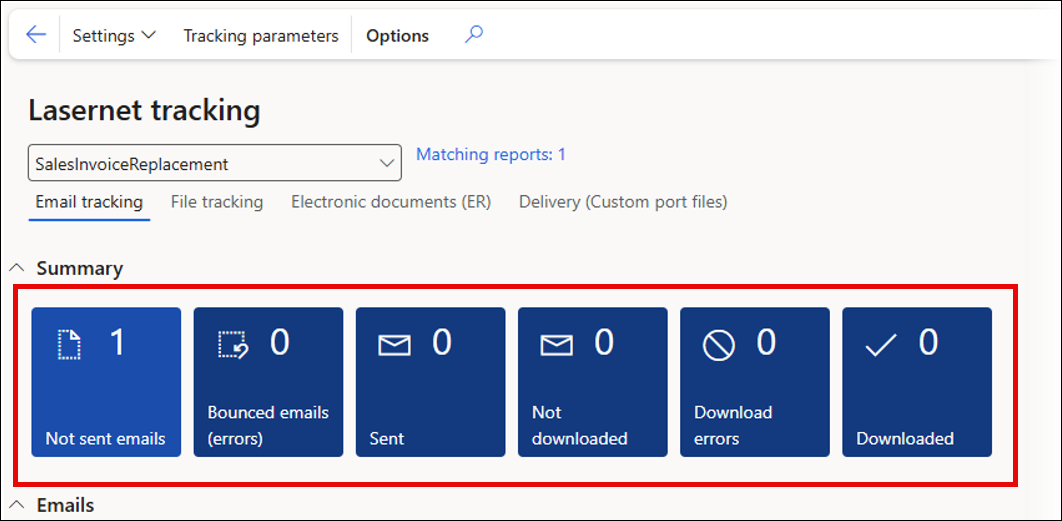
If Until downloaded was selected, six tiles will be visible: Not sent emails, Bounced emails (errors), Sent, Not downloaded, Download errors, and Downloaded.
Email Tracking Parameters
Depending on whether you are using a Lasernet server or the Lasernet Embedded solution, the Append tracking id on email subjects setting on the Tracking parameters (found by navigating to Lasernet > Workspaces > Tracking > Tracking parameters) will need to change.
Append tracking id on email subjects must be set to Yes when using a Lasernet server.
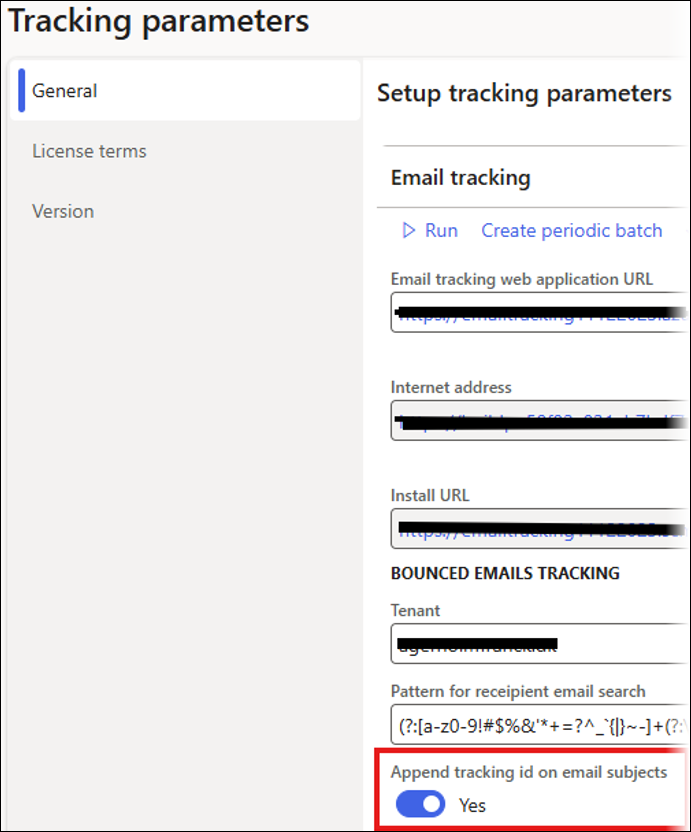
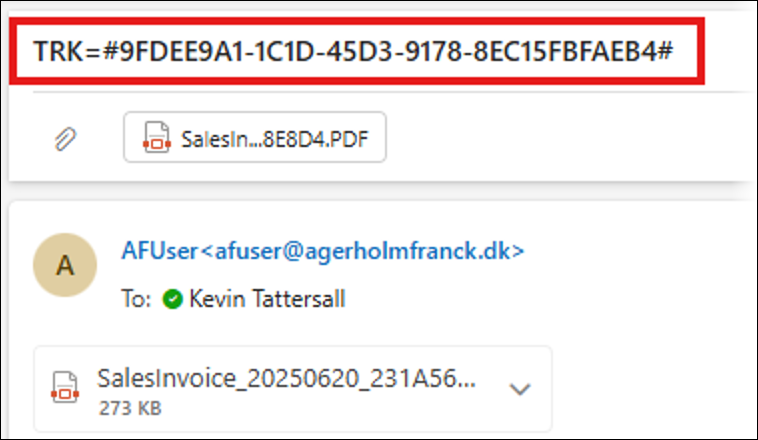
This setting will add a GUID/Tracking ID to the email subject, as shown below. This is needed for the Email Tracking to work.
Append tracking id on email subjects can instead be set to either Yes or No when using the Lasernet Embedded solution.
The Lasernet Embedded solution hides the Tracking ID, so it will not appear in the email subject.
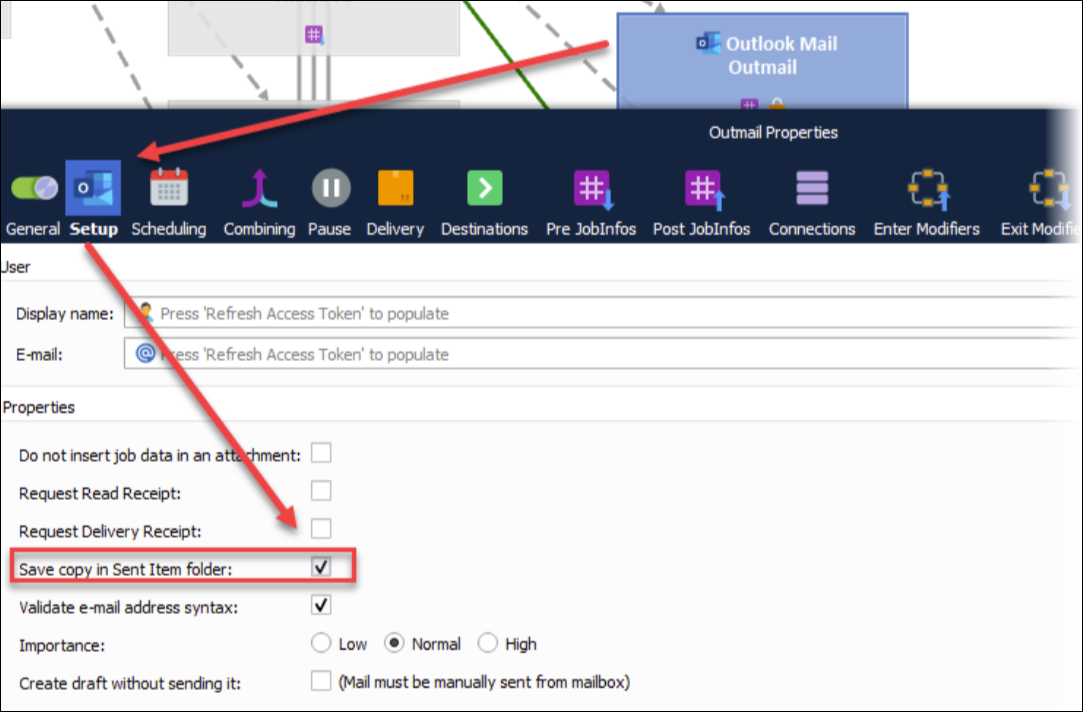
When using a Lasernet server, you must also ensure that the Save copy in Sent Item folder checkbox is selected.
Email Tracking Workspace
You can open the Email tracking workspace by following one of these two navigation paths:
Lasernet > Workspaces > Tracking > Email tracking tab
Lasernet > Common > Reports > select a report > Tracking button > Email tracking tab.
Action Pane
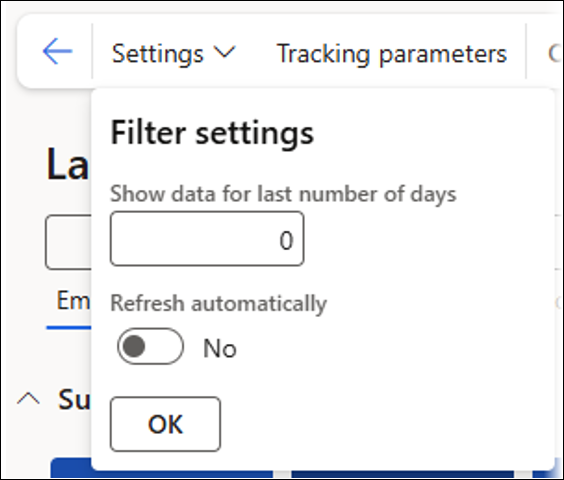
Settings: The Settings drop-down provides the following options:
Show data for last number of days: Indicates the number of days for which to display data. If 0 is specified, all data is displayed.
Refresh automatically: If set to Yes, counters are refreshed as soon as possible. In this case, we recommend good database performance, as requests will be frequent.
Tracking parameters: These are the parameters for Email Tracking and File Tracking. The tracking license can also be entered here.
Lasernet Tracking Form Header
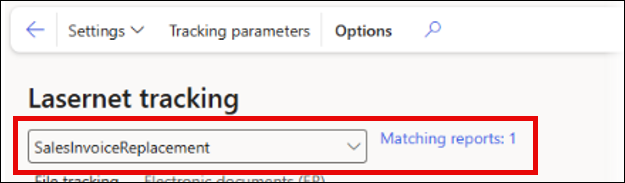
Report name dropdown list: You can select a report name from the dropdown list at the top of this form. This action will create a filter so the Email Tracking results are only related to the selected report.
Matching reports: This is the number of reports that match the selected report. If the Report name field is blank, the Matching reports field will display the total number of all the reports set up for Email Tracking. Click the hyperlink to go to the report.
Summary Section
Up to six tiles are displayed depending on whether the emails are tracked until sent or until downloaded:
Not sent emails
Bounced emails (errors)
Sent
Not downloaded
Download errors
Downloaded
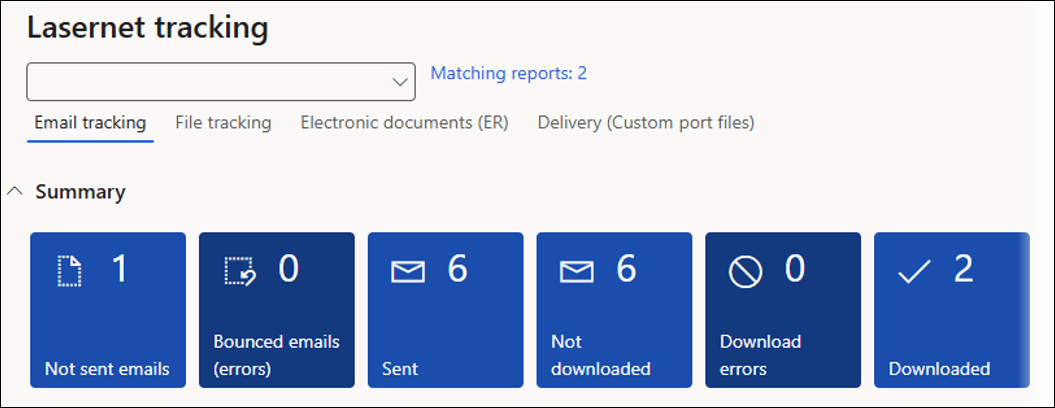
In the screenshot, no filter has been entered in the drop-down list, so the summary contains all reports that have been set up for Email Tracking.
Not Sent Emails
These are emails prepared by the Lasernet module but have not yet been sent by either the FO email engine (in the Lasernet embedded solution) or the Lasernet server.
The tile displays the number of emails that fit this criteria.
Click the tile to navigate to the Batch email sending status form. This form is used to check the status of emails that have not been sent and are using the Lasernet embedded solution.
Bounced Emails (Errors)
These emails are returned from the recipient’s email server to the sender’s inbox due to recipient address or server issues.
The tile displays the number of emails that fit this criteria.
When this tile is clicked, the list of records displays the bounced emails (errors).
Sent
These emails are registered in the Sent folder in the outgoing email account.
The tile displays the number of emails that fit this criteria.
When this tile is clicked, the list of records displays the sent emails.
Not Downloaded
These emails were successfully sent to the recipient, but the recipient has not downloaded the file yet.
The tile displays the number of emails that fit this criteria.
When this tile is clicked, the undownloaded emails are displayed.
Download Errors
These are emails for which the recipient had issues downloading the file.
The tile displays the number of emails that fit this criteria.
When this tile is clicked, the list of records displays the emails with download errors.
Downloaded
These emails were downloaded by the recipient.
The tile displays the number of emails that fit this criteria.
When this tile is clicked, the list of records displays the emails that have been downloaded.
Emails Section
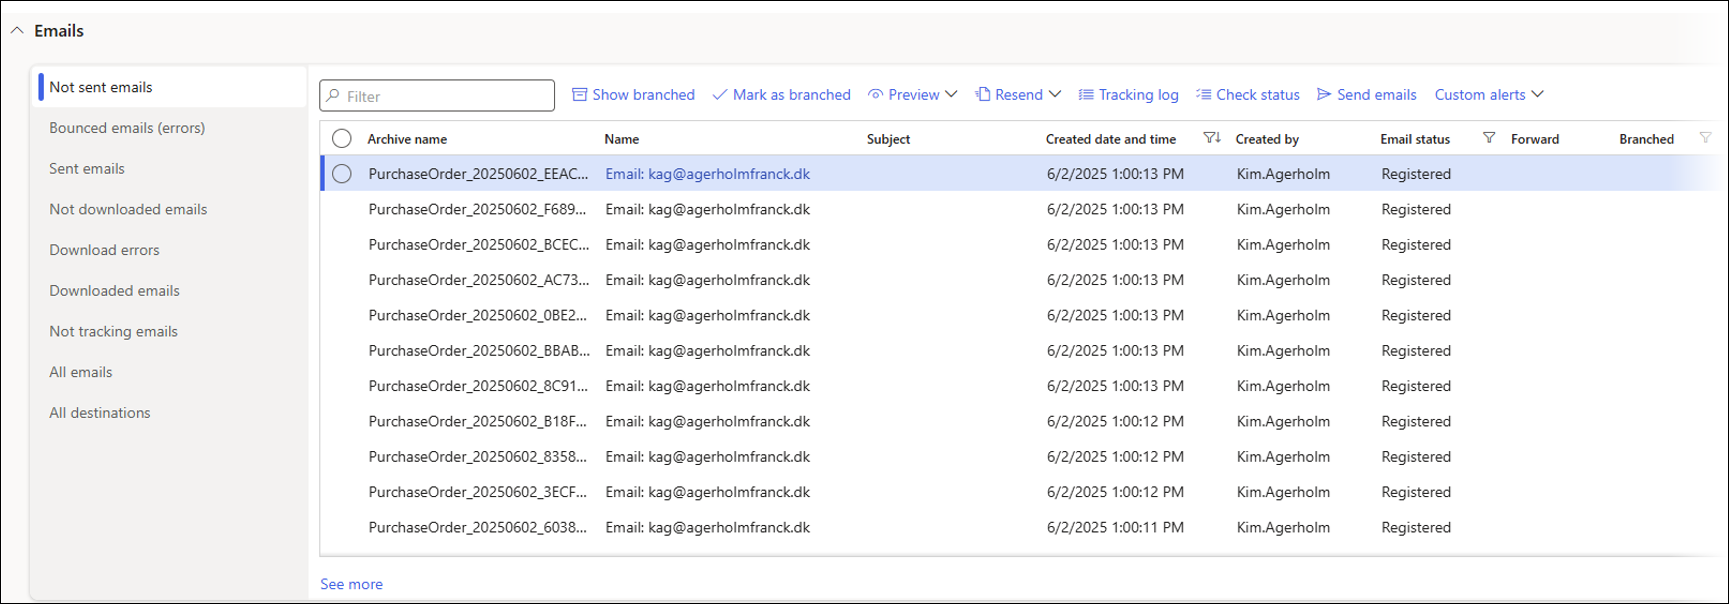
Nine tabs are visible on the left-hand side of the Emails section, which categorise the records in different ways:
Not sent emails
Bounced emails (errors)
Sent emails
Not downloaded emails
Download errors
Downloaded emails
Not tracking emails: Archive records where the Email option is used as the print destination. This tab only includes archive records where Email Tracking is not set up for the Lasernet report.
All emails: Archive records where the Email option is used as the print destination (both tracked and untracked).
All destinations: Archive records that have been sent to any print destination.
The list of displayed files and buttons changes depending on which tab is selected.
Show branched (only available for Not sent emails and Bounced emails (errors)): Applies a filter to the list to display branched records in addition to unbranched records.
Mark as branched (only available for Not sent emails and Bounced emails (errors)): Records can be marked as branched so they are hidden from the list. Useful when Email Tracking is no longer needed for the selected record.
Preview (always available): Used to view the XML or PDF file for the selected record.
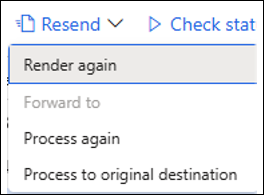
Resend (always available):
Render again: Uses the same XML file and re-renders it through Lasernet, keeping the same archive record.
Forward to: Resends the document to a Lasernet destination.
Resend: Resends the document to a Lasernet destination.
Process to original destination: Resends the report to the original destination.
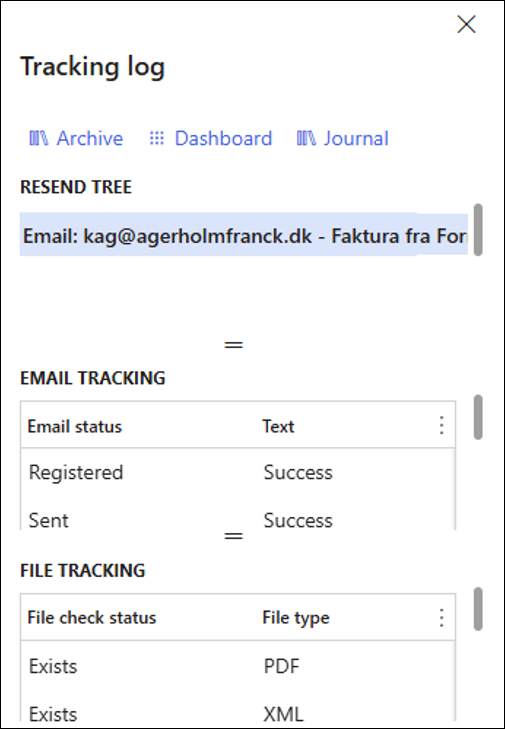
Tracking log (always available): Opens the Tracking log form, which contains details about Email Tracking, File Tracking, and includes links to the Archive and Journal for the selected record.
Check status (always available): A batch job can be set up in the Tracking parameters form, which periodically checks the Email Tracking status. The Check status button can also be used to manually update the Email status if you do not want to wait for the Lasernet emails tracking batch job to run or if the batch job has not been set up.
Send emails (only available for Not sent emails): Can be used to manually trigger the Email distributor batch job to process emails for the Lasernet embedded solution.
Custom alerts (always available): Used to create a standard Dynamics Alert. A good use case for this feature is to create an Alert rule when the Email status field is set to Email failed, so an Alert is triggered for a bounced email.
Links
The See more link takes you to the Lasernet Archive for the selected record. Only one record can be selected from the list. If multiple files are selected, the See more link will be grayed out.