Cloud Print Connector 1.3 - Webservice with Interactive Login
- 04 Mar 2026
- 3 Minutes to read
- Contributors


- Print
- PDF
Cloud Print Connector 1.3 - Webservice with Interactive Login
- Updated on 04 Mar 2026
- 3 Minutes to read
- Contributors
- Print
- PDF
Article summary
Did you find this summary helpful?
Thank you for your feedback
This page explains how to set up and use Lasernet Cloud Print Connector 1.3, focusing on the Web service with interactive login.
No prerequisites are necessary.
Note
Web service printing only works for the entity you have downloaded the config for. On any other entity, the print job remains unhandled.
This is currently a Web service limitation. Therefore, we advise using Azure Service Bus (ASB) and Azure Storage.
Download the Cloud Print Connector
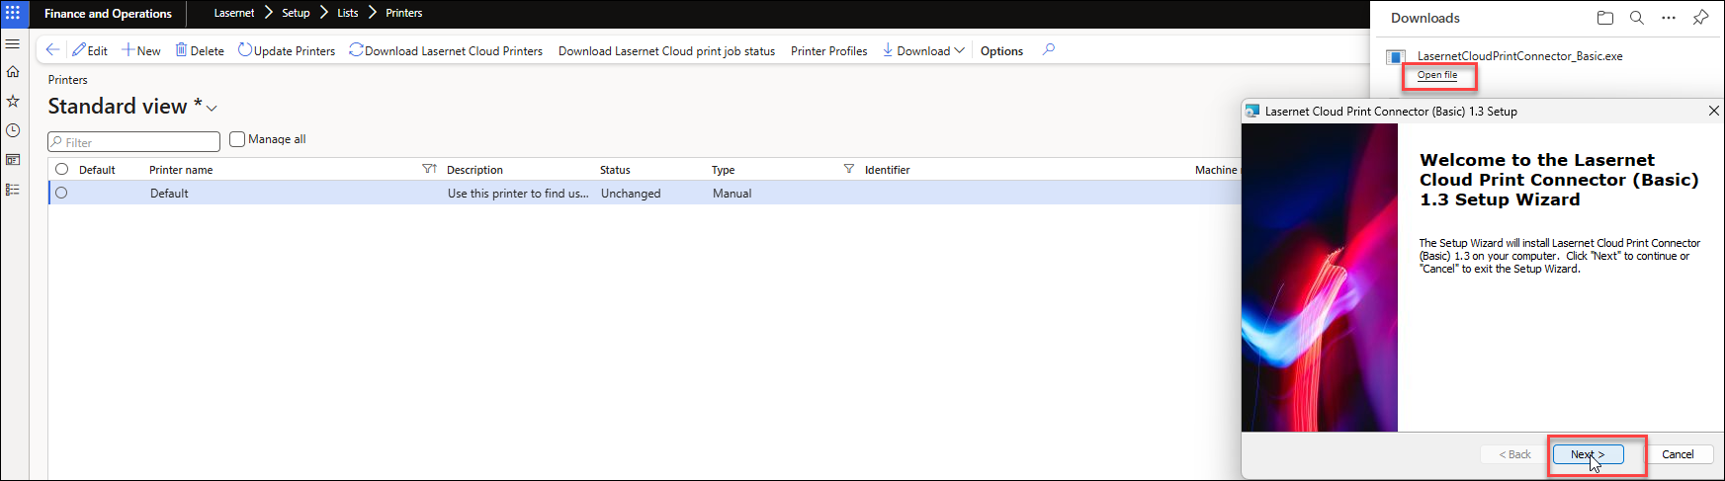
In Dynamics 365 Finance and Operations, navigate to Lasernet > Setup > Lists > Printers.
Click Download on the Action pane and select Download Lasernet Cloud Print Connector (Basic) from the dropdown menu.

Once the download is complete, open the file. A setup wizard will open.
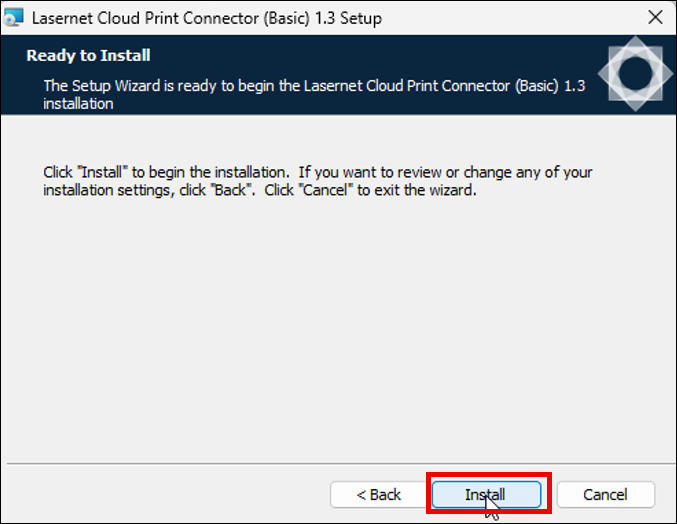
Click Next to proceed and then click Install to begin the installation. It should not take long.
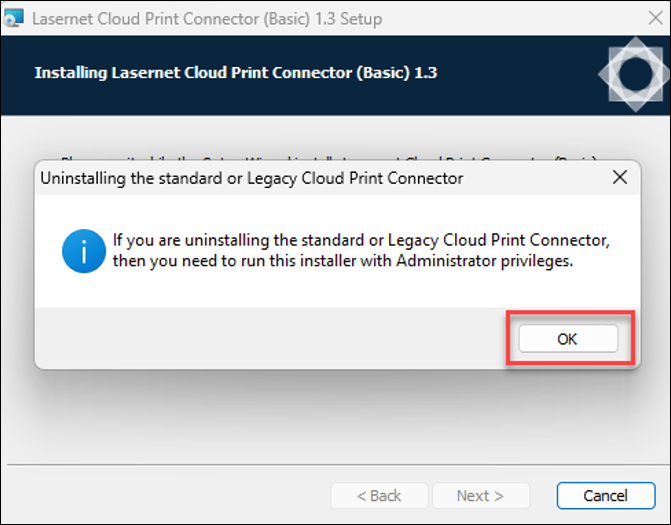
A prompt may appear asking to delete the existing connector. Click OK.
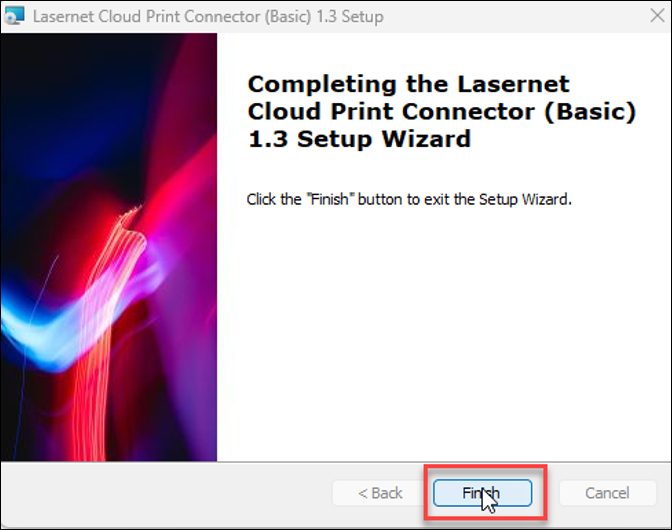
Once the installation is complete, click Finish.
Configure Cloud Print Connector
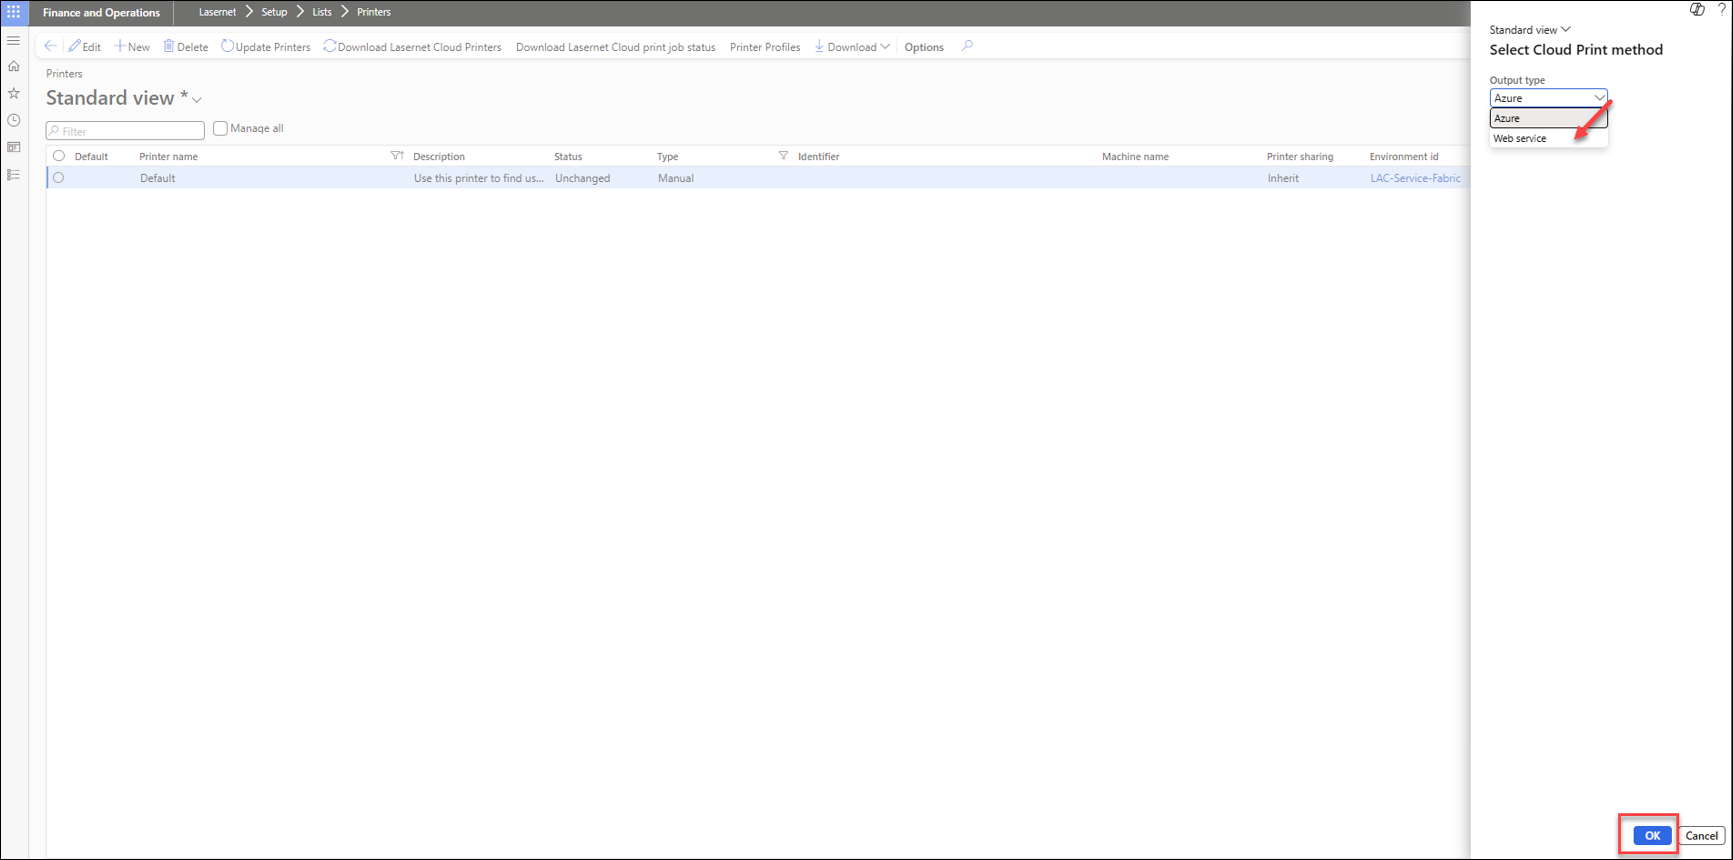
Navigate back to the Printers page of Lasernet FO Connector and open the Download dropdown menu. This time, select Open Lasernet Cloud Print Connector-configuration.

A Select Cloud Print method dialogue will open. Choose Web service from the Output type dropdown menu. Then, click OK.
A prompt may appear asking you to allow the page to open the Cloud Print Connector application. Click Open.

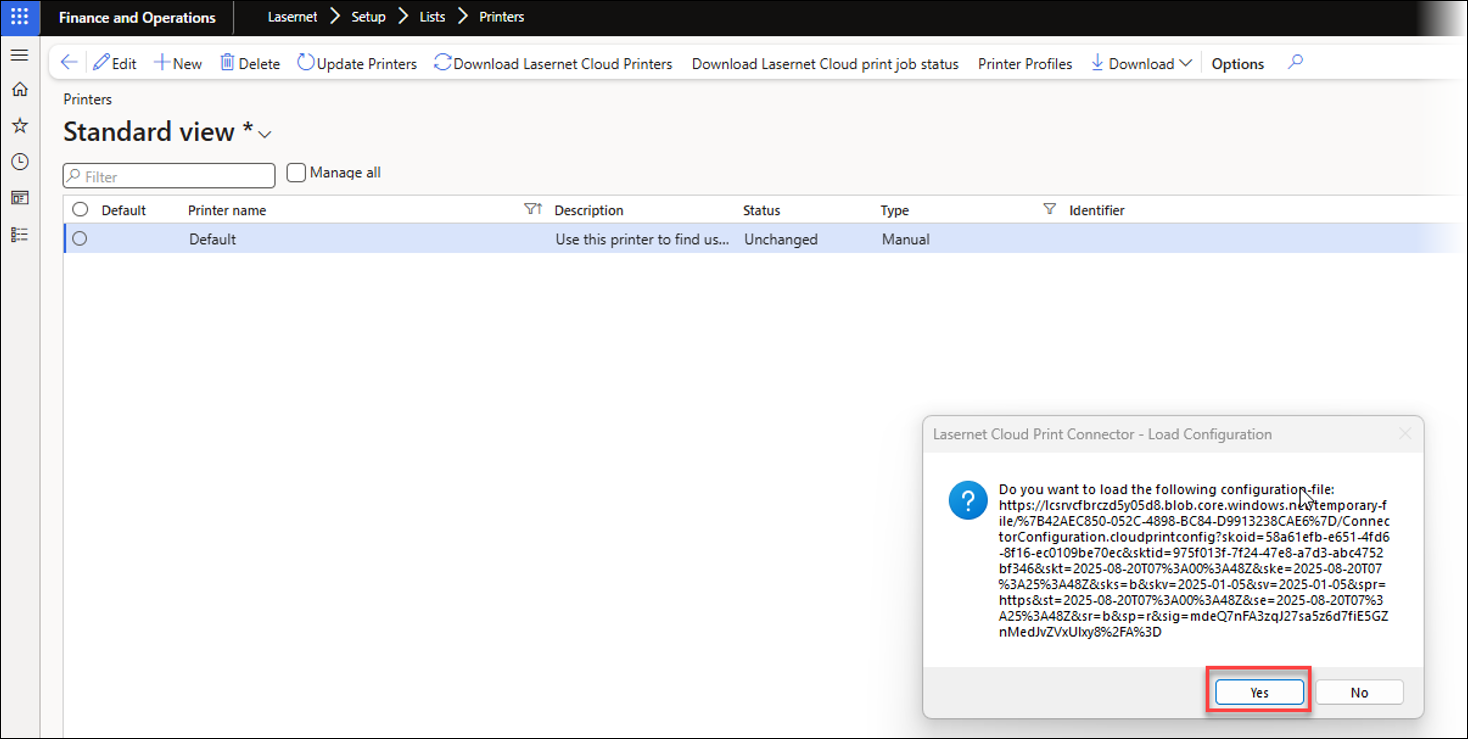
A prompt may appear asking you to load the configuration file. Click Yes.
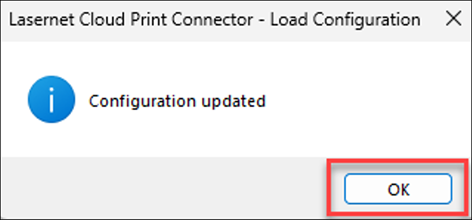
A Configuration updated notification will appear. Click OK.
The Cloud Print Connector opens. Sign in.
Select your account from the list.
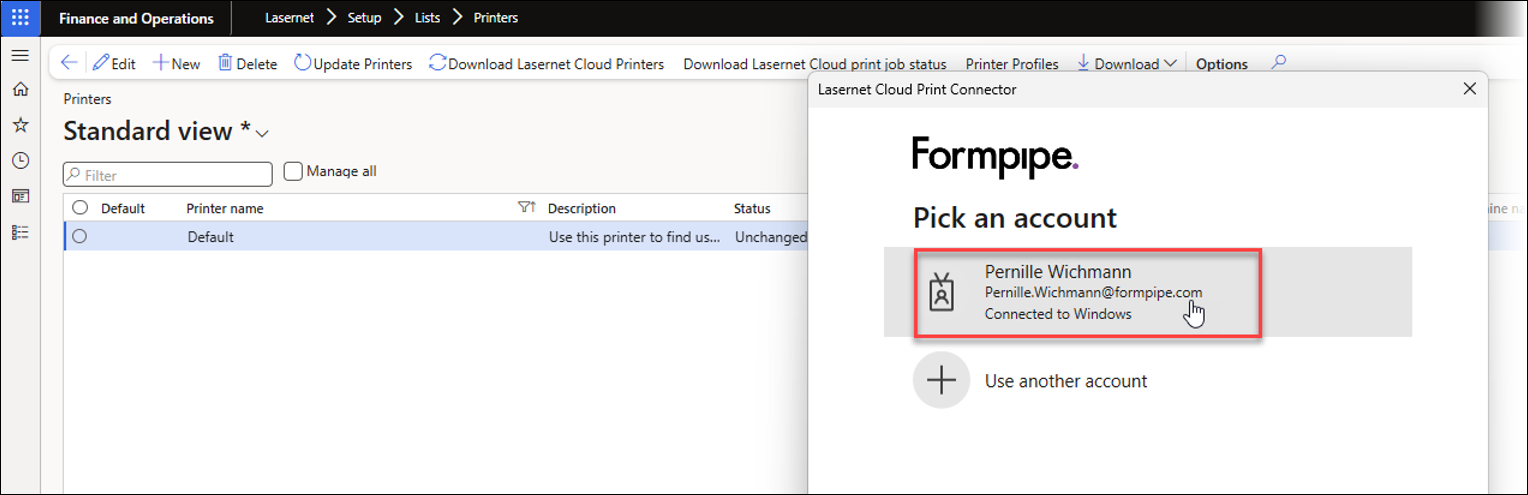
After a moment, you will be redirected to the Printers page.
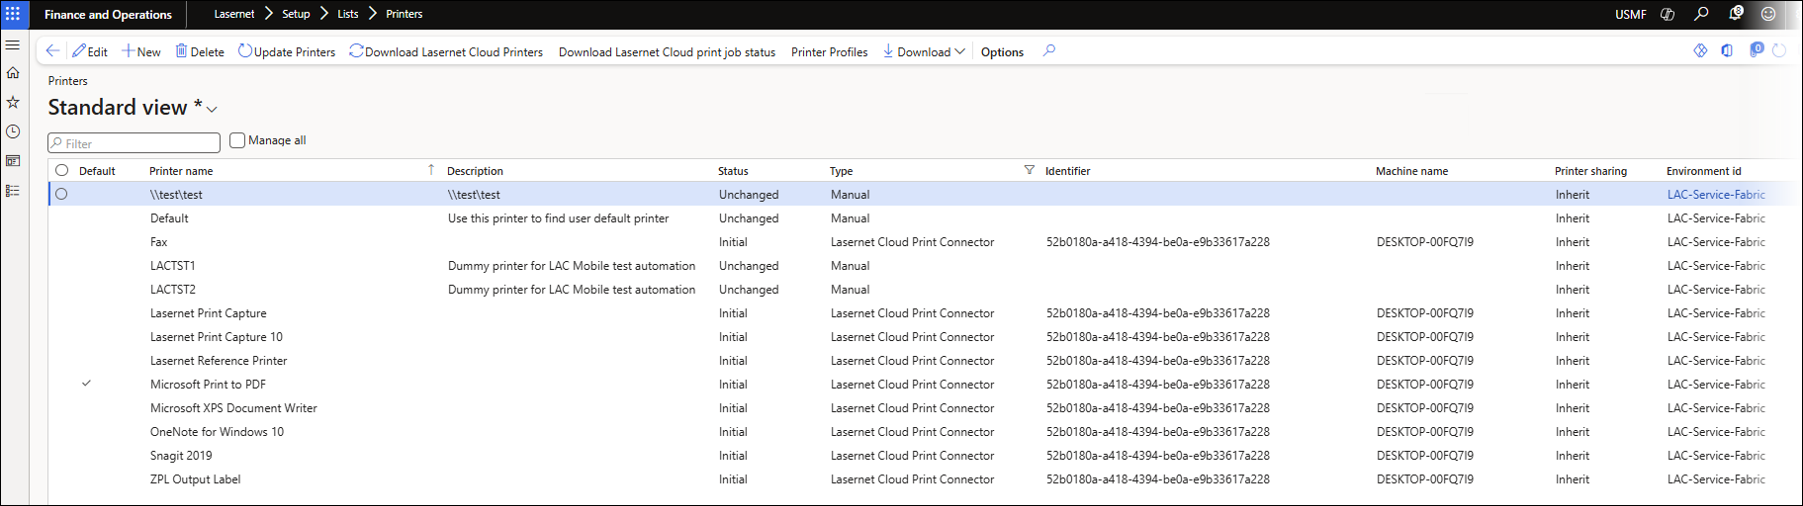
Refresh the page.

Now, a list of available printers is visible.
Cleanup Options
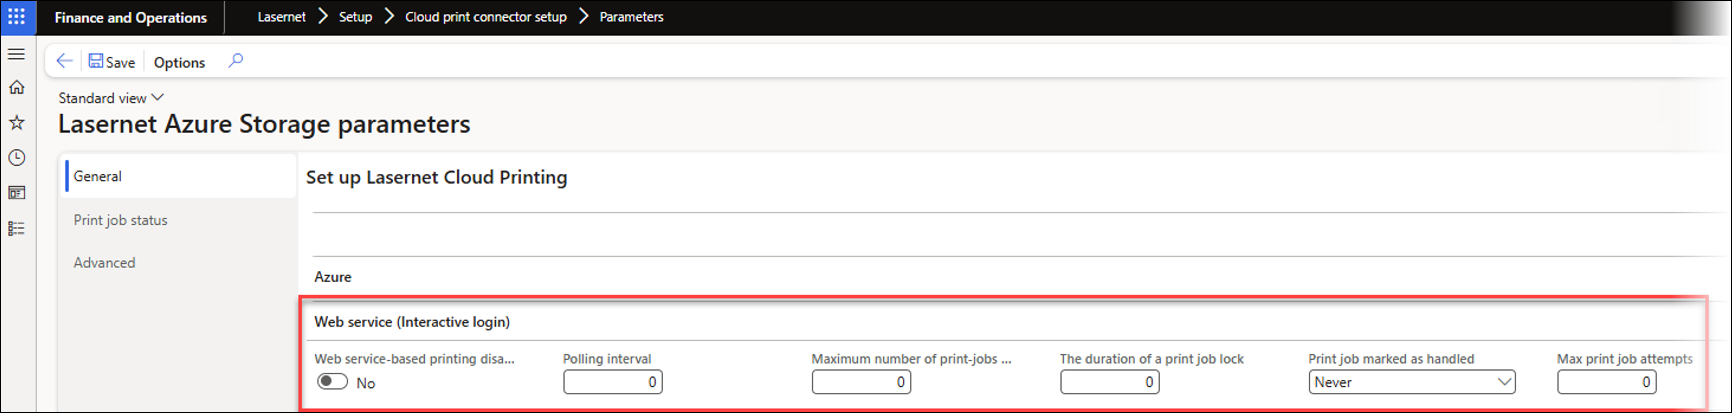
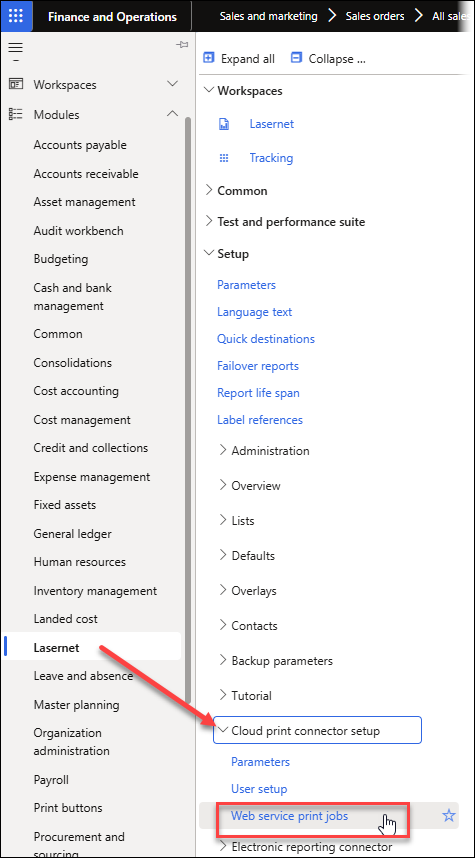
Navigate to Lasernet > Setup > Cloud print connector setup > Parameters.
Under Web service (Interactive login), you can set various parameters, including:
Polling interval
Maximum number of print-jobs per request
The duration of a print job lock
Print job marked as handled - When the print job is marked as handled.
After each print job
After all print jobs
Never
Max print job attempts - Once Lasernet FO Connector provides the print job to Lasernet Cloud Print Connector, you can set the maximum number of print job attempts.
To automate the cleanup of old print jobs, navigate to System administration > Period tasks > Batch job history clean-up. Here, you can find the Lasernet Cloud Print cleanup job. This batch task is automatically created when printing the first document to Lasernet Cloud Print Connector via the Web service, but it is also possible to start it within the Parameters page for Lasernet Cloud Print Connector.
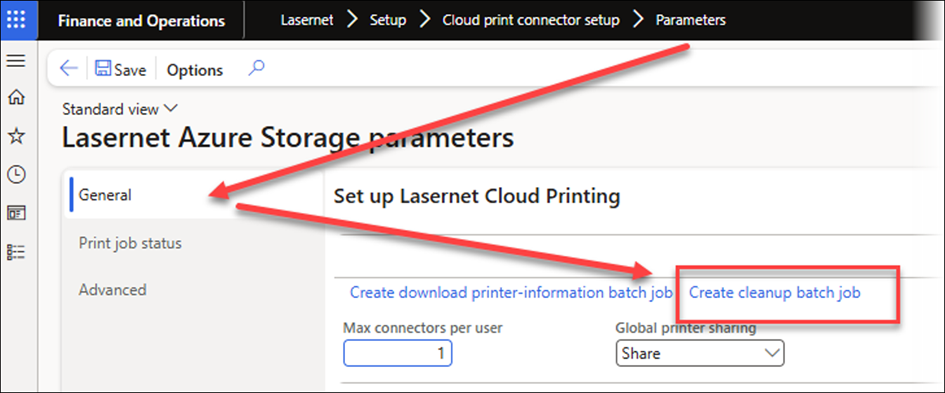
Click Create cleanup batch job to view the details.
Under the Parameters section, you can set the criteria for deleting old print jobs, such as jobs that have been handled, are older than a certain number of minutes, or have exceeded the maximum number of attempts. This helps keep your print queue clean and organized.
Web Service Print Jobs
A new form called Web service print jobs has been introduced in the Parameters page for Lasernet Cloud Print Connector 1.3. To access it, navigate to Lasernet > Setup > Cloud print connector setup > Web service print jobs.

On this form, you can view your handled and unhandled print jobs.
Settings for the form are found at Lasernet > Setup > Cloud print connector setup > Parameters > Web service (Interactive login).
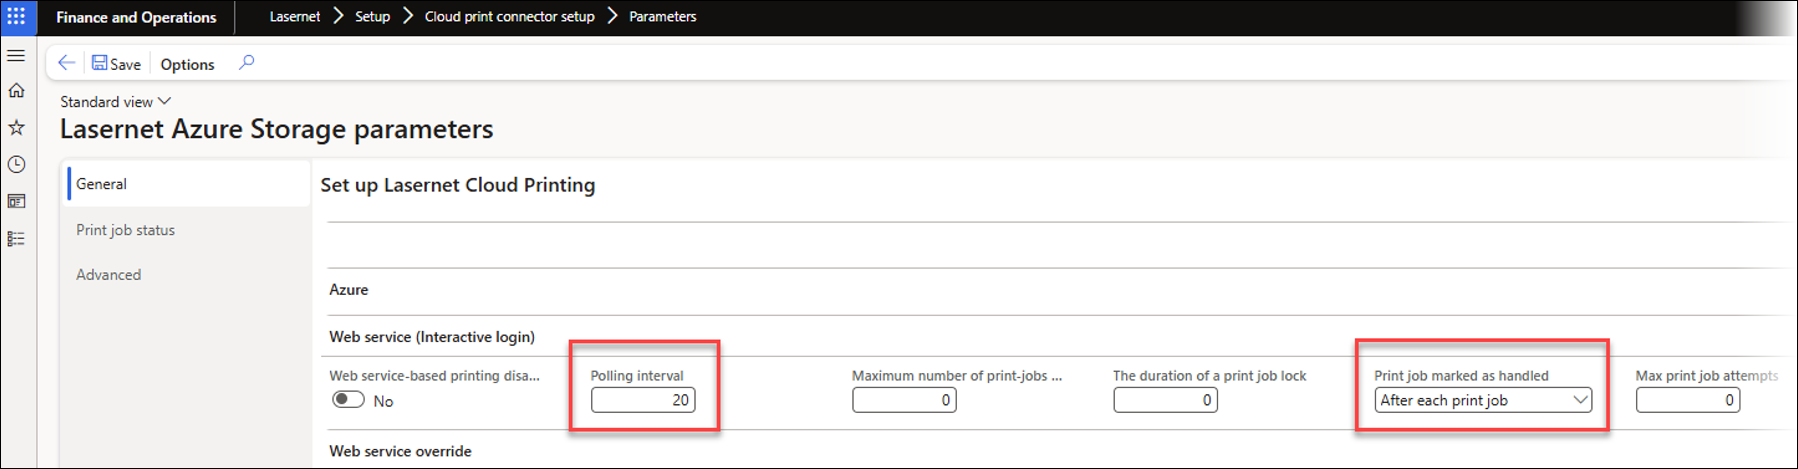
The configuration used for this example is:
Polling interval set to 20 seconds so that the user can navigate to Web service print jobs and save the document to PDF while the status of the print job is still Unhandled. After the document is saved to PDF, the status is changed to Handled.
Print job marked as handled set to After each print job.
The following steps describe how to use the Cloud Print Connector via the Web service. A physical printer is not necessary, as Microsoft Print to PDF can be used to validate that the process works by printing a report that includes an attachment.
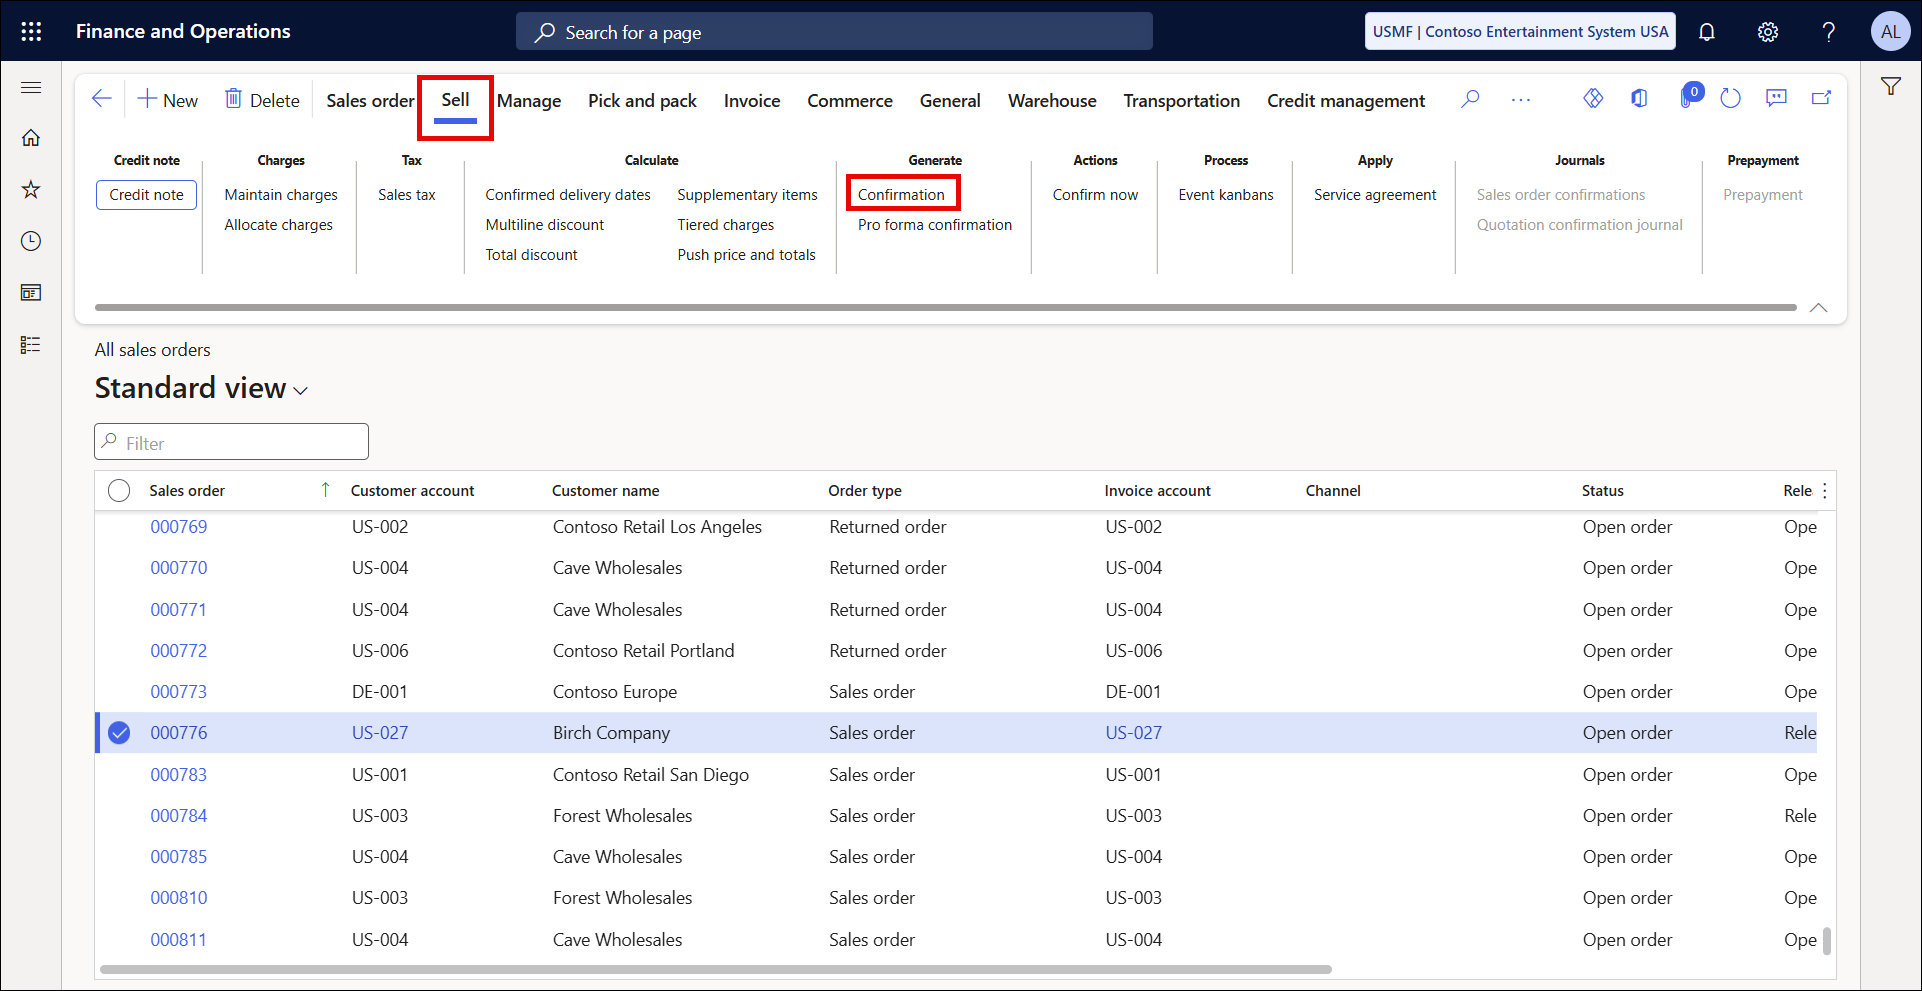
Navigate to Sales and marketing > Sales orders > All sales orders.
Select a sales order and click Confirmation from the Generate group of the Sell section of the Action pane.
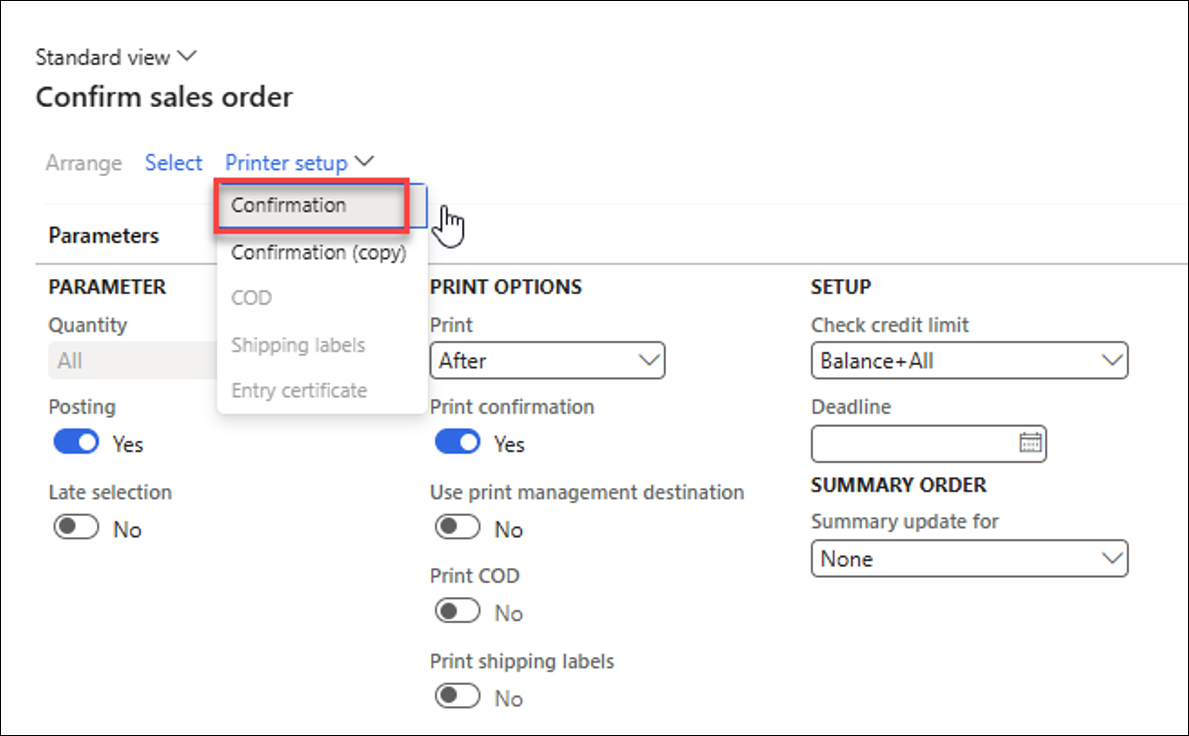
In the Confirm sales order window, click Printer setup and select Confirmation.
Ensure Microsoft Print to PDF is selected in Lasernet Print > Printer name. Then, click OK.
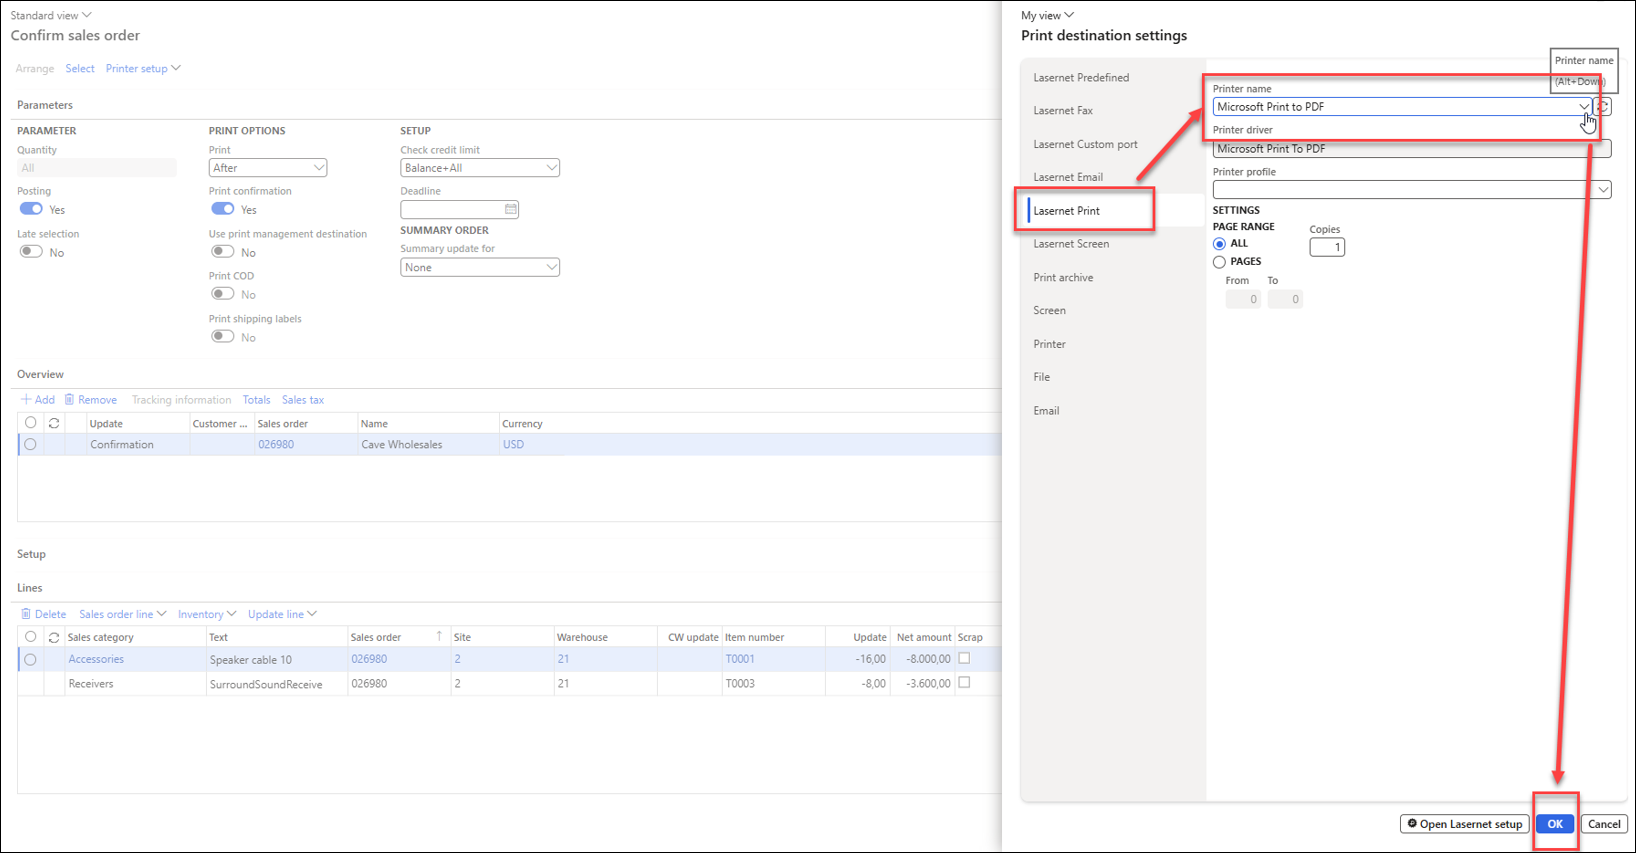
Click OK again.

The system will now process the operation.
To check the status of the print job, navigate to Lasernet > Setup > Cloud print connector setup > Web service print jobs.
The print job is listed as Unhandled. After a moment, a Save print output as dialogue opens.
Name the file Print of Report and click Save.
The job’s status has now changed from Unhandled to Handled.
Repeat the process for a second file, which you will name Print of Attachment and save it as well.
After refreshing the page, both jobs are marked as Handled.