Apply Licenses to Lasernet Core Services
- 08 May 2026
- 10 Minutes to read
- Contributors


- Print
- PDF
Apply Licenses to Lasernet Core Services
- Updated on 08 May 2026
- 10 Minutes to read
- Contributors
- Print
- PDF
Article summary
Did you find this summary helpful?
Thank you for your feedback
A Lasernet Core environment requires a valid and current license. A crucial stage in making a Lasernet Core system operational is uploading a license in the Lasernet Core administration tool and applying that license to environments.
A Lasernet Core license permits the use of specified modules and packages.
Note
Lasernet Developer 11 does not require a license.
To apply a license to Lasernet Core, follow the quick start process or the full installation and setup process on this page.
Note
About the quick start process: The quick start process is a simpler route to an operational Lasernet Core system and it requires only basic IT knowledge. However, it results in a system that is suitable only for demonstration or trial purposes. For more information about the quick start process (and its inherent compromises), see the main Lasernet Core 11 Installation and Setup Guide page.
About the full installation and setup process: The full installation and setup process describes all available installation and setup options and is suitable for setting up production Lasernet Core systems. However, parts of it require some IT and database administration knowledge.
Manage
Quick Start Installation Process
The quick start process describes only how to apply a Lasernet Core demo license.
In the side menu, click System Configuration (see 1 in the image below).
Click the Licences tab (2).
Click Upload Licence File (3).
.png)
In the Upload Licence File window, enter a descriptive Name for the license and optionally a suitable Description.
.png)
Click Upload a valid licence file (in the Licence File area).
In the Open window, navigate to and select the correct
.licensefile, then click Open.Click Confirm. The license is added to the Licences tab. Click the license’s tile to see more details about it.
.png)
Apply the license to the Lasernet Core environment that you created:
On the System Configuration page, click the Environments tab.
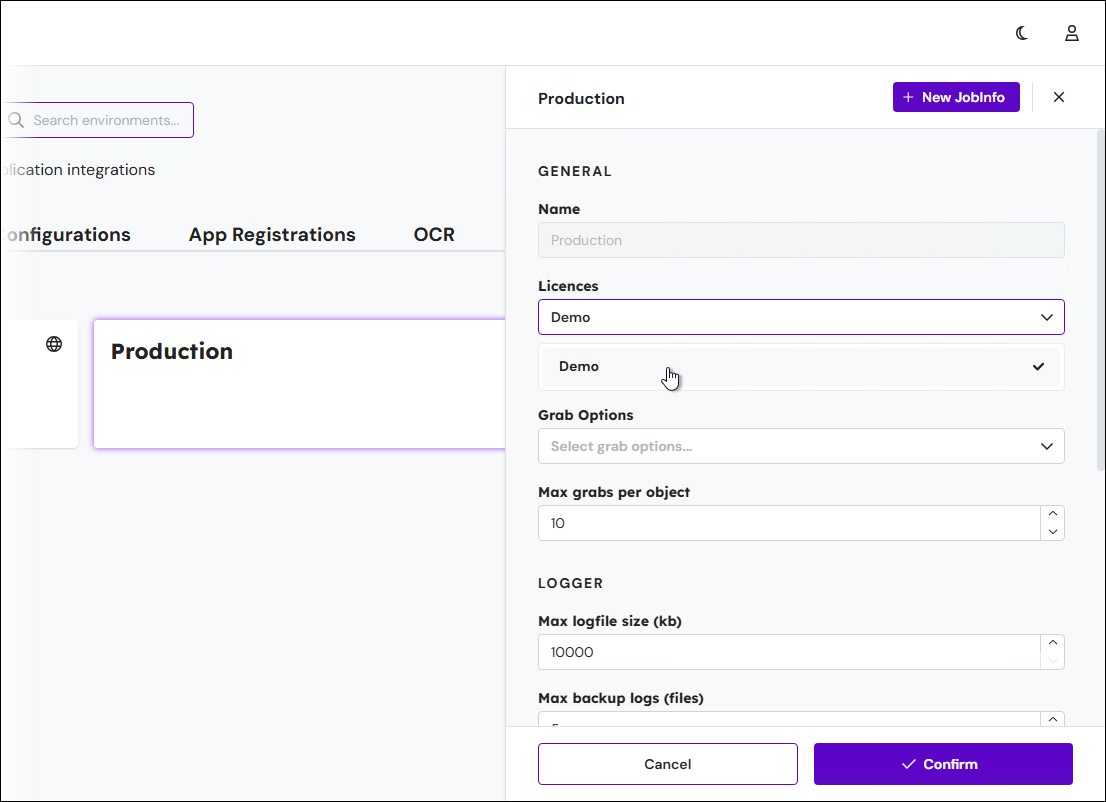
Click the environment that you want to apply the license to.
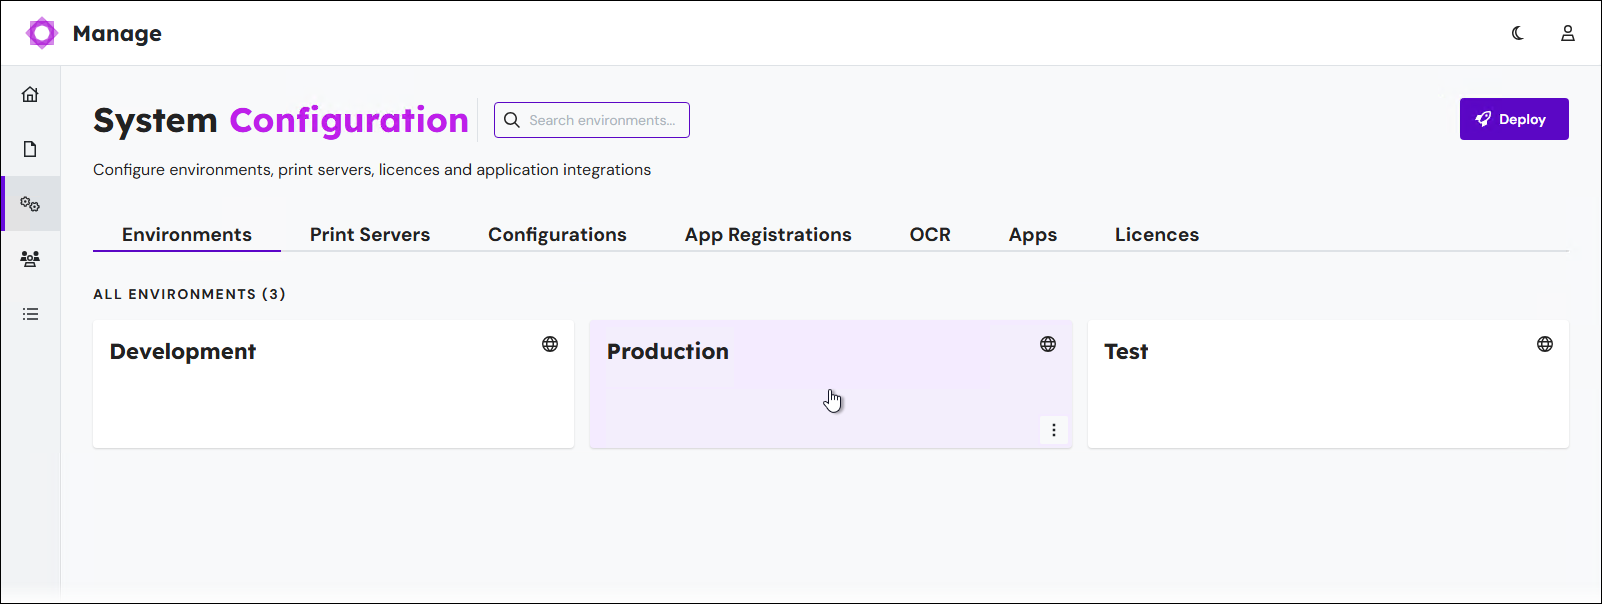
In the General area of the environment’s properties pane, select the license from the Licences list.
Click Confirm.
Config Server has applied the license to the environment.
Next Steps
The next step of the Lasernet Core 11 installation and setup process is to configure users, groups, and security roles.
Full Installation and Setup Process
The full installation and setup process includes steps for applying a demo license or a standard Lasernet Core license.
Important
After you add a standard Lasernet Core license, Lasernet Config Server connects to the license server to activate the license.
If the server that Lasernet Config Server is running on does not have internet access, you must follow the offline activation process.
For other licensing information (such as how to unassign, remove, and deactivate a license, or how to “synchronize” a license if your organization has bought additional Lasernet Core features), see the Lasernet Core License Management page of the Lasernet Core Administration Guide.
To add and apply a Lasernet Core license, follow these steps:
In the side menu, click System Configuration (see 1 in the image below; expand the relevant section).
Click the Licences tab (2).
Follow the steps below that correspond to the type of license (standard or demo) you want to add:
Add a standard Lasernet Core license to the Config Server
Click New Licence (3).
.png)
In the New Licence window, enter a descriptive Name for the license, a suitable Description, and the Activation Code for the Lasernet Core license.
Click Confirm (4). The Config Server will connect to the license server over the internet to activate the license and then add it to the Licenses tab.
Note
If the server does not have internet access, you must follow the offline activation process.
Add a demo license to the Config Server
Click Upload Licence File (3).
.png)
In the Upload Licence File window, enter a descriptive Name for the license and optionally a suitable Description.
.png)
Click Upload a valid licence file (in the Licence File area).
In the Open window, navigate to and select the correct
.licensefile, then click Open.Click Confirm. The license is added to the Licences tab.
Click the license’s tile to see details about it:
.png) The license details include:
The license details include:Name: The name that you entered.
Description: The description that you entered.
Type: The license type.
Environments: The number of environments that the license has been applied to, followed by the number of environments permitted by the license. For example, if the license permits you to apply the license to six environments, and you have applied it to four, Environments will contain 4 / 6. If the license can be applied to an unlimited number of environments, the second number is replaced by ∞ (infinity).
Pods: The number of pods permitted by the license.
Note
Pods is relevant to Lasernet cloud customers only.
Expires: Expiry date of the license (if any).
Apply the license to Lasernet Core environments:
On the System Configuration page, click the Environments tab.
Click the environment that you want to apply the license to.
In the General area of the environment’s properties pane, select the license from the Licences list.
Click Confirm.
The Config Server has applied the license to the environment.
Check Which Modules and Packages are Permitted by a License
You can check which Lasernet Core modules and packages are permitted by a particular license.
On the Licences tab, click the license you want to check.
In the license’s properties pane, scroll down and check the content of the Packages and Modules areas.
Note
On the Modules tab, non-licensed and third-party modules are listed in the Other section.
.png)
Next Steps
The next step of the Lasernet Core 11 installation and setup process is to configure users, groups, and security roles.
Lasernet Config Web App
Note
The Lasernet Config web app was provided with earlier versions of Lasernet Core. It is a legacy web app and will be deprecated in a future version of Lasernet Core.
Expand for information
Quick Start Installation Process
The quick start process describes only how to apply a Lasernet Core demo license.
In the Tools menu (on the left side), click Licenses (see 1 in the image below).
Click Upload license (see 3 in the image below).
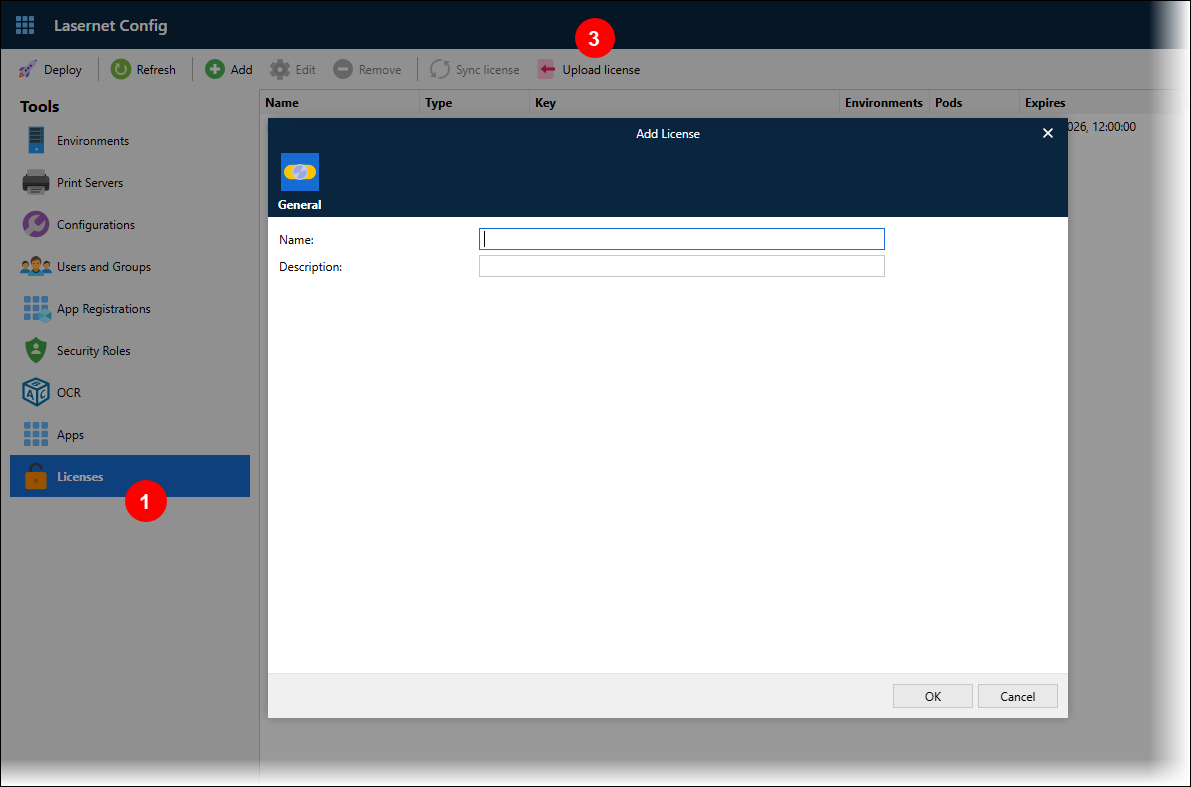
In the Open window, navigate to and then select the correct
.licensefile.In the Add License window, enter a descriptive Name for the license and a suitable Description.
Click OK. The license is listed on the Licenses page.
Apply the license to the Lasernet Core environment that you created:
In the Tools menu, click Environments (see 1 in the image below).
Click the environment that you want to apply the license to.
Click Edit (2).
In the Edit Environment window, click the License tab (3).
Select the license from the License list.
Click OK.
On the Environments page, the License column of the table shows which license is applied to each environment.
Next Steps
The next step of the Lasernet Core 11 installation and setup process is to configure users, groups, and security roles.
Full Installation and Setup Process
The full installation and setup process includes steps for applying a demo license or a standard Lasernet Core license.
Important
After you add a standard Lasernet Core license, Lasernet Config Server connects to the license server to activate the license.
If the server that Lasernet Config Server is running on does not have internet access, you must follow the offline activation process.
For other licensing information (such as how to unassign, remove, and deactivate a license, or how to “synchronize” a license if your organization has bought additional Lasernet Core features), see the Lasernet Core License Management page of the Lasernet Core Administration Guide.
To add and apply a Lasernet Core license, follow these steps:
In the Tools menu, click Licenses (see 1 in the image below; expand the relevant section).
Follow the steps below that correspond to the type of license (standard or demo) you want to add:
Add a standard Lasernet Core license to Config Server
In the top toolbar, click Add (2).
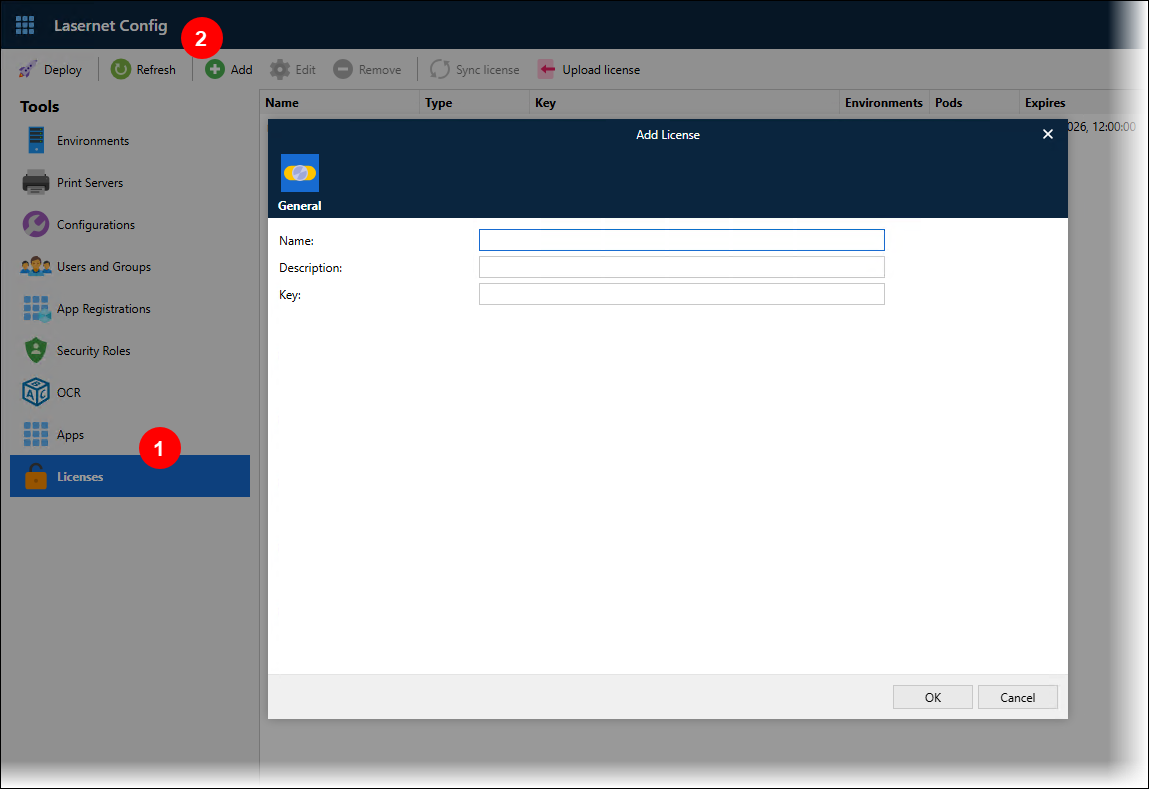
In the Add License window, enter a descriptive Name for the license, a suitable Description, and the license Key for the Lasernet Core license.
Click OK. Config Server will connect to the license server over the internet to activate the license. The license is added to the list.
Note
If the server does not have internet access, you must follow the offline activation process.
Add a demo license to Config Server
Click Upload license (3).
In the Open window, navigate to and then select the correct
.licensefile.In the Add License window, enter a descriptive Name for the license and a suitable Description.
Click OK.
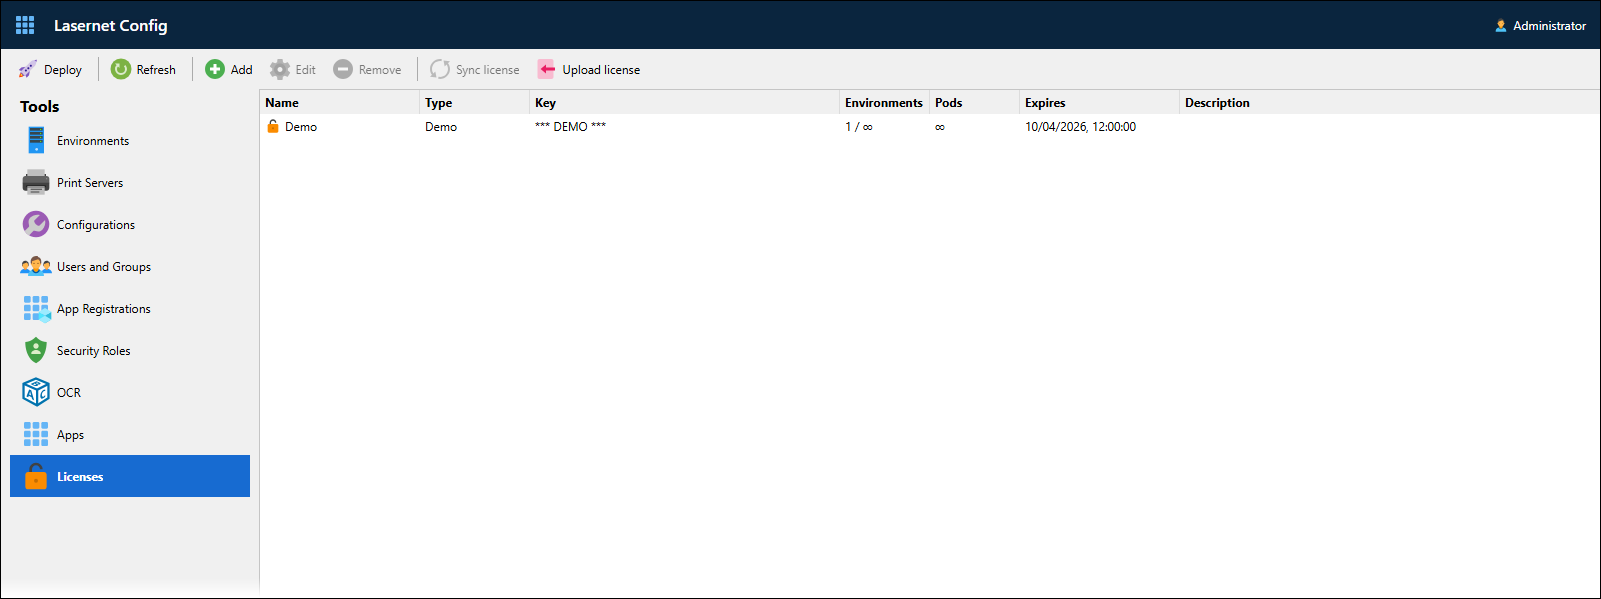
Review the license details in the table on the Licenses page.
Name: The name that you entered.
Type: The license type.
Key: The license key or *** DEMO ***.
Environments: The number of environments that the license has been applied to, followed by the number of environments permitted by the license. For example, if the license permits you to apply the license to six environments, and you have applied it to four, Environments will contain 4 / 6. If the license can be applied to an unlimited number of environments, the second number is replaced by ∞ (infinity).
Pods: The number of pods permitted by the license.
Note
Pods is relevant to Lasernet cloud customers only.
Expires: Expiry date of the license (if any).
Description: The description that you entered.
Apply the license to Lasernet Core environments:
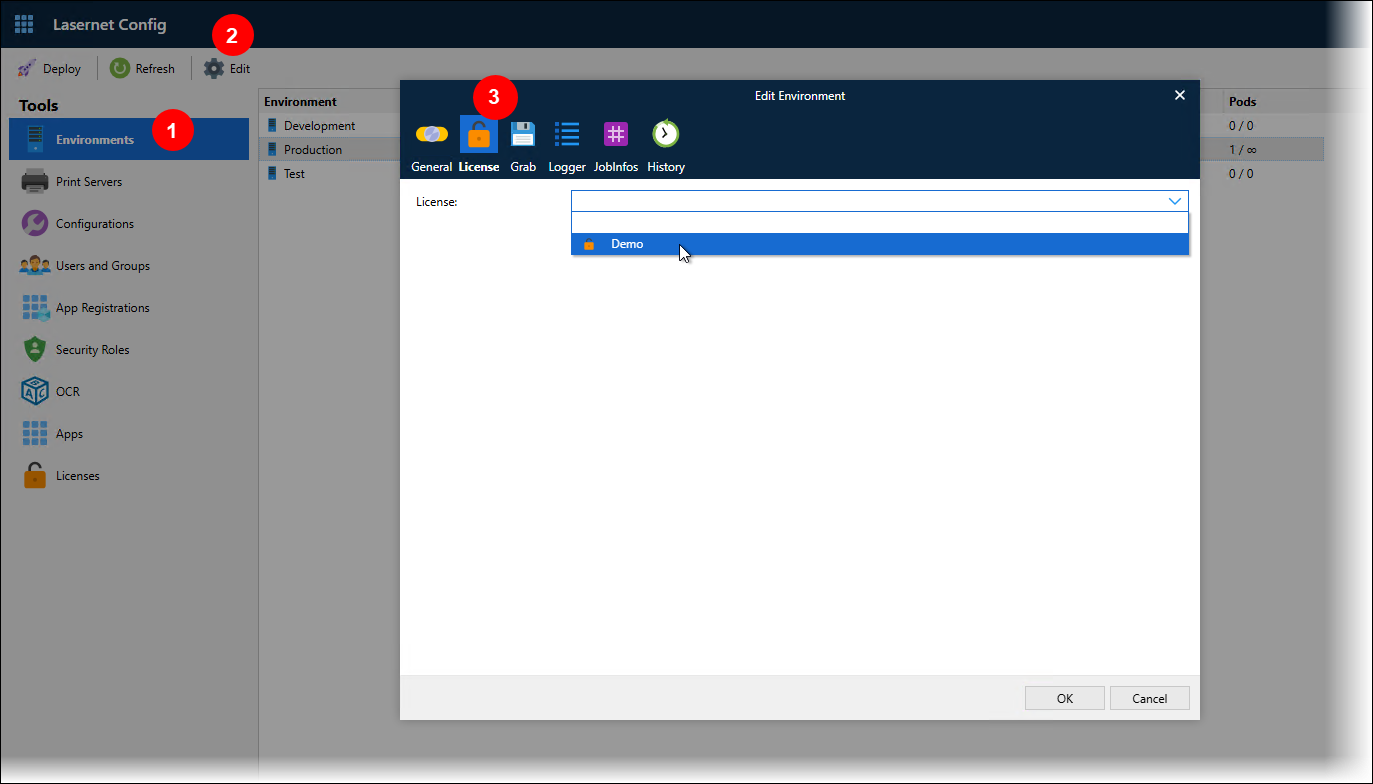
In the Tools menu, click Environments (see 1 in the image below).
Click the environment that you want to apply the license to, then click Edit (2).
In the Edit Environment window, click the License tab (3).
Select the license from the License list.
Click OK.
On the Environments page, the License column of the table shows which license is applied to each environment.
The Pods column shows how many pods (out of the maximum number permitted by the license) have been created for that environment. This is relevant to Lasernet cloud customers only.
Check Which Modules and Packages are Permitted by a License
You can check which Lasernet Core modules and packages are permitted by a particular license.
In the Tools menu, click Licenses.
Click the license you want to check, then click Edit.
In the License Properties window, check the content of the Modules and Packages tabs.
Note
The Packages tab is present only for standard Lasernet Core licenses.
Note
On the Modules tab, non-licensed and third-party modules are listed in the Other section.
Next Steps
The next step of the Lasernet Core 11 installation and setup process is to configure users, groups, and security roles.
Offline License Activation
When you add a standard Lasernet Core license to the Config Server, it must be activated before Lasernet Core environments can use it.
When an internet connection is available, the Config Server connects to the Lasernet Group license server to activate the license.
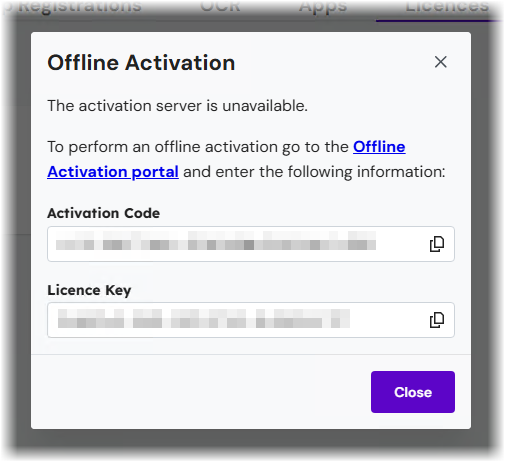
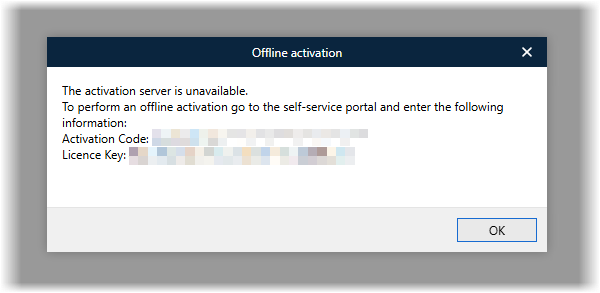
If an internet connection is not available, Manage (or the Lasernet Config web app) will display a license key that you must enter into the Lasernet Offline Activation portal (along with your Lasernet Core activation code) from an internet-connected device. The Lasernet Offline Activation portal will generate an activated license file, which you upload to the Config Server.
If an internet connection is not available when you add a license to the Config Server, follow these steps:
Make a note of the license key that is displayed when you add a standard Lasernet Core license but the Config Server cannot access the Lasernet Group license server.
Important
You must copy the license key when it is displayed. After you close the window, it is not possible to display the license key again. If you do close the window without noting the code, delete the corresponding tile on the Licences page and start the new license process again.
The activation code was supplied to you with your purchase of Lasernet Core.
Manage
Lasernet Config web app
Go to the Lasernet Offline Activation portal and follow the process there. You will need:
The activation code supplied when you purchased Lasernet Core.
The license key displayed by Manage (or the Lasernet Config web app).
.png)
.png)
On the final page of the offline activation process, download the activated license.
.png)
Copy the activated license file to the server that the Config Server is running on.
Upload the activated license file to the Config Server.
Manage
Click Upload Licence File (see 3 in the image below).
In the Upload Licence File window, enter a descriptive Name for the license and optionally a suitable Description.
Click Upload a valid licence file (in the Licence File area).
In the Open window, navigate to and select the correct
.licensefile, then click Open.Click Confirm.
Lasernet Config web app
In the Tools menu, click Licenses (see 1 in the image below; expand the relevant section).
Click Upload license (3).
In the Open window, navigate to and then select the correct
.licensefile.In the Add License window, enter a descriptive Name for the license and a suitable Description.
Click OK.
The license is activated and you can apply it to a Lasernet Core environment.
Note
For information about the offline process for license deactivation and synchronization, see Lasernet Core License Management.