Add Shapes to a Sheet
- 15 Apr 2026
- 6 Minutes to read
- Contributors


- Print
- PDF
Add Shapes to a Sheet
- Updated on 15 Apr 2026
- 6 Minutes to read
- Contributors
- Print
- PDF
Article summary
Did you find this summary helpful?
Thank you for your feedback
Use the Shape tool to add lines, rectangles, or rectangles that have rounded corners to the form design.

Note
Shapes can be added only to PDF, TIFF, and EMF sheets whose underlying format is EMF.
Draw a Line or Shape
To add a line or a shape, follow these steps:
Click the down arrow next to the Shape button, then select Line, Rectangle, or Rounded Rectangle. The Shape button is now selected.
In the form design area, move the cursor (which is now a plus sign) to the start point of the new line or rectangle.
Drag the cursor to draw the line or to define the area of the rectangle.
When you release the left mouse button, the Form Editor adds the line or rectangle to the form and then automatically switches to Select mode. Now, you can double-click the shape to modify it. For example, you can specify its line color. Or, you can drag the shape to move it and drag its resize handles to resize it.
Draw Another Line or Shape
Click Shape, then use the cursor to add the shape to the form.
To draw a different shape, click the down arrow as described in the steps above.
Draw a Series of Shapes that are Linked to a Pattern in the Input Data
Because of its pattern criterion, a pattern can match multiple line items in the input data. By linking a shape to a pattern, you can automatically add multiple shapes that each correspond to a particular line item.
For example, if the input data is an invoice that contains several line items, you could (in one action) add several rectangles; you could use each one to visually enclose a particular line item in the output form. When you do this, the Form Editor will adjust the vertical spacing of any existing rearranges that are also linked to that pattern, so that the data of each line item and its corresponding shape are vertically aligned.
To add shapes that are linked to a pattern, click Shape, then (in the input data area) drag the plus cursor to select the pattern.
Prevent Anyone from Moving or Resizing the Shape
Right-click the shape and then select Lock.
Or, on the General page of the Edit Shape window (that you use to modify the shape), select Locked.
Modify the Shape’s Properties
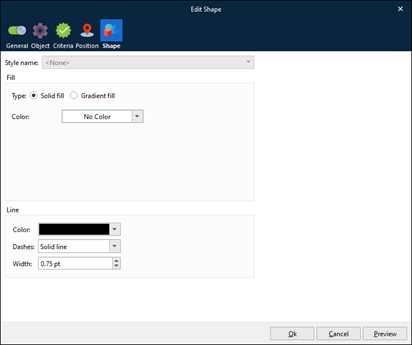
Double-click the line or rectangle to open the Edit Shape window. On the Shape page, the following shape-modification properties are available.
Note
Gradient fill is available in Lasernet Core 11 and Lasernet Essentials / Professional / Advanced only.
Properties | Description |
|---|---|
Style name drop-down list (available for all shapes) | |
Style name | If any named shape styles exist, select a style from this list to apply it to this shape.
|
Fill group box (available for rectangles and rounded rectangles only) | |
Type | Select Solid fill (single color) or Gradient fill (multiple colors). For more information about gradient fills, see Apply a Gradient Fill to a Rectangle or Rounded Rectangle.
|
Color | If you selected Solid fill or are using Lasernet Core 10: Set the fill color. If you selected Gradient fill: See Apply a Gradient Fill to a Rectangle or Rounded Rectangle. |
Direction, Gradient stop, Position, and Brightness | These properties are relevant to gradient fill only. See Apply a Gradient Fill to a Rectangle or Rounded Rectangle. |
Line group box (available all shapes and lines) | |
Color | Set the color. |
Dashes | Set the line style. |
Width | Set the line width. |
Rounding group box on the Position tab (available for the rounded rectangle only) | |
Width (Lasernet Core 11 and Lasernet Essentials) Width ellipse (Lasernet Core 10) | Define the width of the ellipse (which affects the corner rounding). |
Height (Lasernet Core 11 and Lasernet Essentials) Height ellipse (Lasernet Core 10) | Define the height of the ellipse (which affects the corner rounding). |
Left / top, Left / bottom, Right / top, and Right / bottom | The checkboxes enable you to choose which corners the rounding is applied to. Unselected corners become 90-degree angles.
|
Note
The properties on all the other pages in the Edit Shape window are described in Edit Rearrange Properties.
Apply a Gradient Fill to a Rectangle or Rounded Rectangle
Note
Gradient fill is available in Lasernet Core 11 and Lasernet Essentials / Professional / Advanced only.
A gradient fill is a transition between colors. A gradient fill can transition between just two colors, or it can transition through a series of colors. For example, a rectangle’s fill can transition from black to white, or it can transition from black to gray to white.
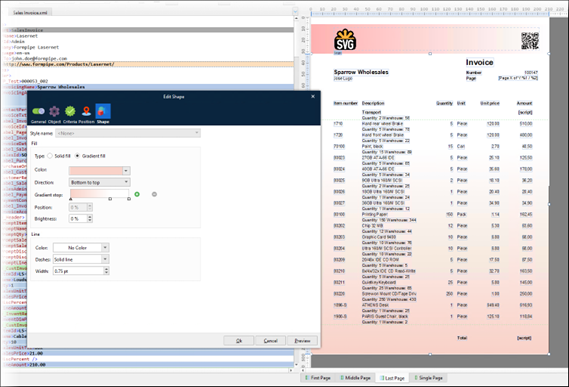
In the example of gradient fills below, a rectangle that uses a gradient fill covers the whole page to form the background of the output document. The Edit Shape window (on the left) shows the bottom-to-top gradient Fill settings for the shape, and the outcome is displayed on the right. Also, at the top of the page, a different rectangle uses a left-to-right gradient fill.
An essential part of creating a gradient fill is creating gradient stop points. Each gradient stop specifies the color at a specific stage of the fill. So, a gradient fill must have at least two gradient stops (one at the left-side 0% (start) position and another at the right-side 100% (end) position) but can have additional gradient stops at intermediate percentage positions.
For example, if there are three gradient stops (Position 0% with Color black, Position 40% with Color blue; Position 100% with Color white), the fill will begin in black, transition to blue over the first 40% of its extent, then transition to white over the rest of its extent.
To use a gradient fill on a shape, follow these steps:
Double-click the shape to open the Edit Shape window.
Navigate to the Shape page, then click Gradient fill (in the Fill area).
Select a Direction.
The gradient stop points specified in the following step are applied to the shape in the order specified by Direction.
For example, if the Gradient stop bar is white at its left side (the 0% position) and black at its right side (the 100% position), and Direction is Bottom to top, the shape’s fill will be white at its bottom end and black at its top.
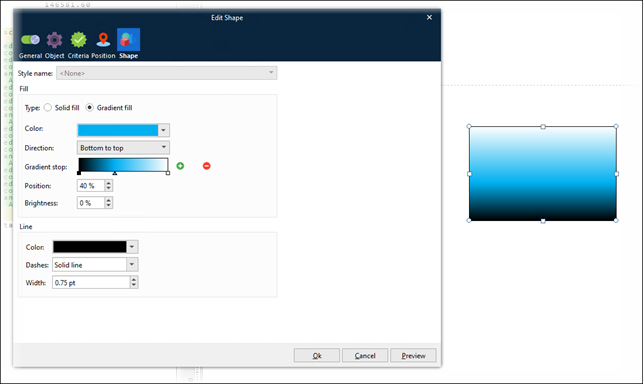
Create gradient stop points to design the fill that you want to apply to the shape:
Click the existing 0% gradient stop and configure it.
Color: Choose a color for the selected gradient stop. No Color is not supported.
Brightness: Use this control to make small brightness adjustments to the color. 0% results in the Color that you selected. A negative brightness value darkens the color; a positive value brightens it.
Note
The selected gradient stop is displayed as a triangle under the color bar.
Repeat the preceding step for the 100% gradient stop.
Add new points if necessary. To add a new gradient stop point:
Decide where you want to add the stop point, then click the stop point to the left of that position.
Click the plus icon (to the right of the color bar). The Form Editor will add a stop point halfway between the selected stop point and the next stop point.
Specify the new point’s Color, Position (use the up and down arrows beside the position % value to change the position of the selected gradient stop), and Brightness.
Click minus to delete points, if necessary.
Click Preview to see the effect of your settings on the shape. If necessary, adjust the fill settings.
Click Ok to apply the fill to the shape.
Tip
Multiple gradient stops can have the same Color. So, if you want a fill to transition from black to white over the first 70% of the shape, then stay white for the remaining 30% of the shape, specify three gradient stops: Position 0% with Color black, Position 70% with Color white, Position 100% with Color white.
Note
A gradient fill cannot be applied to a rotated shape. So, if a shape has a gradient fill, its Rotation control (on the Position page of the Edit Shape window) is grayed out. If a shape’s Rotation is not 0%, you cannot select Gradient fill on the Shape page of the Edit Shape window.