XHTML Output (Image, JobInfo, and Hyperlink)
- 06 Mar 2026
- 2 Minutes to read
- Contributors


- Print
- PDF
XHTML Output (Image, JobInfo, and Hyperlink)
- Updated on 06 Mar 2026
- 2 Minutes to read
- Contributors
- Print
- PDF
Article summary
Did you find this summary helpful?
Thank you for your feedback
Applies to: Lasernet 9
In this exercise, you are proposed to continue designing your HTML output by adding an image, JobInfos, and a hyperlink.
Note
This article describes a software version that is no longer supported. Although the software will no longer receive updates or technical support, existing documentation, such as this article, will be retained for reference purposes but will no longer be updated. If you have any questions, contact Lasernet Support.
Exercise
Download and import the attached configuration called 02. XHTML Output (Image, JobInfo, and Hyperlink) in Lasernet Developer 9. Afterward, navigate to the Forms section and open the Sample form.
Start by adding an image from the external file to the output. To this end, follow these steps:
In the output, switch to the Template tab.
Place the cursor where you want to paste an image.
On the Developer toolbar, click Image, then click Local and Remote, and then click File...
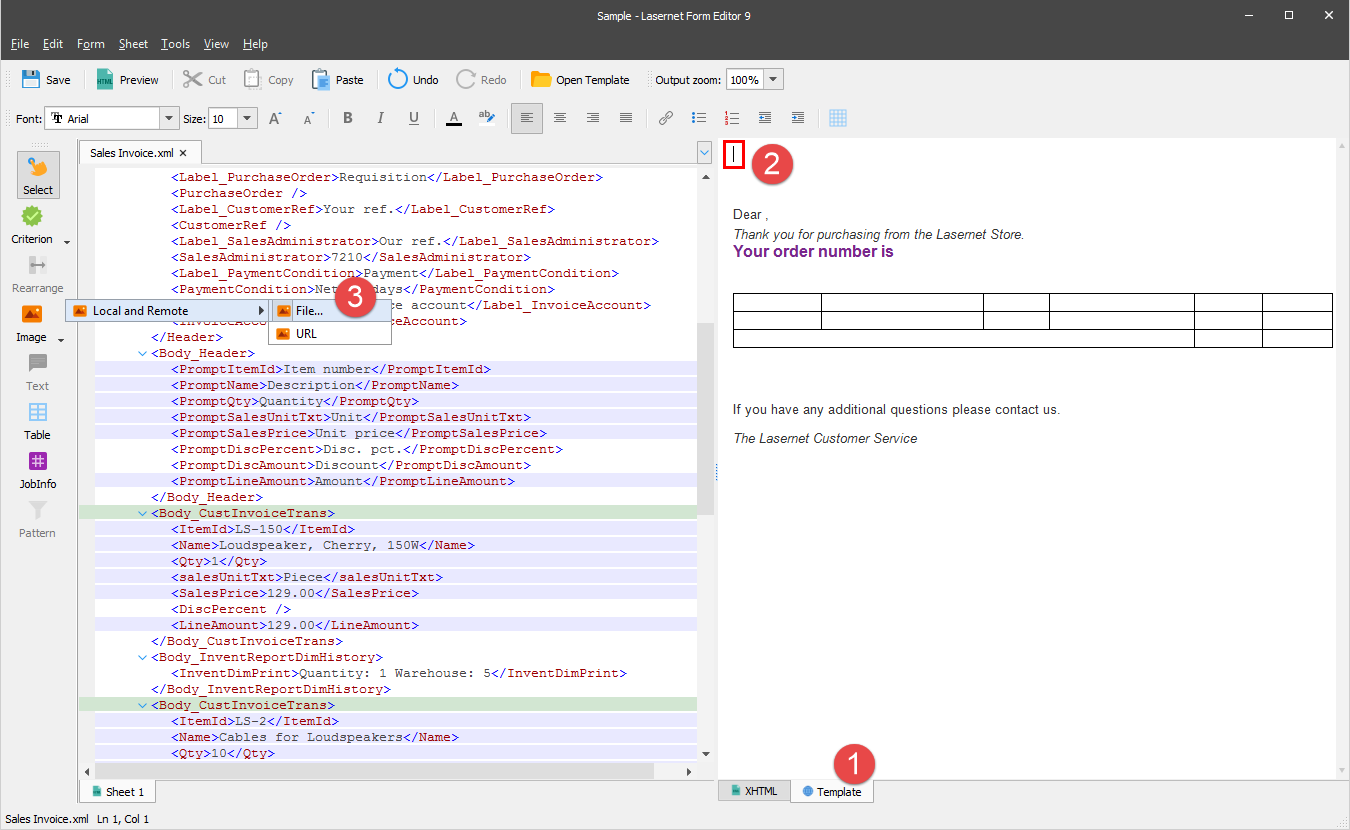
In the Choose an image file dialog displayed, select a file, and then click Open.
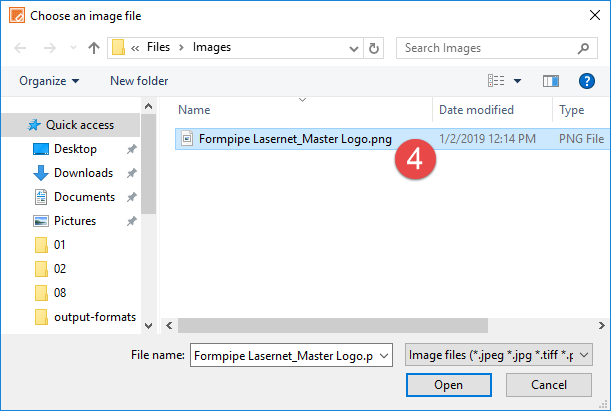
Once the image is inserted, drag one of the control points on the sides or corners of the selection box to resize it.

Continue designing your HTML output by adding JobInfos. To this end, follow the steps listed below.
Switch to the XHTML tab to make adding JobInfos to the input possible.
On the Developer toolbar, click JobInfo.
When a pointer becomes a cross, click the <ContactPersonName> element.
Once you are done, repeat steps 7-8 to JobInfo to the <SalesID> element.

In the output, switch to the Template tab.
Place the cursor in the first line before a comma and type the following text: #ContactPersonName#.
Place the cursor at the end of the third line and type the following text: #SalesID#.

Note
When a JobInfo is added to the XML input, it takes automatically a name which is equal to a name of the node to which it is added. To correctly execute the JobInfo in the output, the JobInfo name enclosed in the hash signs (#) shall be indicated. While generating the document, a JobInfo name is substituted with the node value, so you can see the value in the final document.
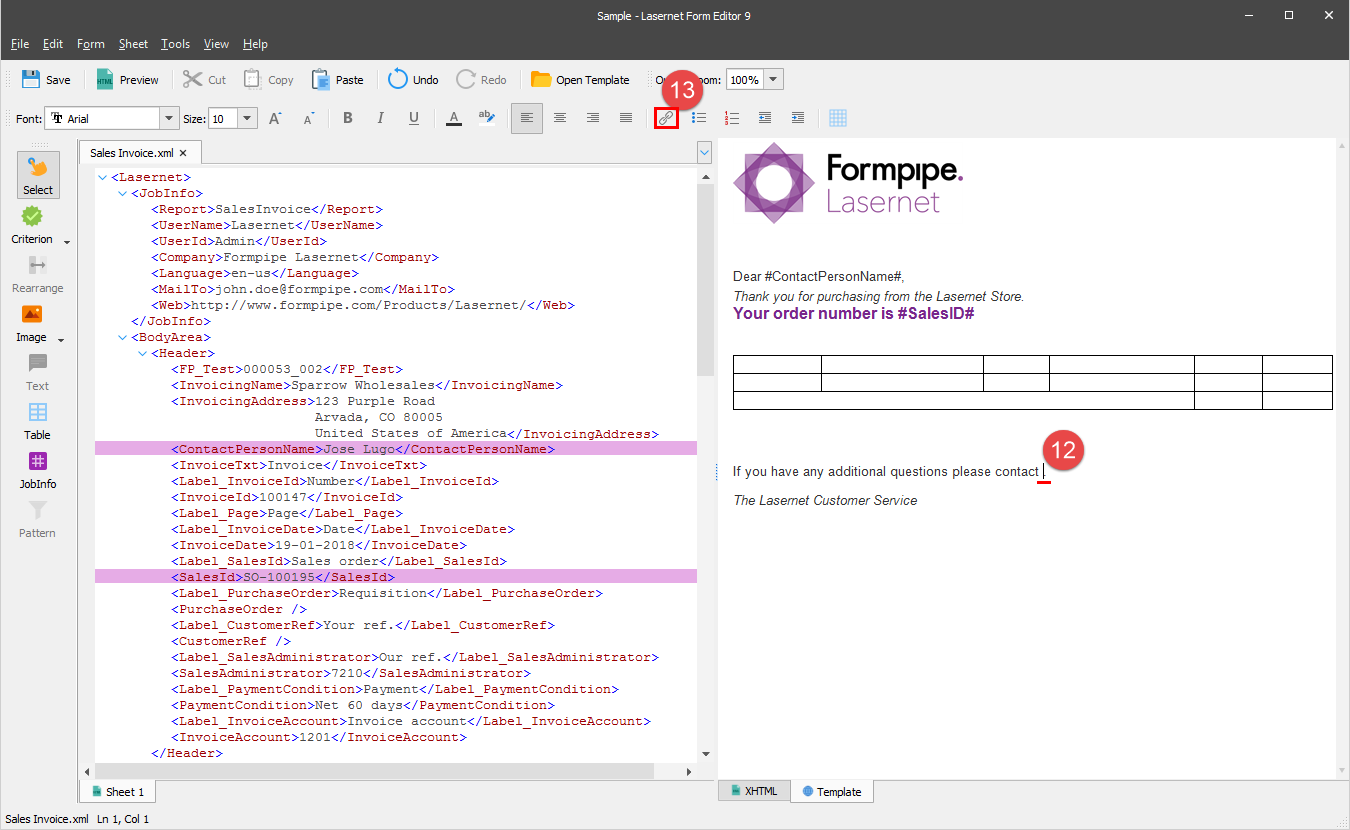
You are now proposed to add a hyperlink. To this end, follow these steps:
In the fourth line, delete the us text and place the cursor instead.
On the toolbar, click the button that allows you to create a link to a web page.
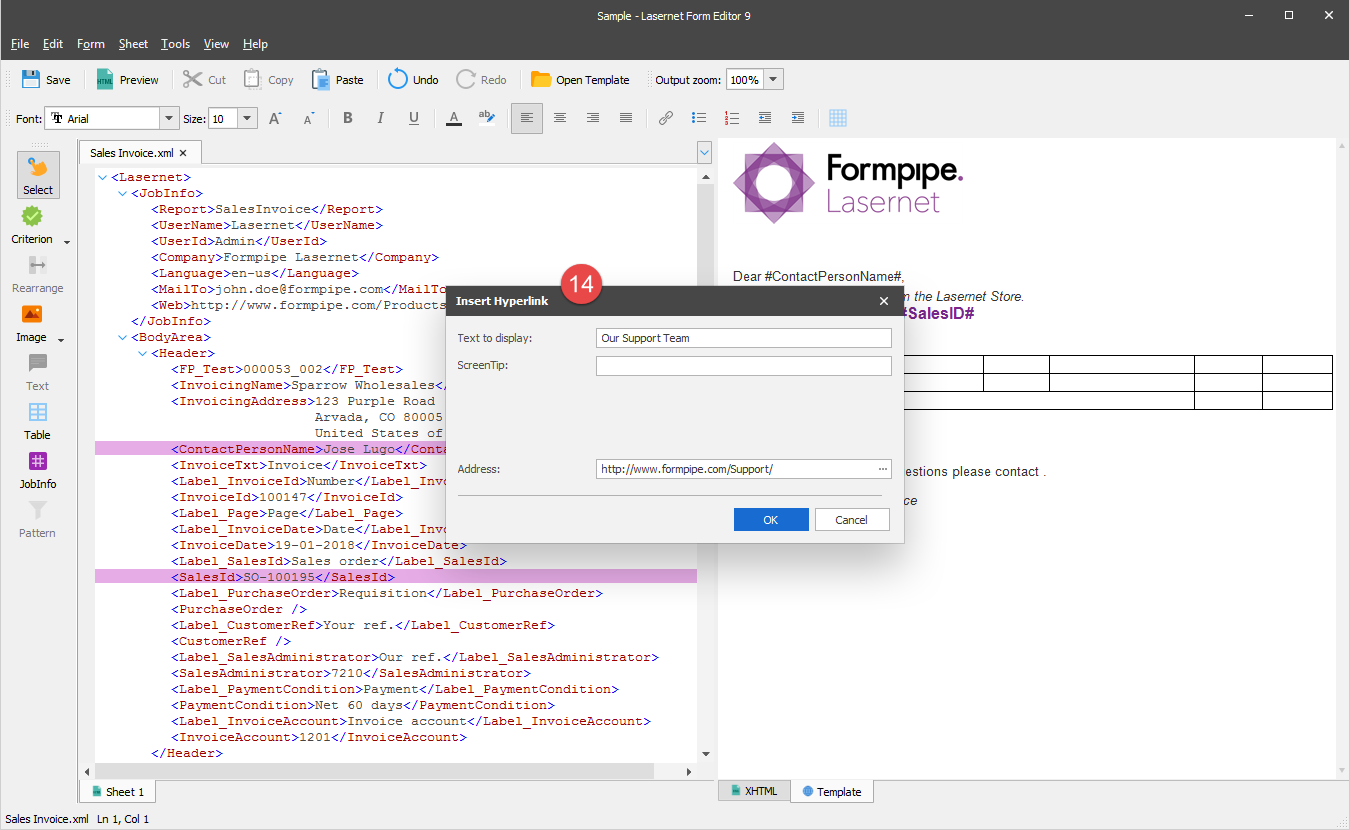
In the Insert Hyperlink dialog displayed, type Our Support Team in the Text to display text box and http://www.formpipe.com/Support/ in the Address text box. Once you are done, click OK.
On the toolbar, click the Preview button to view the final result in a browser window.
.png)