Use Overlays for Graphical Design
- 15 Apr 2026
- 10 Minutes to read
- Contributors


- Print
- PDF
Use Overlays for Graphical Design
- Updated on 15 Apr 2026
- 10 Minutes to read
- Contributors
- Print
- PDF
Article summary
Did you find this summary helpful?
Thank you for your feedback
Applies to: Lasernet Core 11 and 10 (not Lasernet Essentials / Professional / Advanced)
You can use overlays to provide the graphical design elements of your forms. Overlays are designed and maintained outside Lasernet Form Editor using one of the applications listed below (among others). This approach enables the rapid creation of new overlays from existing marketing materials and also ensures a clear separation between the graphical design and data retrieval aspects of form building.
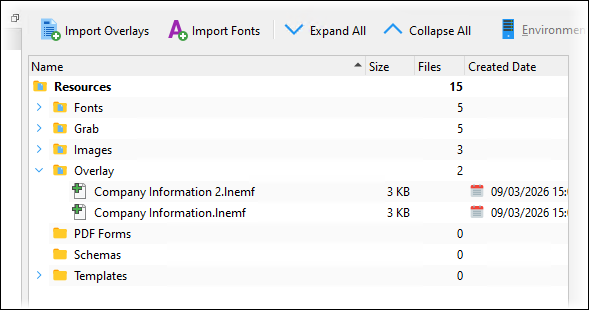
To get an overview and maintain a list of overlays and templates added to a configuration, navigate to Lasernet Developer > Resources > Overlay.
Note
Overlays are relevant only to PDF, TIFF, and EMF sheets whose underlying format is EMF.
Tip
Instead of using overlays, we highly recommend that you use shapes in Lasernet Form Editor to create the graphical design elements of your form. Using shapes enables you to increase document generation throughput, reduce file storage capacity requirements, and eliminate reliance on third-party design applications. For more information about the benefits of using shapes instead of overlays, see The Lasernet Shape Tool and the Benefits of Overlay-Free Forms.
Design Overlays
Overlays represent all the graphical elements of a form, such as company logo, borders, boxes, fixed text, images, lines, and so on. For easier maintenance, you can use a single overlay for a form or create separate overlays for each individual graphical element.
You can design and maintain overlays outside of Lasernet Developer using any Windows application that can print to the Lasernet Print Capture printer, which is an integral part of the Lasernet Core installation. The following is a list of recommended Windows applications to use when creating overlay files for your Lasernet Core forms:
Microsoft Word
Adobe InDesign
Microsoft Publisher (not supported from October 2026, see the following note)
Note
Using Microsoft Publisher to create overlays for Lasernet Form Editor will no longer be possible after October 2026. For more information, see Microsoft Publisher will no longer be supported after October 2026 and What Alternatives to Publisher Can I Use to Design Fixed Overlays for Lasernet Forms?.
Overlay files are created in Lasernet Core EMF format and are generated via the Windows printer queue named Lasernet Print Capture.
We recommend that you split up all of your graphical elements for a form into separate overlays. For example:
An overlay file containing your company logo and company address
An overlay file containing the text “COPY” to be used on all of your printed copies
Separate overlay files for each of your form types. For example, one for invoices, one for credit notes, one for a statement of accounts, one for payroll statements, and so on.
Example of Overlay Design
The following example shows how to create a simple overlay design for your forms.
.png "overlays 2(1).png")
The image above depicts an overlay designed in Microsoft Publisher. It is a payment slip to be used as a part of a form layout.
Generate Overlays
When you install Lasernet Core server software, the Lasernet Print Capture printer is added to your list of printers in Windows.
When you have finished creating an overlay file, click File > Print in your design application.

Select the Lasernet Print Capture printer and click Print. An overlay file is generated, which you can import into your Lasernet Core configuration. The overlay file has an .lnemf file extension and the same file name as the file that you printed from your chosen design application.
Note
Ensure that the Lasernet Print Capture Windows service is running.
Import Printed Overlays into the Lasernet Core Configuration
Overlay files printed to the Lasernet Print Capture service are not available to Lasernet Form Editor until you import them into your Lasernet Core configuration.
You can import printed overlays:
Through the Resources tool in Lasernet Developer. This method adds the overlay to the configuration.
On the Overlay Files tab of the Sheet Options window in Lasernet Form Editor. In addition to adding the overlay to the configuration, this method applies the overlay to the sheet (whose Sheet Options window you opened).
Note
To import overlays, Lasernet Developer must be running on the same computer as the Lasernet Print Capture service. However, after an overlay is imported, it becomes part of the Lasernet Core configuration, which can be sent to any Lasernet Core machine over the network as normal. Imported overlays are transferred with the configuration.
Import Overlays Through the Resources Tool
To import an overlay into the configuration’s Resources area, follow these steps:
In the Tools pane, click Resources.
Click Import Overlays.

The Import Printed Overlays window lists overlays that have been printed to the Lasernet Print Capture service but not imported into a Lasernet Core configuration yet. Select the overlays that you want to import, then click Import. Lasernet Developer deletes the overlays from the Lasernet Print Capture service and begins importing them into the currently open Lasernet Core configuration.

For each selected overlay, change the file name proposed for each imported overlay or use the default name, then click Save. Lasernet Developer imports the overlays into the configuration as LNEMF files. The files are saved to disk in the
Overlayfolder for the currently loaded Lasernet Core configuration. As a result, they appear in the Overlays folder of the configuration’s Resources area.
The overlays are now available in the Overlay folder of the configuration’s Resources area.
Note for Lasernet Core 11 Users
In Lasernet Developer, you must click Save Resources to save the LNEMF overlay files to the workspace. Resource files (such as overlays) that you do not save to the workspace are not distributed to other Lasernet Core developers or transferred to Lasernet Core environments.
Import Overlays on the Overlay Files Tab of the Sheet Options Window
To import overlays into the configuration and apply them to a sheet’s pages in one process, follow these steps:
In Lasernet Form Editor, open the Sheet Options window for the sheet that you want to apply the overlays to.
On the Overlay Files tab, click Import.

The Import Printed Overlays window lists overlays that have been printed to the Lasernet Print Capture service but not yet imported to a Lasernet Core configuration. Select the overlays that you want to import, then click Import. Lasernet Form Editor deletes the overlays from the Lasernet Print Capture service and begins importing them into the currently open Lasernet Core configuration.
For each selected overlay, change the file name proposed for each imported overlay or use the default name, then click Save. Lasernet Form Editor imports the overlays as LNEMF files. The files are saved to disk in the
Overlayfolder for the currently loaded Lasernet Core configuration. As a result, they appear in the Overlays folder of the configuration’s Resources area.Choose whether to automatically apply the overlay to the sheet’s pages. In the Add Overlays window, select one of the following options, then click OK:
Yes, to the current page type: Applies the overlay to the form’s page that is currently selected in Form Editor. For example, Single Page.
Yes, to all pages: Applies the overlay to all the form’s pages (First Page, Middle Page, Last Page, and Single Page).
No. Imports the overlay into the configuration but does not apply it to any of this form’s pages. You must manually add the overlay to the sheet (from the list of overlays available from the configuration) and apply it to this form’s pages.
Unless you selected No in the Add Overlays window, Lasernet Form Editor adds the overlay to the sheet and applies it to form pages. Cick OK and then save the form.

Note for Lasernet Core 11 Users
In Lasernet Developer, you must click Save Resources to save the LNEMF overlay files to the workspace. Resource files (such as overlays) that you do not save to the workspace are not distributed to other Lasernet Core developers or transferred to Lasernet Core environments.
Add Existing LNEMF Overlay Files to the Lasernet Core Configuration
To add existing LNEMF overlays to the currently loaded Lasernet Core configuration, follow these steps:
In the Tools pane, click Resources.
Double-click the Overlay folder in the Resources area to open the corresponding folder on disk.
Copy LNEMF files to that folder. The files are now part of the configuration.
Note for Lasernet Core 11 Users
In Lasernet Developer, you must click Save Resources to save the LNEMF overlay files to the workspace. Resource files (such as overlays) that you do not save to the workspace are not distributed to other Lasernet Core developers or transferred to Lasernet Core environments.

Manage a Sheet’s Overlays
To manage the list of overlays used by a sheet, navigate to the Sheet Options > Overlay Files tab for that sheet.
The area on the left-hand side of the Overlay Files tab list the overlays that you have added to the sheet. The First, Middle, Last, and Single checkboxes indicate which pages an overlay is applied to.
The Preview area on the right-hand side displays a preview of the selected overlay. Scroll down this area to see how overlays are applied to each of the form’s pages.
By default, overlays are shown as thumbnails. To show overlays as a list, click the Thumbnails button.
Apply Overlays to Sheet Pages
For each overlay that is listed on the Overlay Files tab, select the following checkboxes to apply it to particular form pages:
First
Middle
Last
Single
You can also set the following options:
Master Only
Editor Only
Inactive
You can also set these options for the Edit Overlay window for the overlay.
Add Overlays to the Sheet
To add existing overlays to a sheet, click Add on the Overlay Files tab. In the Add overlay window, you can add any of the listed overlays to the sheet.
The Add overlay window has a General tab that contains the following three tabs:
The List tab lists the overlay files that are in the configuration’s
Files\Overlayfolder on disk (on the computer running Lasernet Developer) and are not currently used by the sheet.The Thumbnails tab enables you to preview overlays before selecting them to add to the sheet.
The Source files tab enables you to open overlays in the corresponding graphics editor and edit them.
Add Overlay Files to the List
To add LNEMF overlay files that are not currently present on the List tab, click the … (three dots) icon beside the Files list. In the Choose overlay file(s) window, navigate to the folder that contains the .lnemf overlay files that you want to add to the sheet, then click Open. Lasernet Form Editor copies the files to the configuration’s Files\Overlay folder on disk, which adds them to the configuration and the List tab.
Note for Lasernet Core 11 Users
In Lasernet Developer, you must click Save Resources to save the newly added LNEMF overlay files to the workspace. Resource files (such as overlays) that you do not save to the workspace are not distributed to other Lasernet Core developers or transferred to Lasernet Core environments.
Add Listed Overlays to the Sheet
To add overlays that are present in the configuration to the sheet:
Select them on the List or Thumbnails tab.
Use the On page controls below the list to select which form pages to apply the overlay to (First, Middle, Last, and Single).
Click Ok.

You can also use a JobInfo to specify the overlay to add. On the General tab, click the JobInfo option, then enter the name of a JobInfo that contains the name of an overlay file stored in the default directory of the current setup.
Overlay Properties
Property | Description |
|---|---|
Criteria | Form or JobInfo criteria look for key data in specific locations in a data input file to determine whether the overlay file should be added to the final layout. |
On page | Select First, Middle, Last, or Single to add the overlay to the specific pages. |
Flags | Select Active to activate the overlay file. Select Master only to prevent the overlay file from being inherited on child sheets. To prevent only the Form Editor from showing the overlay file during processing, clear the Editor only checkbox (which is the default setting). |
Change Overlay Sequence
To change the sequence of the overlay files, use the Move up and Move down buttons on the Overlay Files tab. The sequence is important because it describes the layer order. The last drawn overlay is placed at the top. Rearranges, static text, and other form content are added after overlays and are always rendered on top of the overlay.
Edit Overlay
To modify an overlay’s properties, select it and then click Edit.
The Edit Overlay window is similar to the Add Overlay window. Instead of checkboxes, the Files list provides option buttons that enable you to change which overlay is used.
Remove Overlay
To remove an overlay from the sheet, select it and click Remove.
Summary
Instead of using overlays, we highly recommend using shapes in Lasernet Form Editor to create the graphical design elements of your form.
However, if you decide to use overlays, follow this process:
Design the overlay files representing your form’s graphical elements in your favorite Windows design application.
Open your Lasernet Core configuration in Lasernet Developer.
Print the graphical design files to the Lasernet Print Capture printer.
Import the overlay to make it available in the configuration.
Add the overlay files (
.lnemffiles) to the relevant pages in your form.