Upgrade to Version 4.2.0.0
- 13 Nov 2025
- 1 Minute to read
- Contributors

- Print
- PDF
Upgrade to Version 4.2.0.0
- Updated on 13 Nov 2025
- 1 Minute to read
- Contributors
- Print
- PDF
Article summary
Did you find this summary helpful?
Thank you for your feedback
Upgrade to Version 4.2.0.0
To support the new functionality in Lasernet BC Connector 4.2.0.0, some changes must be applied to your Lasernet Configuration. If in doubt, do not hesitate to contact your local Lasernet Partner.
If you are upgrading from a version earlier than 4.1.0.0, ensure to download and install Lasernet BC Connector 4.1.0.0 before you upgrade to version 4.2.0.0.
Follow these steps:
Add a new Destination called #CustomPort# to the Destination Selections Pass-through engine. Remember to include the #.
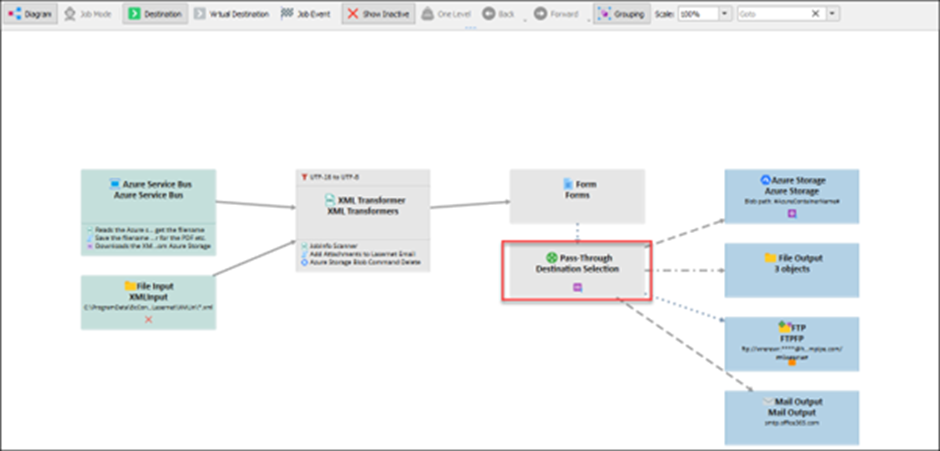
(38).png)
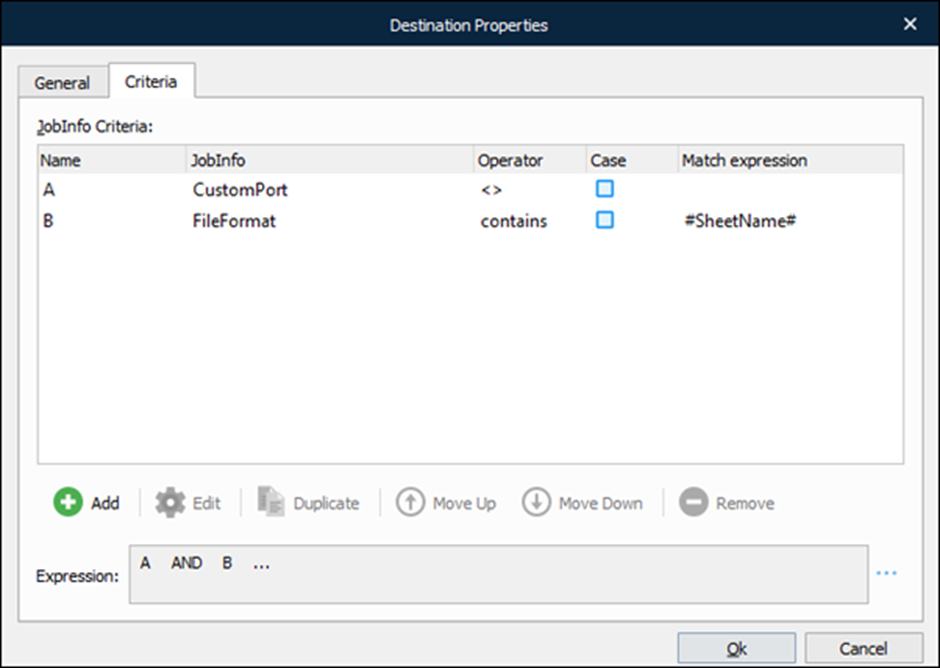
On the Criteria tab, add the following criteria:
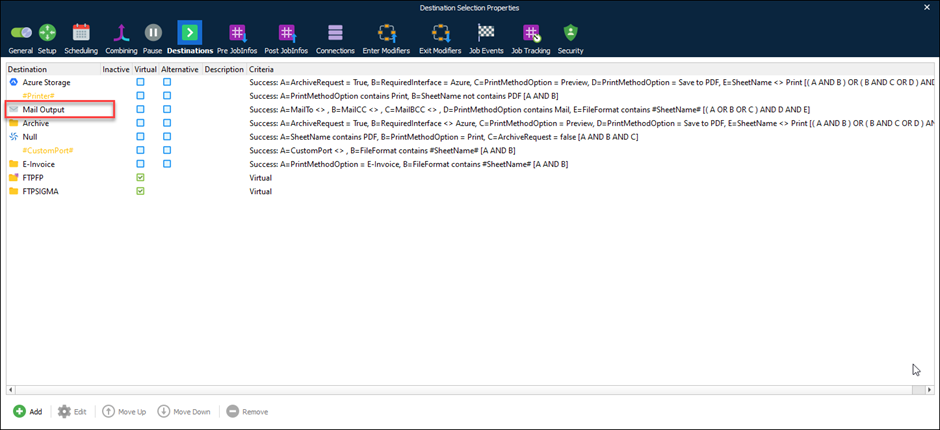
Click Ok and open the Mail Output destination.
Open the Criteria tab and add the criteria:
FileFormat = #SheetName#
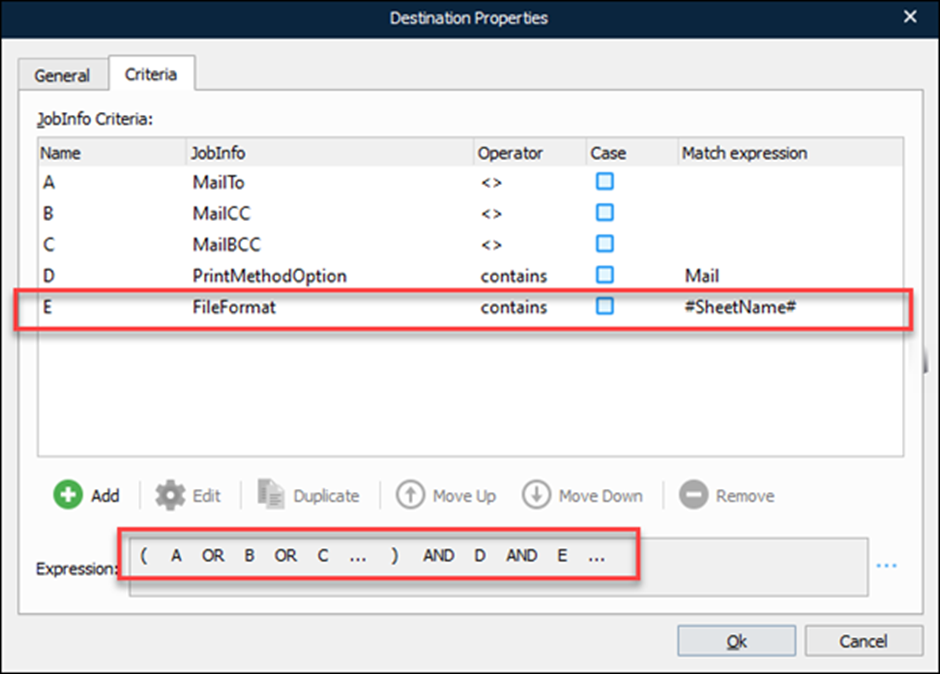
Double-check the expression and the order of the criteria.
Close the Destination form.
Select the Post JobInfos tab on the top menu bar and add the JobInfos:
FileName = #FileNameWithOutExt##FileFormat#
FileName = #FileNameWithOutExt#.pdf

Do not forget to add the criteria as specified in the image.
Close the form.
Open the Mail Output module.
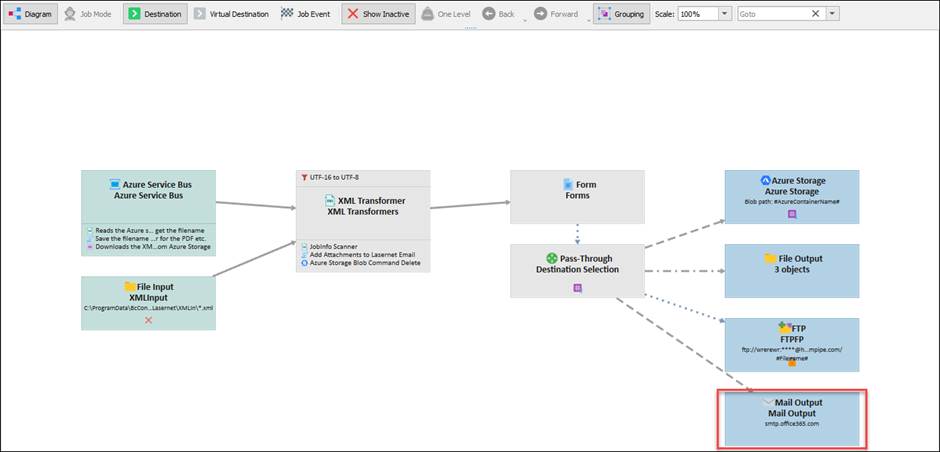
Open the Pre JobInfos tab.
If what you see on your screen does not correspond to the following image, remove the extension and add #FileFormat# at the end of the text line. The result should read:
#DocNameForMail# #DocNoForMail##FileFormat#

Close the forms.
Open the Azure Storage module.
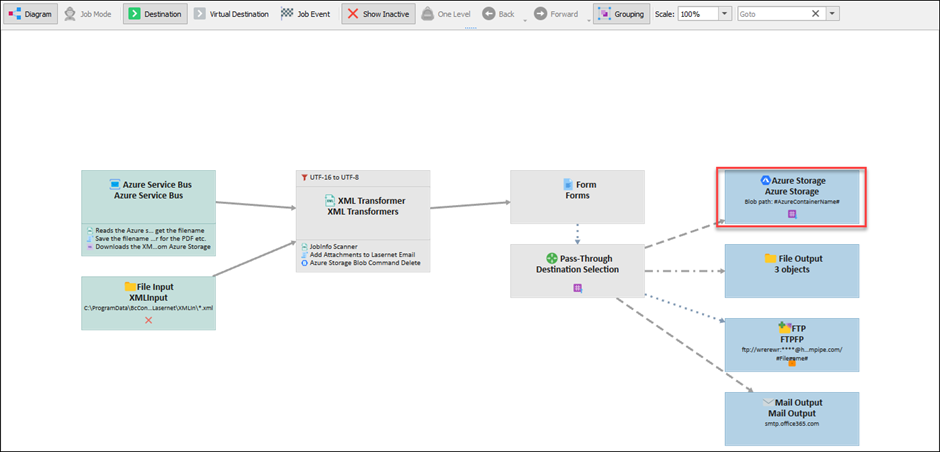
Open the Command tab and change the Blob name to #Filename#.

Ensure to test the new functionality before applying the changes to a production environment.
Upgrade to Version 4.2.0.2
Note
Use this guide only if you are a customer who uses BC on-premises and Filesystem.
In order to support the new functionality in version 4.2.0.2, you need to change your Lasernet Configuration. If in doubt, do not hesitate to contact your local Lasernet Partner.
If you are upgrading from an older version, ensure to follow the previous guides before proceeding with this one.
The following is only necessary if you are using a file within Lasernet Connector Setup/Connector interface:

If you are using Azure, you do not need to worry about this.
Follow these steps on your Lasernet Server configuration:
Open your Lasernet Server configuration and select Modifiers from the Tools menu.

Right-click and select Add and then JobInfo Manipulation.

On the General tab, give the modifier a name.

On the Setup Tab, add the following JobInfo Manipulation modifiers:

Click OK once you are done.
Select Modules from the Tools menu.

Double-click the XMLInput module.

Select the Exit Modifier tab.

Select Add.
Within the Name drop-down menu, select your new modifier.

Click OK twice.
Commit and Deploy.