- Print
- PDF
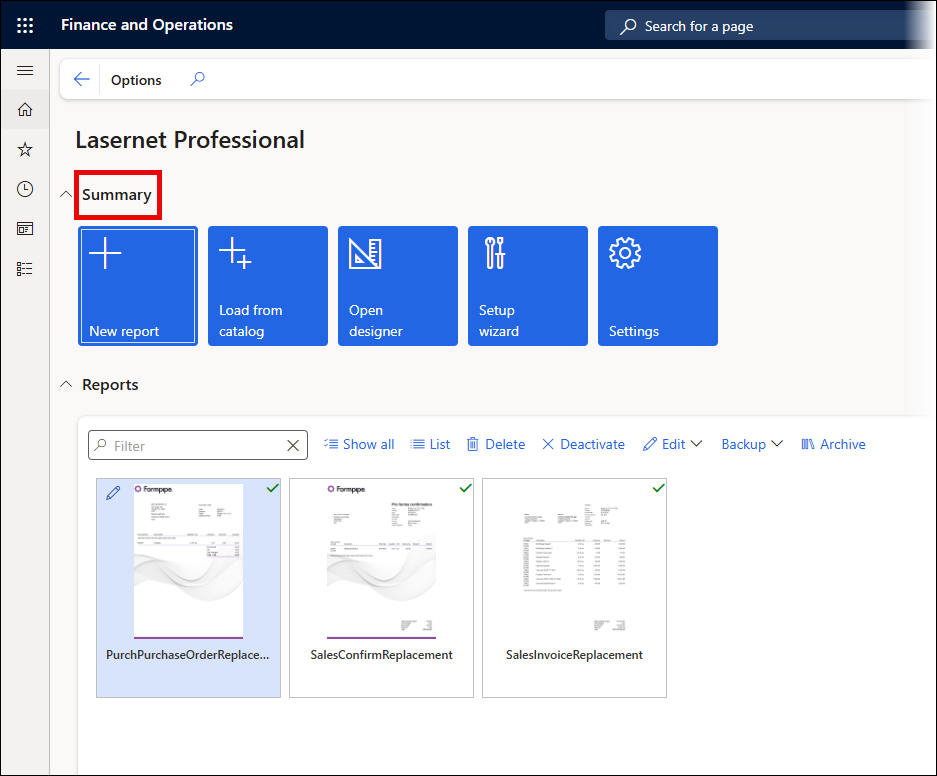
In the Summary section of the Lasernet Professional workspace, you can configure a new report, manage the product license, set up your environment version using a guide, or quickly open the report designer (Lasernet Form Editor) to update or enhance your active and inactive reports.
Configure New Report
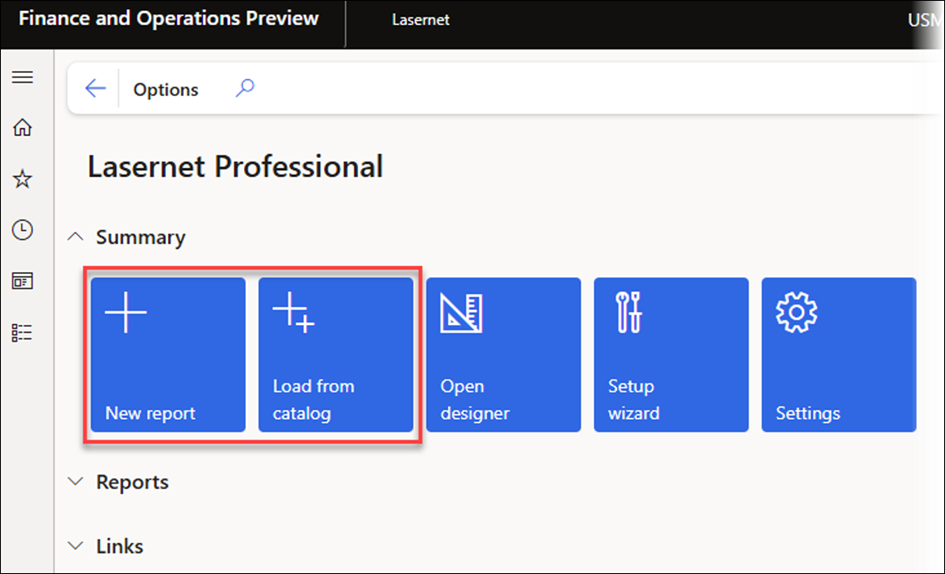
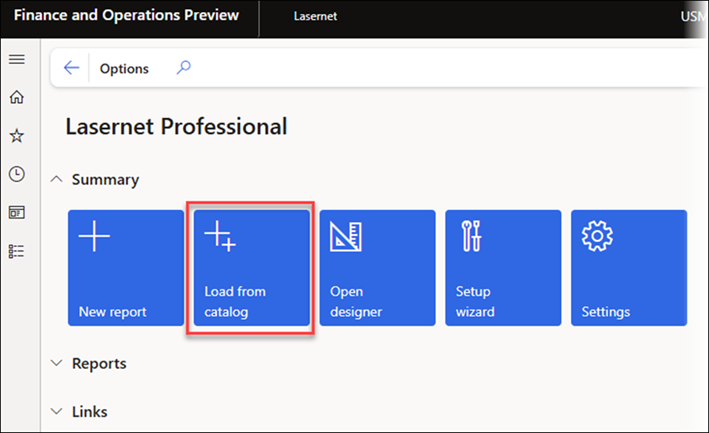
Configuring a new report within Lasernet Professional is straightforward. You can do this from within the workspace by clicking New report or Load from catalog.
Alternatively, it can also be achieved when running a report by using the Setup for Lasernet button.
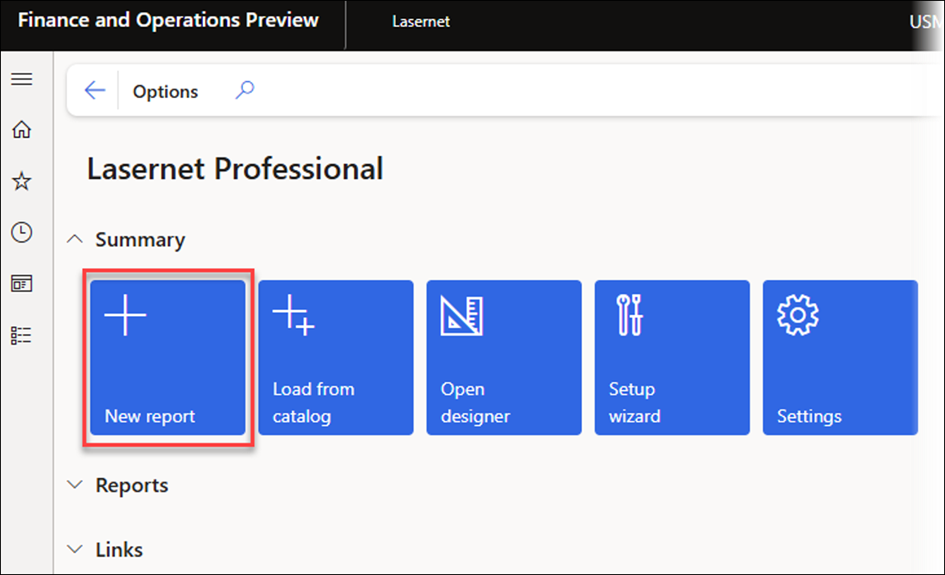
New Report
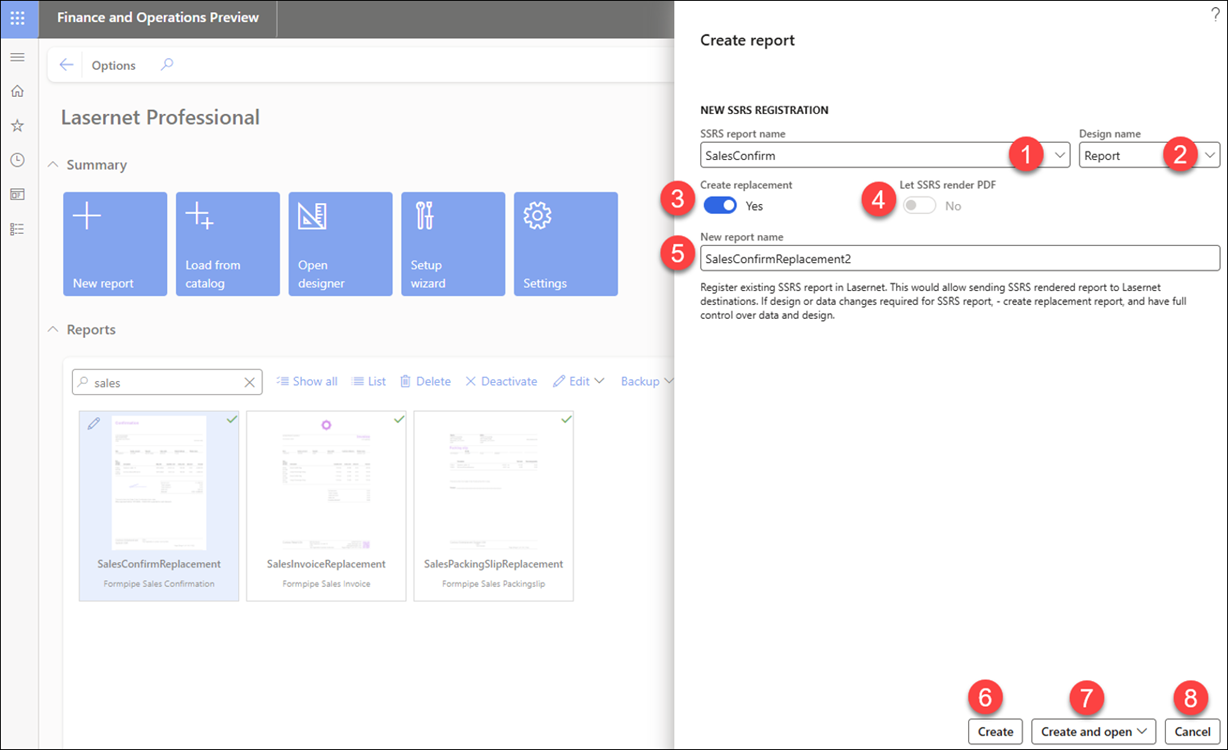
SSRS report name
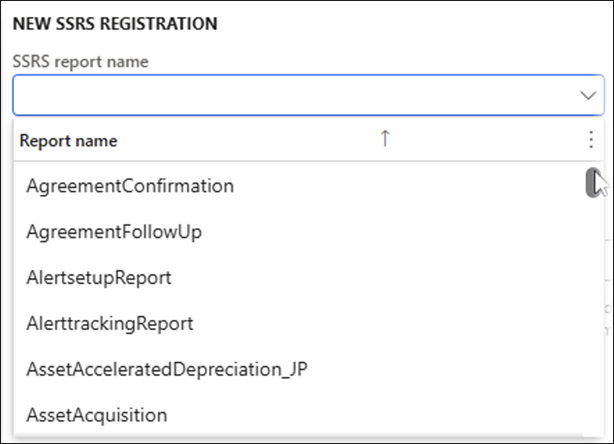
The field SSRS report name is populated by default with the name of the report you have selected from the Reports FastTab. You can see the SalesConfirmReplacement report is highlighted in light blue, which means it has been previously selected. Use the dropdown to pick any SSRS report you wish to create.
Design name
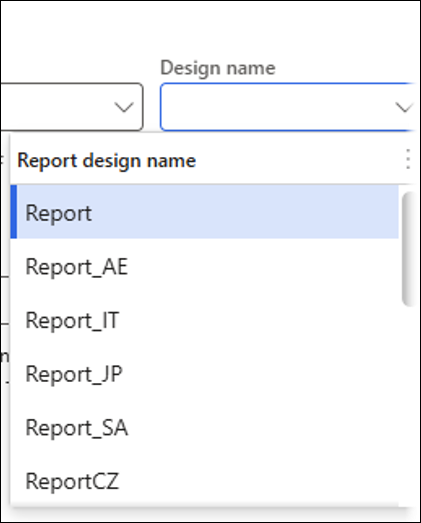
The Design name dropdown enables you to choose the report design you will employ in the legal entity you are currently using. Customer-facing reports have different localization designs that honor specific legislation. The following is an example for the SalesInvoice.
Create replacement

By toggling the Create replacement button to Yes, you will have full control over the data and design of the report by using Lasernet’s powerful Query Wizard and Form Editor.
The Create replacement option uses the default naming convention for the Lasernet Replacement report, which adds the suffix “Replacement” to the SSRS report name.
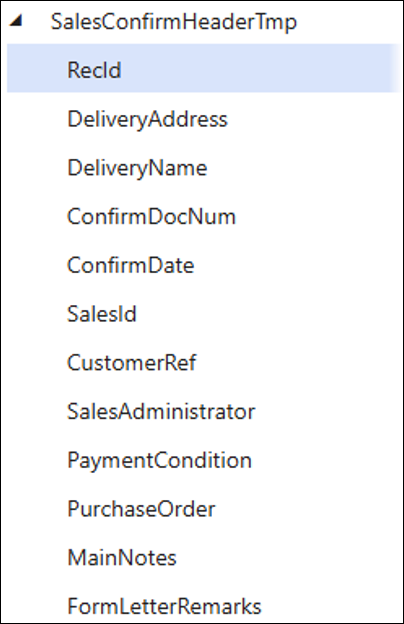
Tables used in the SSRS report, including TMP (temporary) tables, will be added to the Query Wizard.
Fields used in the SSRS report will also be added to the Query.
Note
The Lasernet Report Replacement functionality is an advanced feature of Lasernet FO Connector. A Lasernet report replacement can be used to replace an SSRS report generated from Dynamics 365 Finance and Operations.
An SSRS data provider normally populates TMP tables with data required for an SSRS report when the report is generated. A Lasernet report replacement can use the data from the TMP tables to create an XML file directly within Finance and Operation. Lasernet Developer can then use the data from the XML file to create professional-looking documents.
Since all data used by SSRS reports is generated within Finance and Operations, Replacement reports can reuse all the data sources for execution.
It is also possible to enhance the data in the Lasernet Replacement report by joining additional tables to the TMP tables to retrieve data that is not available with the standard SSRS report. This can be done from the front end and requires no customizations in Finance and Operations.
Note
If you are new to the Lasernet Report Replacement functionality, read about event handlers here.
Let SSRS render PDF
When the Let SSRS render PDF button is toggled to No, you will have to use Lasernet Form Editor to create the document's layout.
When the Let SSRS render PDF button is toggled to Yes, you will have to use the current SSRS report design, exactly as it is.
Note
The Lasernet function Let SSRS render PDF is used to render SQL Server Reporting Services (SSRS) reports as PDF files. This function leverages the capabilities of SSRS to generate reports in a PDF format, which can then be used as is for Lasernet to distribute, printing, or archiving.
To use this function, you typically need to configure SSRS to render the report and then save it as a PDF file. Lasernet has done this programmatically using the SSRS API or through the SSRS web interface. The process involves specifying the report parameters, rendering the report, and then saving the output as a PDF file.
New report name
The Create replacement option uses the default naming convention for the Lasernet Replacement report, which adds the suffix “Replacement” to the SSRS report name. However, you are free to change this name to your liking.

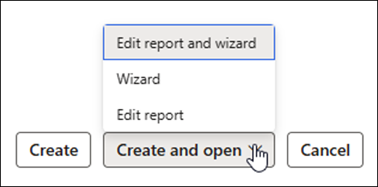
Create
By clicking Create, your newly created report is added to the report list.
Create and open
Clicking Create and open means you are ready to work with the report and would like the report and wizard to open so you can add fields to your report.
Cancel
When clicking Cancel, the whole process will be halted, and no new report will be created.
Load from Catalog
The Load from catalog feature enables the configuration (import) of several reports in the same run.
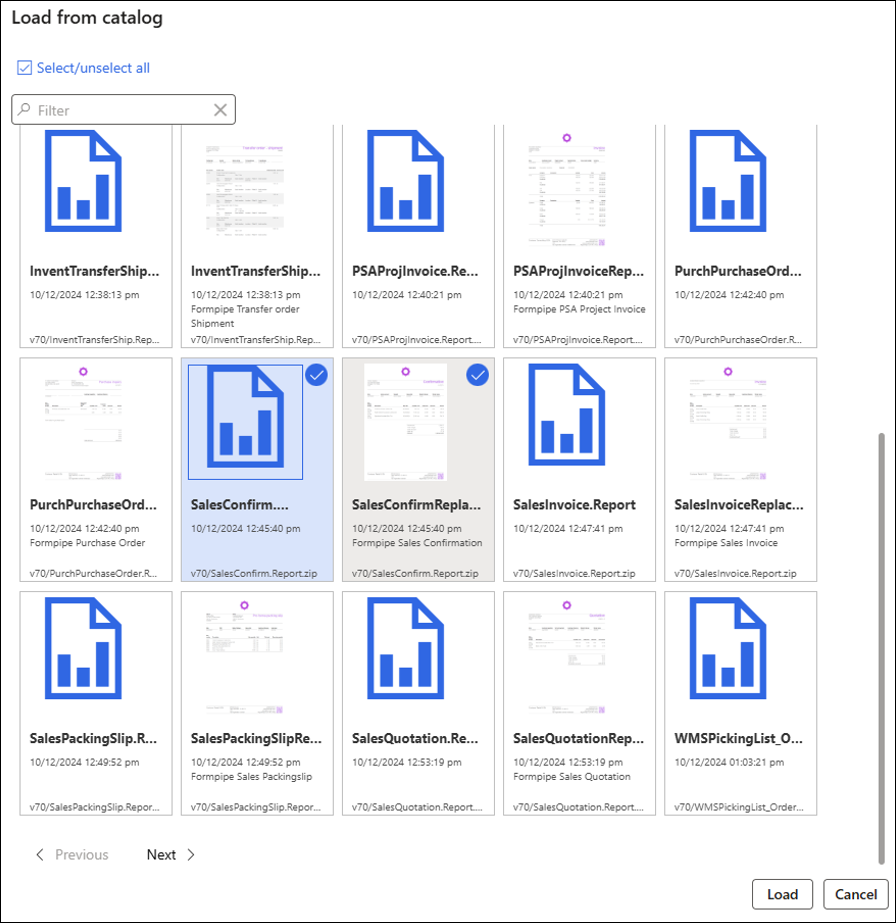
Mark both versions of the report - SSRS and Replacement report - and click Load.
The report is now added to your Reports FastTab and ready for use.
If the following error occurs, consult this article:
Error
Exception of type ‘Microsoft.Dynamics.Platform.Integration.SharePoint.SharePointException’ was thrown.
Overwrite
The following prompt is displayed if a report already exists:
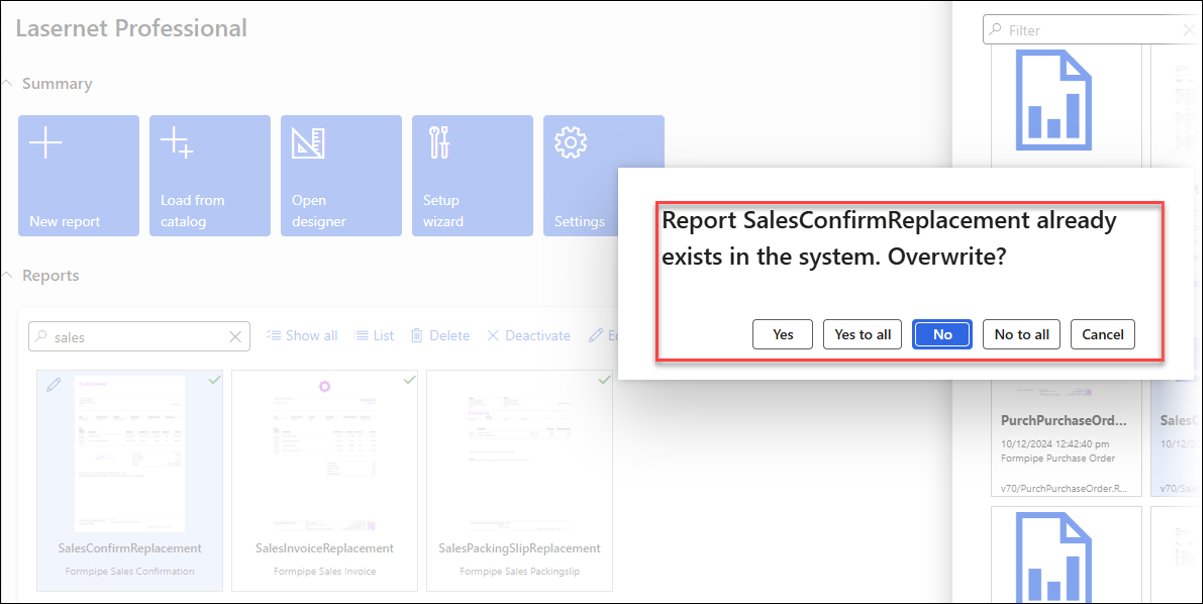
Command | Description |
|---|---|
Yes | Overwrite report |
Yes to all | Overwrite multiple reports |
No | Do not overwrite report |
No to all | Do not overwrite multiple reports |
Cancel | Do not overwrite any report(s) |
Configure Report from Journal - Setup for Lasernet
Additionally, you can set up a Lasernet report within any of the standard journals in Dynamics 365 for Finance and Operations. To do so, follow these steps:
Select a standard destination for previewing the report.
The user must have either the role System Administrator or Lasernet Administrator.
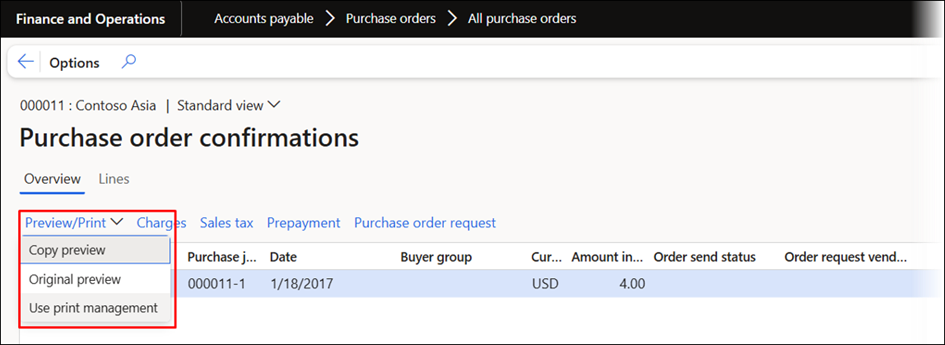
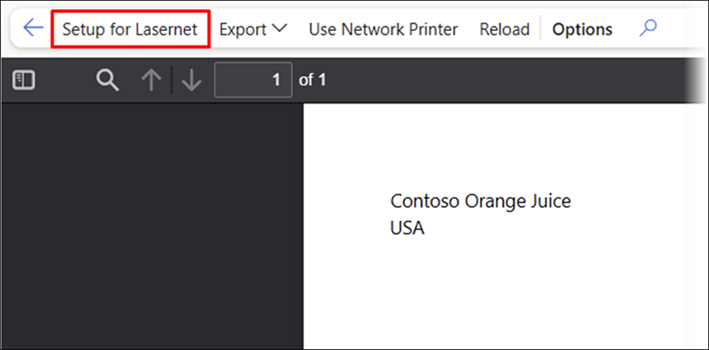
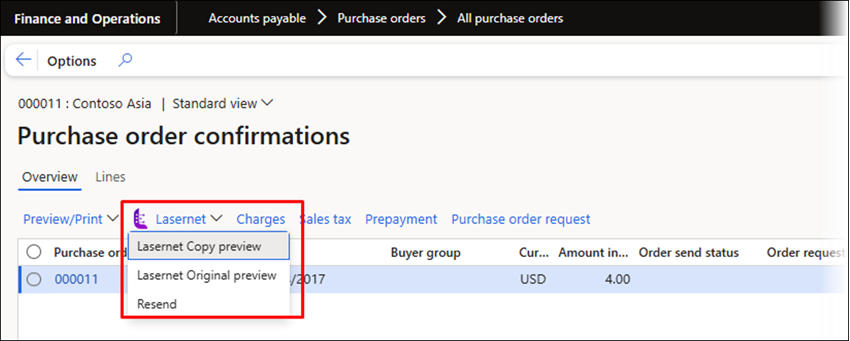
Click Setup for Lasernet within the report Preview (preview of standard SSRS report).
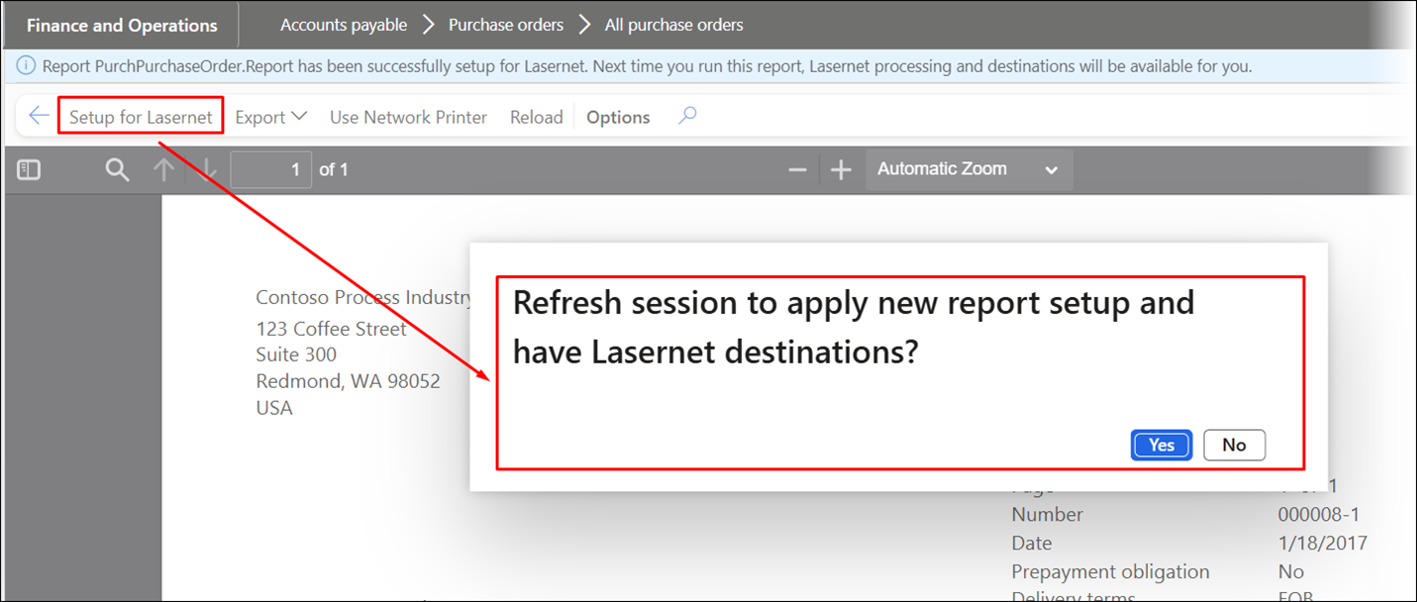
A refresh is needed when the report is set up from a journal but not if it is configured through a printer dialog, such as when posting packing slips or invoices.
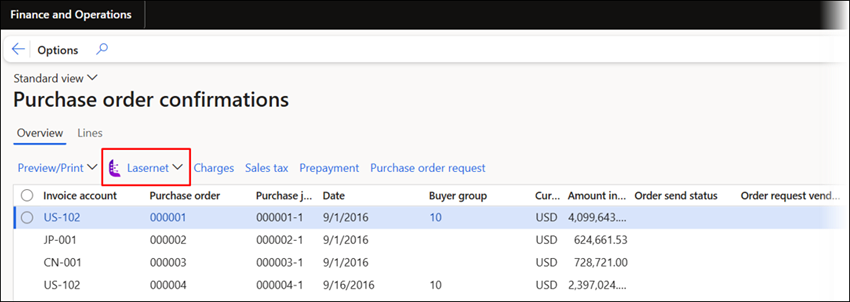
The following dropdown menu is shown after the session has been refreshed, with the Lasernet destinations:
Open Designer - Lasernet Form Editor
To start developing, highlight one of your active or inactive reports and click Open designer.
Open designer will open Lasernet Form Editor, where you will be able to adjust the design for the selected report.
When launching the Form Editor, the system will indicate if an XML/Grab file is missing from the report. A single archive entry will be provided for each Formpipe default report.
It is possible to open the designer from either the Preview of a report or within the workspace.
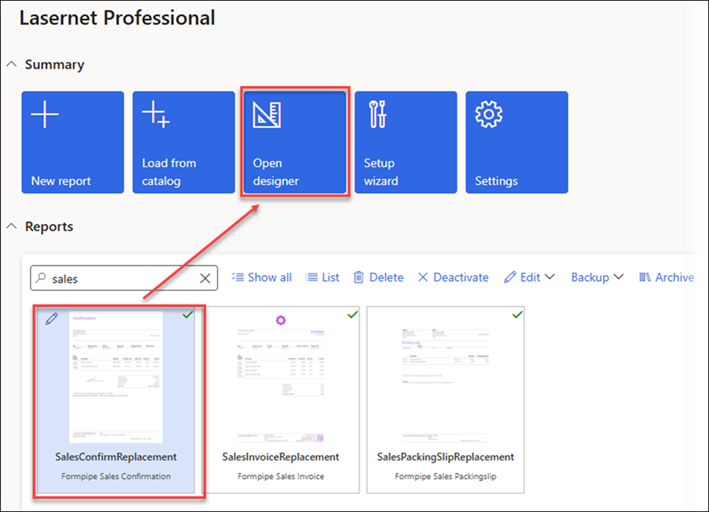
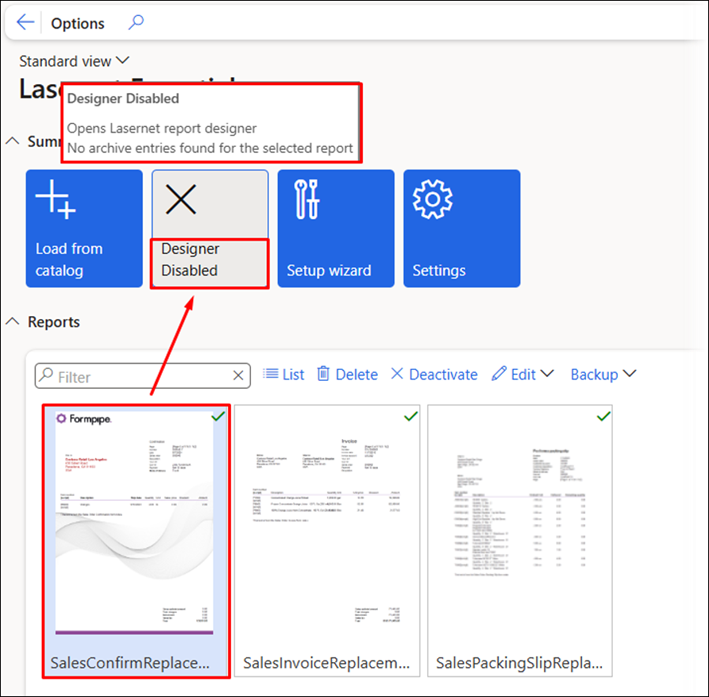
The Open designer button works only if you have run the report you wish to design at least once.
If no entry is found for the report within the Lasernet Archive, the tile’s name will change to Designer Disabled. The system will inform you about this when the mouse pointer is positioned over the tile.
If you have not run your report, run it to Lasernet Screen and open the Form Editor directly from that screen.
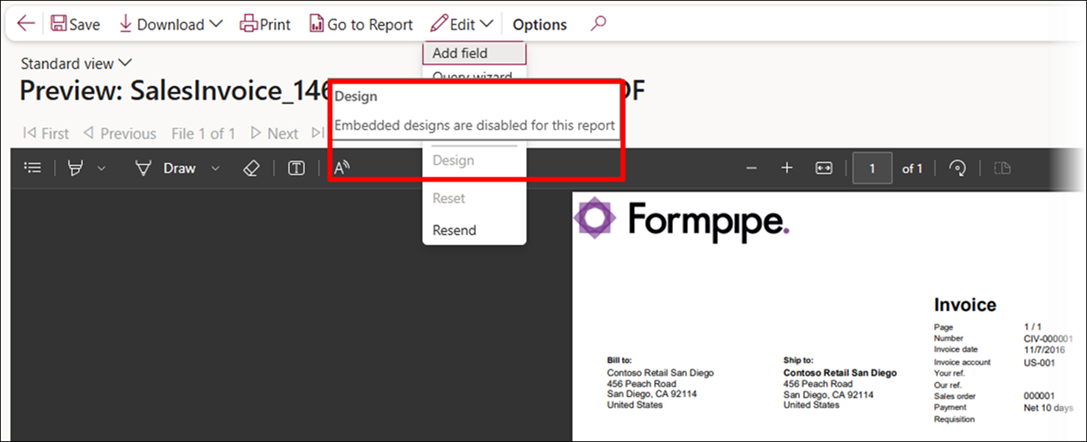
The Designer Disabled tile is also shown if the report does not use an Embedded design, such as in a hybrid setup where some reports use the Embedded engine, and others use a Lasernet Server (such as in the Enterprise version).
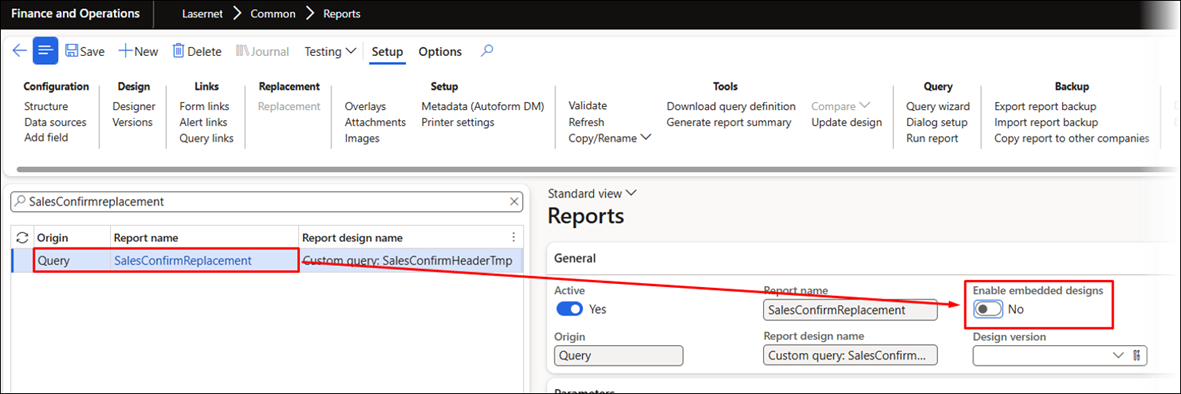
Similarly, a message appears within the report’s Preview if Enable embedded designs is disabled and if no single entry exists within the Archive.
When Lasernet Form Editor is opened from a report’s Preview or from the workspace, the report name appears in the top bar of the Form Editor.
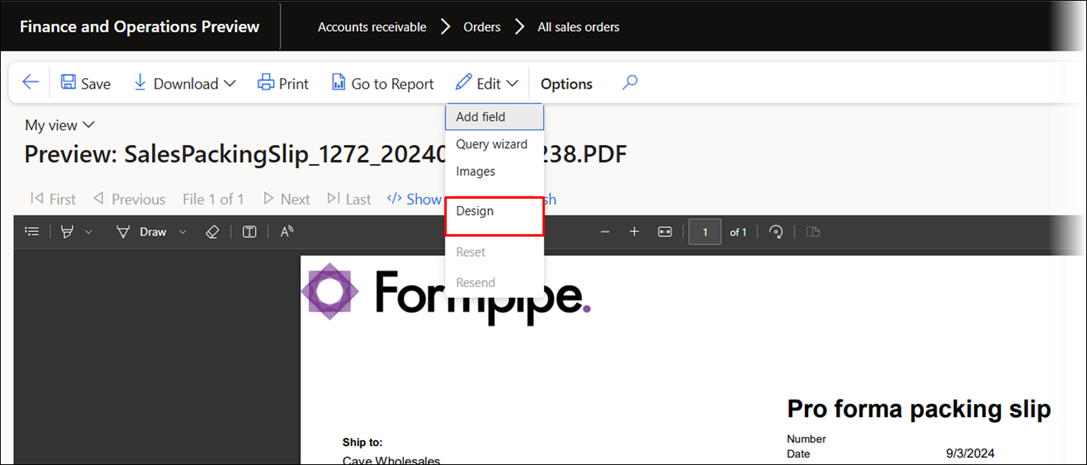
The report name will appear at the top of the Lasernet Form Editor window when the designer is opened from either the Preview or the workspace.
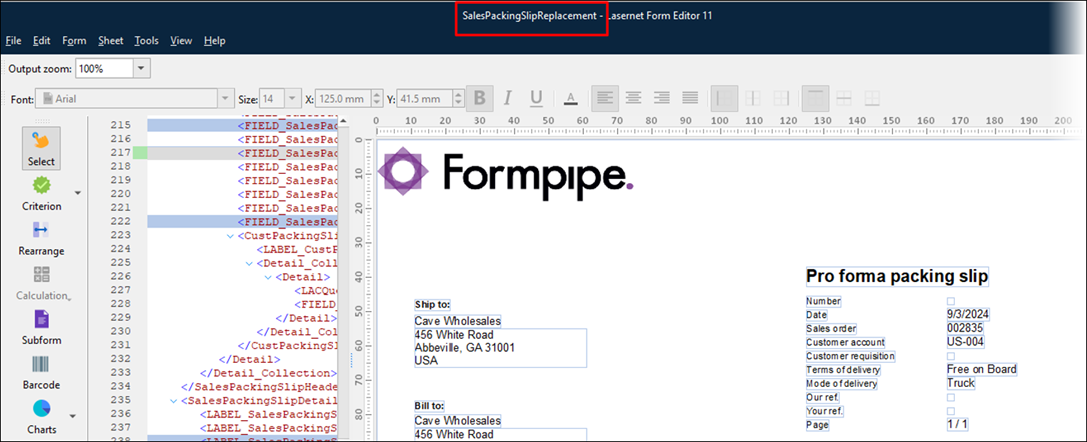
If no data is shown when opening the designer, run the report from its original location. Generating the report from its initial location will help ensure that data is available the next time the designer is accessed from the workspace.
Setup Wizard
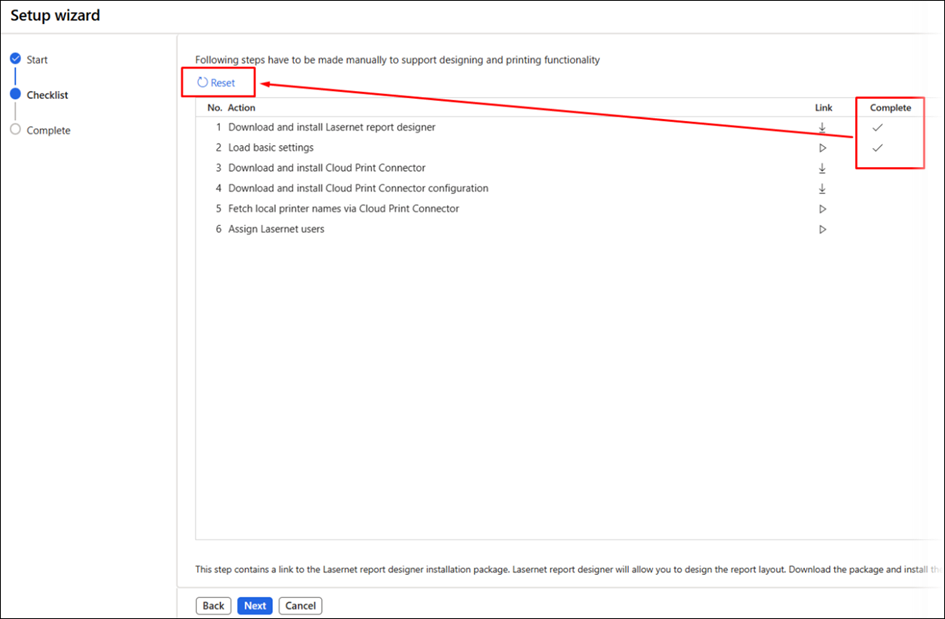
The Setup wizard is a quick guide for getting you set up and configured with default settings, Cloud Print Connector, and downloading Lasernet Form Editor for form design.
It is valid for both Lasernet Essentials and Lasernet Professional (if a valid license has been entered).
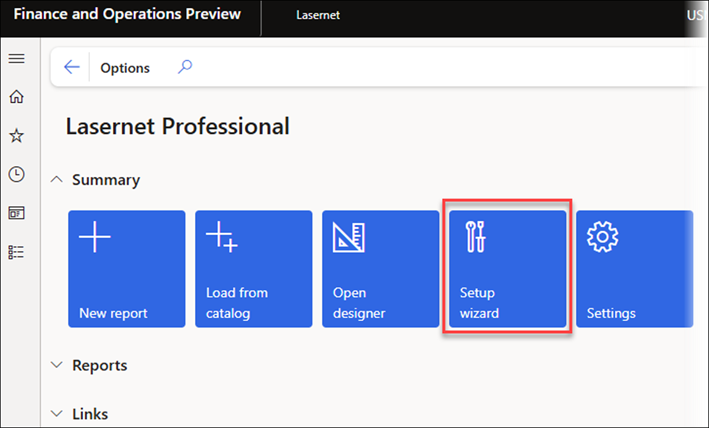
Follow the checklist from Action No.1 to Action No.6 to get started quickly and efficiently.
You can skip the Cloud Print Connector installation, but you will need the Lasernet report designer (Form Editor) and to Load Basic Settings (our default configuration for Lasernet Essentials, Professional, and Advanced).
Once you are ready to install and configure the Cloud Print Connector, return to this menu and download the client and the configuration.
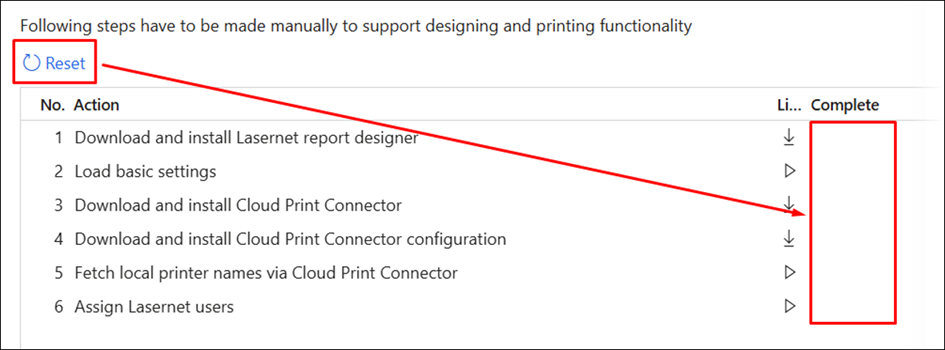
A checkmark in the Complete column indicates that a step has been completed. It is, however, possible to use the Reset button to remove all checkmarks and start over.
Settings
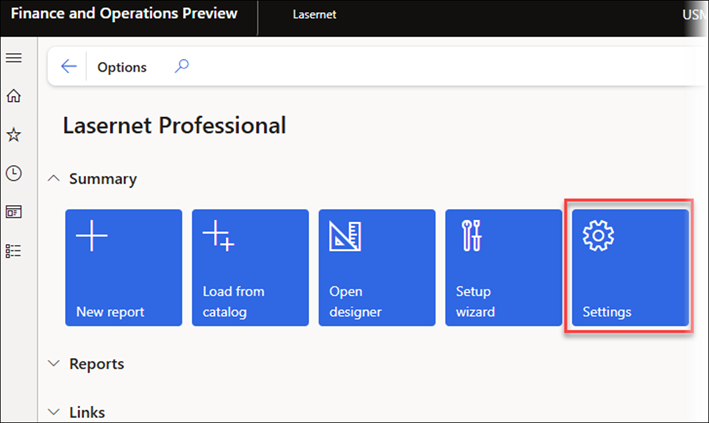
Click the Settings button to access the Lasernet parameters page.
General FastTab
In this FastTab, you can prevent the Edit dropdown option from appearing on a report’s Preview by toggling the Disable report preview edit features button to Yes.
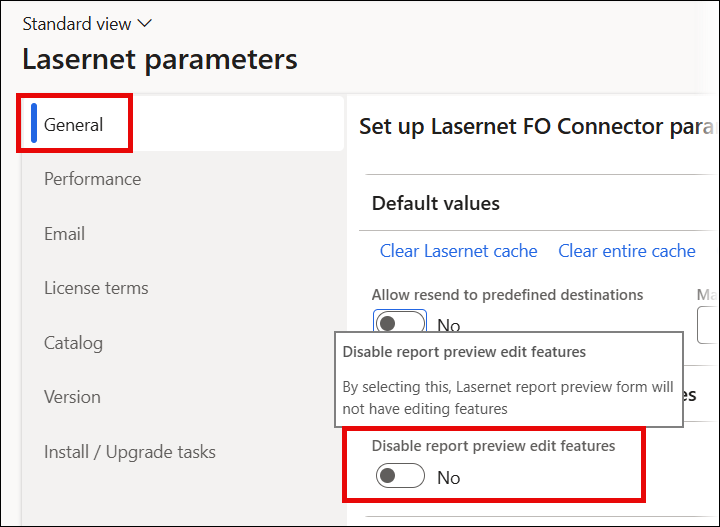
Normally, the Edit dropdown is shown in a report’s Preview if the user has the role of either System Administrator or Lasernet Administrator.
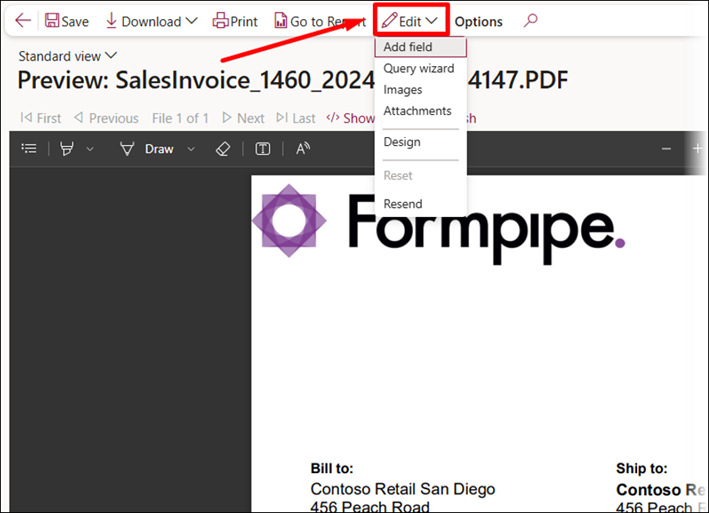
The Disable report preview edit features option will hide the Edit button and, therefore, all features located within this dropdown.
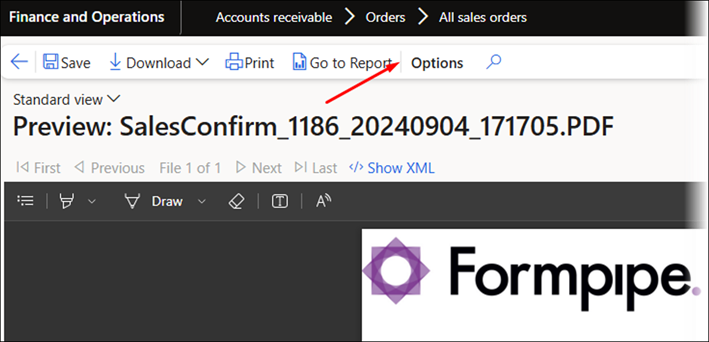
Note
While the Edit button can be disabled, the Go to Report button is always available in a report Preview and is used to show the report within the workspace.
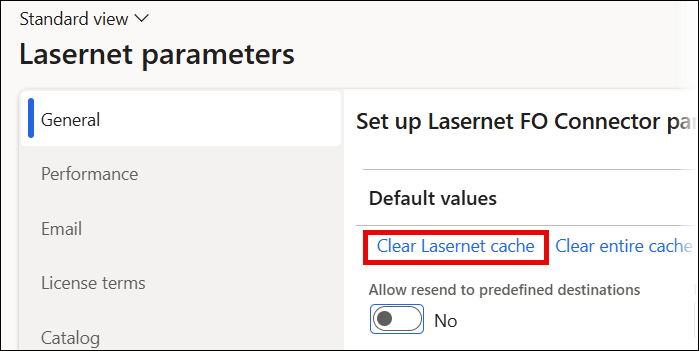
The Clear Lasernet cache function is located within the General FastTab and removes stored information about tables and fields within the environment. It should be used whenever new tables or fields are added.
Using Clear Lasernet cache will not interrupt any user sessions.
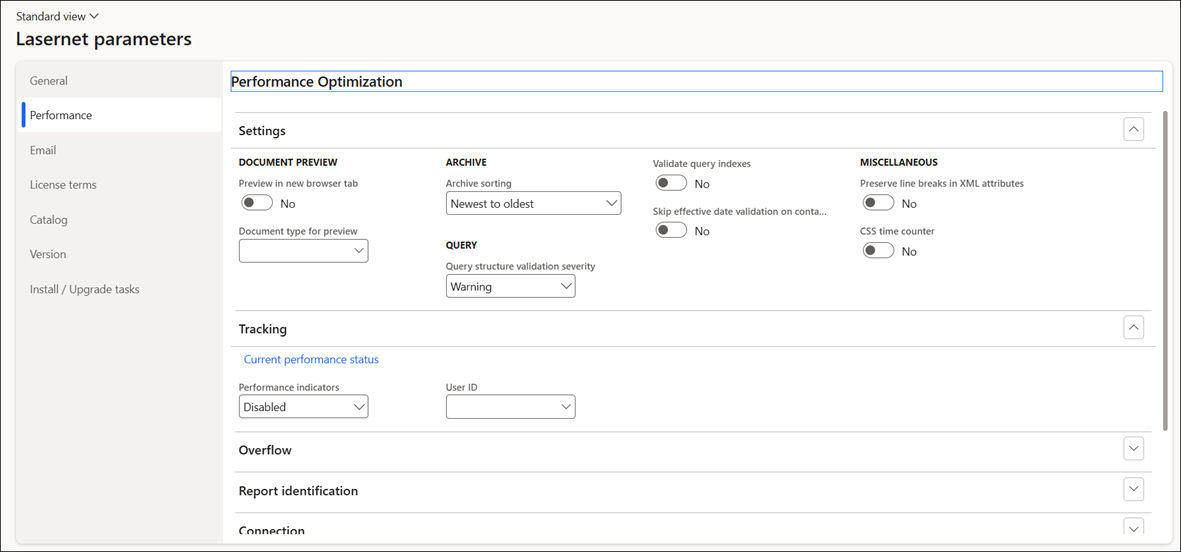
Performance FastTab
This FastTab enables users to choose settings for Performance optimization.
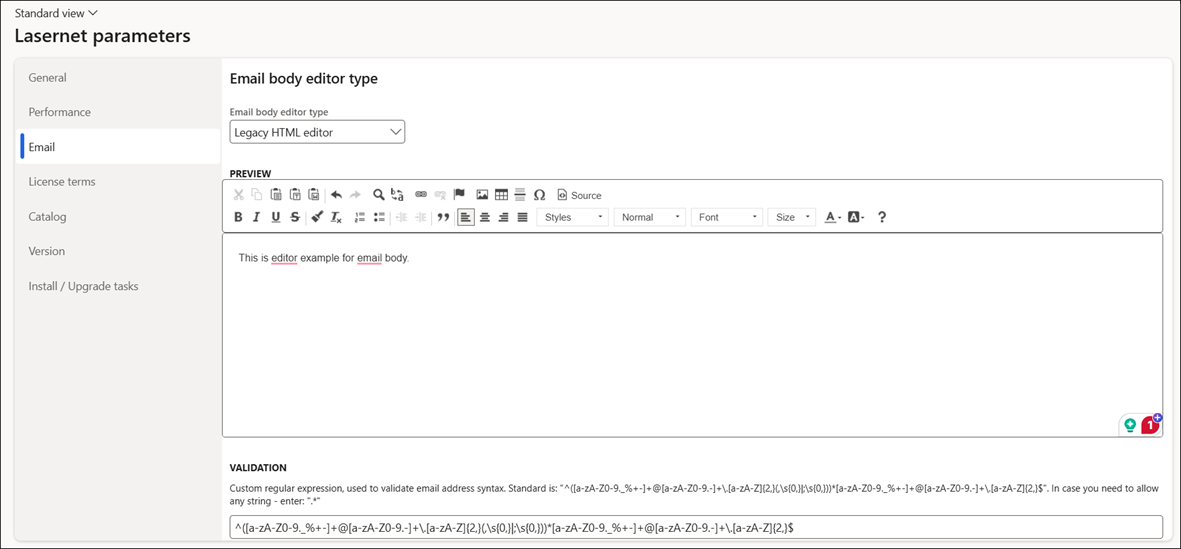
Email FastTab
This FastTab enables the user to set up the Email body editor type.
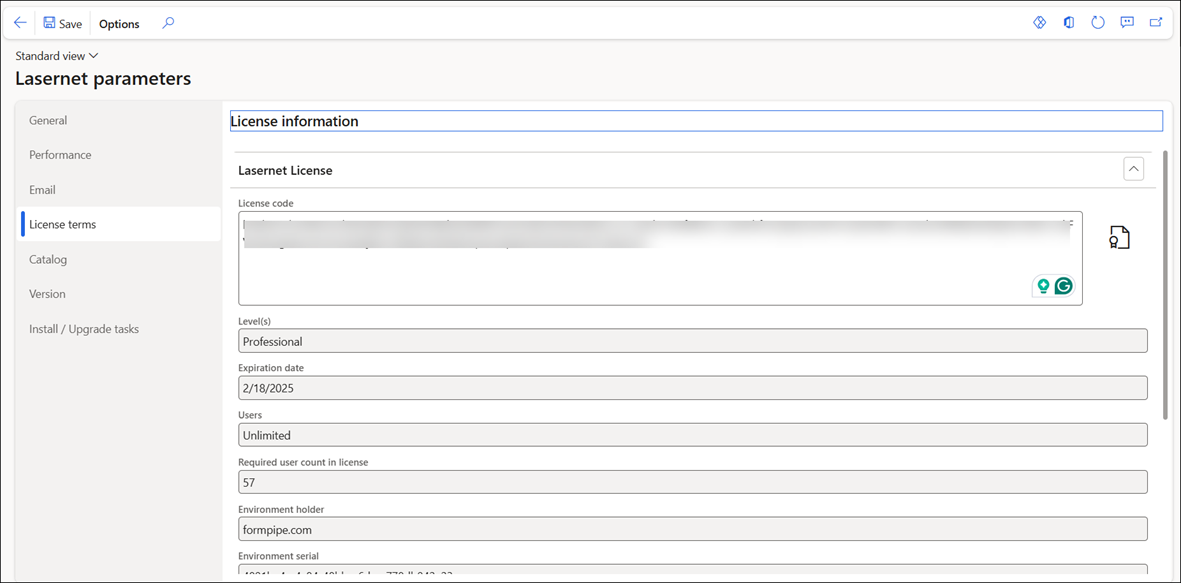
License terms FastTab
This FastTab contains information about the license type.
After entering a License code, click Save to ensure Lasernet is shown within the Modules list if a valid License code is provided.
Clicking Save will also ensure Lasernet is removed from the Modules list if no valid License code is entered.
Note
The limit for the number of users who can have access to the same Lasernet FO Connector environment with the same License code is 100.
Catalog FastTab
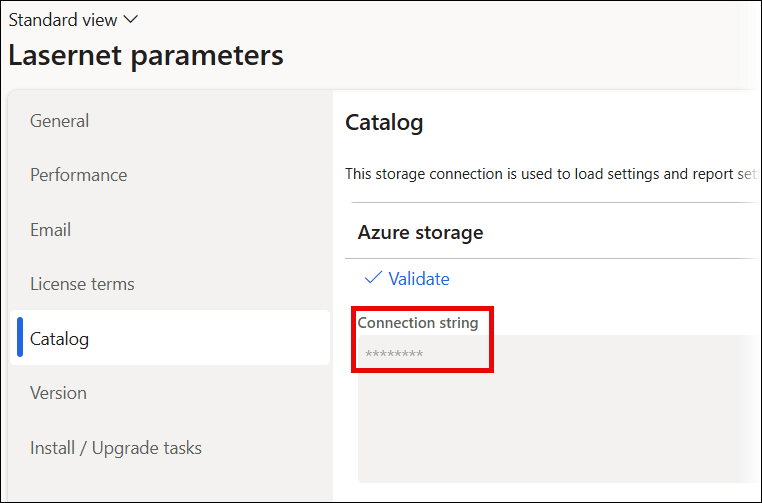
The Connection string found in this FastTab includes an optional link for loading basic settings and configuring reports. This is useful for sharing environment settings and report configurations.
Version FastTab
This FastTab contains details regarding the environment and installed software versions.
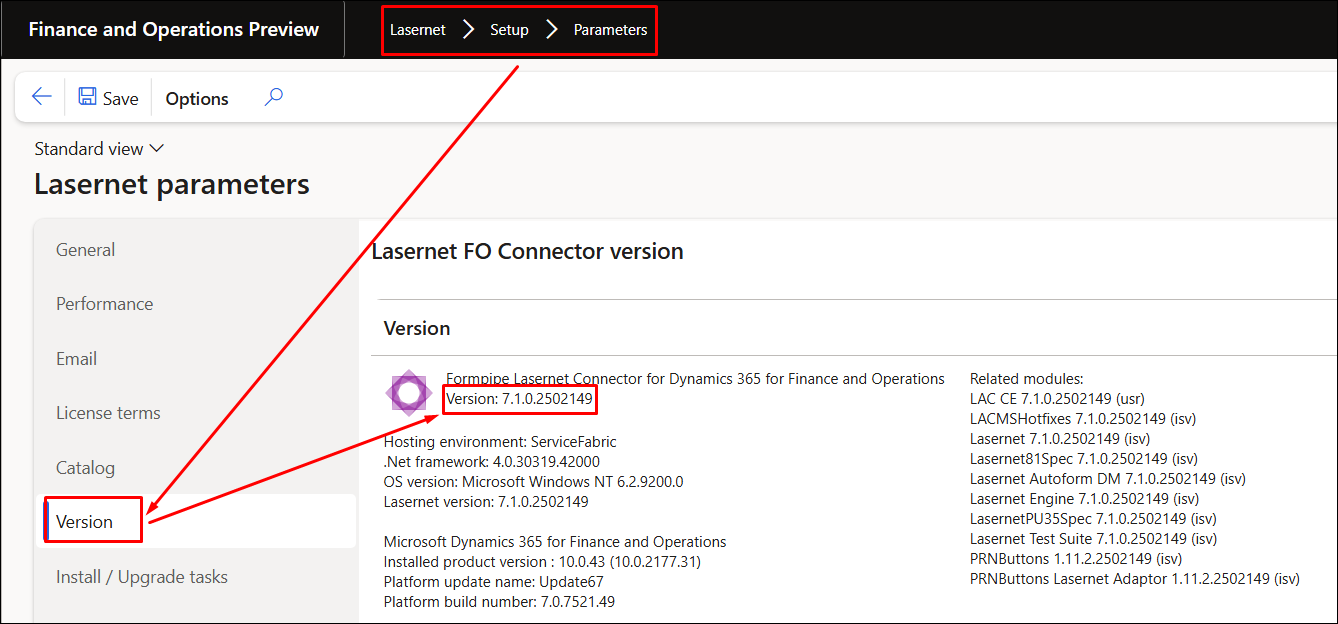
To enable the Professional edition, input a valid License code in the License terms FastTab and click Save. This will refresh the session.

Once a valid License code for Lasernet Advanced or Enterprise has been provided, Lasernet will appear in the Modules list and the main menu.
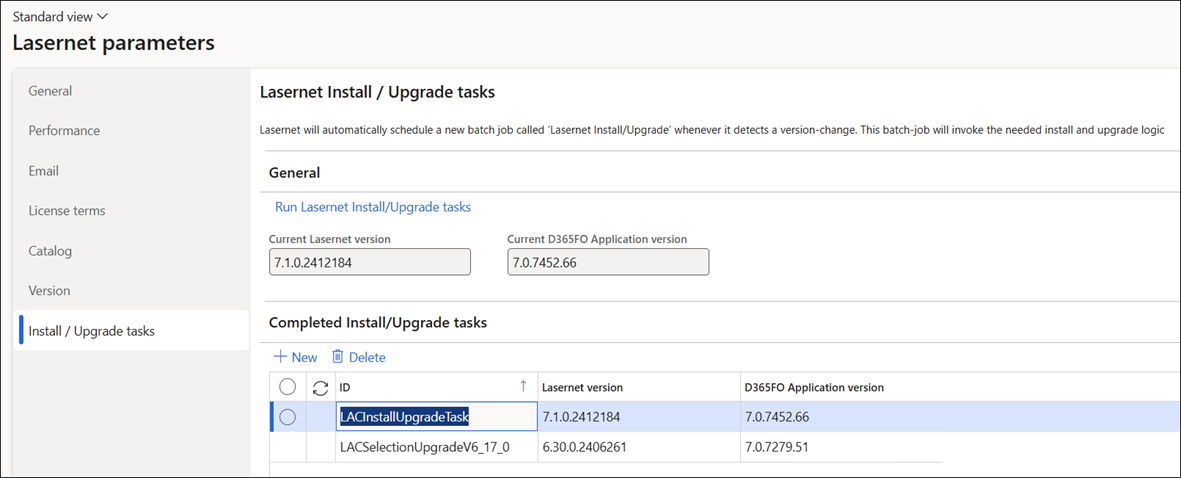
Install/Upgrade Tasks FastTab
In this FastTab, you can view the batch job that Lasernet automatically schedules whenever it detects a version change. This batch job is called Lasernet Install/Upgrade.
