- Print
- PDF
In the Summary section of the Lasernet Essentials workspace, you can configure a new report, manage the product license, set up your embedded version using a guide, or quickly open the report designer (Lasernet Form Editor) to update or enhance your active and inactive reports.
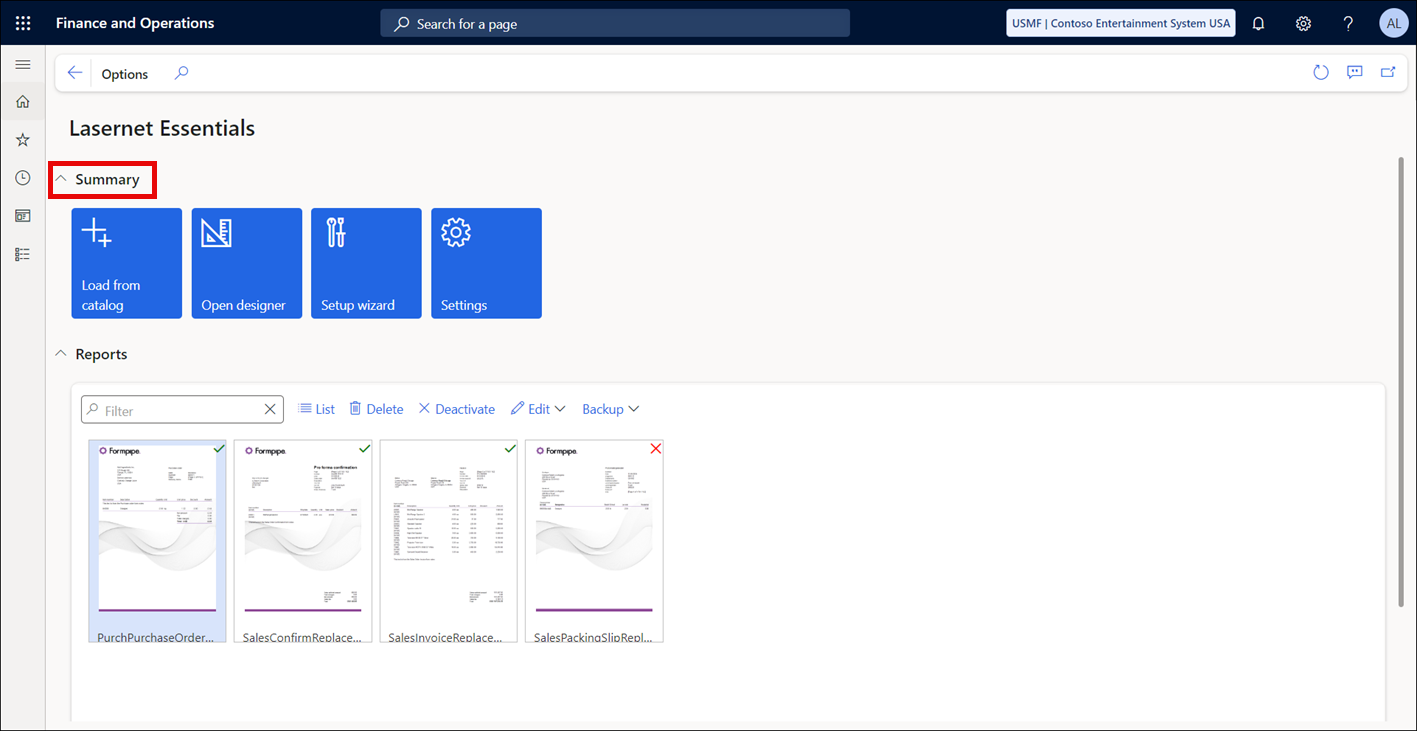
Configure New Report
Configuring a new report with Lasernet Essentials is a fairly straightforward process and can be achieved either when running a report or by using the Load from catalog function within the Lasernet Essentials workspace.
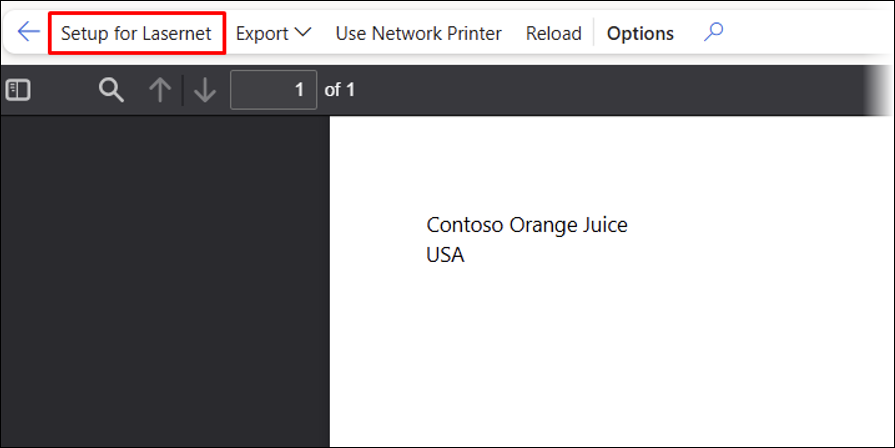
Option 1: Use the Setup for Lasernet button after previewing the report to standard screen (preview of standard SSRS report).
Option 2: Use the Load from catalog tile within the Lasernet Essentials workspace.
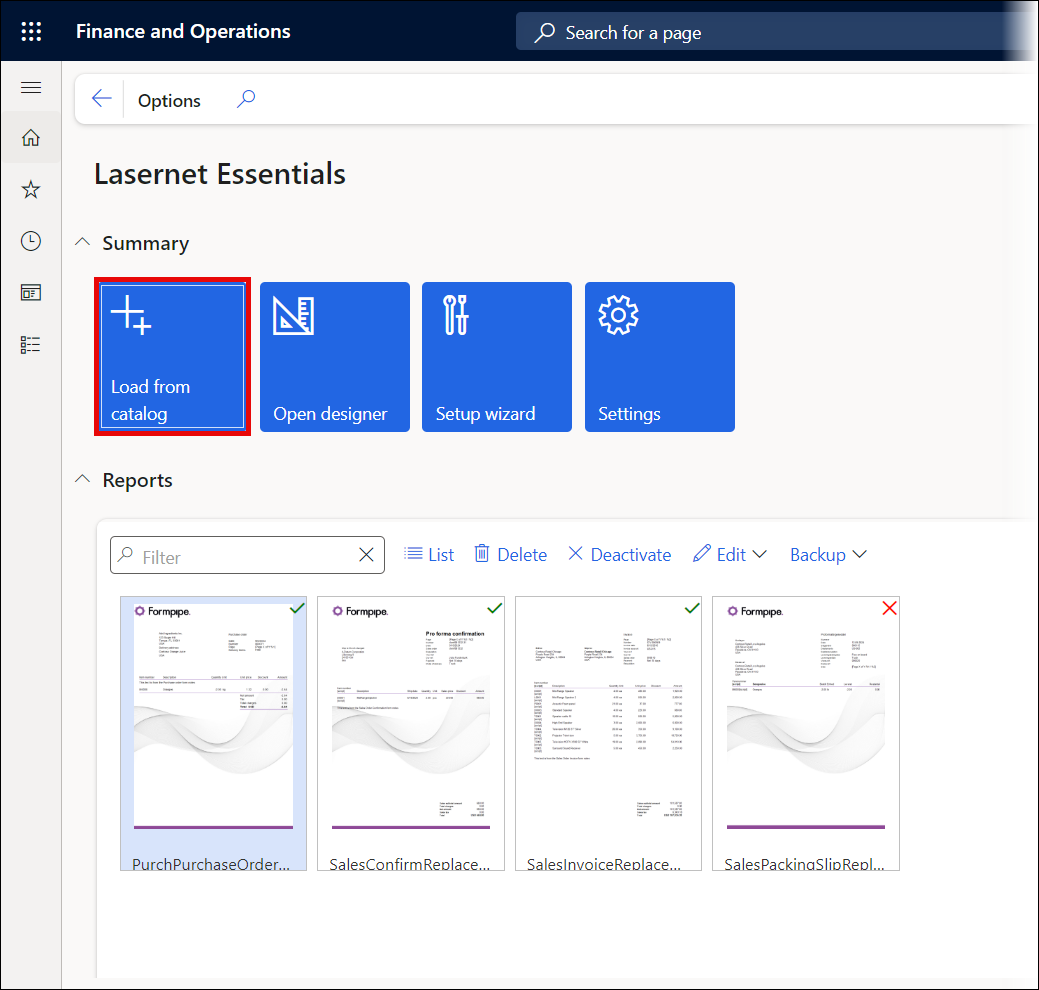
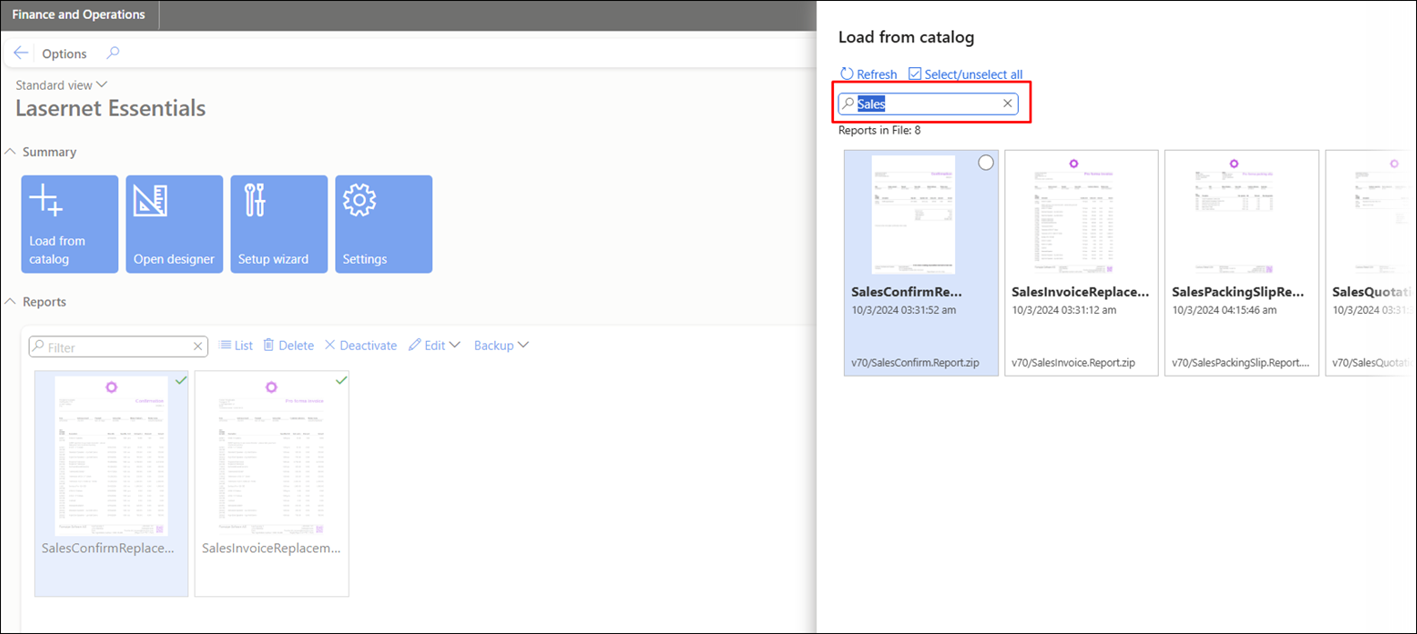
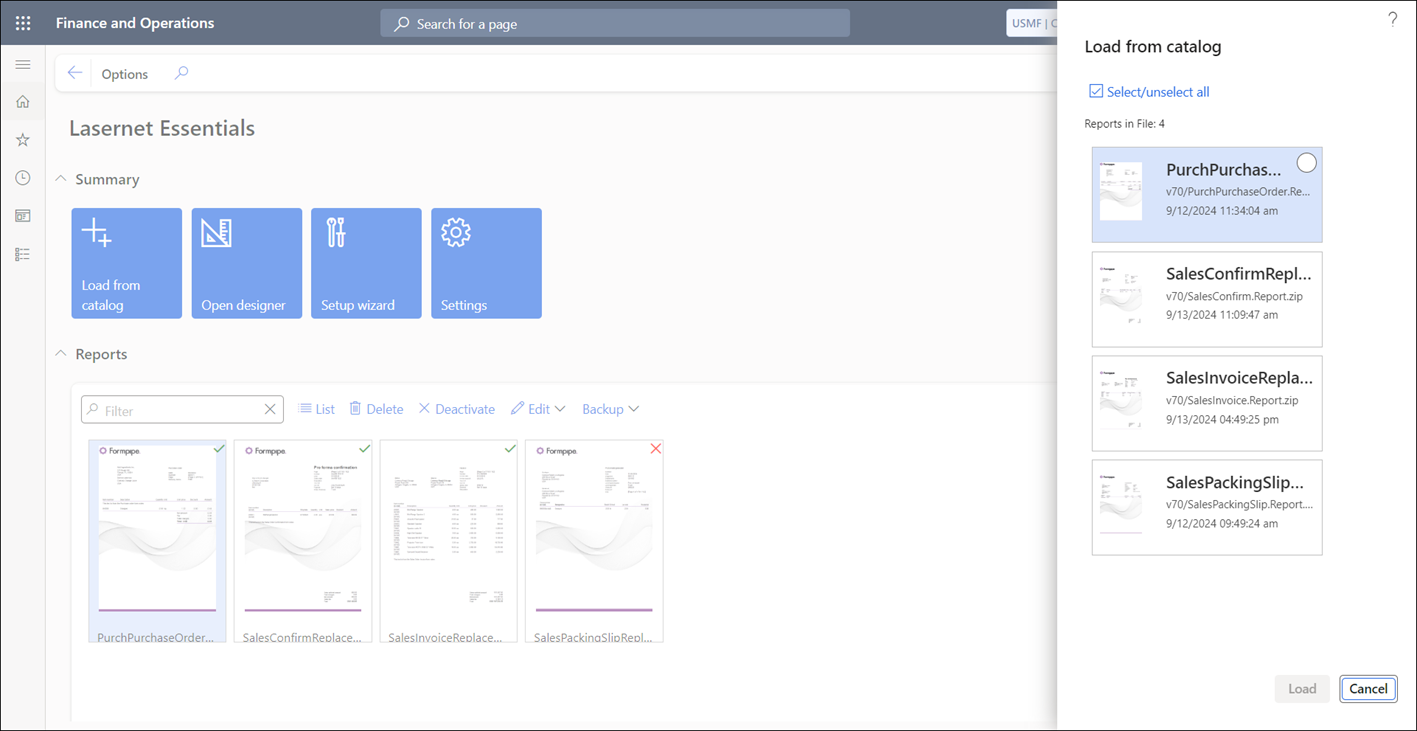
The Load from catalog feature enables the configuration (import) of several reports in the same run.
Note
A search field has been introduced to load reports from the catalog. This feature is useful for task recordings within Dynamics 365 Finance and Operations.
If the following error occurs, consult this article:
Error
Exception of type ‘Microsoft.Dynamics.Platform.Integration.SharePoint.SharePointException’ was thrown.
The following prompt is displayed if a report already exists:
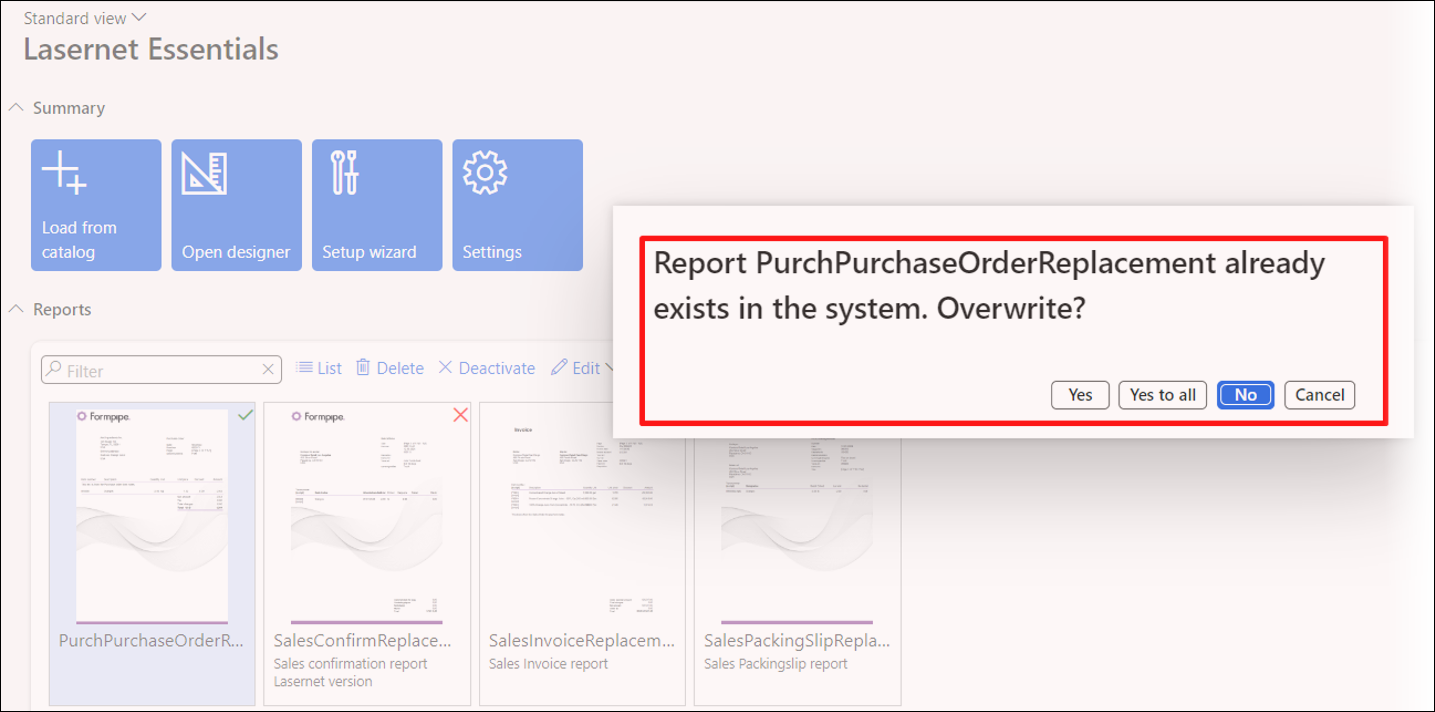
Yes: Overwrite report
Yes to all: Overwrite all reports (multiple)
No: Do not overwrite report
Cancel: Do not overwrite any reports (multiple)
Once configured, it is possible to select Lasernet as a destination.
The embedded solution will come with 13 reports preloaded, but if you cannot see any reports or you have deleted a report and want to add it back, follow these steps:
Run the SSRS report you want to (re)add.
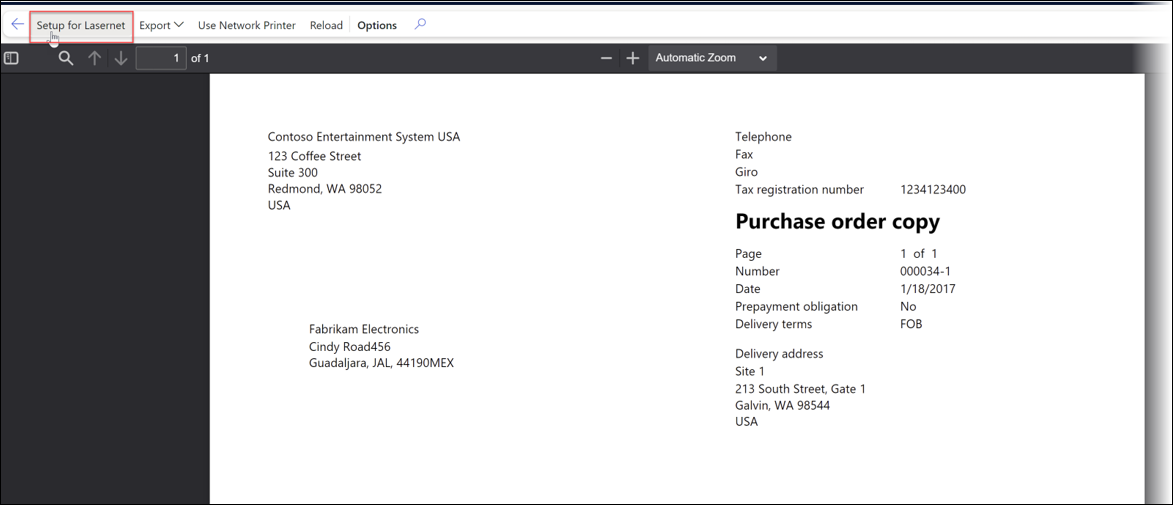
Once you see the report on your screen, click Setup for Lasernet. This will add the report to your list.
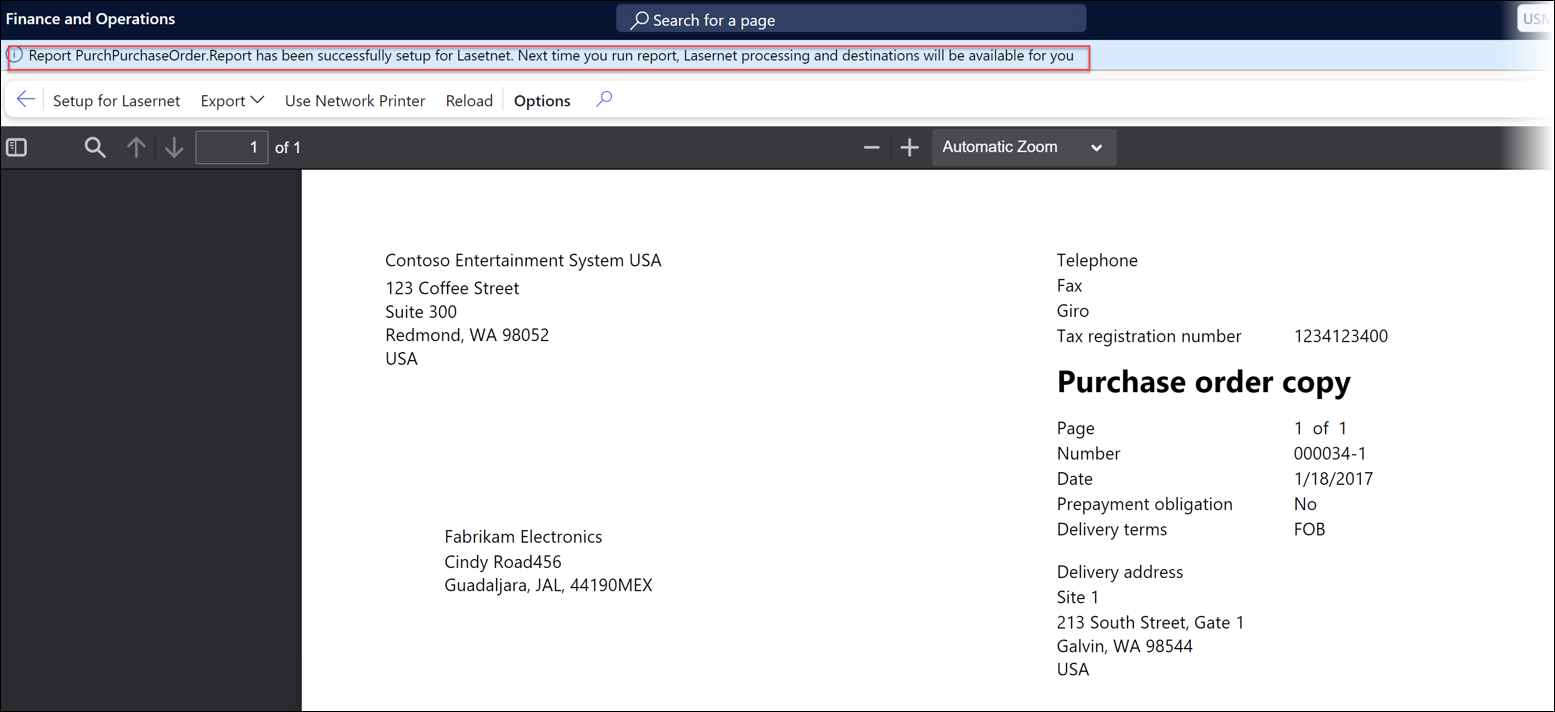
Look for confirmation of the import of the report.
Run the report again as a Lasernet report, generate the XML, and prepare it for form design.
You are limited to activating three reports among the 13 standard reports we provide with the embedded solution (no custom Query). Once you activate the fourth report, you will get an error message informing you that report processing has slowed down.
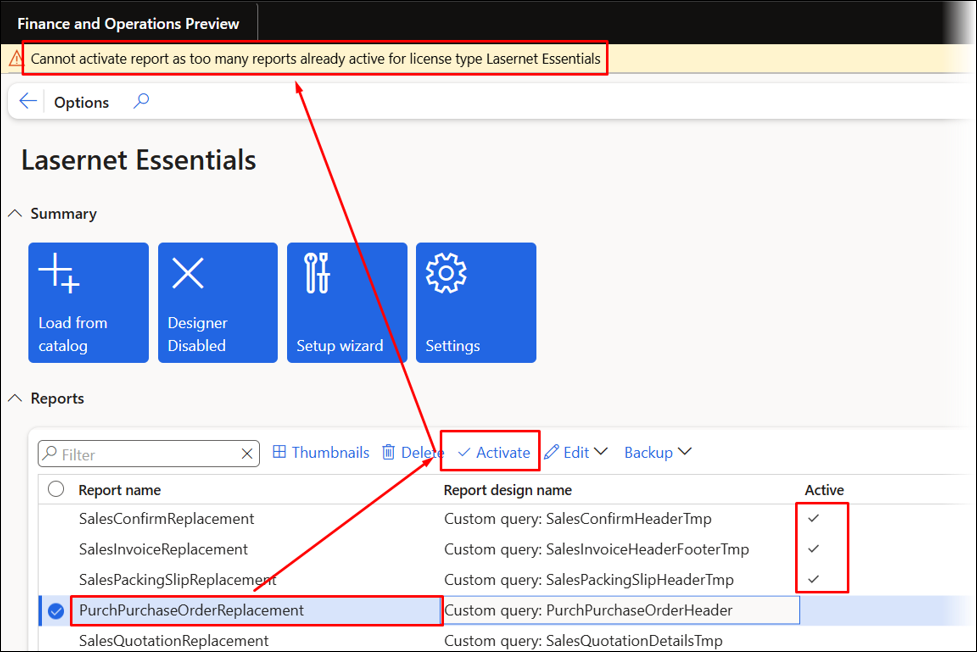
You can pick any report and start designing by clicking Open designer.
Configure a Report in a Standard Journal
Additionally, you can set up Lasernet reports within any of the standard journals in Dynamics 365 Finance and Operations.
Select a standard destination to preview the report.
The end-user must have either the role of System Administrator or Lasernet Administrator.
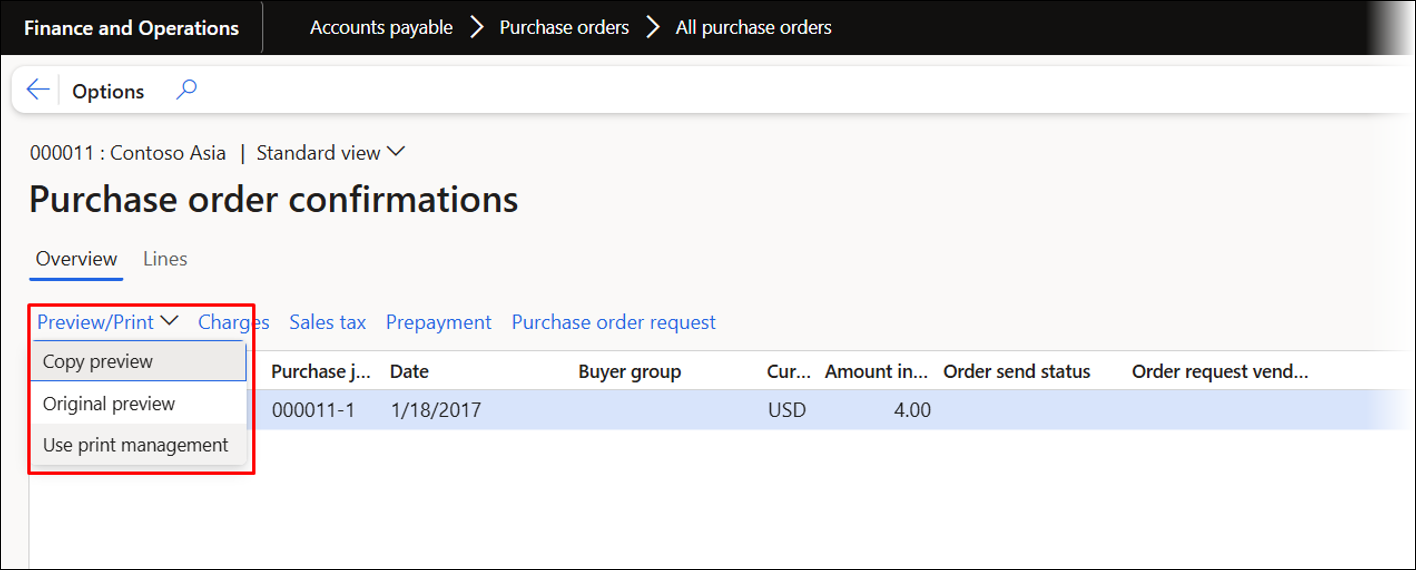
Click Setup for Lasernet within the report Preview.
A refresh is needed when the report is set up from a journal but not if it is configured through a printer dialog, such as when posting packing slips or invoices.
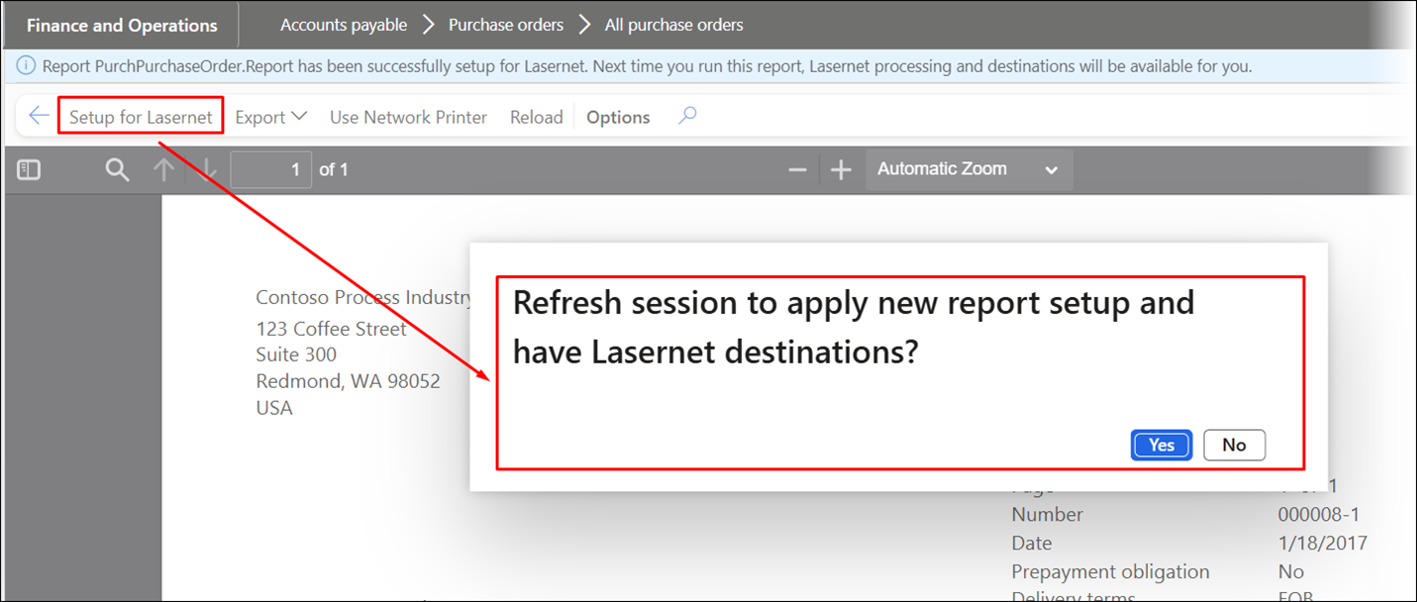
The following menu is shown after the session has been refreshed:
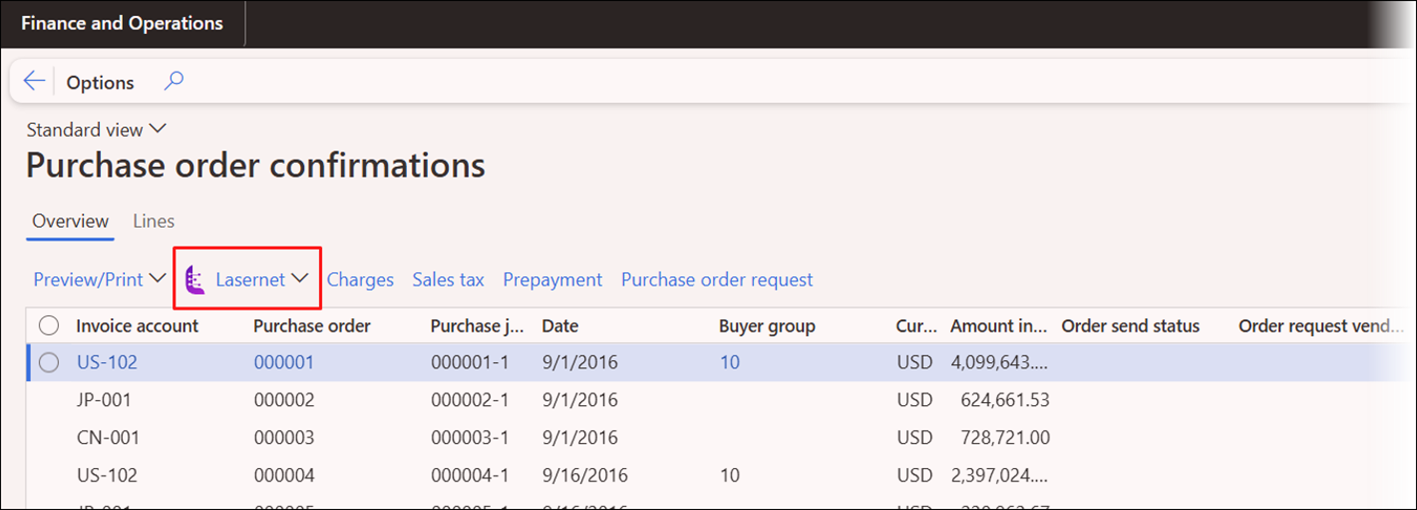
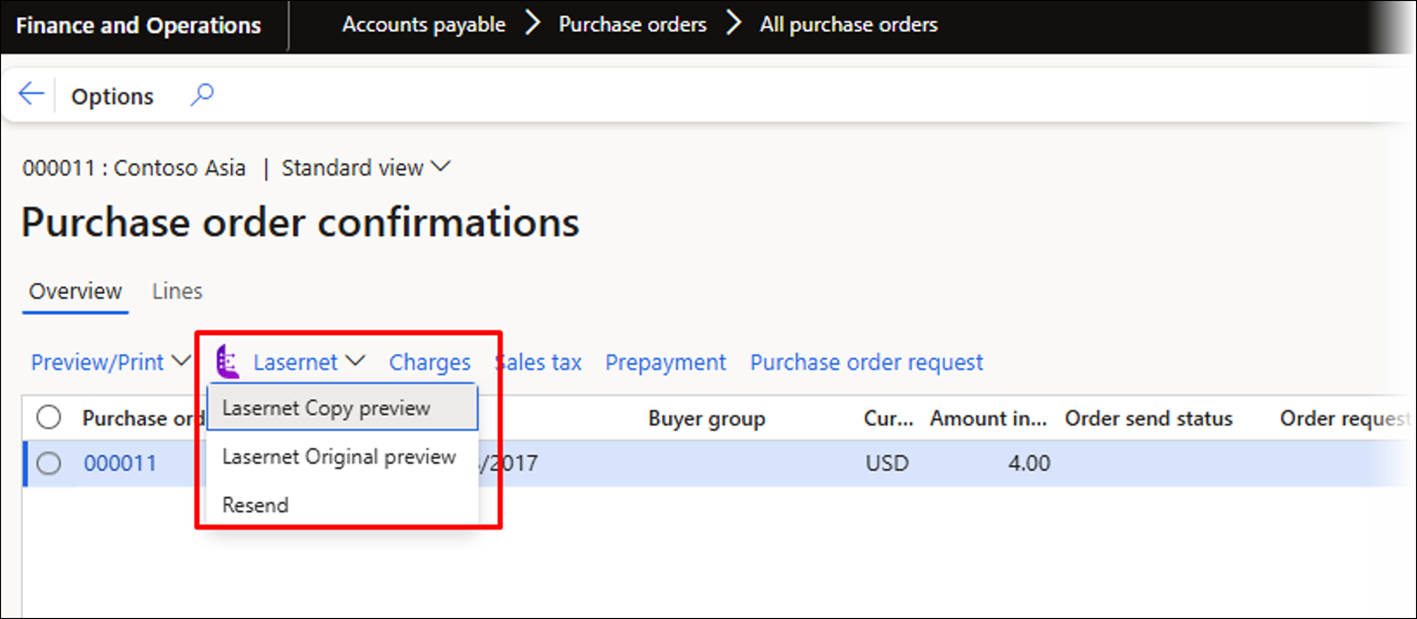
Open Designer - Lasernet Form Editor
To start developing, highlight one of your active or inactive reports and click Open designer.
Open designer will open the Lasernet Form Editor, where you will be able to adjust the design for the selected report.
When launching the Form Editor, the system will indicate if an XML/Grab file is missing from the report. A single archive entry will be provided for each Formpipe default report.
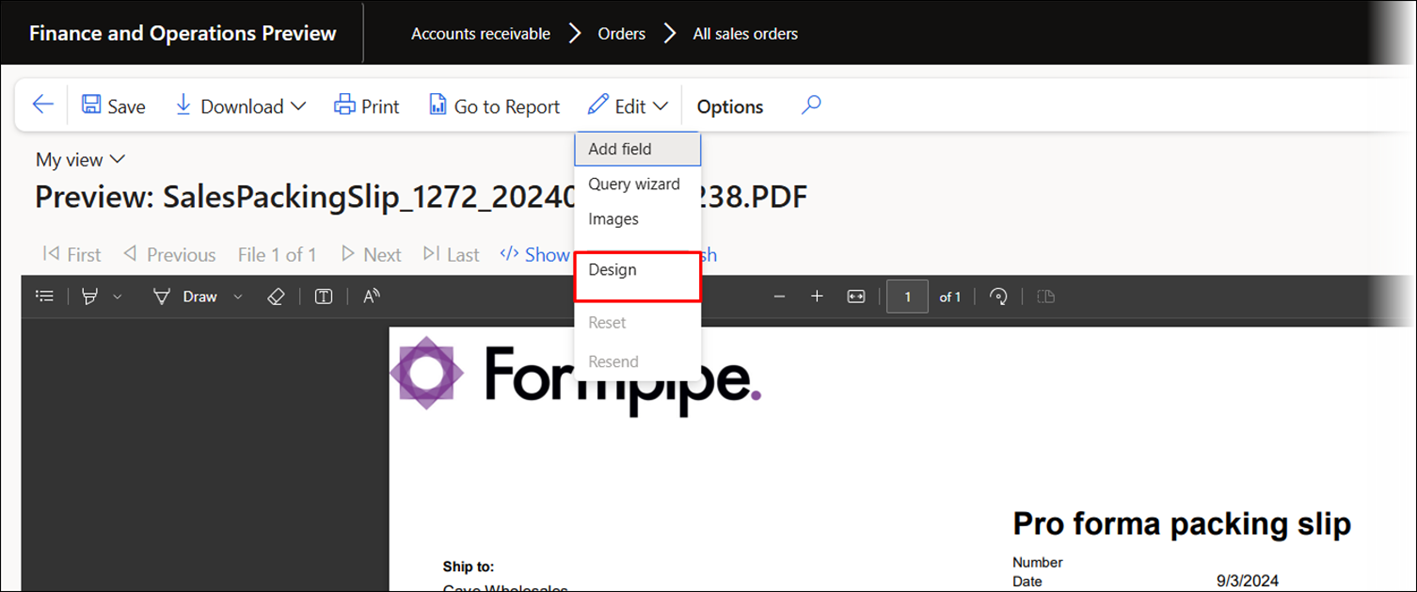
It is possible to open the designer from either the Preview of a report or within the workspace.
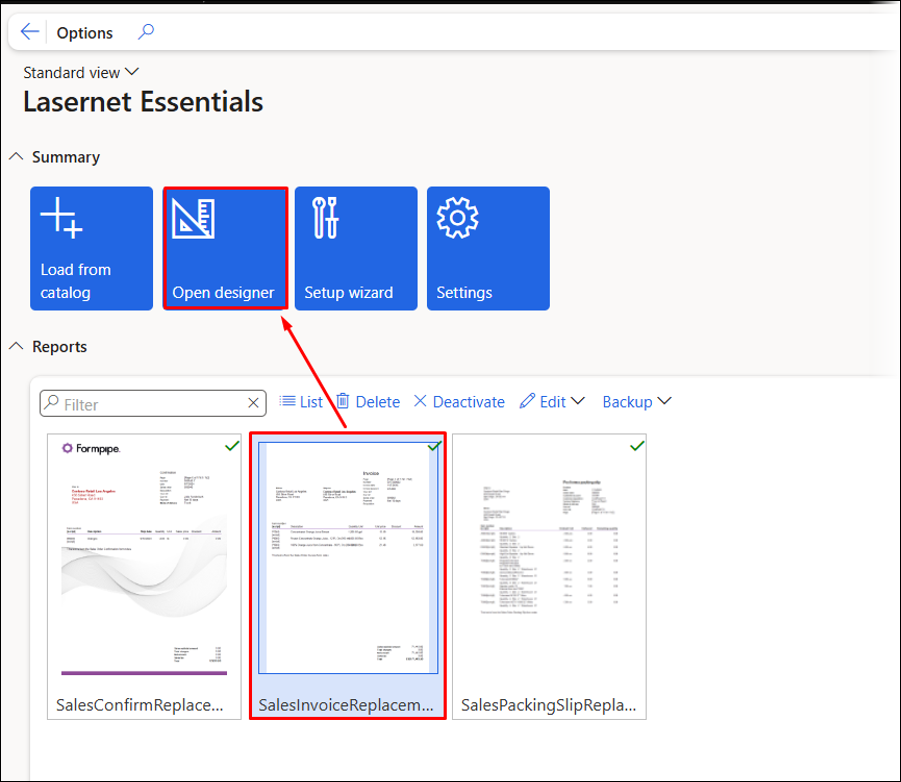
The Open designer button works only if you have run the report you wish to design at least once.
The button will read Designer Disabled in case no entry for the report is found within the Lasernet Archive (this information is displayed when positioning your mouse pointer over the button).
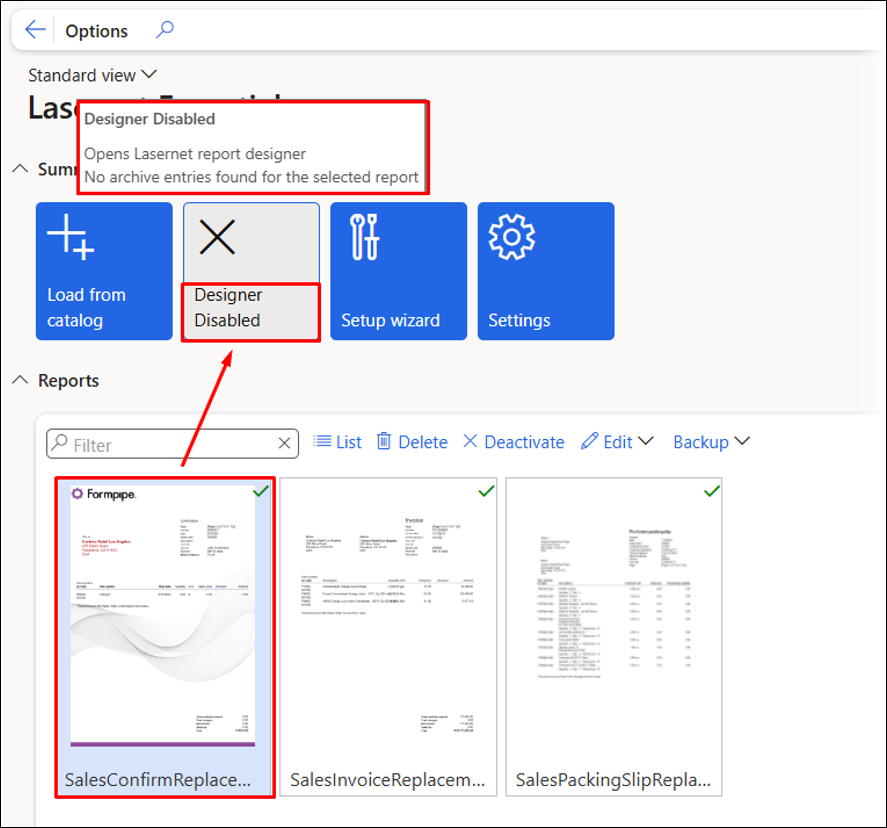
If you have not run your report, run it to Lasernet screen and open the Form Editor directly from that screen.
The Designer Disabled button is also displayed if the selected report does not use an embedded design, such as in a hybrid setup where some reports use Lasernet Essentials while others use Lasernet Professional or Enterprise.
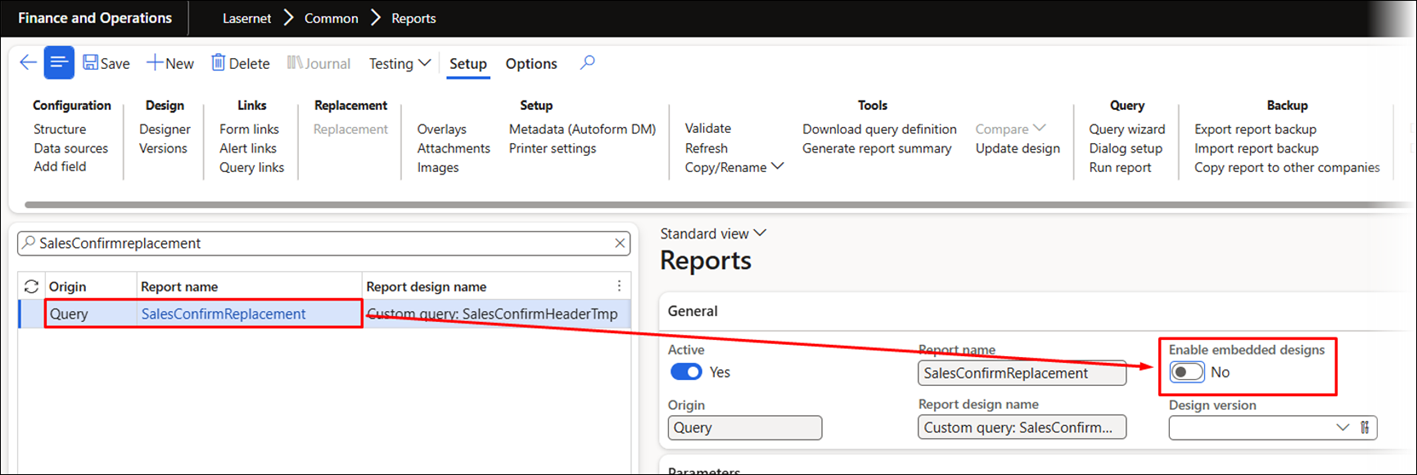
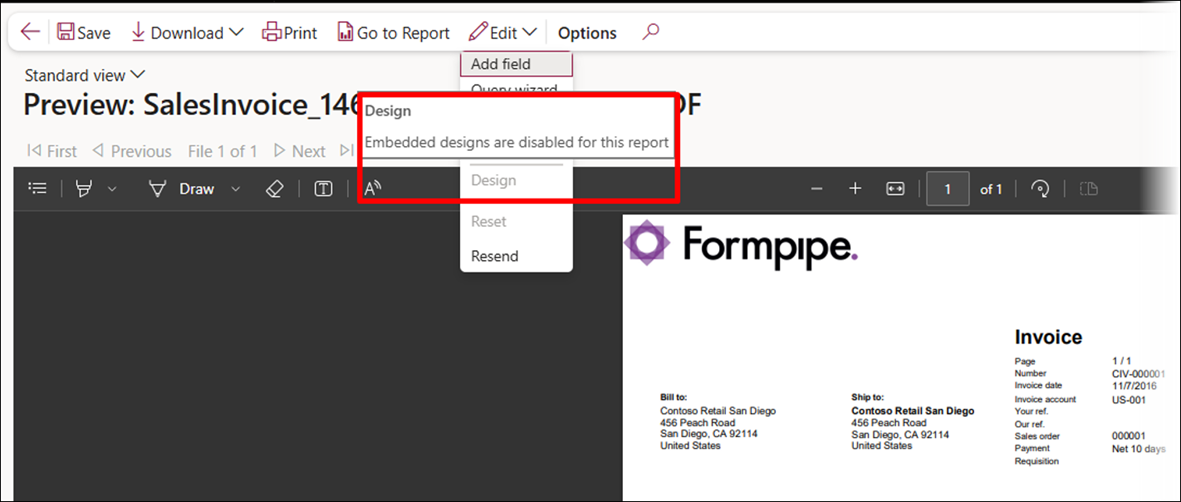
The Design option is also disabled within the report Preview if the Enable embedded designs button is toggled to the No status and no entry exists within the Archive.
Otherwise, it is possible to open Lasernet Form Editor from the report Preview.
The report name will appear at the top of the Lasernet Form Editor window when the designer is opened from either the Preview or the workspace.
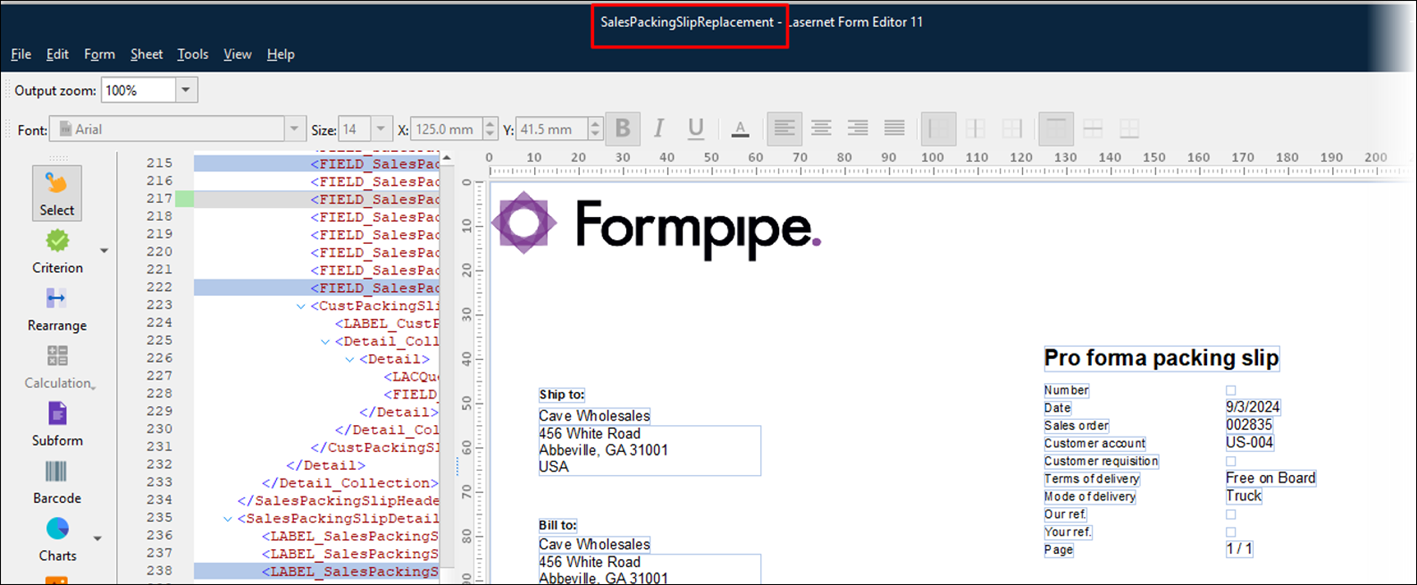
If no data is shown when opening the designer, ensure that the report is run from its original location. Generating the report from its initial location will help ensure that data is available the next time the designer is accessed from the workspace.
Setup Wizard
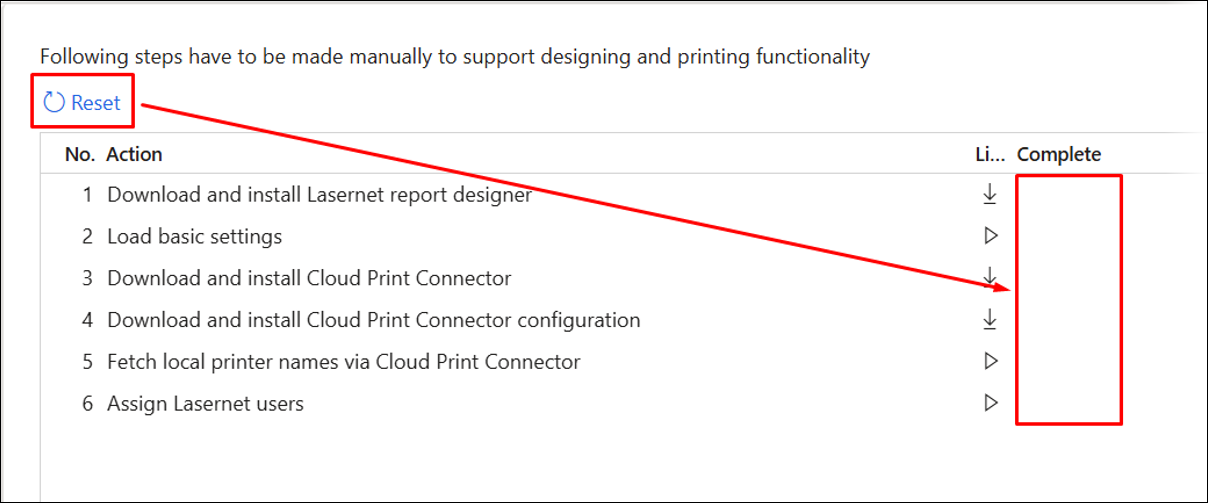
The Setup wizard is a quick guide for getting you set up and configured with default settings, Cloud Print Connector, and downloading the Lasernet Form Editor for form design.
It is valid for both Lasernet Essentials and Lasernet Professional (if a valid license has been entered).
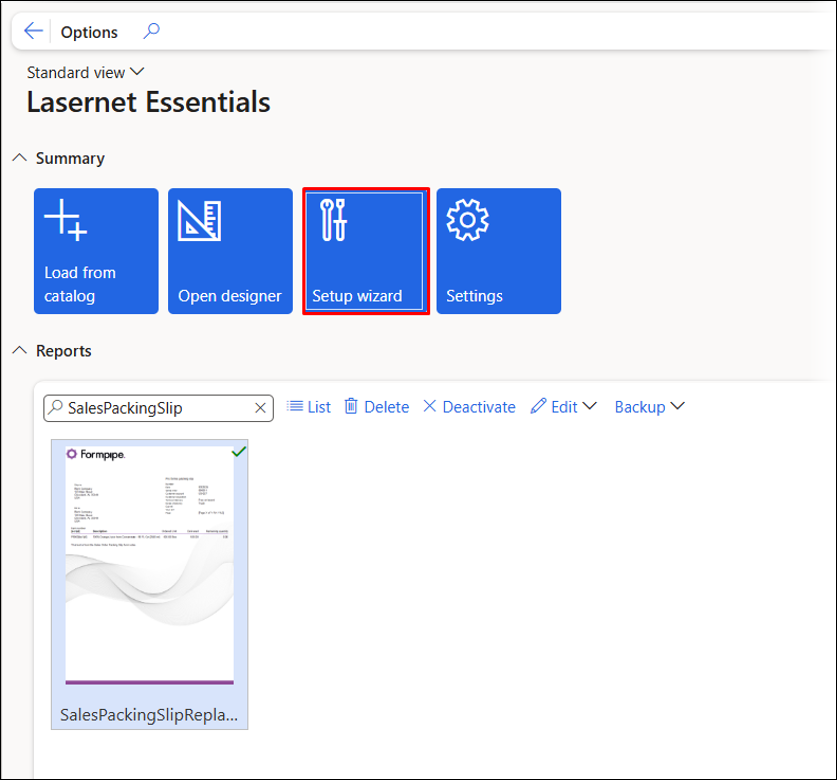
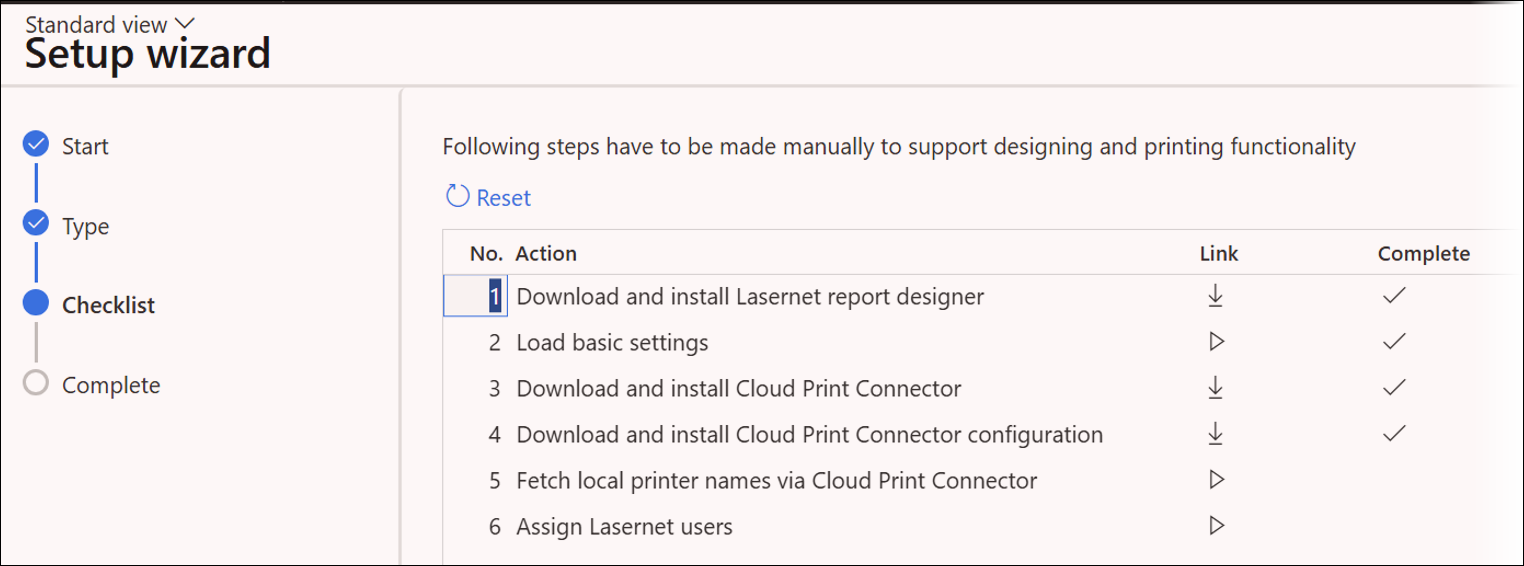
Follow the checklist from Action No.1 to Action No.6 to get started quickly and efficiently.
You can skip the Cloud Print Connector installation, but you will need the Lasernet report designer (Form Editor) and to Load Basic Settings (our default configuration for the free version).
Once you are ready to install and configure the Cloud Print Connector, return to this menu and download the client and the configuration.
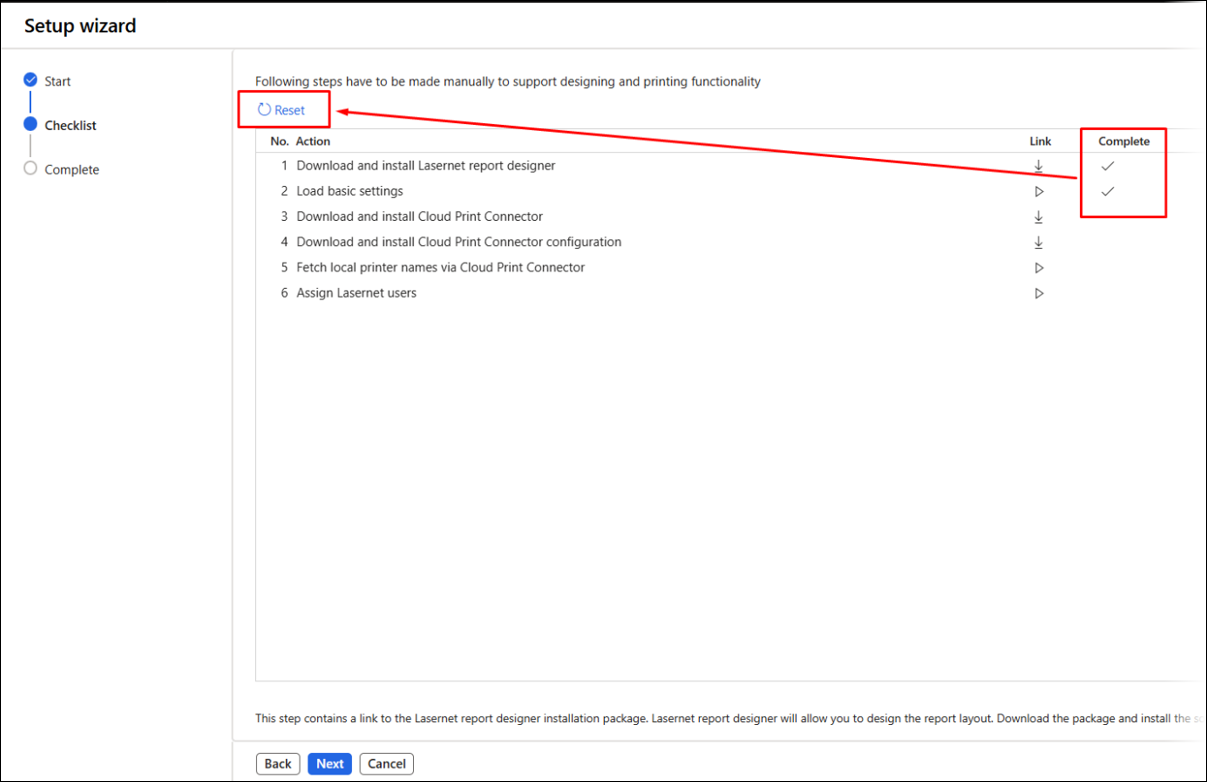
The Complete checkmark indicates that a step has been completed, but it is possible to use the Reset button to remove all checkmarks.
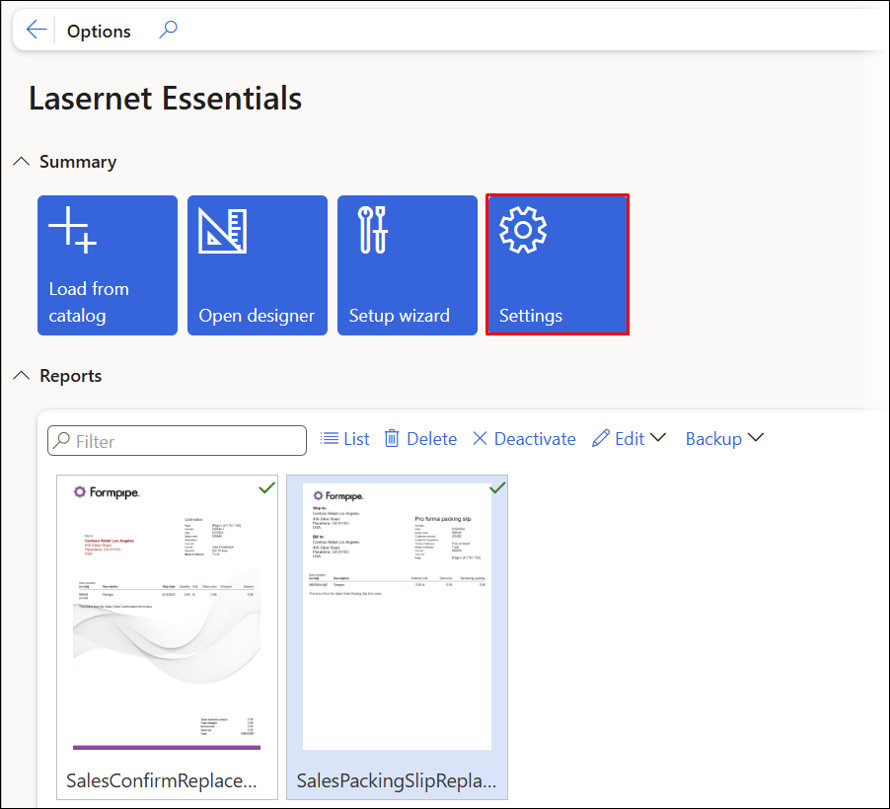
Settings
Click the Settings button to access the Lasernet parameters page.
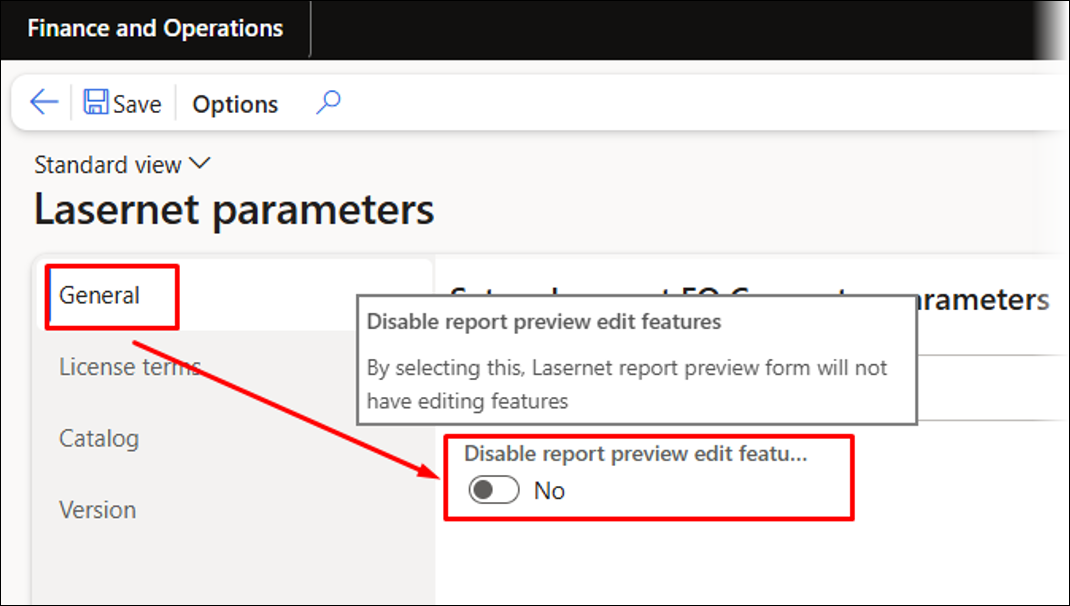
General
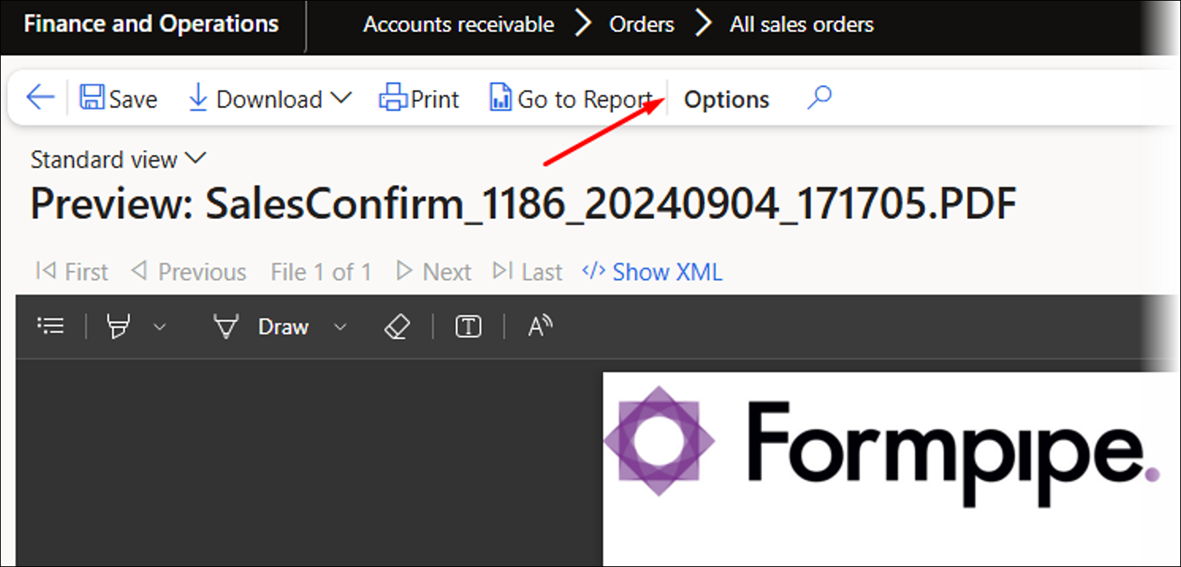
From the General tab of the Lasernet parameters page, you can prevent the Edit button from appearing in a report Preview by toggling the Disable report preview edit features button to the No status.
Normally, the Edit button is shown in the report Preview if the user has the role of either System Administrator or Lasernet Administrator.
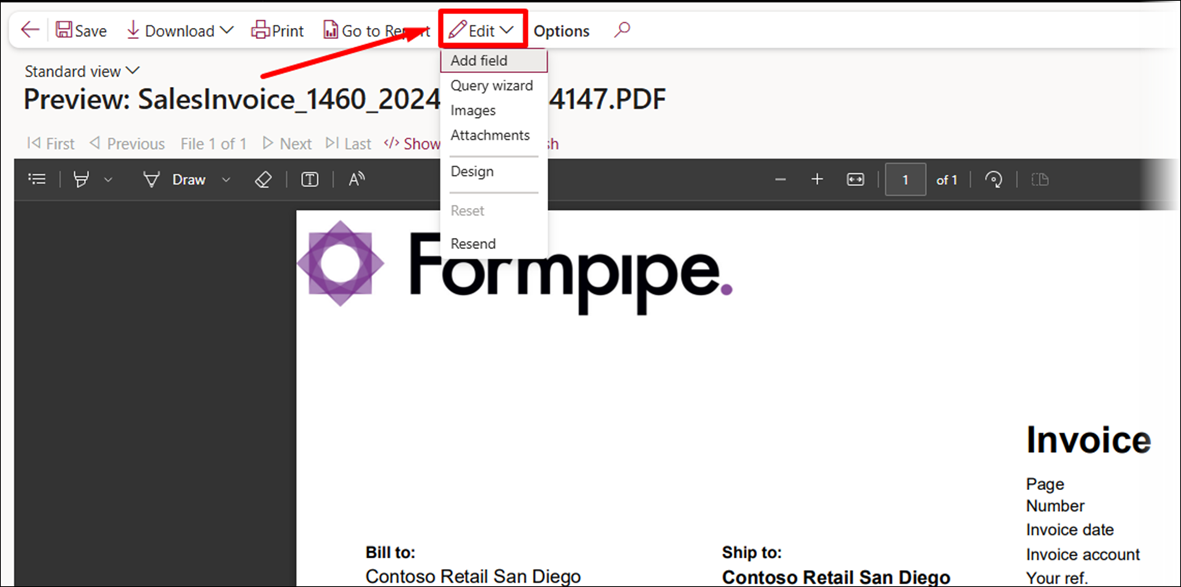
The Disable report preview edit features option will hide the Edit button and the features located within its dropdown menu.
Note
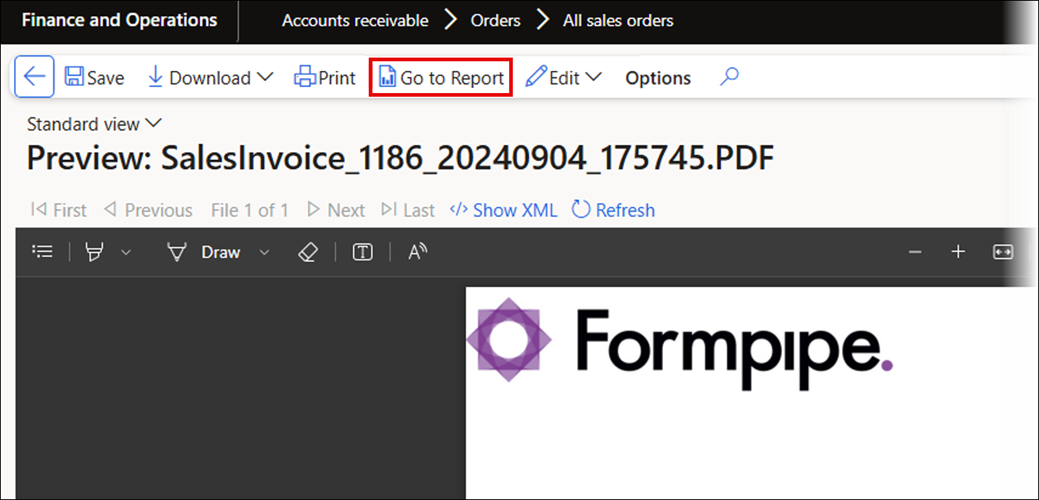
The Go to Report button in the report Preview will open the report within the workspace.
License Terms
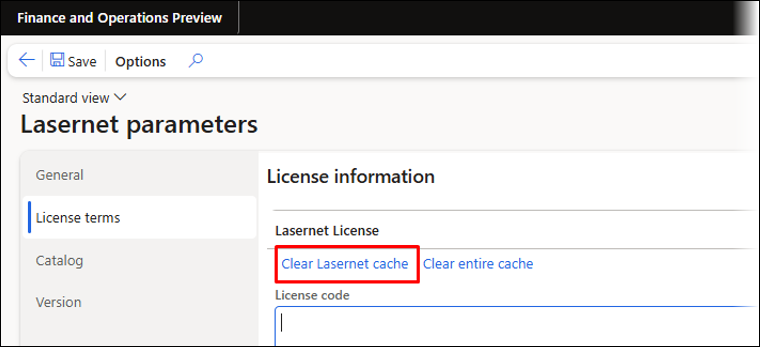
The Clear Lasernet cache function can be found in the License terms tab of the Lasernet parameters page. This function removes stored information about tables and fields within the environment. It can be used whenever new tables or fields are added.
Using Clear Lasernet cache will not interrupt any user sessions.
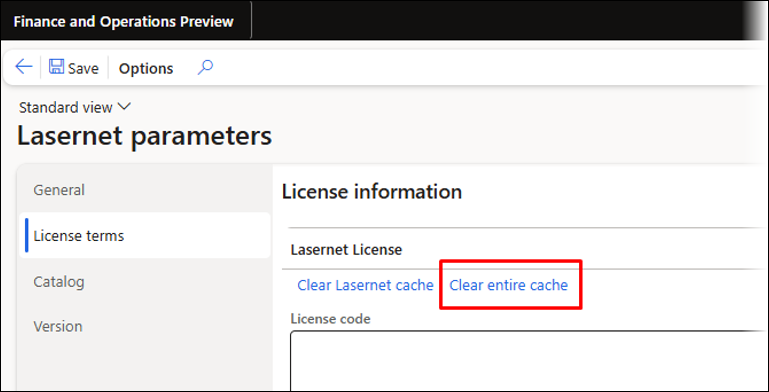
It is also possible to clear all caches (data, AOT) within Dynamics by using the Clear entire cache button. However, this might interrupt other sessions.
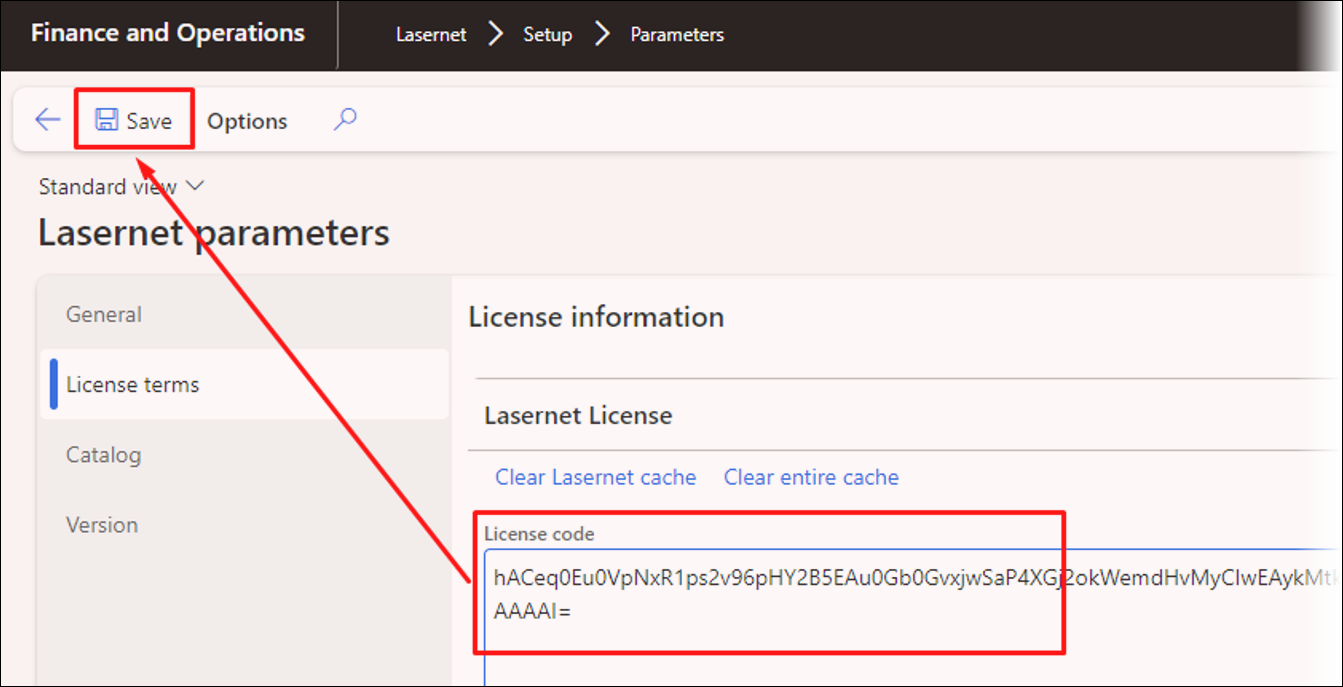
The embedded version ships and installs as the free version. The presence of a License code determines whether you are using a free or professional/enterprise version of the embedded solution.
Click the Save button after either entering a License code, as this will ensure that the Lasernet module is visible within the Modules list.
The Save button will also ensure that the Lasernet module is hidden if no valid License code is entered.
Catalog
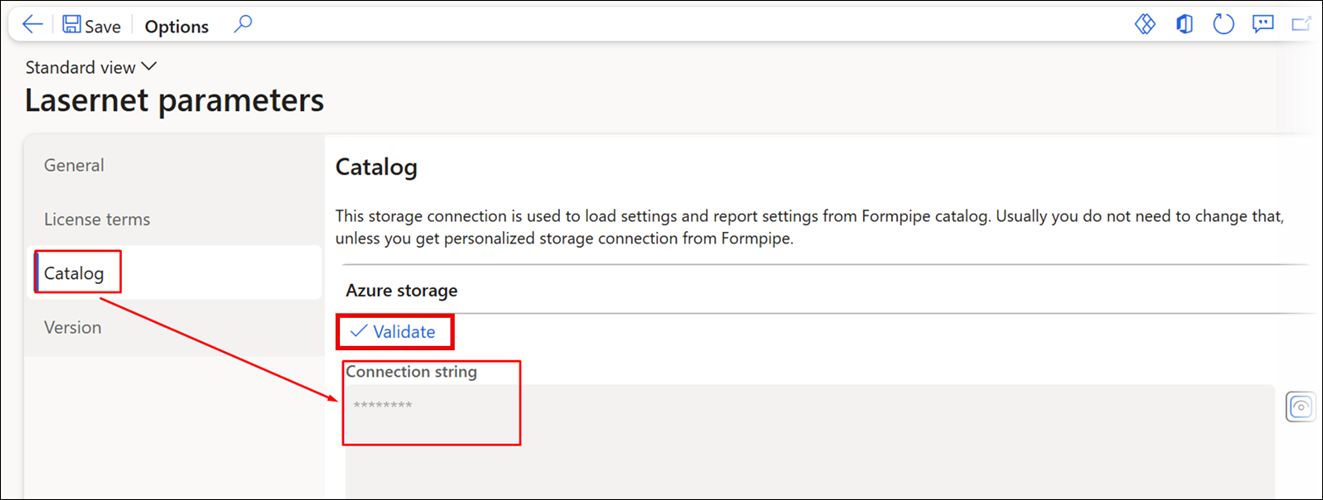
The Catalog tab Connection string includes an optional link for loading basic settings and configuring reports. This is a useful feature for sharing environment settings and report configurations. Formpipe Partners can also use it to distribute their default configuration.
You can validate the connection to the Azure Storage account by clicking the Validate button.
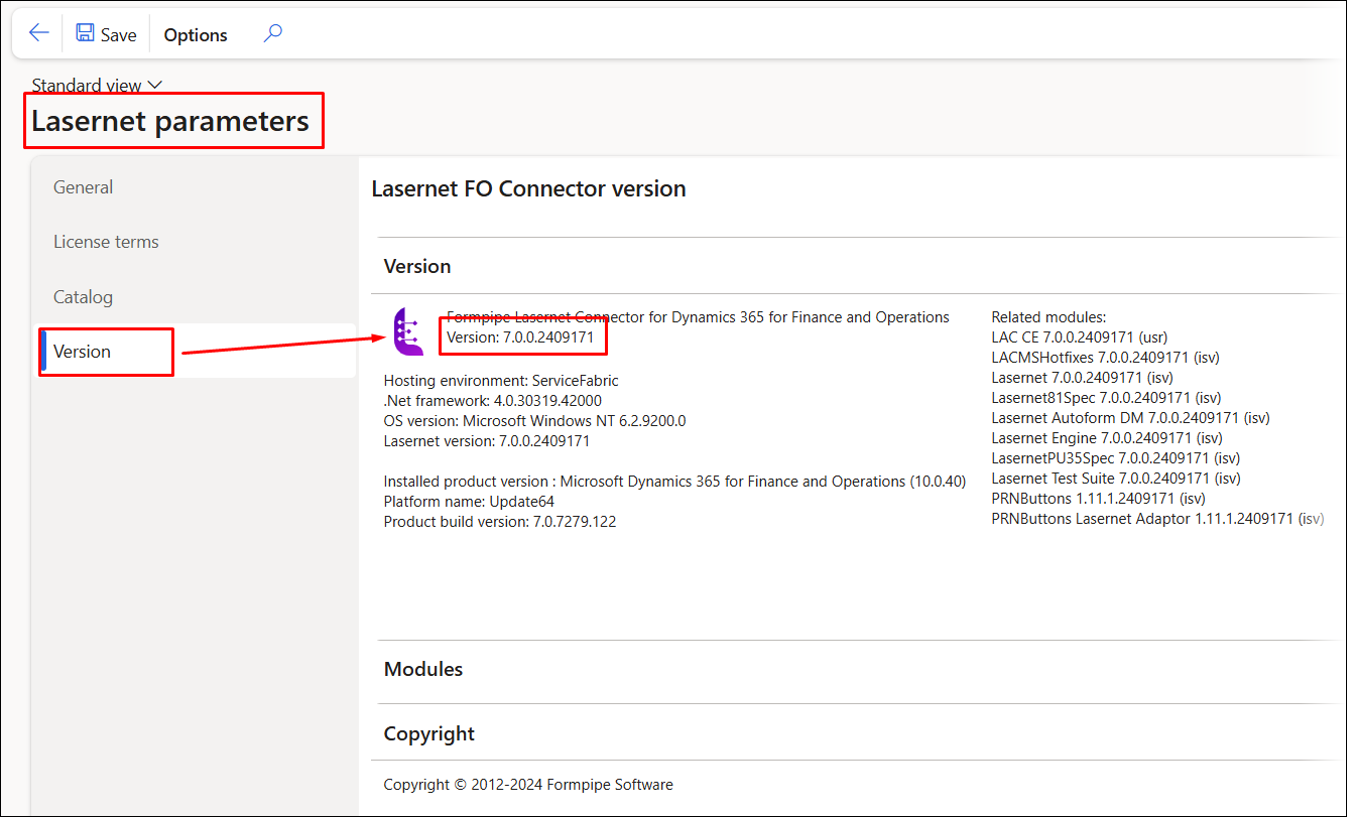
Version
The Version tab includes details regarding the environment and installed software versions.
To enable Lasernet Professional, input a valid License code and click Save. This will refresh the session, incorporating the Lasernet module in the main menu.
