Set Up Tracking for Sent and Bounced Emails in Lasernet FO Connector and Azure
- 03 Mar 2026
- 3 Minutes to read
- Contributors


- Print
- PDF
Set Up Tracking for Sent and Bounced Emails in Lasernet FO Connector and Azure
- Updated on 03 Mar 2026
- 3 Minutes to read
- Contributors
- Print
- PDF
Article summary
Did you find this summary helpful?
Thank you for your feedback
This section of the Email Tracking guide will walk you through the process of configuring Lasernet Tracking for sent and bounced emails in Lasernet FO Connector. This involves setting up parameters in Finance and Operations and creating and configuring an app registration in Microsoft Azure to grant necessary permissions.
Prerequisites
Access to Dynamics 365 Finance and Operations with administrative privileges.
Access to an Azure subscription with permissions to create app registrations.
Part 1 - Navigate to Tracking Parameters in Finance and Operations
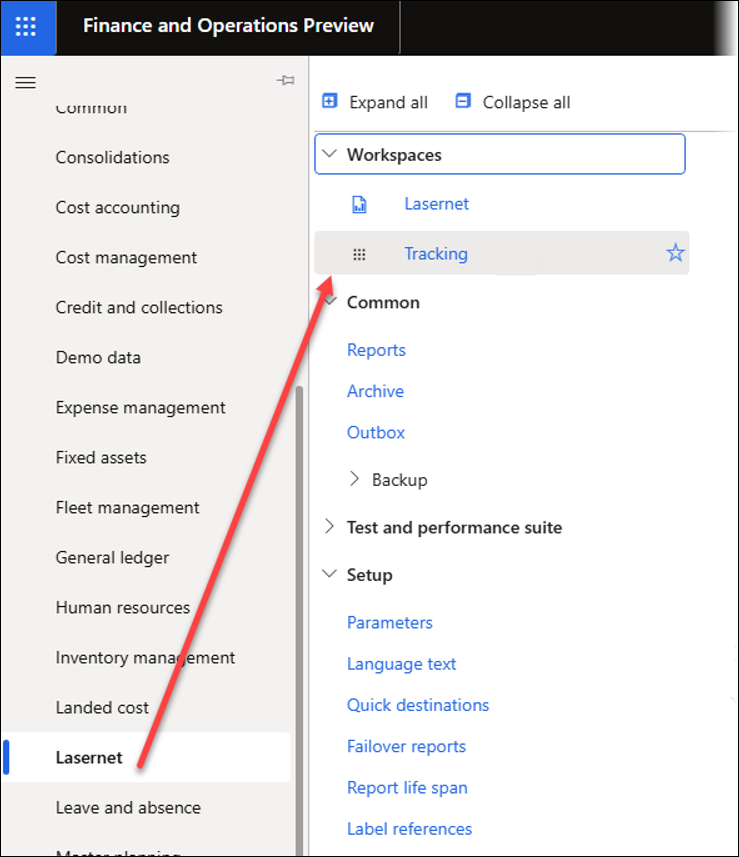
In Dynamics 365 Finance and Operations, navigate to Lasernet > Setup > Tracking > Tracking parameters.

Here, we will configure the Email sent and bounce tracking section.
Part 2 - Initial Configuration in Finance and Operations
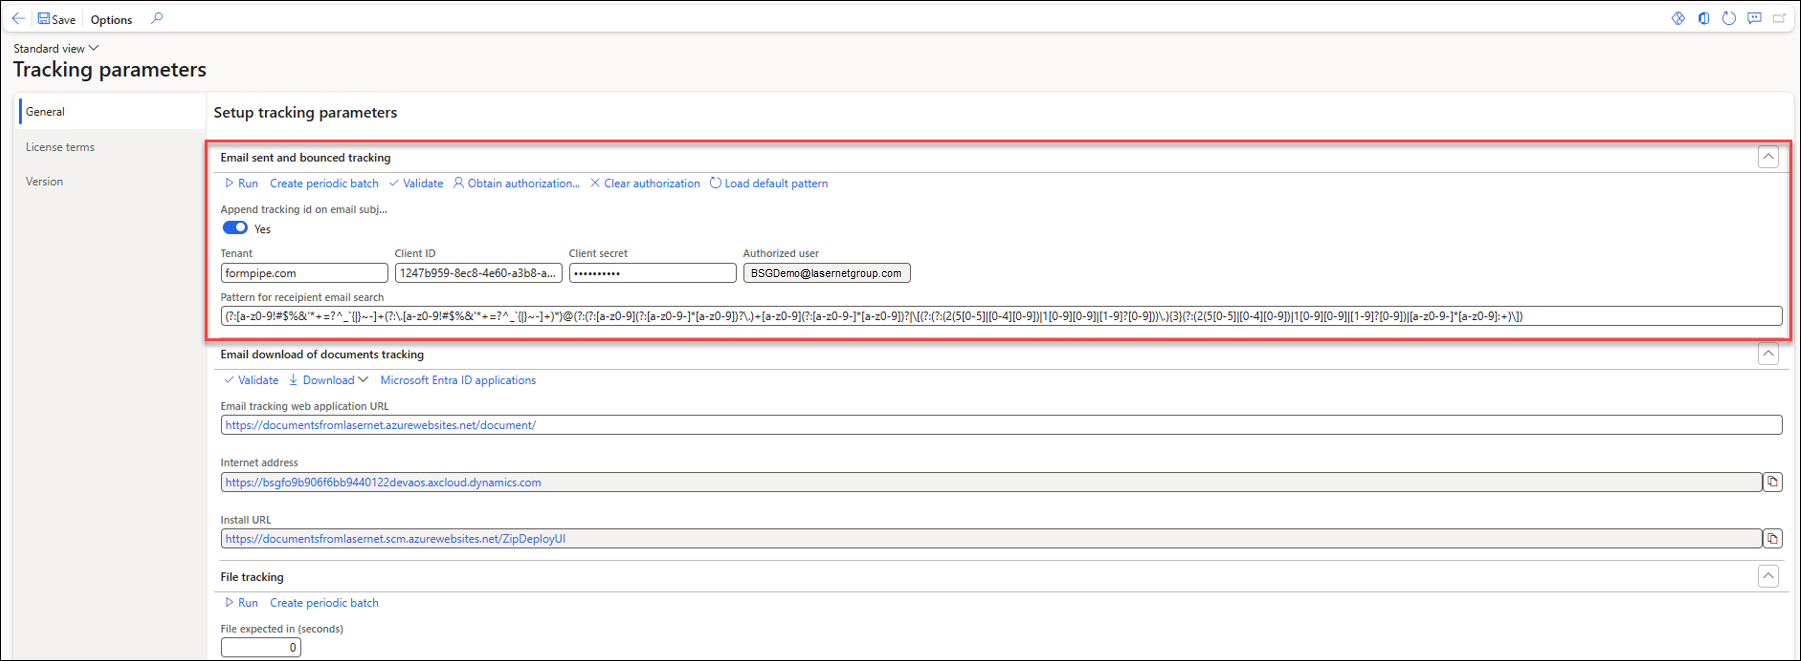
On the Setup tracking parameters form (found in the General FastTab), locate the Email sent and bounce tracking section.
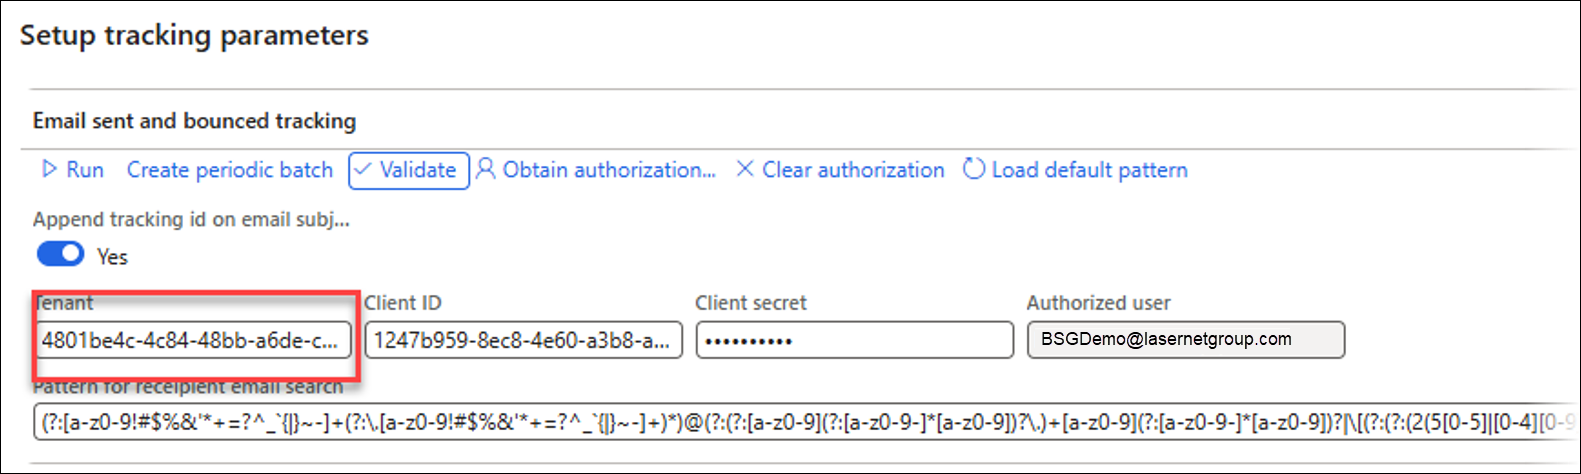
Enter your Azure Tenant ID or Domain ID in the Tenant field.
The Domain ID may look like a URL, such as lasernetgroup.microsoftonline.com.
The Azure Tenant ID is a GUID (Global Unique Identifier), such as 1234be5c-6c78-91bb-a2de-c345db678a91.
Part 3 - Create Azure App Registration in the Azure Portal
Open your web browser and navigate to the Azure portal.
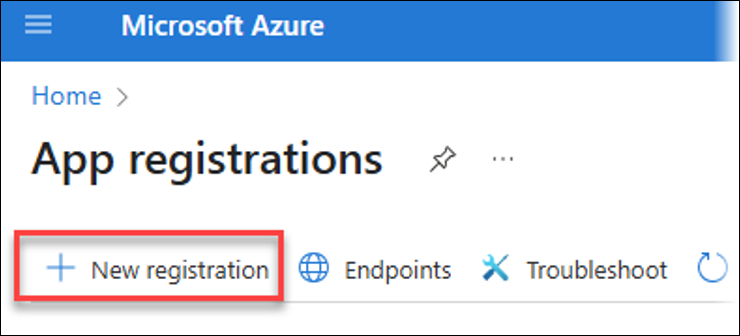
In the Azure portal, search for and navigate to App registrations.

On the App registrations page, click New registration.
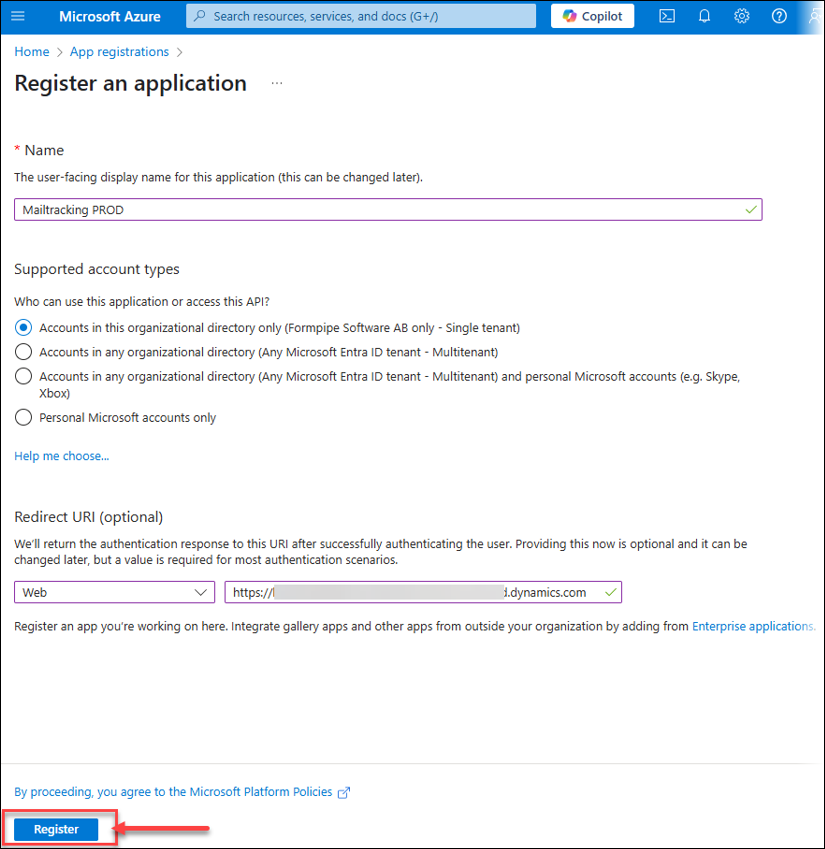
Once the Register an application page opens, follow these instructions:
Name: Enter a descriptive name for your application (for instance, "Mailtracking PROD").
Supported account types: Select the appropriate option. In this example, we are using the default Accounts in this organizational directory only (<Your Directory Name only> - Single tenant).
Redirect URI (optional):
Select the platform: Web.
In FO, navigate to Lasernet > Setup > Tracking > Tracking parameters > General > Email tracking and copy the Internet address URL (for instance,
https://pc5867...cloud.dynamics.com).Paste the URL into the Redirect URI field in Azure.
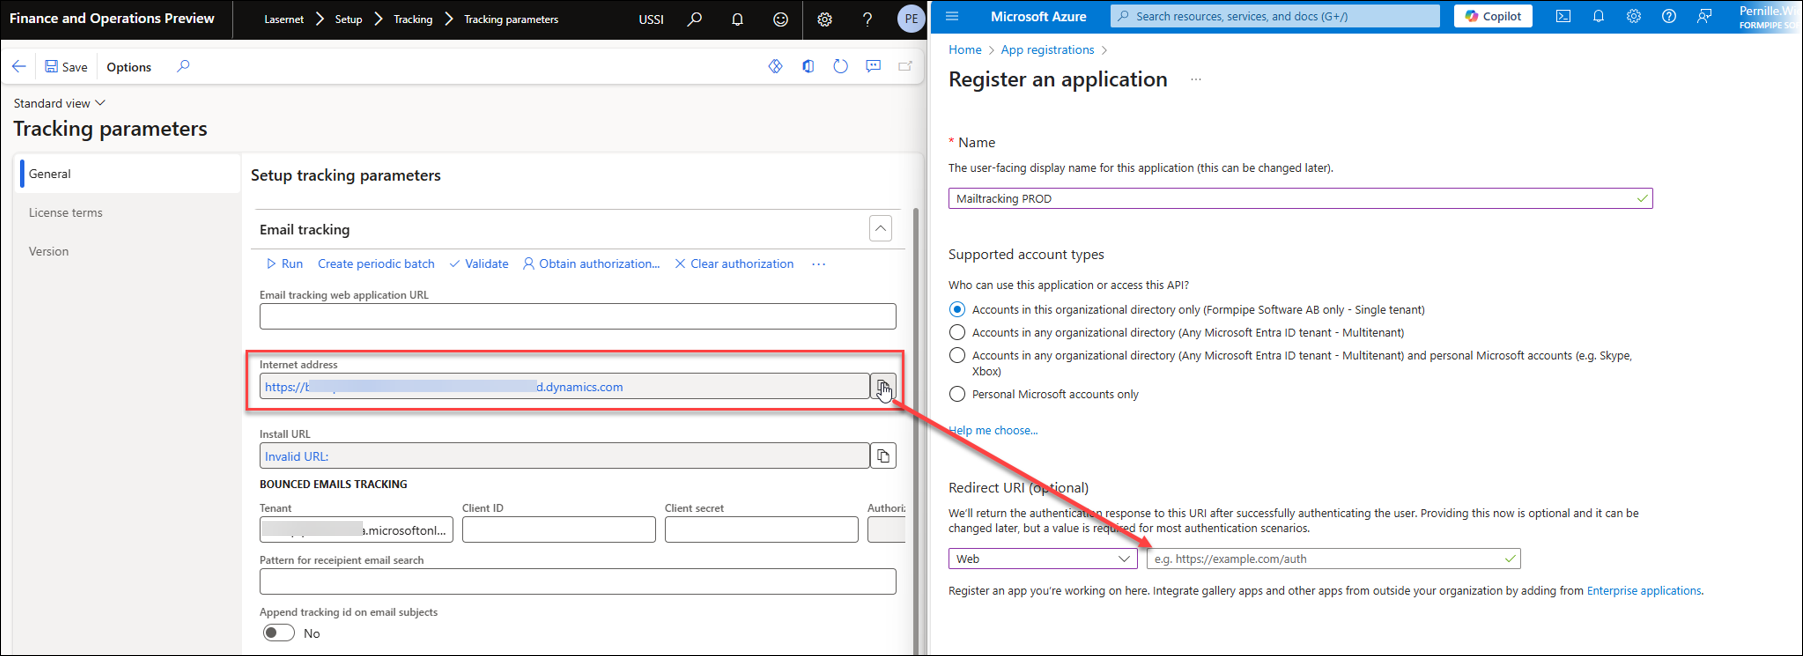
Click Register.
Part 4 - Configure App Registration Details in Finance and Operations
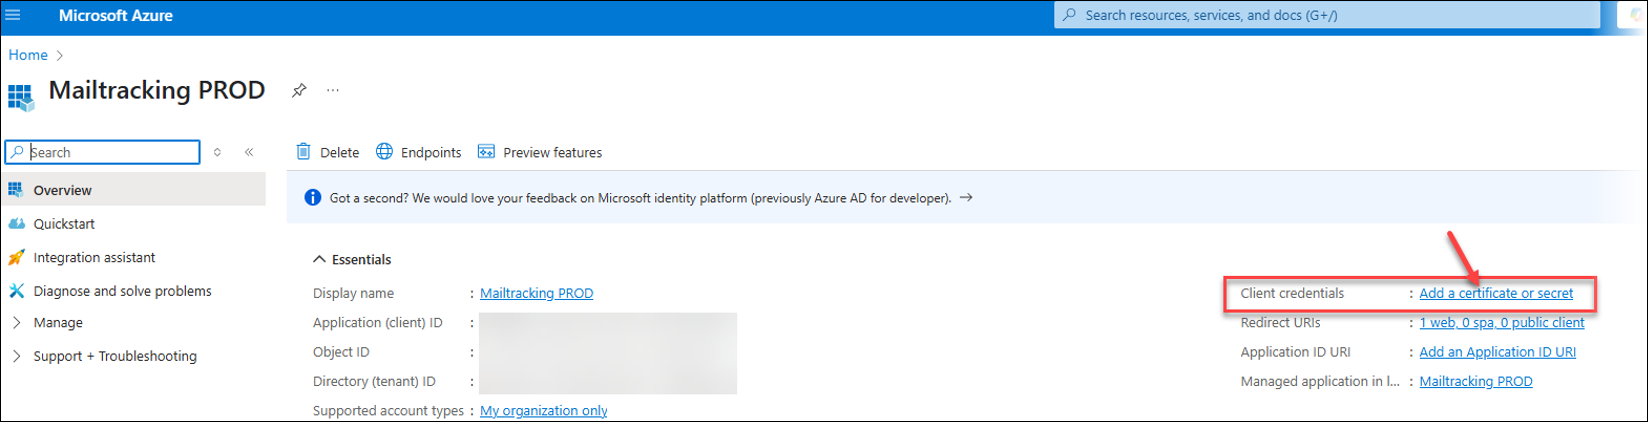
Once the app is registered in Azure, you will be taken to its Overview page.

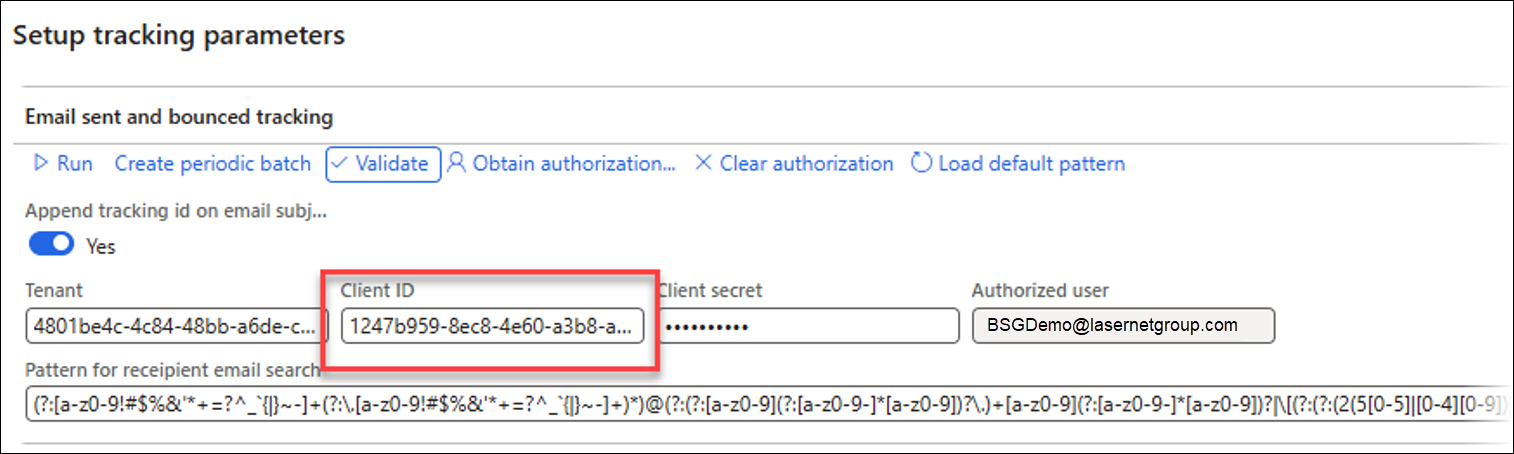
Client ID
On the Azure App Registration's Overview page, find and copy the Application (client) ID.
In Finance and Operations, navigate to Lasernet > Setup > Tracking > Tracking parameters > General > Email tracking and paste the Application (client) ID into the Client ID field within the Email sent and bounced tracking section.
Client Secret
Navigate to Azure, to your app registration's Overview page
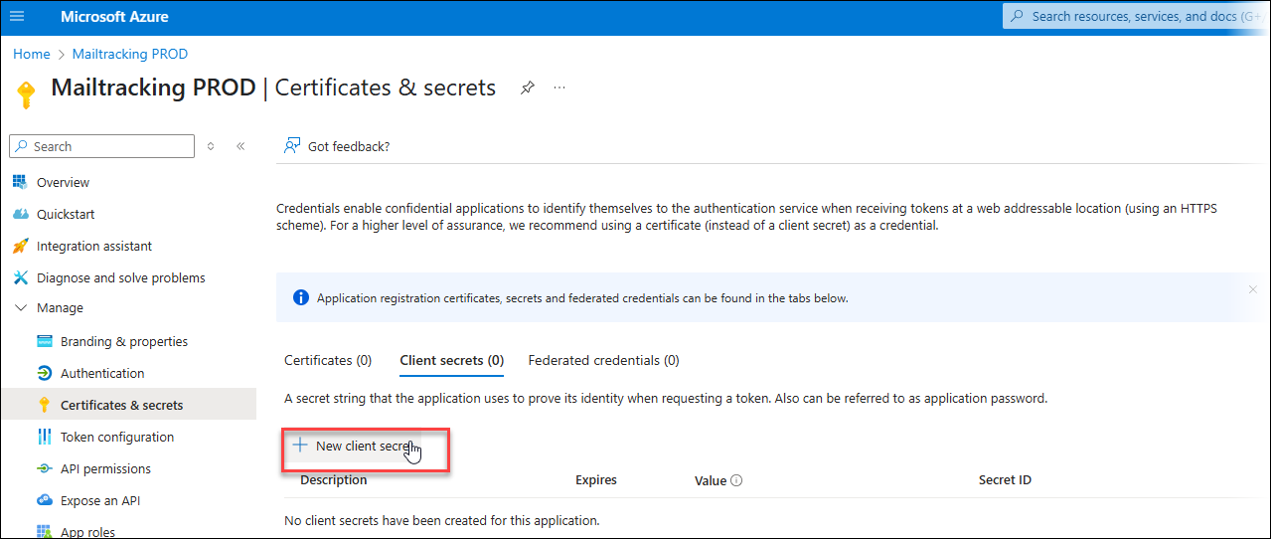
Click Add a certificate or secret.
Click New client secret.
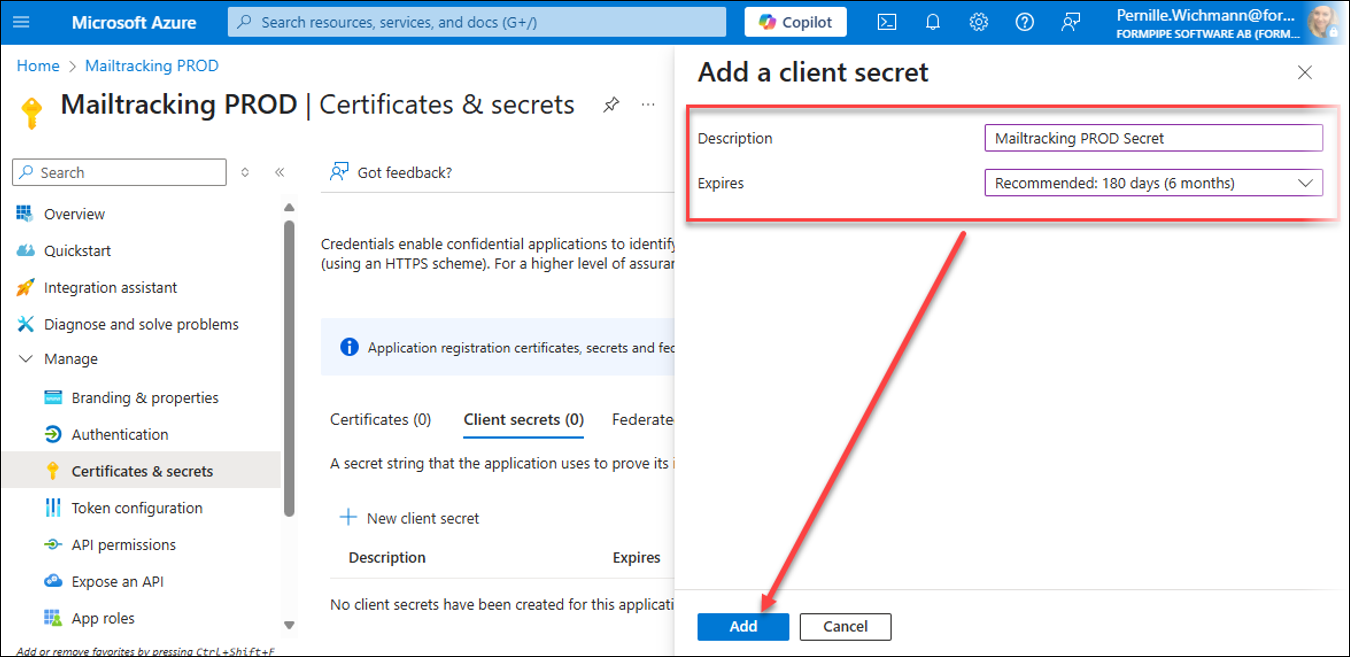
On the Add a client secret dialog, follow these instructions:
Description: Enter a description (for instance, "Mailtracking PROD Secret").
Expires: Select an expiration period for the secret.
Click Add.
Crucial step
A new client secret will be generated. Copy the Value of this secret immediately. This is only displayed once, so it is crucial to copy it immediately.

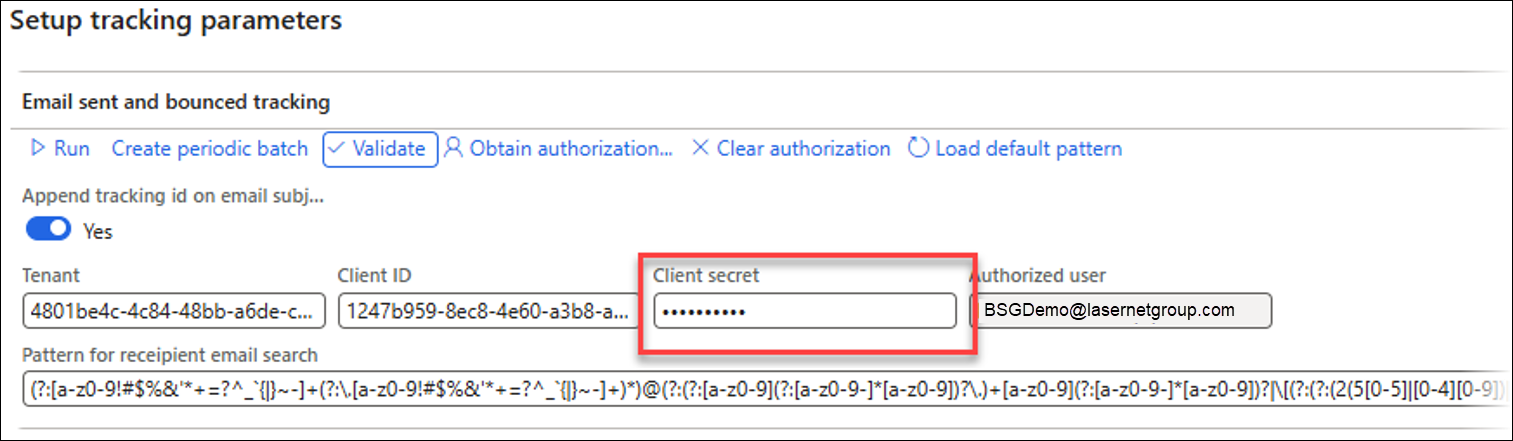
In FO, navigate to Lasernet > Setup > Tracking > Tracking parameters > General > Email tracking.
Paste the copied client secret Value into the Client secret field in the Email sent and bounced tracking section.
Part 5 - Obtain Authorization
In FO, navigate to Lasernet > Setup > Tracking > Tracking parameters > General > Email sent and bounce tracking, and click the Validate button.

An error message will likely appear:
Error
Application has not been authorized. Fill in properties and click Obtain authorization.
This is expected.
Click the Obtain authorization button.
A Microsoft sign-in window will open.
Sign in with an account that has the necessary permissions within your Azure AD tenant.
Enter the password and complete the sign-in process.
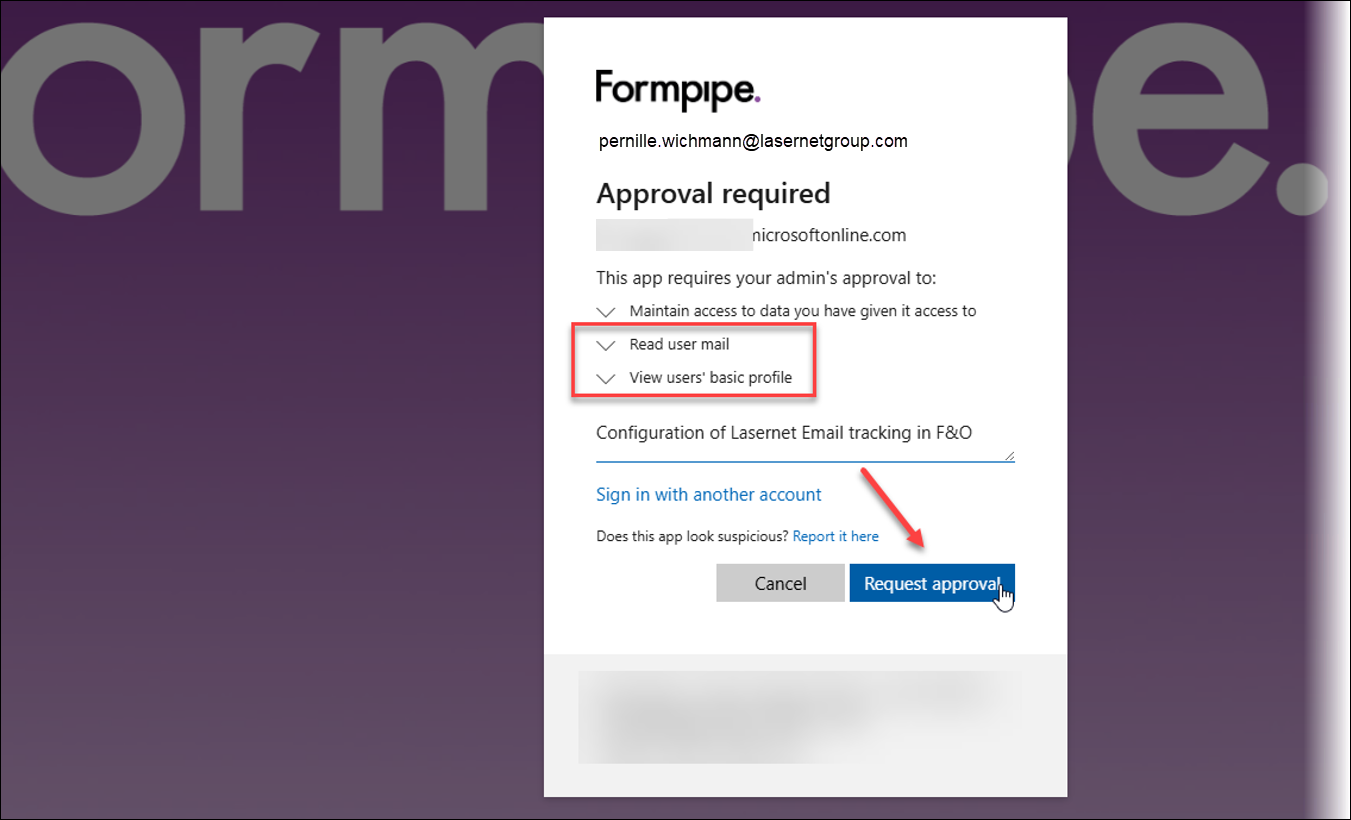
A Permissions requested dialog will open for the app registration you created (in this example, "Mailtracking PROD").
Review the requested permissions.
Click Accept.
If you do not have the necessary permissions within your Azure Tenant, you will have to wait for approval from your IT department.
Part 6 - Final Validation
After successfully granting permissions and being redirected back to FO, the Tracking parameters page will reload.
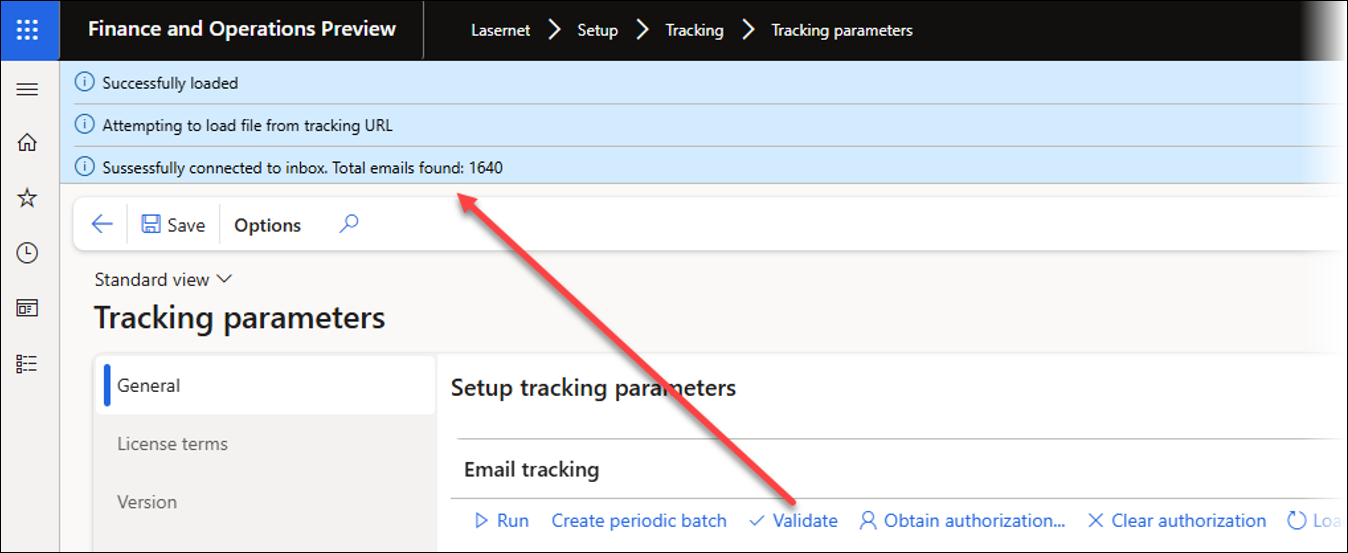
Click the Validate button again.
A success message should now appear at the top:
Success message
Successfully connected to the inbox. Total emails found: <number>
Outcome
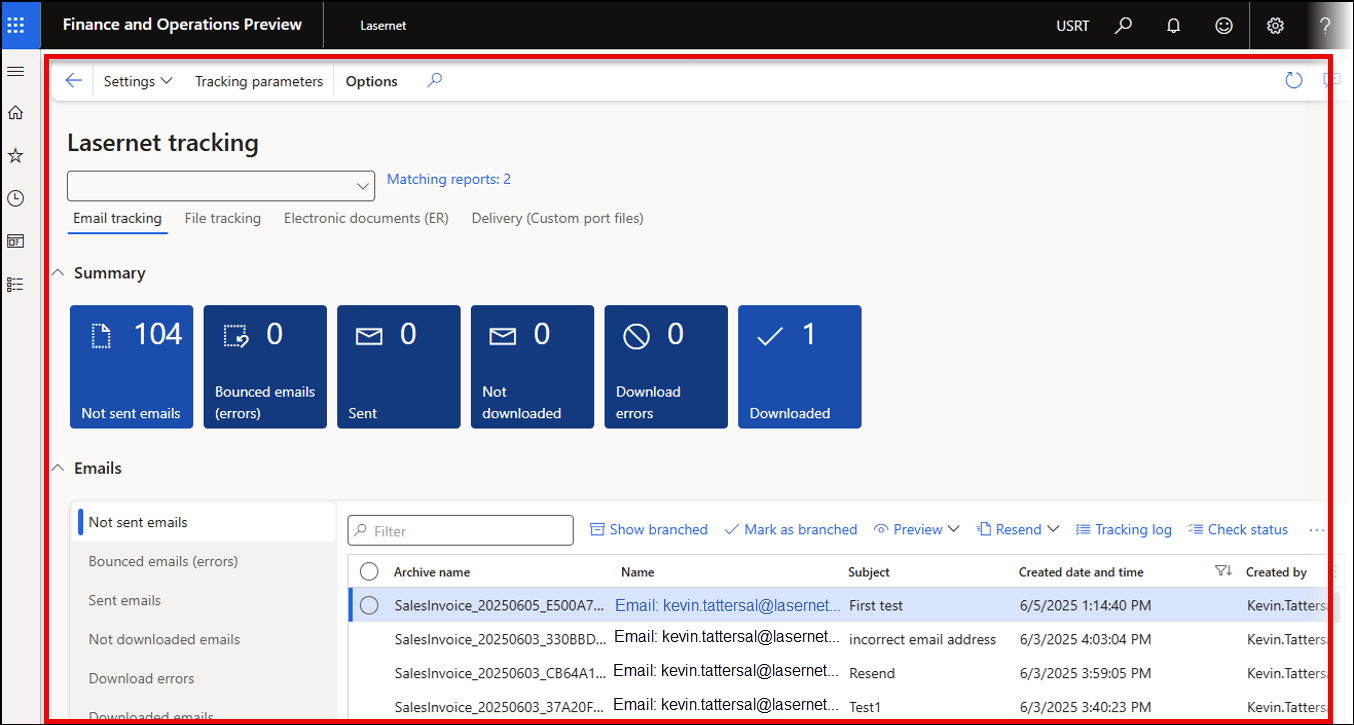
Tracking of bounced and sent emails has been successfully configured. Lasernet will be able to access the specified mailbox to check for bounced emails, and the Summary tiles in the Lasernet tracking workspace (Bounced emails (errors) and Sent tiles) will reflect this data.
To validate this, open FO and navigate to Lasernet > Workspaces > Tracking.