Set Up Data Formats (Regional Profiles)
- 15 Apr 2026
- 4 Minutes to read
- Contributors


- Print
- PDF
Set Up Data Formats (Regional Profiles)
- Updated on 15 Apr 2026
- 4 Minutes to read
- Contributors
- Print
- PDF
Article summary
Did you find this summary helpful?
Thank you for your feedback
Lasernet Core uses regional profiles to interpret incoming number, currency, time, and date data. For example, numerical values in incoming data might be formatted in a way that is specific to a particular country, such as using a comma as a decimal separator: 856,54.
In the Form Options window, you specify which regional profiles the form will use to interpret incoming data. Unless you apply a regional profile directly to a rearrange (through the rearrange’s Input format settings), the regional profile specified in the Form Options window is used.
For an introduction to regional profiles, see Regional Profiles.
Note
To specify which regional profiles Lasernet Core uses to format number, currency, and time and date data in the generated output, use Sheet Options (or apply an output format to a rearrange through its Output format settings).
Note for Lasernet Core 11 and 10 users (not Lasernet Essentials / Professional / Advanced)
Regional profiles are created and managed in Lasernet Developer. The regional profiles that exist within a Lasernet Core configuration are available to every form in that configuration.
For information on how to create regional profiles in Lasernet Developer, see the Lasernet Developer Guide.
Refer to the information for the version of Lasernet that you are using.
Lasernet Core 11 and 10
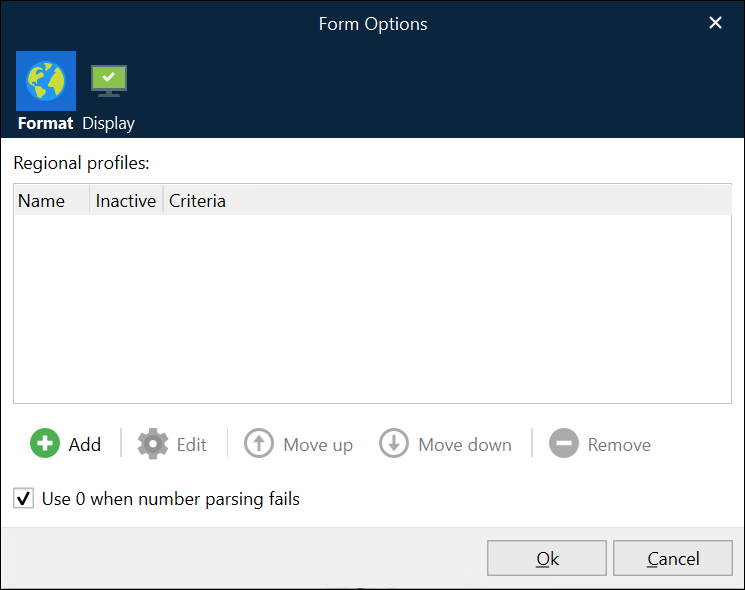
The Format tab of the Form Options window lists the regional profiles that have been applied to the form.
 1.png "Format (Regional Profiles) 1.png")
Add a Regional Profile to the List or Edit an Existing Entry
Click Add to add a regional profile to the list, or click Edit to modify an existing entry in the list.
In the Edit Regional Profile Mapping window, you can select an existing regional profile (from the Regional profile list). To create a new profile, you can click Add (see Create a Regional Profile below); the new regional profile will be added to the profile list in Lasernet Developer.
Add Criteria to a Regional Profile in the List
When you use the Edit Regional Profile Mapping window (to add a regional profile to the list or edit an existing assignment), you can use the Criteria tab to specify the scenario in which the form will use that regional profile. Doing this enables you to ensure that particular profiles are used only for specific jobs.
For example, you can add criteria that determine the locale of the incoming data (by reading a relevant JobInfo or reading a relevant value from the input data), compares that to a specific value (such as United Kingdom), and then (if those values match) selects a UK-appropriate regional profile.
Profile Order
You can click Move up and Move down to move the profile up or down the profile precedence list.
As part of adding a profile to this list, you can add criteria to each profile in the list, as described above. The first listed profile whose criteria are met will be used. However, if multiple regional profiles are assigned to the form and specific profile selection behavior is required, you might need to move profiles to specific list positions.
For example, a “fallback” regional profile that has no criteria (and will be used if none of the assigned regional profiles that have criteria are selected) would have to be last in the list.
Create a Regional Profile
As described above, as part of adding a regional profile to the list, you can create a new one. Or, in Lasernet Developer, you can navigate to the Profiles > Regional Profiles area, right-click in the main area, and then click Add. For more details, see Regional Profiles in the Lasernet Developer guide.
When you create a regional profile, you specify the format of numeric, currency, time, and date data.
 4.png "Format (Regional Profiles) 4.png")
Remove a Regional Profile from the List
To remove a regional profile from the list, select it and then click Remove.
This action does not delete the regional profile from the configuration. It only removes it from the list of regional profiles that are applied to this form.
Profile Precedence Across Rearranges, Forms, and the Lasernet Core Configuration
Regional profiles can be directly assigned to rearranges or assigned to forms. Also, the Lasernet Core configuration can specify a default regional profile. In general, a rearrange’s regional profile takes precedence over the form’s profile, and if neither of these locations selects a regional profile to use, the configuration’s default profile is used.
For more detailed information about profile precedence, see Regional Profiles.
Lasernet Essentials / Professional / Advanced
If no regional profile is added on the Input format tab of a rearrange, a regional profile that is listed in the Form Options > Format window is used.
If the Form Options > Format > Regional Profiles table is empty, add a new regional profile to the list (if necessary, in order to correctly interpret incoming data).
Add a Regional Profile to the List or Edit an Existing Entry
Click Add to add a regional profile to the list, or click Edit to modify an existing entry.
In the Edit Regional Profile Mapping window, click Add to create a new regional profile.
You can define the general form properties for numbers, currency, time, and date.
.png)
Add Criteria to a Regional Profile in the List
When you use the Edit Regional Profile Mapping window, you can use the Criteria tab to specify the scenario in which the form will use that regional profile. Doing this enables you to ensure that particular profiles are used only for specific jobs. The first listed profile whose criteria are met will be used.
For example, you can add criteria that determine the locale of the incoming data (by reading a relevant JobInfo or reading a relevant value from the input data), compares that to a specific value (such as United Kingdom), and then (if those values match) selects a UK-appropriate regional profile.