Report Identification - Example
- 08 May 2025
- 1 Minute to read
- Contributors

- Print
- PDF
Report Identification - Example
- Updated on 08 May 2025
- 1 Minute to read
- Contributors
- Print
- PDF
Article summary
Did you find this summary helpful?
Thank you for your feedback
When printing reports, the Lasernet Print Buttons are not displayed on the user interface of Dynamics 365 Finance and Operations, even though Lasernet has been set up as the default option for Print management. For example, the issue presents itself when printing a Payment advice from the Payment journal in Accounts payable.
Solution
Report Identification can be set up for a report to make the Lasernet destinations available on the report's print dialog.
In order to set up Report identification, follow these steps:
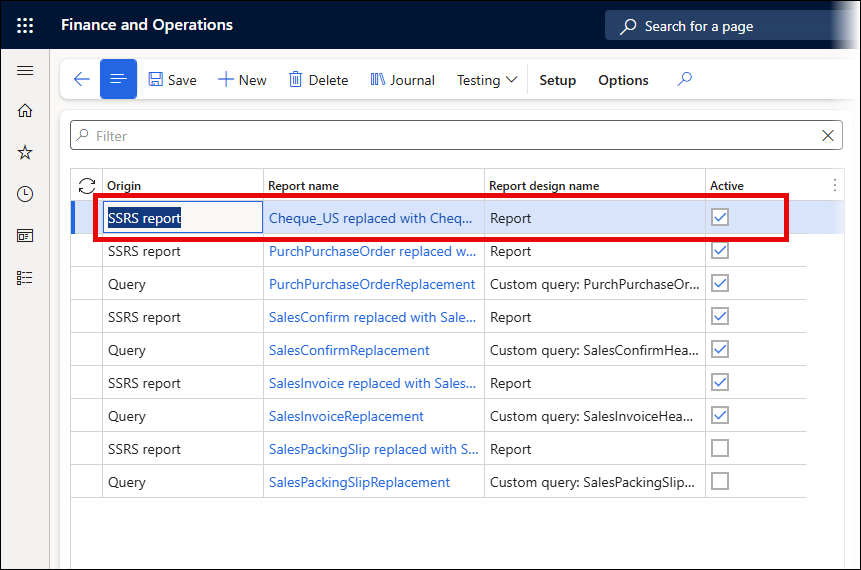
Navigate to Lasernet > Common > Reports.
Locate the report name, for example, Cheque_US replaced with Cheque_USReplacement SSRS report.
Navigate to Lasernet > Setup > Parameters.
Open the Performance tab, then expand the Report identification section.
Enable the Activate report identification mode option by toggling it to Yes.
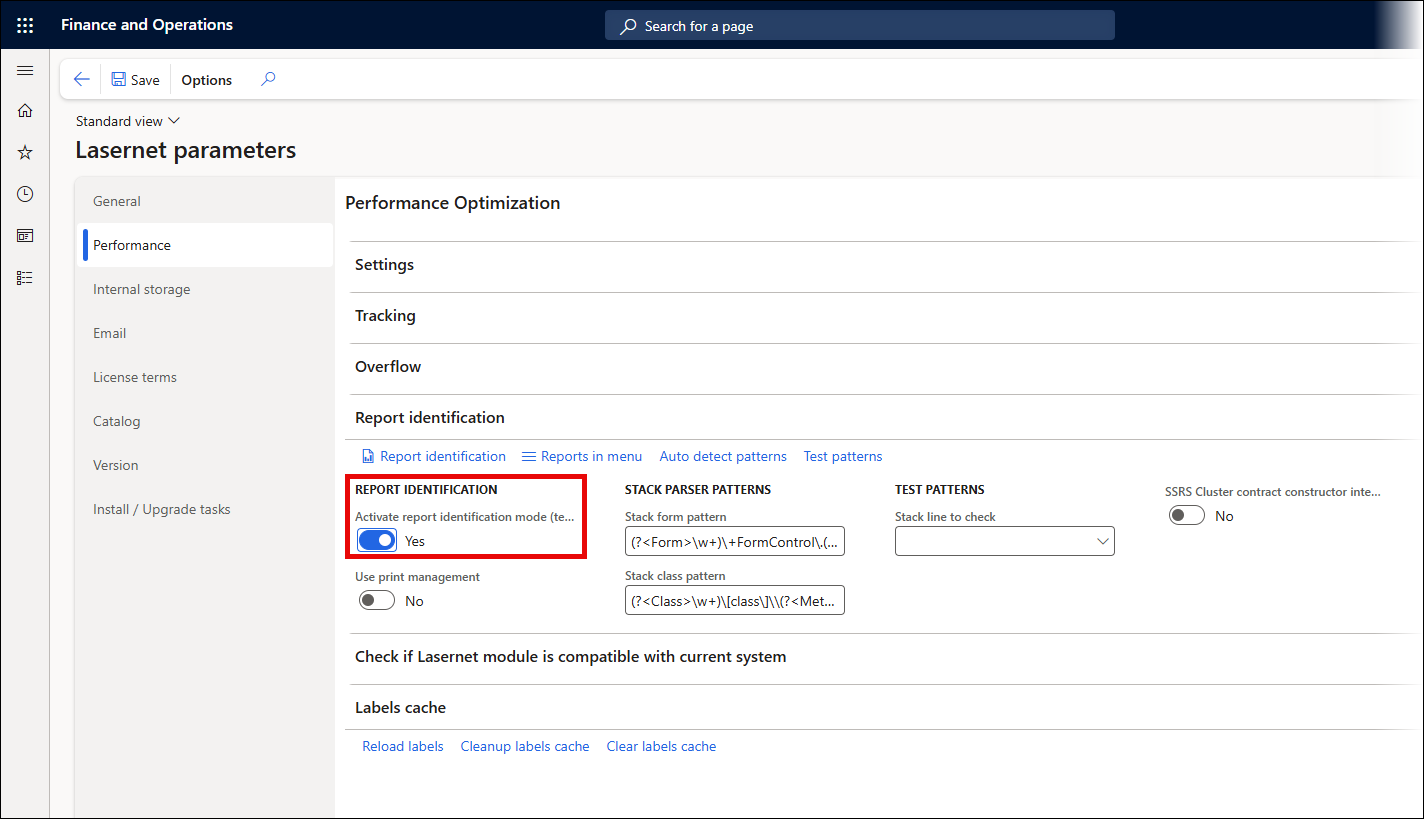
This will ensure the Report identification button is available on the report's print dialog.
Note:
You may also create the report class by clicking the Report identification button.
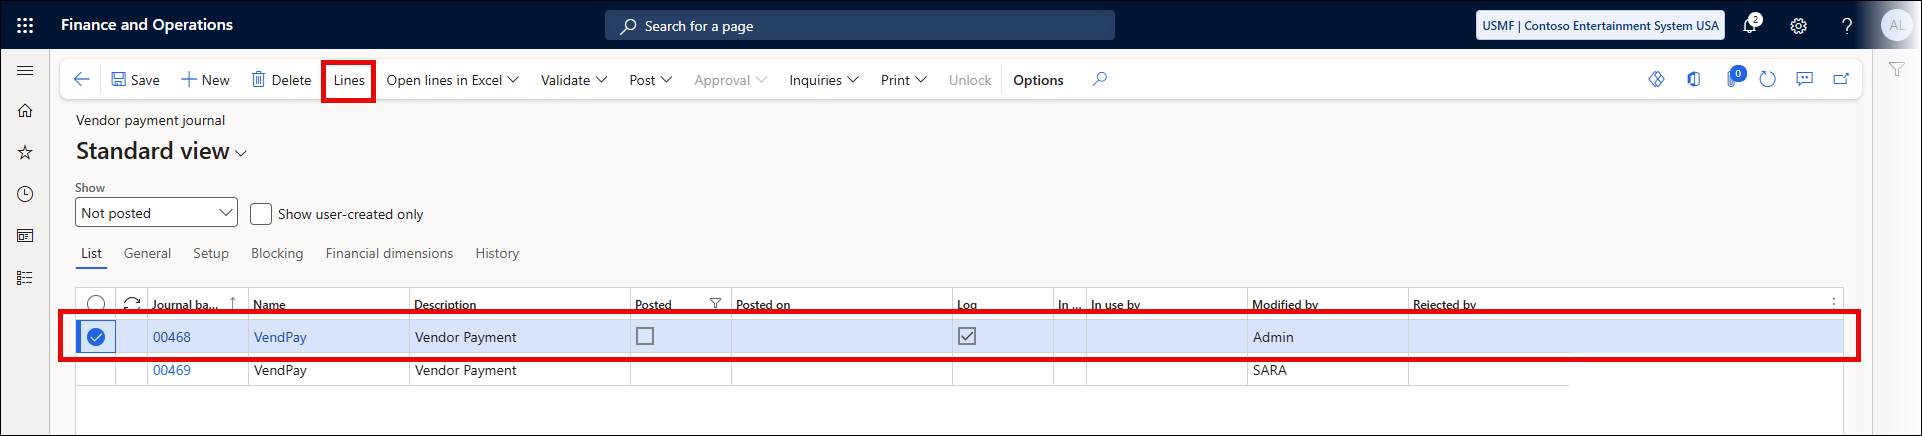
Navigate to the report with the missing Lasernet destinations and open the print dialog for it. As an example, for the Cheque_US replaced with Cheque_USReplacement SSRS report, navigate to Accounts payable > Payments > Vendor payment journal.
Select a journal and click the Lines button from the menu bar to open the journal.
Click Print on the Action pane and choose Payment advice from the dropdown menu.
.png)
Click Print destination in the print dialog.
.png)
Click the Report identification button.
.png)
Navigate back to Lasernet parameters > Performance and click Report identification.
Click New, provide the Report name, and Save.
.png)
Open the dropdown list for the Object name and select from the current call stack, FormFunctionButtonControl.
Open the dropdown list for the Caller and select CustVendPaymPrinterSettings.
Click Save.
Exit and retry the print.
.png)
The Lasernet Print Buttons are now an available option.
Note:
This default report is "hard-coded" to Screen, but you may change it via Print management, if necessary.