Rearrange Properties (Overflow)
- 06 Mar 2026
- 2 Minutes to read
- Contributors

- Print
- PDF
Rearrange Properties (Overflow)
- Updated on 06 Mar 2026
- 2 Minutes to read
- Contributors
- Print
- PDF
Article summary
Did you find this summary helpful?
Thank you for your feedback
Applies to: Lasernet 9
We are now looking at the settings with which we need to work to handle letters not fitting a rearrange box in the horizontal direction. When a word is too long, this work process takes place in the Auto Y and Manual modes.
Force Line Break cuts a word as late as possible and then inserts a new line for the rest of the word.
Truncate cuts a word as late as possible and hides the rest of the word.
Overflow (default) allows a word to overflow the content box.
In all instances besides the scenario where we handle overflowing words, the word is first placed in a new line to give it as much space as possible.
Note
Vertical overflow is handled by Auto XY/Auto Y (allowing any height) or Auto X/Manual (restricting height).
Note
This article describes a software version that is no longer supported. Although the software will no longer receive updates or technical support, existing documentation, such as this article, will be retained for reference purposes but will no longer be updated. If you have any questions, contact Lasernet Support.
Exercise
First, download and import the attached configuration called 04. Rearrange Properties (Overflow) in Lasernet Developer 9. Afterward, navigate to the Forms section and then open the Sample form.
By default, the Overflow property is set to Overflow, allowing a word to overflow the content box.
Add a copy of the Rearrange to the clipboard. To this end, right-click the Rearrange, and then select Copy in the context menu.
Paste a copy of the Rearrange from the clipboard. To this end, right-click anywhere in the output view, and then select Paste in the context menu. As a result, the Rearrange is inserted at the selected point.
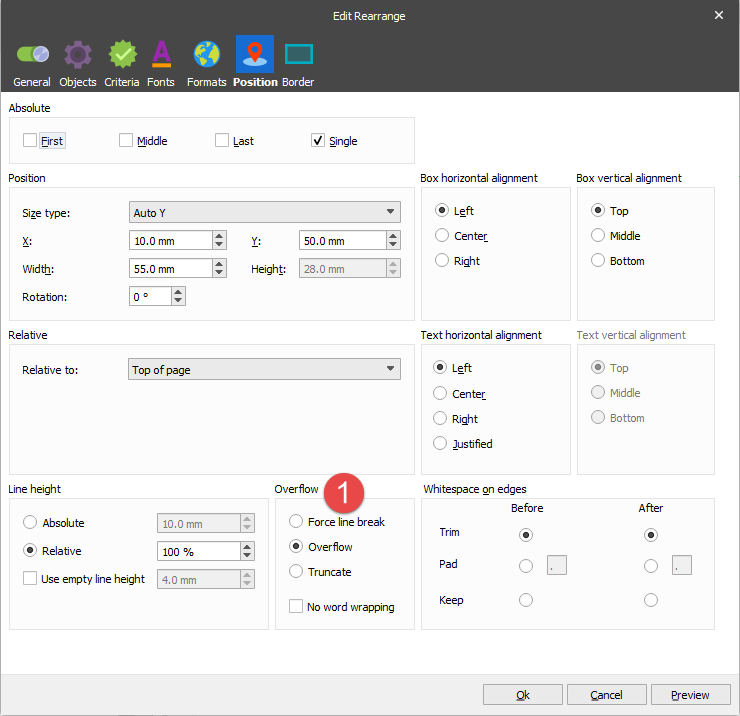
Once you are done, edit the properties of the new Rearrange object by setting the X position to 80 mm and the Y position to 50 mm.
Edit properties of the recently added Rearrange.
Select the No word wrapping check box to activate the setting, and then click Ok to apply it.
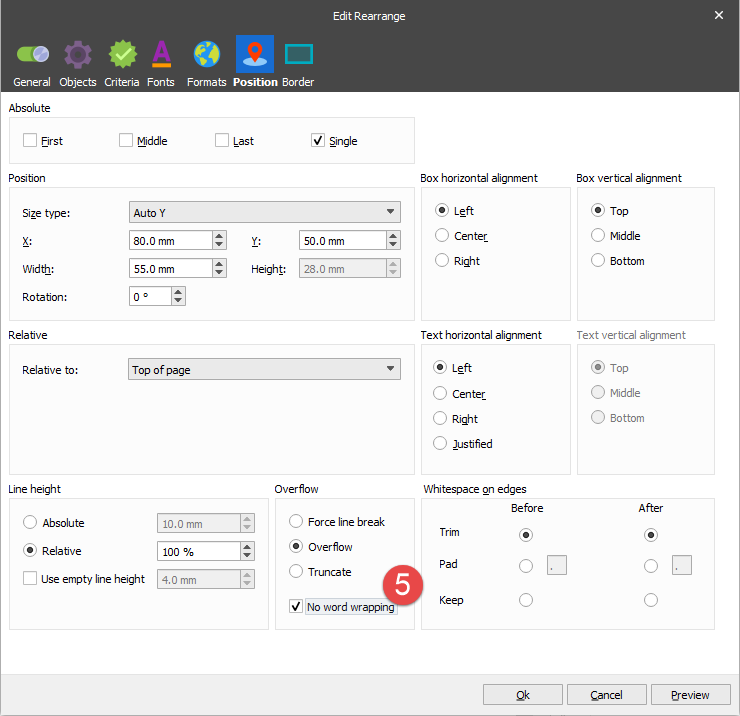
When the No word wrapping check box is selected, a word at the end of any line is allowed to overflow the content box.
Create 4 additional Rearranges by using Copy/Paste. Set new values for the X/Y position and the Overflow setting.
Set the X position to 10 mm and Y to 85 mm. For Overflow, select the Force line break radio button and clear the No word wrapping check box.

The Force line break setting allows wrapping the last word to the next line.
Set the X position to 80 mm and Y to 85 mm. For Overflow, select the Force line break radio button as well as the No word wrapping check box.

When the No word wrapping check box is selected, the Force Line Break setting cuts the input line at the end of the Rearrange. It allows inserting as many new lines as required to fit the rest of the input line inside the box.
Set the X position to 10 mm and Y to 125 mm. For Overflow, select the Truncate radio button and clear the No word wrapping check box.

Truncate cuts the word as late as possible and hides the last part.
Set the X position to 80 mm and Y to 125 mm. For Overflow, select the Truncate radio button as well as the No word wrapping check box.

When the No word wrapping check box is selected, the Truncate setting cuts the input line at the edge of the Rearrange box and hides the rest of the line.