Rearrange Properties (Background and Border)
- 06 Mar 2026
- 2 Minutes to read
- Contributors


- Print
- PDF
Rearrange Properties (Background and Border)
- Updated on 06 Mar 2026
- 2 Minutes to read
- Contributors
- Print
- PDF
Article summary
Did you find this summary helpful?
Thank you for your feedback
Applies to: Lasernet 9
You can add an optional background color or surrounding rectangle to your text. In addition, you have the possibility to specify a margin (in millimeters) from the text to the rectangle edge.
While selecting, positioning, and resizing the Rearrange, you use the normal (inner) box instead of the surrounding (outer) margin.
When multiple Rearranges with defined background colors overlap, the order in which they are layered is important. The last Rearrange you create is located over the previous one, hiding it. You can change the order in which the Rearranges are placed by right-clicking any Rearrange and selecting the Order command on the context menu.
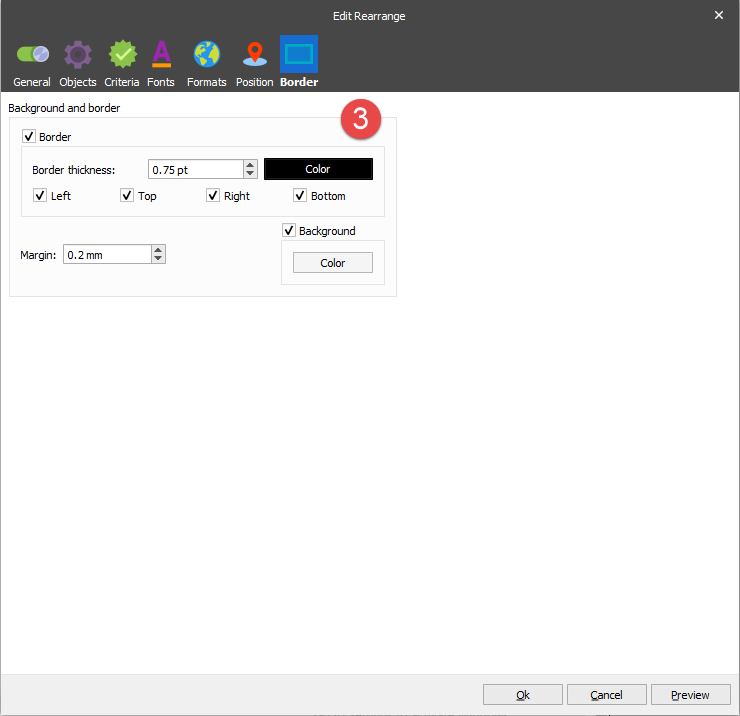
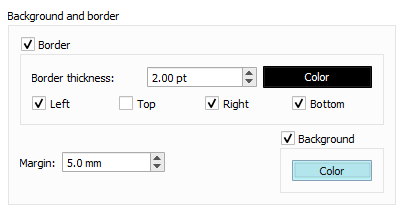
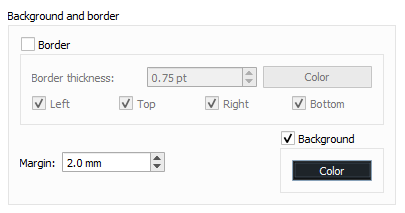
In addition, you can add a border to the selected Rearrange. For this purpose, select the Border check box to activate the other controls. You can now set border thickness and color and show borders (Left, Top, Right, Bottom) by selecting the required check box.
Note
This article describes a software version that is no longer supported. Although the software will no longer receive updates or technical support, existing documentation, such as this article, will be retained for reference purposes but will no longer be updated. If you have any questions, contact Lasernet Support.
Exercise
Download and import the attached configuration, 09. Rearrange Properties (Background and Border) in Lasernet Developer 9. Afterward, navigate to the Forms section and open the Sample form.
Add a new Rearrange similar to the one illustrated in the following image:
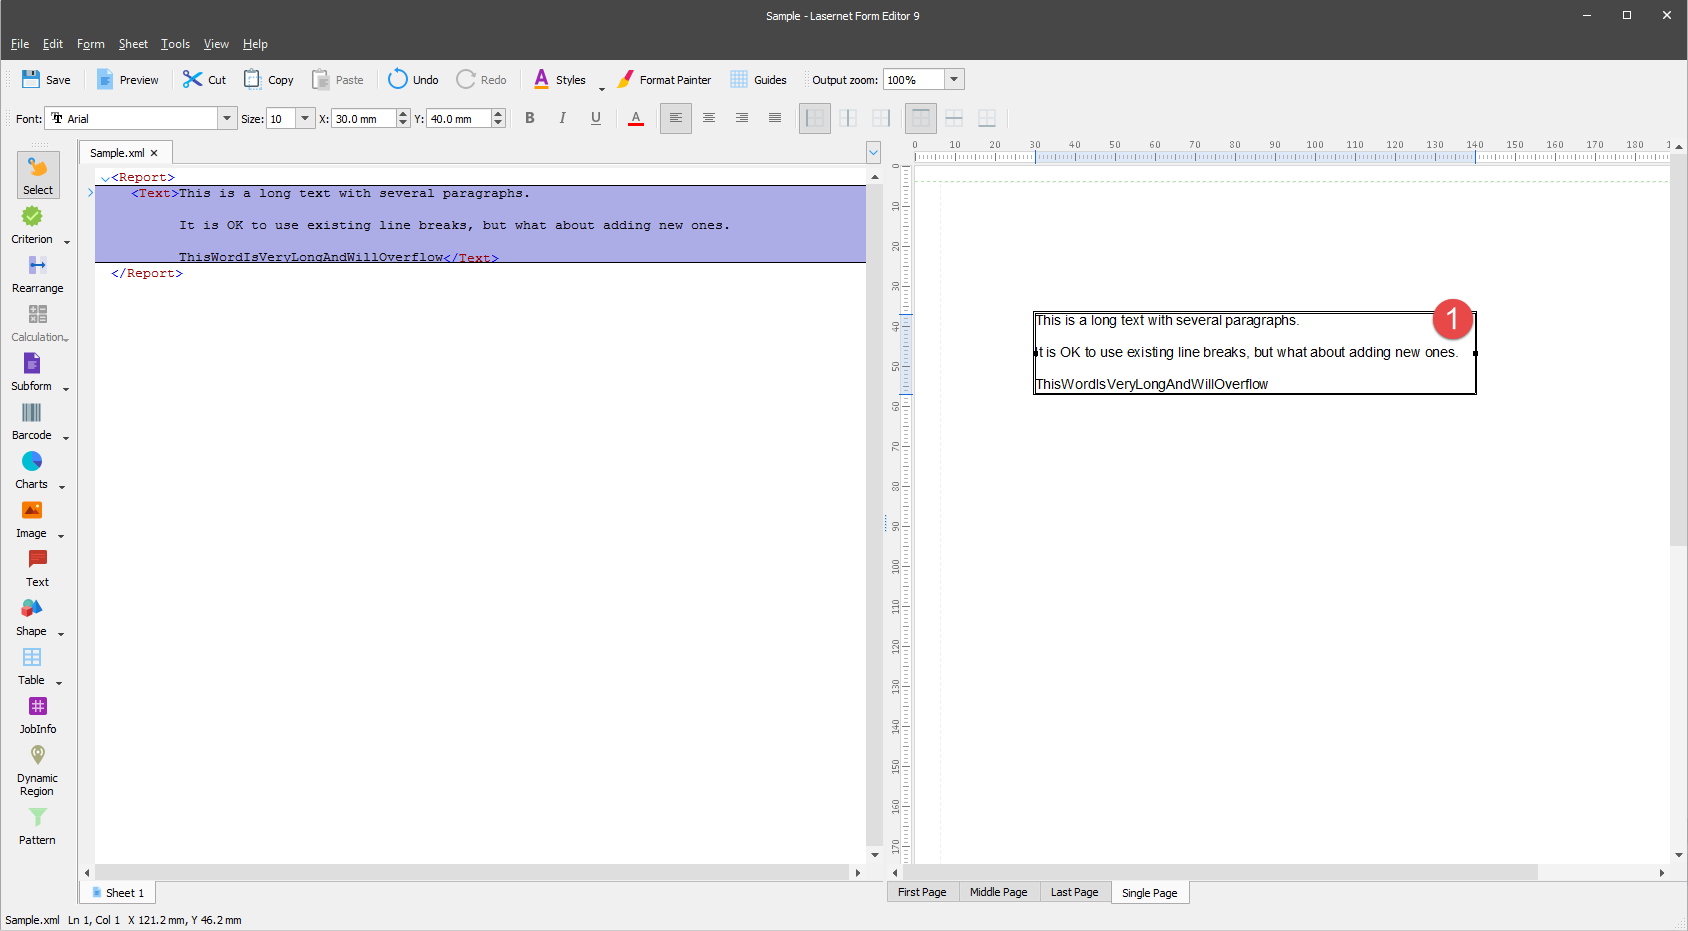
Set the X position to 30 mm, Y to 40 mm, and Width to 110 mm.
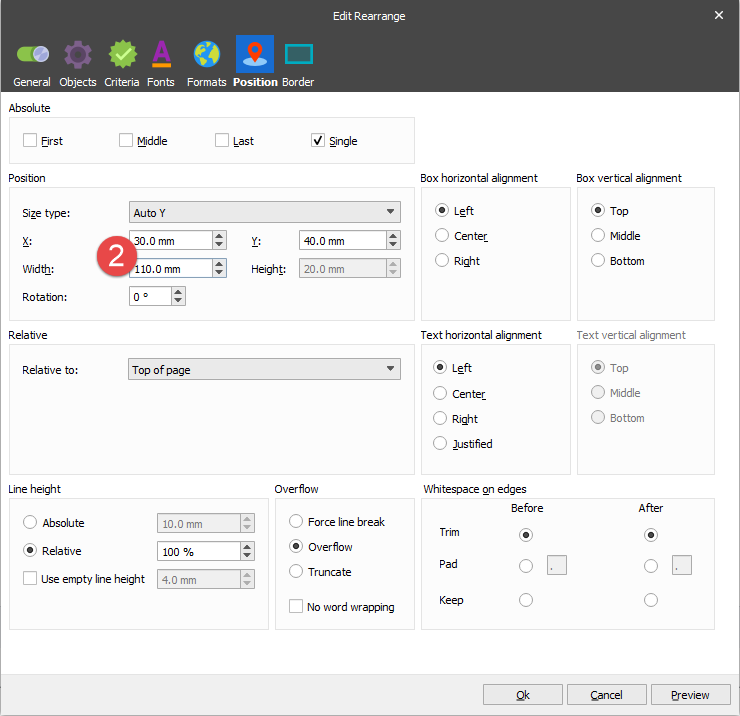
Activate the Background and Border settings by selecting the corresponding checkboxes.
Copy the rearrange and paste three additional instances of it.

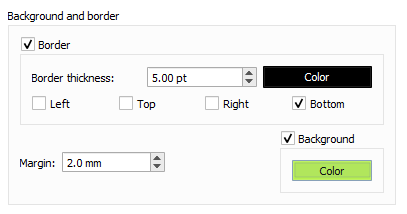
Set Border thickness to 5 pt and select the Bottom check box. Afterward, select the Background checkbox, set Margin to 2 mm and select green as a background color.
Set Border thickness to 2 pt and select the Left, Right, and Bottom checkboxes. Afterward, select the Background check box, set Margin to 5 mm and select blue as a background color.
Clear the Border checkbox. Afterward, select the Background checkbox, set Margin to 2 mm, and select black as a background color.
Once the Select tool is active, click the Rearrange in the black box (the last copy of the Rearrange, located at the bottom of the page), which is now hidden because its text is also black. On the Property bar, click the Pick Color button and set Font color for the Rearrange copy to white.

Now you can see the Background and Border settings are applied to the added Rearrange and its copies:
