Patterns (Multiple Pages)
- 06 Mar 2026
- 4 Minutes to read
- Contributors


- Print
- PDF
Patterns (Multiple Pages)
- Updated on 06 Mar 2026
- 4 Minutes to read
- Contributors
- Print
- PDF
Article summary
Did you find this summary helpful?
Thank you for your feedback
Applies to: Lasernet 9
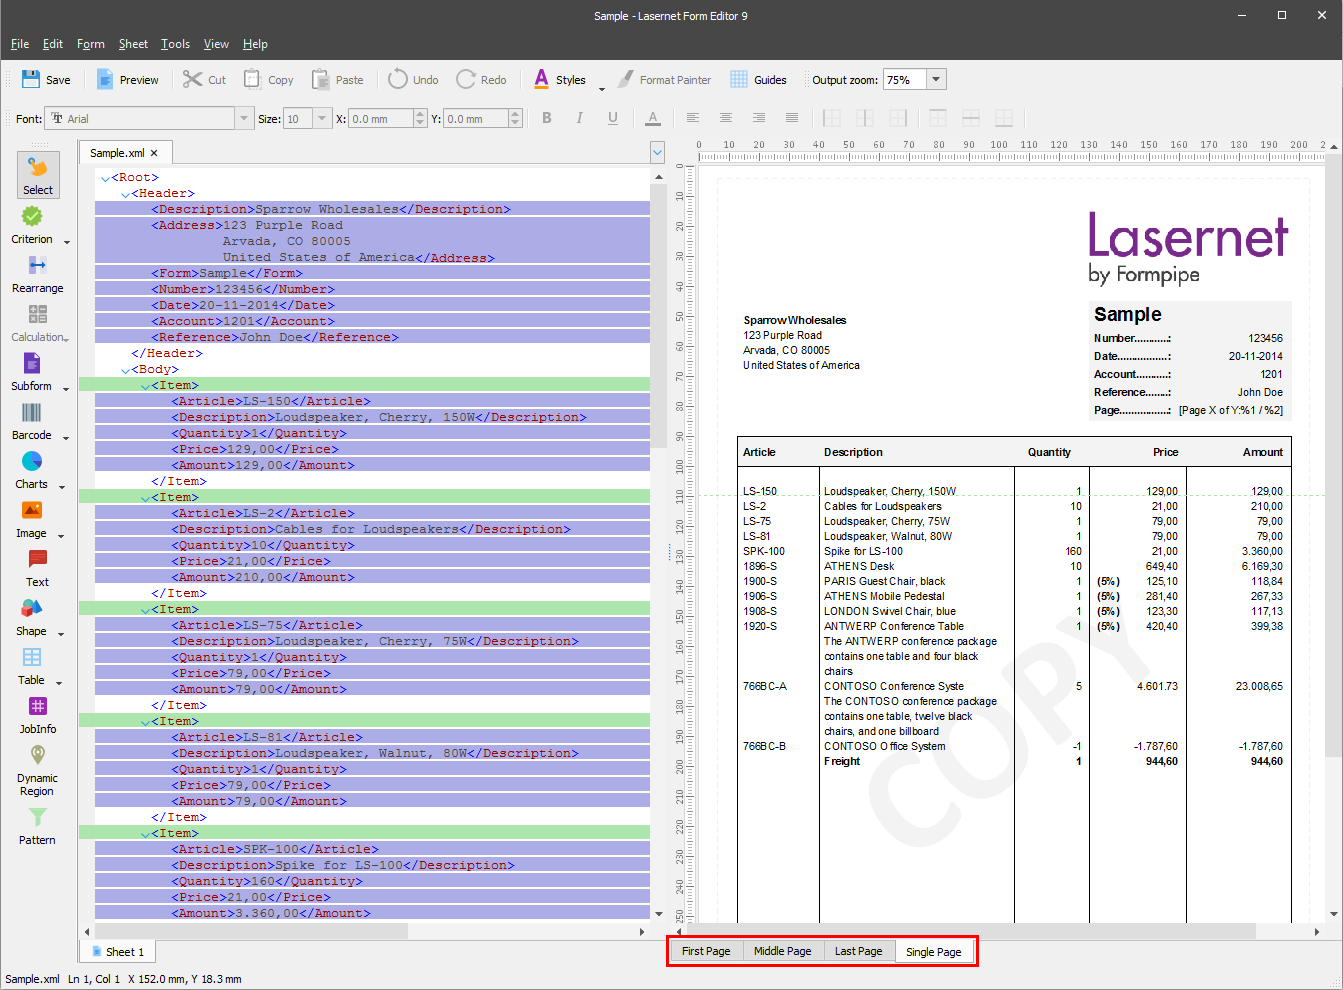
Each sheet has a First, Middle, Last, and Single Page for formatting the output. These pages can contain overlays providing the graphical presentation of the print, rearranges representing the actual printed data, fixed texts and scripts.
If your print job can be printed on one page only, the Single Page design is then used.

If your print job spans more than one page, you can use a First, Middle, and Last Page to design your final output document.

In other words, you have full flexibility in designing your output pages, and you no longer have to print pages with very little content.
Note
This article describes a software version that is no longer supported. Although the software will no longer receive updates or technical support, existing documentation, such as this article, will be retained for reference purposes but will no longer be updated. If you have any questions, contact Lasernet Support.
Exercise
Download and import the attached configuration called 16. Patterns (Multiple Pages) in Lasernet Developer 9. Afterward, navigate to the Forms section and open the Sample form.
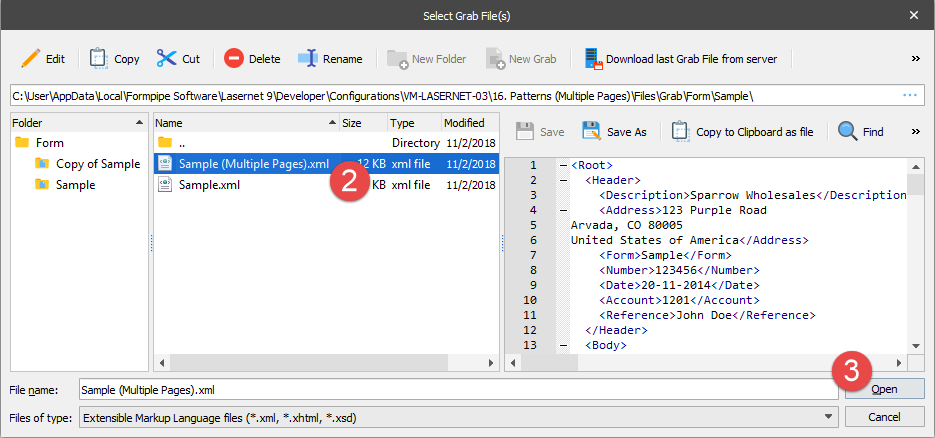
Select another grab file that contains enough item lines to make it necessary to use more than one page. On the Menu bar, click Form, and then click Select Grab File.

With the dialog displayed, select the Sample (Multiple Pages).xml file.
Click the Open button.
The grab file you have opened contains more item lines compared to the previous grab file. If item lines do not fit a single page, you can select First Page and then Last Page to view all the item lines.

Now let us define more suitable settings in the Conditional Area for the form design.
On the Menu bar, click Sheet, and then click Conditional Area.

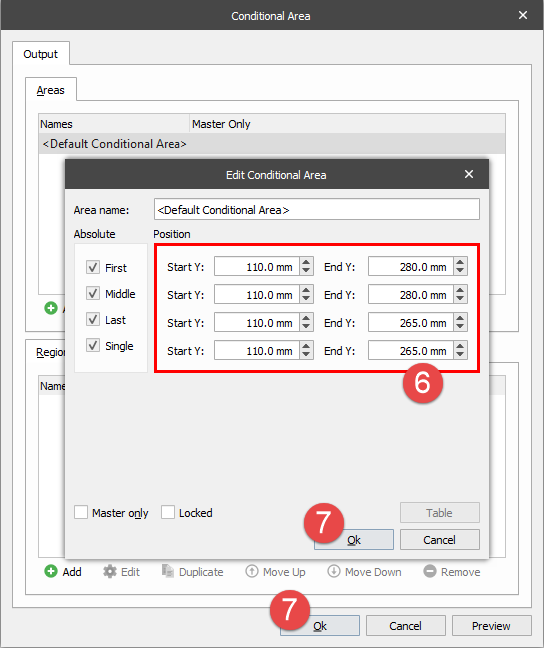
With the Conditional Area dialog displayed, click the Edit button.
Set Start Y and End Y positions for First, Middle, Last, and Single Pages as illustrated. Set Start Y to 110 mm and End Y to 280 mm for First and Middle Pages as well as Start Y to 110 mm and End Y to 265 mm for the Last Page.
Once you are done, accept changes by clicking Ok on both dialogs.
After you have defined new values in the Conditional Area for Start Y and End Y, the item lines also appear on the Middle Page(s).

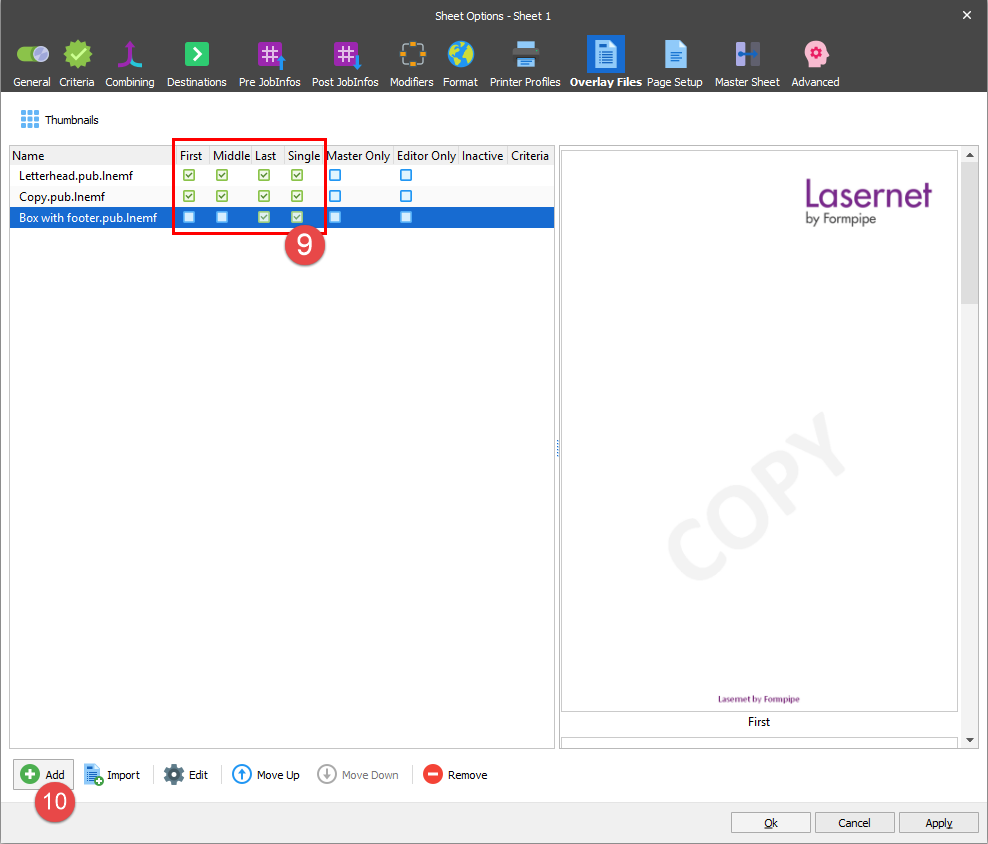
Right-click in the output view and select Overlay Files in the context menu that appears to open the Overlay Files tab in the Sheet Options dialog.

Select the First, Middle, Last, and Single checkboxes for the Letterhead.pub.lnemf and Copy.pub.lnemf overlays. Afterward, select the Last and Single checkboxes for the Box with footer.pub.lnemf overlay.
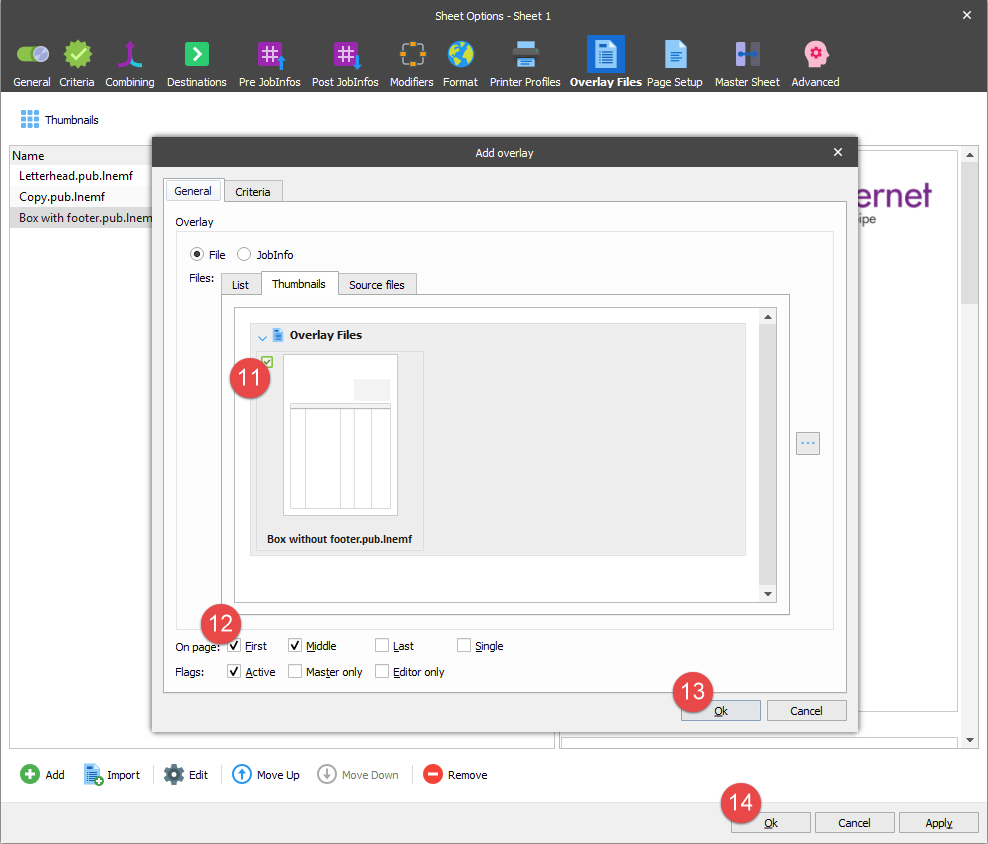
Another overlay with boxes included is needed. It should not have a footer for the First and Middle pages. Click the Add button to add such an overlay.
Select the Box without footer.oub.lnemf overlay from the list.
Select the First and Middle checkboxes under On page.
Click Ok to accept changes for adding an overlay.
Afterward, click Ok on the Sheet Options dialog.
You have now added overlays for the First, Middle, Last, and Single pages.

And now, you can assign the required rearranges and add them to the Single Page, the First Page, the Middle Page and the Last Page. To this end, follow these steps:
Switch to the Single Page tab.
Open the properties of the rearrange containing the Sparrow Wholesales rearrange text. Select the First, Middle, Last and Single checkboxes in the Absolute group box.
Click Ok to accept the changes.

You have now added the rearrange to all the pages.

Let us do the same for the rest of rearranges. To this end, follow these steps:
Switch to the Single Page tab and.
Select all rearranges in the header by holding down Shift and clicking the required rearranges, or you can draw a rectangle around the rearranges using the Select tool.
Right-click one of the selected rearranges, select Absolute, and then click All in the context menu that appears.

Select both rearranges in the footer of the document. Right-click one of them, select Absolute, and then click Last in the context menu that appears.

The Total label as well as the total amount appear only on the Single and Last pages.

In the header, you can view the page number and how many pages are in the final document. To this end, a script is inserted. The number of pages is calculated by using the Start Y and End Y positions in any of the Conditional Areas and the total progress for all the patterns.

On the Menu bar, click View and then click Run JavaScript, or click Shift+F5 to show the script result.

You can show the page number for each page by switching to the First, Middle, and Last tabs respectively.
The script visualizes the result of a page calculation which corresponds to the selected page.
In the Edit Rearrange dialog, you can edit the Page format if Type of insert text is set to Page x of y. %1 stands for for the current page number. %2 stands for the total number of pages. The parameters can be combined with a static text.
