Manage Users
- 21 May 2026
- 11 Minutes to read
- Contributors


- Print
- PDF
Manage Users
- Updated on 21 May 2026
- 11 Minutes to read
- Contributors
- Print
- PDF
Article summary
Did you find this summary helpful?
Thank you for your feedback
User accounts define who can access Keep. Each user account defines various aspects of that user’s identity and Keep settings, including the following:
Username
Password
User properties (such as the user’s full name and account expiry date)
Account settings (such as Bypass login lockout, which if enabled, prevents Keep from locking the user out after repeated unsuccessful login attempts)
Their role assignment (Standard User or Admin User)
Their group membership (which can control various aspects of the user’s Keep experience, including which searches and uploads they can access)
Their access to searches and uploads (which can be granted directly to a user, in addition to through group membership)
Note
User authentication and identities are managed by Keep, unless Keep is configured to use single sign-on (SSO) or LDAP.
If using SSO or LDAP, some elements of the Keep user management experience are grayed out or not present. The instructions on this page contain additional information to indicate when this is the case. Also, Keep displays a message to alert you when some controls are grayed out for this reason.
Navigate to the All Users Page
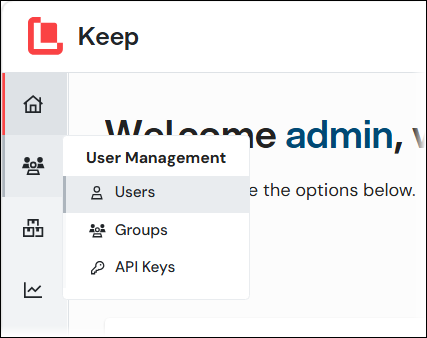
To access the All Users page, click User Management in the admin menu, then select Users.
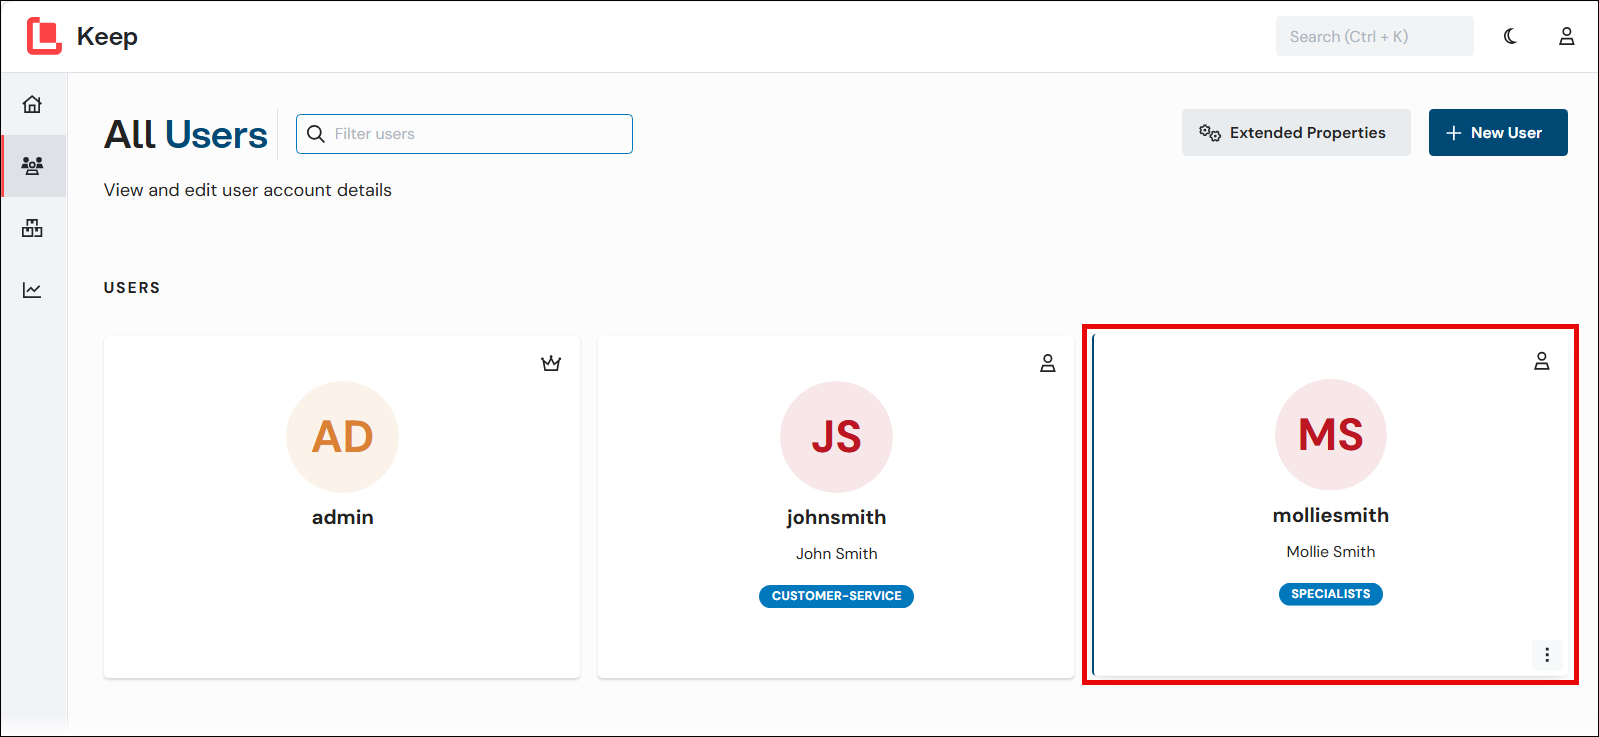
Find Your Way Around the All Users Page
Number | Item | More information |
|---|---|---|
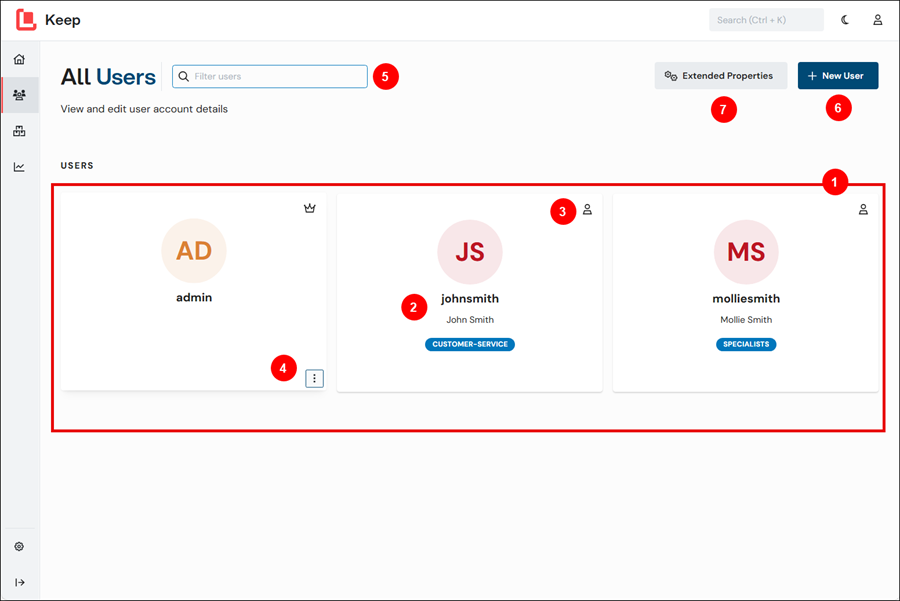
1 | Users | The main area of the page contains a tile for each user.
|
2 | User tile | Each user’s tile displays their user name, full name (if provided), and group memberships. Click a user’s tile to edit that user. |
3 | Role icon | A person icon denotes a standard user. A crown icon denotes an admin user. |
4 | Menu button | Click the menu button (three vertical dots) to access the menu for a user definition. You can delete the user or clone the user. |
5 | Filter users box | Type here to filter the user list to only those users whose user name or full name contain the text you entered. |
6 | New User button | Click New User to begin creating a new user in Keep.
|
7 | Extended Properties button | Click Extended Properties to define extended properties for users. You can provide values for extended properties when you add or edit a user. |
Add a User
To add a user to Keep, follow this process:
Create a new user. This involves setting basic properties (such as Username) and making appropriate selections for various account settings.
Specify the user’s password. This includes entering their password and making appropriate selections for password-related settings.
Specify the user’s role and (if relevant) their group memberships.
Specify the user’s access to search and upload configurations.
For step-by-step instructions, see the following sections.
Note
In LDAP and SSO enabled systems, Keep automatically creates users. As a result, in these systems, you cannot manually add a user to Keep.
To edit an automatically created user, see Edit a User.
1. Create a User
To begin the process of adding a user, click New User on the All Users page. The Add User page opens.
.png)
The Add User process is a straightforward page-by-page experience. A progress indicator shows you how far through the process you currently are.
Click Next and Prev (in the upper-right corner) to navigate between pages of the process. Click Cancel to discard the new user and return to the All Users page.
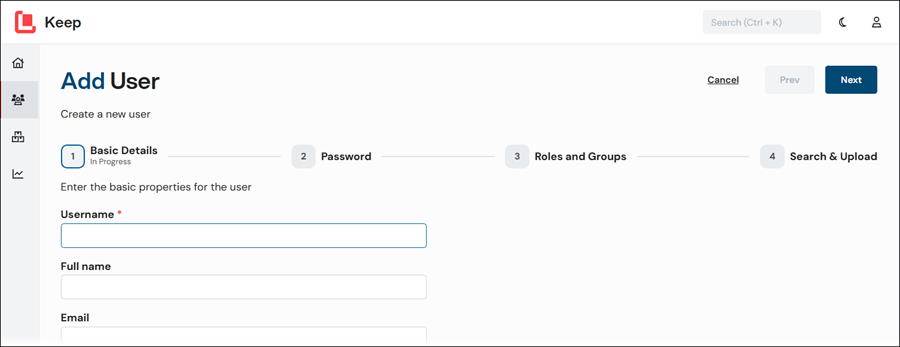
The process begins at the Basic Details stage of the process. To complete this page, follow these steps:
Enter a Username. The user enters this username when they log in to Keep. Usernames cannot contain spaces.
Optional: Enter the user’s Full name and Email address.
Optional: Enter an Account expiry date for the user account.
If extended properties have been defined for Keep users, they appear below the expiry date. Provide values for any extended properties that are displayed.
In the Account Settings area, make appropriate selections for the settings
Bypass login lockout: If selected, the user is not locked out after multiple unsuccessful login attempts.
Note
The attempt limit for this lockout is configured in the Keep server settings.
Bypass document security: If selected, Keep does not apply document access verification to the user when the Document Access Control setting is turned on. As a result, the user can access any document in the archive. This setting is generally used for user accounts created as part of third-party system integrations with Keep, where the user identity is used to make requests through interfaces such as the Keep REST API.
Disable login: Prevents the user from logging in to Keep. When you create a new user, you might want to disable the user’s account until you are ready for them to use it.
Reset incorrect login count: If the user has made one or more unsuccessful login attempts, select this checkbox to reset the unsuccessful login count to zero.
Click Next.
2. Specify the User’s Password
The Password stage of the process enables you to specify a password for the user and make appropriate password settings.
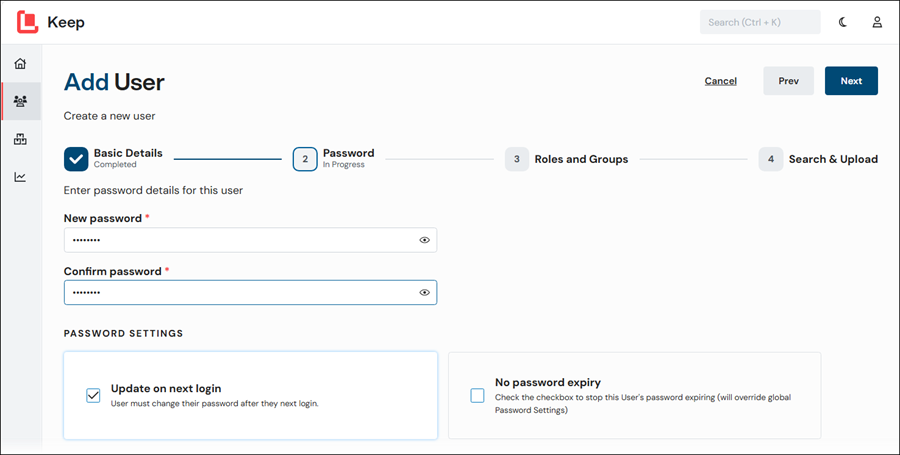
On the Password page, follow these steps:
Enter a password for the user into New password and Confirm password.
Note
The Keep server settings specify which password rules are applied. For example, minimum and maximum password length, restrictions around the use of repeated characters within a password or the reuse of recently used passwords, and restrictions around password content (such as requiring that passwords contain uppercase and lowercase characters).
In the Password Settings area, make appropriate selections for the settings:
Update on next login: If selected, the user must change their password themselves when they next log in to Keep.
No password expiry: If selected, this user’s password will not expire. The Keep server settings specify whether password expiry is enabled (system-wide) and how many days the password expiry period is.
Click Next.
3. Specify the User’s Role and Group Memberships
The Roles and Groups stage of the process enables you to assign a role to the user and grant them group memberships.
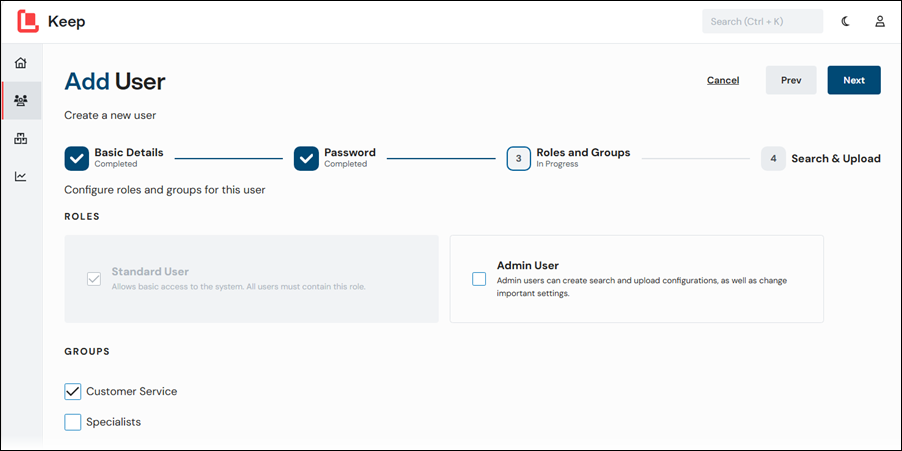
On the Roles and Groups page, follow these steps:
In the Roles Settings area, select which roles the user has.
Because every user must have at least the standard user role, the Standard User checkbox is automatically selected and cannot be cleared. This role enables a user to log in to Keep. However, this role does not grant the user access to any upload and search configurations; access to these must be granted separately.
To specify that the user is a Keep administrator, select Admin user. An admin user has access to the Keep admin menu, can create search and upload configurations, and can change important system settings.
In the Groups area, select the groups or subgroups that you want the new user to be a member of.
Click Next.
4. Specify the User’s Access to Search and Upload Configurations
The Search & Upload stage of the process enables you to grant the user access to particular search and upload configurations.
Note
If an internal user has a Document ID, they can use the Keep REST API to view and download that document, regardless of their access permissions. When Document Sharing is enabled, they can also share that document with external users. To enforce document access verification on all API requests, turn on the Document Access Control in the Keep server settings.
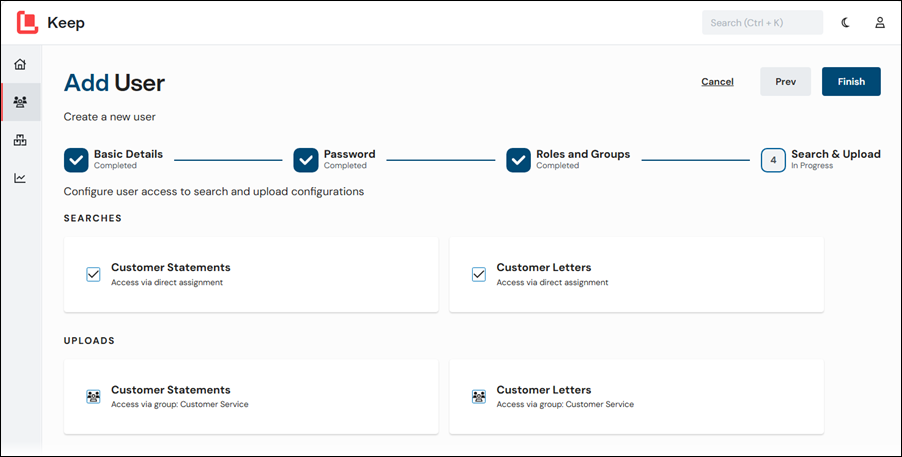
On the Search & Upload page, select the searches and uploads that you want the user to be able to access. The page is organized into Searches and Uploads sections.
Follow these steps:
Review the user’s default access settings for each configuration:
User has no access: The Access via direct assignment checkbox in the configuration’s tile is not selected.
User has access through their group membership: The configuration’s tile contains Access via a group and then displays the name of a group that the user is a member of. In this scenario, the user is granted access because either that group has access to the configuration, or it is a subgroup of a group that has access.
Click a configuration’s tile to modify the user’s access to that search or upload:
If the user has no access: Click the tile to assign them direct access.
If the user has directly assigned access: Click the tile to remove their directly-assigned access. They revert to either no access, or access via a group (if configured).
If the user has access through their group membership: Click the tile to assign them directly-assigned access. If they have directly-assigned access, they will retain access to the search or upload if they are removed from their group.
5. Save the New User
To complete the Add User process, click Finish.
The user is now available on the All Users page.
Warning
The work you have done to create the new user is not saved until you click Finish.
Edit a User
You can make changes to an existing Keep user. To edit a user, navigate to the All Users page, and then click the tile of the user that you want to edit.
The Edit User page opens.
.png)
Edit Basic Details
To edit basic details, user extended properties, and account settings, click the Basic Details tab, and then follow these steps:
Update Full name, Email, and Account expiry date.
Note
You cannot change the Username of an existing user.
Note
In LDAP and SSO enabled systems, you cannot change the Full name or Email of a user, and Account expiry date is not present because it is not applicable.
If extended properties have been defined for Keep users, they appear below the expiry date. Update the values for any extended properties that are displayed.
Change settings in the Account Settings area.
Edit Password or Password Settings
Note
In LDAP and SSO enabled systems, user authentication and passwords are managed by an external system. For this reason, the Password tab is not present in those Keep systems.
To edit a user’s password or change their password settings, click the Password tab, then follow these steps:
To change the user’s password, click Change password, then enter a new password in the New password and Confirm password boxes.
Note
The Keep server settings specify which password rules are applied. For example, minimum and maximum password length, restrictions around the use of repeated characters within a password or the reuse of recently used passwords, and restrictions around password content (such as requiring that passwords contain uppercase and lowercase characters).
Note
To change their own password, a user can click Change Password in Keep’s Account Info pane.
To change password settings for the user, change the settings in the Password Settings area.
Edit Role and Group Membership
Click the Roles and Groups tab, select the roles and groups you want to assign to the user, and then save your changes.
If the user is a member of a subgroup, they are regarded as a member of the parent group too. The Groups area indicates if this is the case for the user that you are editing.
For more information about this task, see Specify the User's Role and Group Memberships.
Note
In SSO-enabled systems, roles and group memberships are managed by an external system. As a result, you cannot assign roles or modify group memberships for Keep users. In these Keep systems, instead of a Roles and Group tab, the Edit User page contains a Groups tab. On this tab, you can view the user’s group memberships but you cannot modify them.
In LDAP-enabled systems, you can manage a user’s role and group memberships in Keep. However, depending on Keep’s LDAP configuration, data changes made in the external system that authenticates users might automatically update users’ role and group memberships in Keep.
Edit Search and Upload Configuration Assignment
To change which search and upload configurations the user has access to, follow these steps:
Click the Search & Upload tab.

Review the existing access settings for each configuration:
User has no access: The Access via direct assignment checkbox in the configuration’s tile is cleared.
User has directly assigned access: The Access via direct assignment checkbox in the configuration’s tile is selected.
User has access through their group membership: The configuration’s tile contains Access via a group and then displays the name of a group that the user is a member of. In this scenario, the user is granted access because either that group has access to the configuration, or it is a subgroup of a group that has access.
Click a configuration’s tile to modify the user’s access to that search or upload:
If the user has no access: Click the tile to assign them access.
If the user has directly assigned access: Click the tile to remove their directly-assigned access. They revert to either no access, or access via a group (if configured).
If the user has access through their group membership: Click the tile to assign them directly-assigned access. If they have directly-assigned access, they will retain access to the search or upload if they are removed from their group.
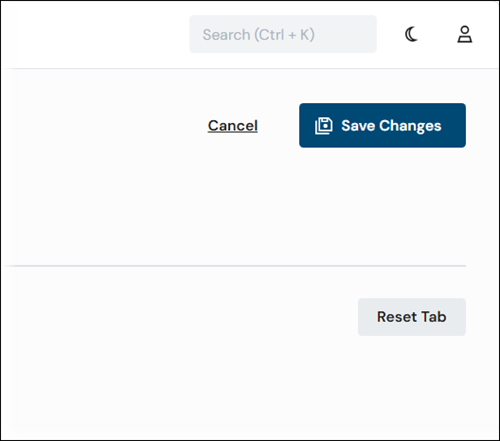
Save Your Changes After Editing a User
To save your changes to the user, click Save Changes.
To discard your changes (without returning to the All Users page) so that you can start again on the tab you are currently using, click Reset Tab.
To discard your changes and return to the All Users page, click Cancel.
Delete a User
To delete a user, follow these steps:
Click the menu button (three vertical dots) on their tile on the All Users page.
Select Delete.
In the Delete User window, click Confirm.
Note
For information about preventing an existing user from accessing Keep, see Remove a User's Access to Lasernet Keep to learn about all the options that are available to you.
Note
In LDAP and SSO enabled systems, you cannot delete users.
Clone a User
You can use the current setup of an existing user to create a new user. To do this, you clone an existing user. The new user will have the same role assignments, group memberships, search and upload access, and extended property values as the user they were copied from.
To clone a user, follow these steps:
On the All Users page, click the menu button (three vertical dots) on the tile of the user that you want to clone.
Select Clone.
The Clone User process begins. This process is identical to the Add User process, except that the new user’s settings match those of the cloned user. Make any necessary adjustments to the settings. You must also enter a user name and password for the new user. Usernames cannot contain spaces.
To complete the process and save the new user, click Finish. Keep returns to the All Users page, which contains the new user.
Note
In LDAP and SSO enabled systems, you cannot clone users.