Manage Groups and Subgroups
- 29 May 2026
- 8 Minutes to read
- Contributors


- Print
- PDF
Manage Groups and Subgroups
- Updated on 29 May 2026
- 8 Minutes to read
- Contributors
- Print
- PDF
Article summary
Did you find this summary helpful?
Thank you for your feedback
Groups can simplify Keep administration by enabling you to manage multiple Keep users as a single group.
For example, you can add several Keep users to a group, and then assign that group access to particular search and upload configurations. As a result, all group members can use those search and upload configurations.
Subgroups enable you to specify more granular groupings of users. The subgroup’s link to its parent group means that subgroup members inherit the search and upload configuration assignments that you make for the parent group.
Note
Groups are managed by Keep, unless Keep is configured to use single sign-on (SSO).
If using SSO, some elements of the Keep group management experience are grayed out or not present. This instructions on this page contain additional information to indicate when this is the case. Also, Keep displays a message to alert you when some controls are grayed out for this reason.
Navigate to the All Groups Page
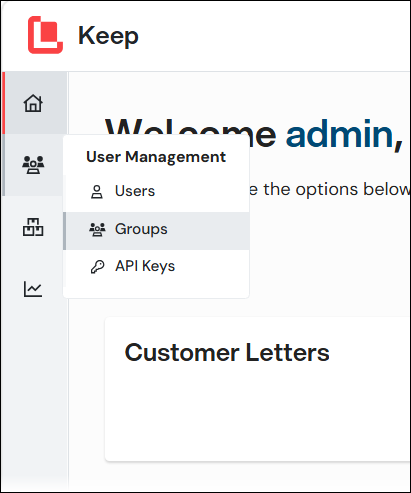
To access the All Groups page, click User Management in the admin menu, then select Groups.
Find Your Way Around the All Groups Page
Number | Item | More information |
|---|---|---|
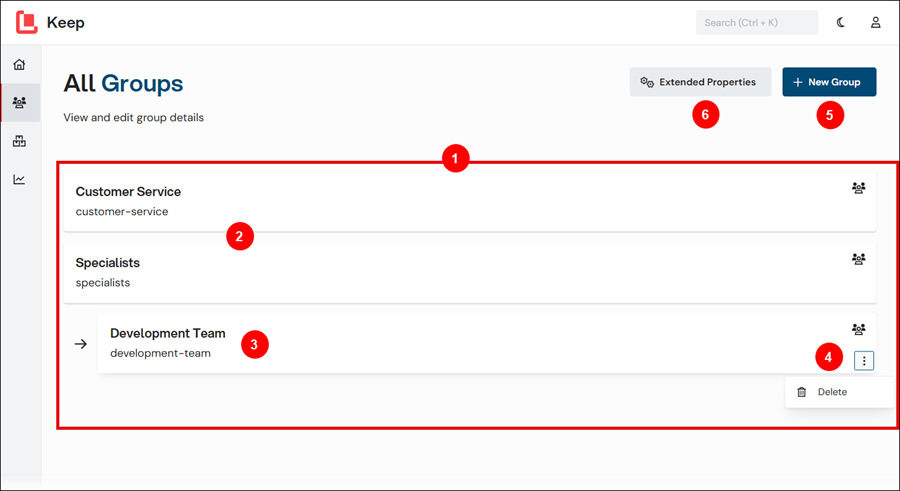
1 | Groups | The main area of the page contains a tile for each group. |
2 | Group tile | Each group’s tile displays the group’s name. Click a group’s tile to edit that group. If a group is a parent to subgroups, its subgroups are displayed directly below its tile. |
3 | Subgroup | Subgroups are indented below their parent group’s tile. |
4 | Menu button | Click the menu button (three vertical dots) to access the menu for a group. You can delete the group. |
5 | New Group button | Click New Group to begin creating a new group in Keep.
|
6 | Extended Properties button | Click Extended Properties to define extended properties for groups. You can provide values for extended properties when you add or edit a group. |
Add a Group
To add a group to Keep, follow this process:
Create a new group. This involves specifying the Label and Name of the group.
Specify the group’s access to search and upload configurations.
For step-by-step instructions, see the following sections.
Note
In SSO-enabled systems, Keep automatically creates groups. As a result, in these systems, you cannot manually add a group to Keep.
To edit an automatically created group, see Edit a Group.
1. Create a Group
To begin the process of adding a user, click New Group on the All Groups page. The Add Group page opens.
.png)
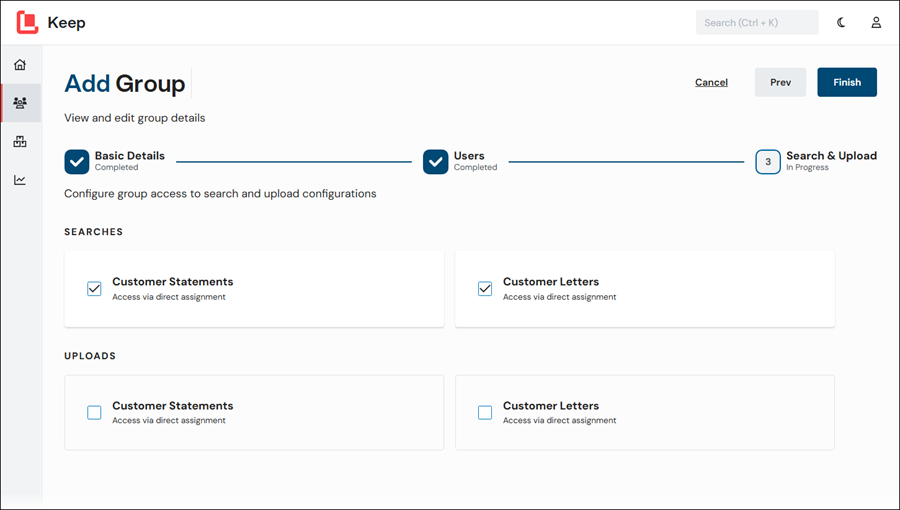
The Add Group process is a straightforward page-by-page experience. A progress indicator shows you how far through the process you currently are.
Click Next and Prev (in the upper-right corner) to navigate between pages of the process. Click Cancel to discard the new group and return to the All Groups page.
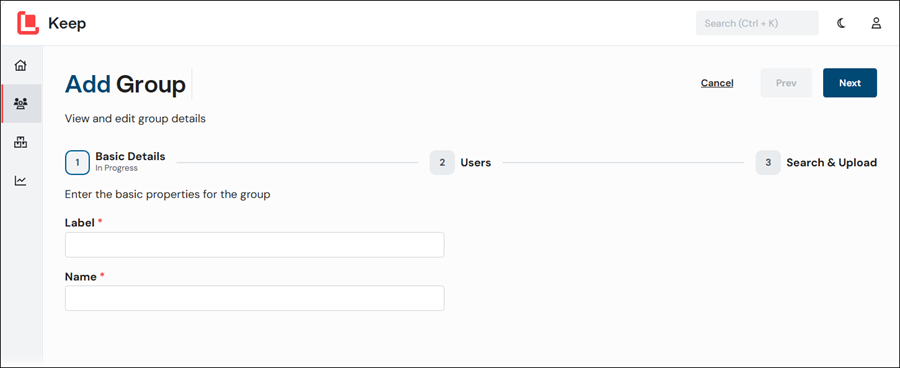
The process begins at the Basic Details stage of the process. To complete this page, follow these steps:
Enter a Label for the group. The Label is the group’s “display name” and must be unique. Keep uses this label to identify the new group in various parts of the application, such as on the group’s tile on the All Groups page.
Enter a Name. Primarily, Keep uses Name internally when processing actions. It is displayed in only some areas in the Keep user interface (such as in the audit log). Name must be unique and cannot contain spaces.
If extended properties have been defined for Keep groups, they appear below Name. Provide values for any extended properties that are displayed.
Click Next.
2. Add Members to the Group
In the user table, each row corresponds to a Keep user. To add a user to the group, select the checkbox in the Member column of their row. The Access column for group members displays Member.
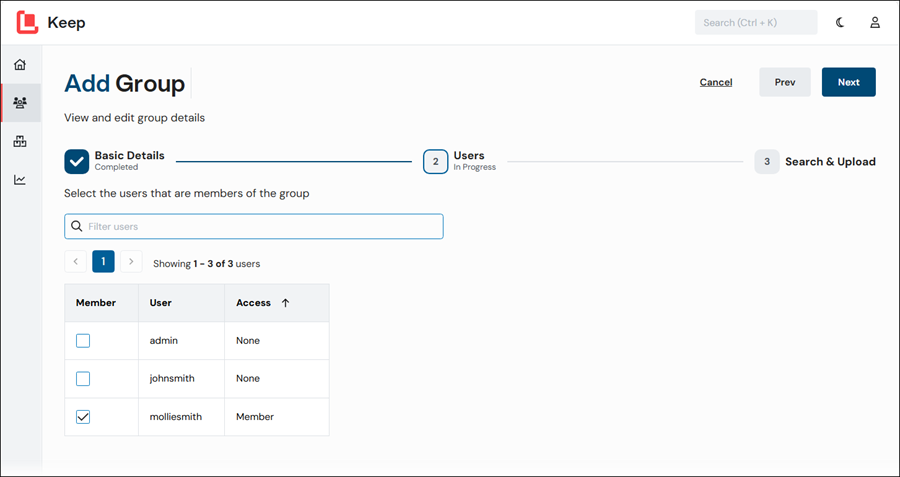
Use the page controls above the table to move between pages of the user list.
Use the Filter users box above the table to find particular users in the list.
To move to the next stage, click Next.
3. Specify the Group’s Access to Search and Upload Configurations
Select the searches and uploads that you want the group’s members to be able to access. The page is organized into Searches and Uploads sections.
4. Save the New Group
To complete the Add Group process, click Finish.
The user is now available on the All Groups page.
Warning
The work you have done to create the new user is not saved until you click Finish.
Edit a Group
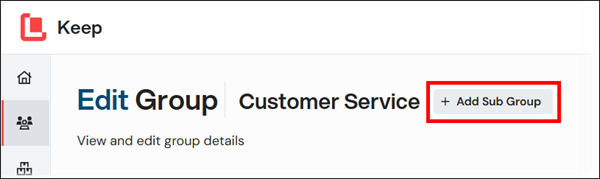
You can make changes to an existing Keep group or subgroup. To edit a group, navigate to the All Groups page, and then click the group that you want to edit.
.png)
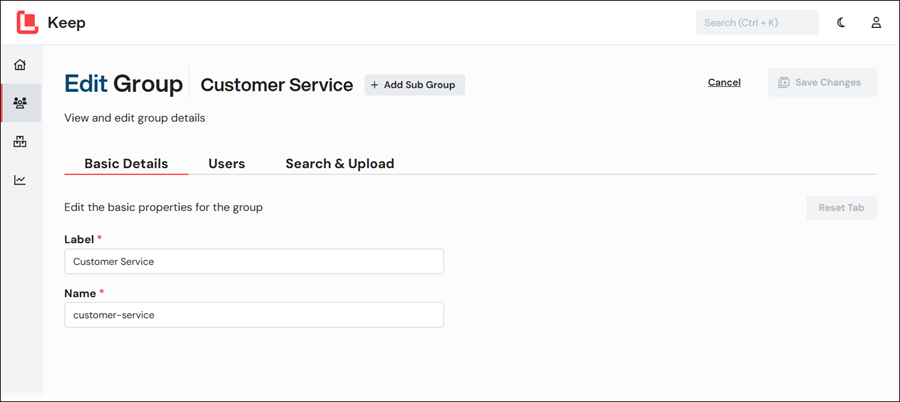
The Edit Group page opens.
Note
You can create a subgroup here too (unless you are using an SSO-enabled Keep system). For more information, see Add a Subgroup to an Existing Group.
Edit Basic Details
To edit basic details of the group (including extended properties), click the Basic Details tab, and then follow these steps:
Update Label and Name.
Note
In SSO-enabled systems, you cannot change the Label or Name of a group.
If extended properties have been defined for Keep groups, they appear below Name. Provide values for any extended properties that are displayed.
Edit Group Membership
To edit the group membership, click the Users tab.
.png)
In the user table, each row corresponds to a Keep user. The Access column shows whether each user is a group member:
If a user is not a member of the group, the Access column contains None.
If they have been added to the group, the Access column contains Member.
If they are a member of a subgroup of the group, the Access column contains Through <subgroup name> (substitute <subgroup name>; see example in the following image).
To change a user’s membership, select or clear the Member checkbox in their row:
If they are not a member, select the checkbox to add them to the group.
If they are a member, clear the checkbox to remove them from the group. Their access changes to None, or to Through <subgroup name> if they are a member of a subgroup.
If they are a member of a subgroup, select the checkbox to add them to the parent group too.
Note
In SSO-enabled systems, you cannot edit a group’s membership. In these systems, you can view a group’s membership on the Users tab, but the checkboxes that control each user’s membership are not present.
Use the page controls above the table to move between pages of the user list.
Use the Filter users box above the table to find particular users in the list.
When you have finished editing group membership, save your changes.
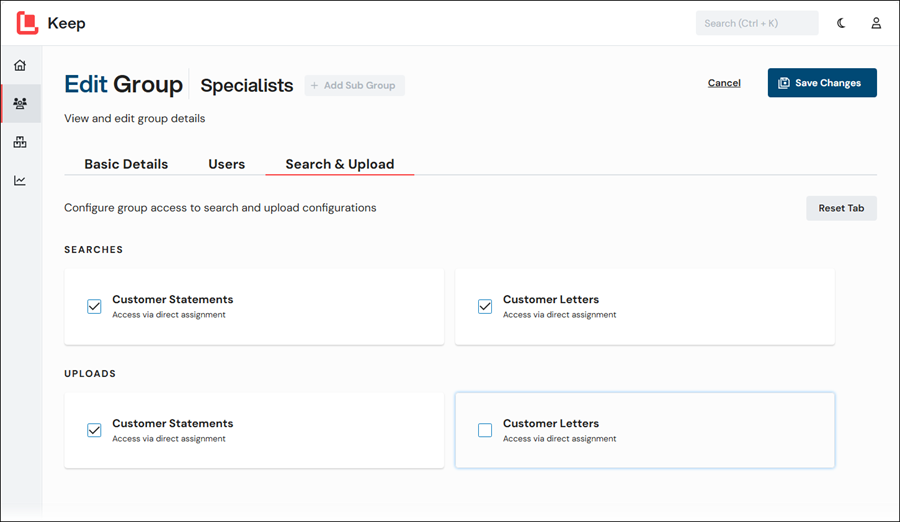
Edit Search and Upload Configuration Access
Select the searches and uploads that you want the group’s members to be able to access. The page is organized into Searches and Uploads sections.
Use the checkbox in each tile to assign or remove access to that search or upload configuration.
When you have finished, save your changes.
Access Inheritance for Subgroups
Subgroups inherit search and upload access from their parent group. When a subgroup inherits access to a particular search or upload, that configuration’s tile on the Search & Upload tab contains Access via parent: <parent group name> (substitute <parent group name>).
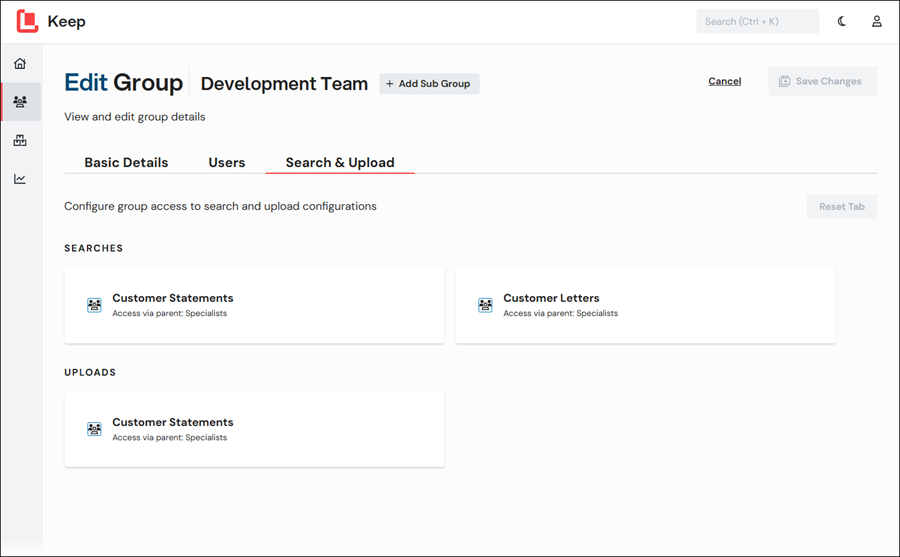
To assign the subgroup direct access to a configuration, click the search or upload’s tile to select its checkbox and change the access status to Access via direct assignment. The subgroup’s members will have access to the search or upload even if the parent group’s access to it is removed.
To revert the subgroup’s access to Access via parent: <parent group name>, clear the Access via direct assignment checkbox.
If the parent group is not assigned access to a search or upload, the subgroup does not inherit access to it. In this scenario, the search or upload’s tile toggles the Access via direct assignment checkbox between selected and unselected.
When you have finished, save your changes.
Save Your Changes
To save your changes to the group, click Save Changes.
To discard your changes (without returning to the All Groups page) so that you can start again on the tab you are currently using, click Reset Tab.
To discard your changes and return to the All Groups page, click Cancel.
.png)
Delete a Group
To delete a group, click the Delete (trashcan) icon on its tile on the All Groups page. In the Delete Group window, click Confirm.
Note
In SSO-enabled systems, you cannot delete groups.
Add a Subgroup to an Existing Group
Subgroups are groups that are linked to a parent group but have their own separate member list. Subgroups inherit the search and upload access granted to their parent group, but can also override this inherited access by specifying their own search and upload access assignments. Subgroup members are included on the member list of their parent group (when you edit the parent group).
You can use subgroups to represent groups of users who are considered a distinct group of users (possibly a team who have specific Keep access requirements) but are also considered to be part of a larger group in your organization.
Subgroups can have their own subgroups. However, the maximum group hierarchy depth is three levels (Parent group > Subgroup > Subgroup of subgroup).
Note
Subgroups are not applicable to SSO-enabled Keep systems.
To add a subgroup to an existing group, follow these steps:
On the All Groups page, click the group that you want to add a subgroup to.
On the Edit Group page, click Add Sub Group. The Add Sub Group process begins. This process is similar to the Add Group process.
On the Basic Details page, enter a Label and Name for the subgroup.
On the User page, use the checkboxes in the Member column to add users to the group.
Note
This page does not indicate whether a user is a member of the parent group.
On the Search & Upload page, assign the group access to search and upload configurations:
If a configuration’s tile contains a cleared checkbox and “Access via direct assignment”: Select the checkbox to assign the group access to the search or upload configuration.
If a configuration’s tile contains “Access via parent: <parent group>” and no checkbox: The group inherits access to this configuration from its parent group. As a result, subgroup members will have access to the search or upload. However, to directly assign the subgroup access to the configuration (so that their access does not depend on whether the parent group has access), click the tile; it changes to a selected checkbox beside Access via direct assignment.
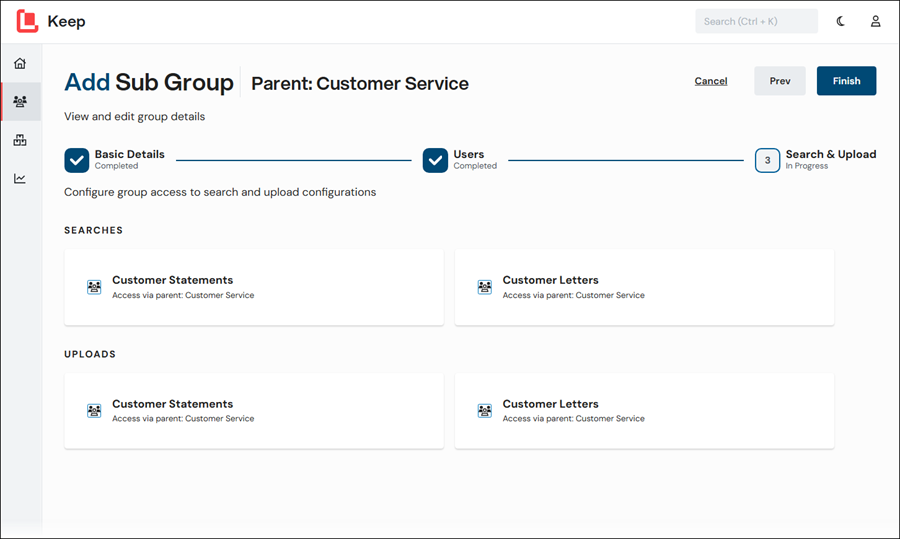
Click Finish. Keep adds the subgroup to the All Groups page.