Integrate Electronic Reports with Lasernet FO Connector in Dynamics 365 Finance and Operations
- 03 Mar 2026
- 2 Minutes to read
- Contributors


- Print
- PDF
Integrate Electronic Reports with Lasernet FO Connector in Dynamics 365 Finance and Operations
- Updated on 03 Mar 2026
- 2 Minutes to read
- Contributors
- Print
- PDF
Article summary
Did you find this summary helpful?
Thank you for your feedback
Prerequisites
Ensure the required electronic report (ER) is configured in standard FinOps. The steps below pertain to the Sales and Free text credit note and the Sales and Free text invoice. However, any electronic report can trigger the integration with Lasernet.
To enable the options described in this document, the Preview feature Electronic Invoicing Integration must be disabled in ServiceFabric (Microsoft-hosted) environments.
Steps
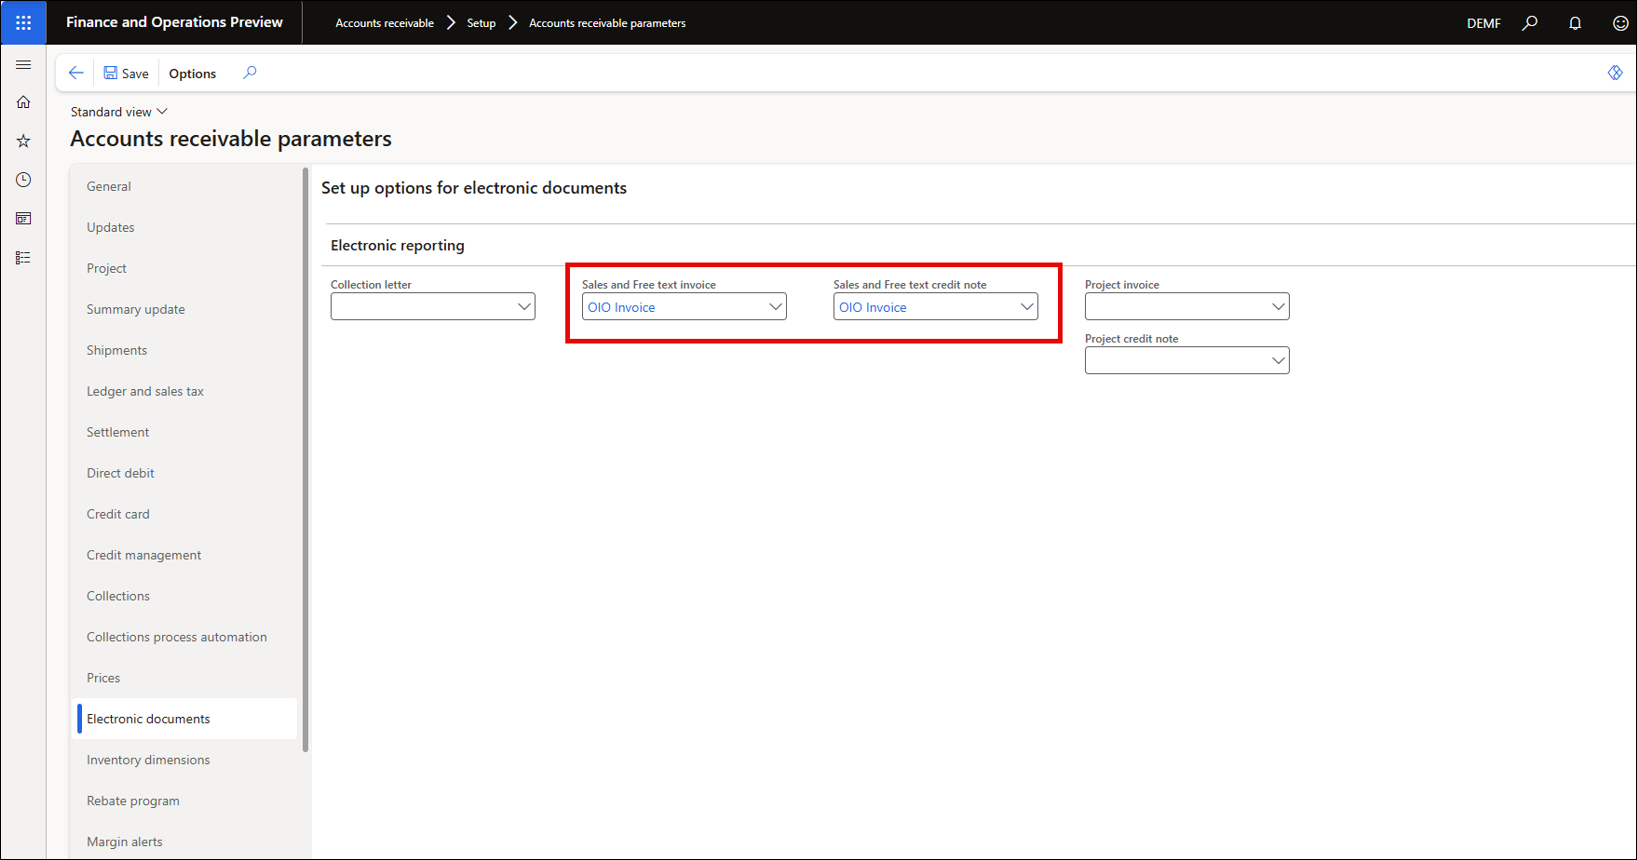
1. Configure Accounts Receivable Parameters
Navigate to Accounts receivable > Setup > Accounts receivable parameters.
Select Electronic documents.
Define an electronic reporting document for your Sales and Free text invoices.
2. Create a New Query Report in Lasernet
Navigate to Lasernet > Common > Reports.
Click New to create a new query report.
In the Archive FastTab, select Default from the Archive dropdown list, and enable Save XML.

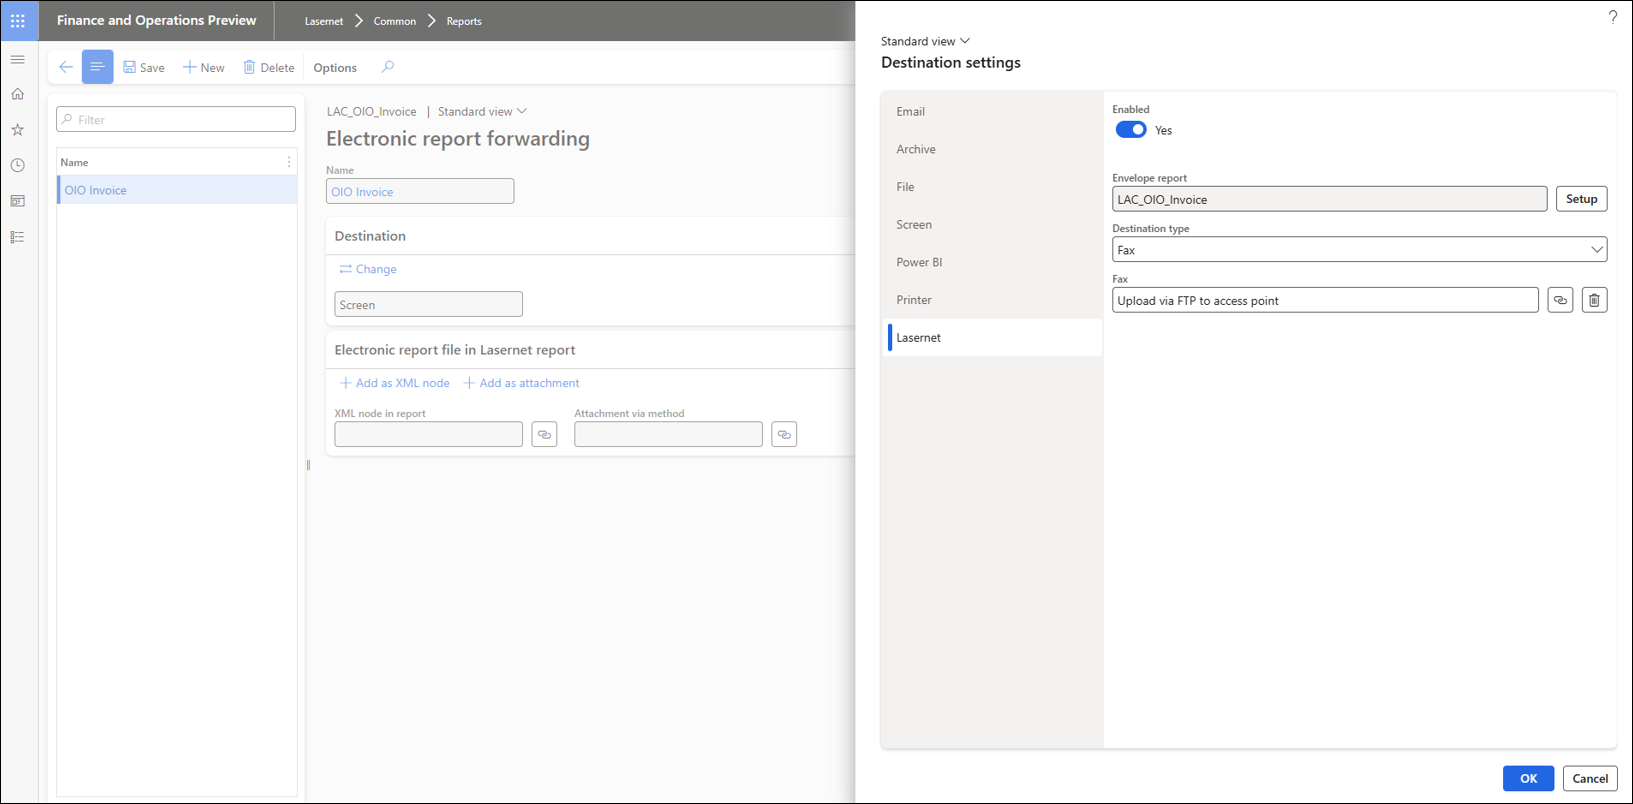
3. Link the Electronic Report
Click Electronic reports on the Action pane.
On the form that opens, click New to create a new record, and select your electronic report from the Name dropdown list.
Set your destination by clicking Change on the Destination FastTab. The Destination settings dialog will open.
Click the Lasernet destination and enable it.
Click the Destination type dropdown and choose your destination. If, for instance, that is Fax, provide a fax number.
Click OK to close the dialog.
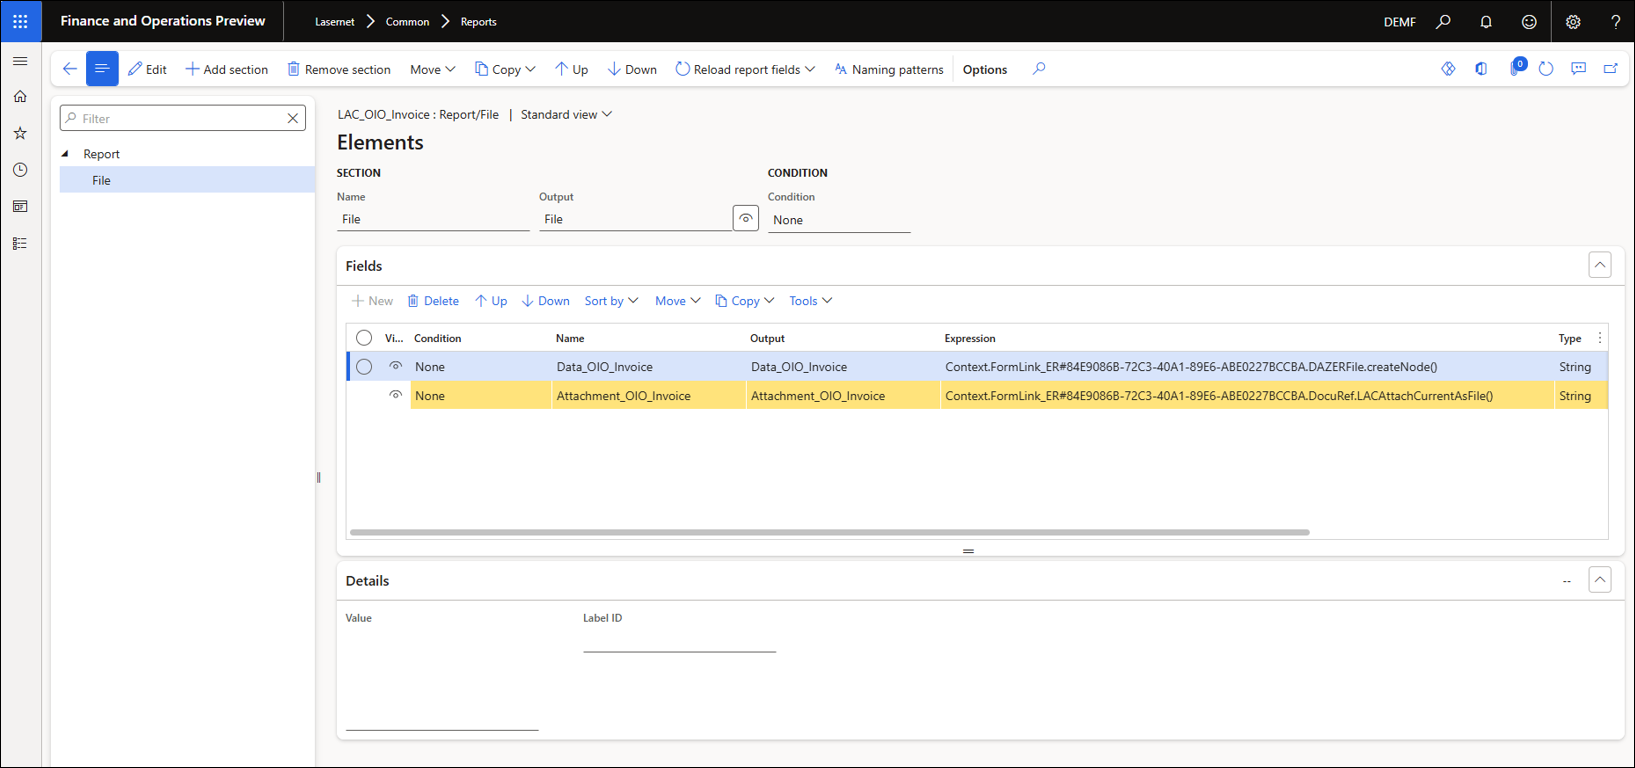
4. Add as XML Node and Add as Attachment
On the Electronic report file in Lasernet report FastTab, click Add as XML node. This adds an XML node with the electronic report data to the Lasernet XML.
Click Add as attachment. This adds the electronic report as an attachment to the Lasernet XML.
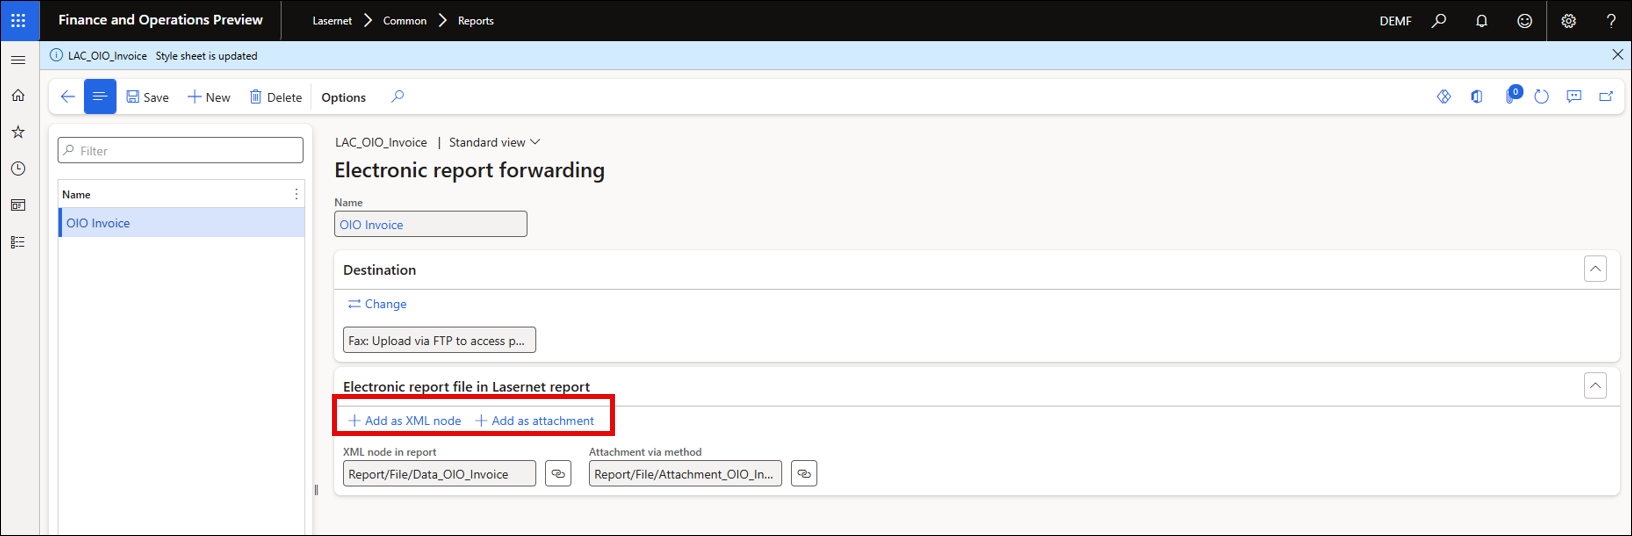
Click the link icon next to the XML node in report field (visible in the screenshot above) to preview the structure and see where the electronic report data XML node will be added in your report structure, as well as the Context method to add the attachment data to your XML.
5. Send the Electronic Report
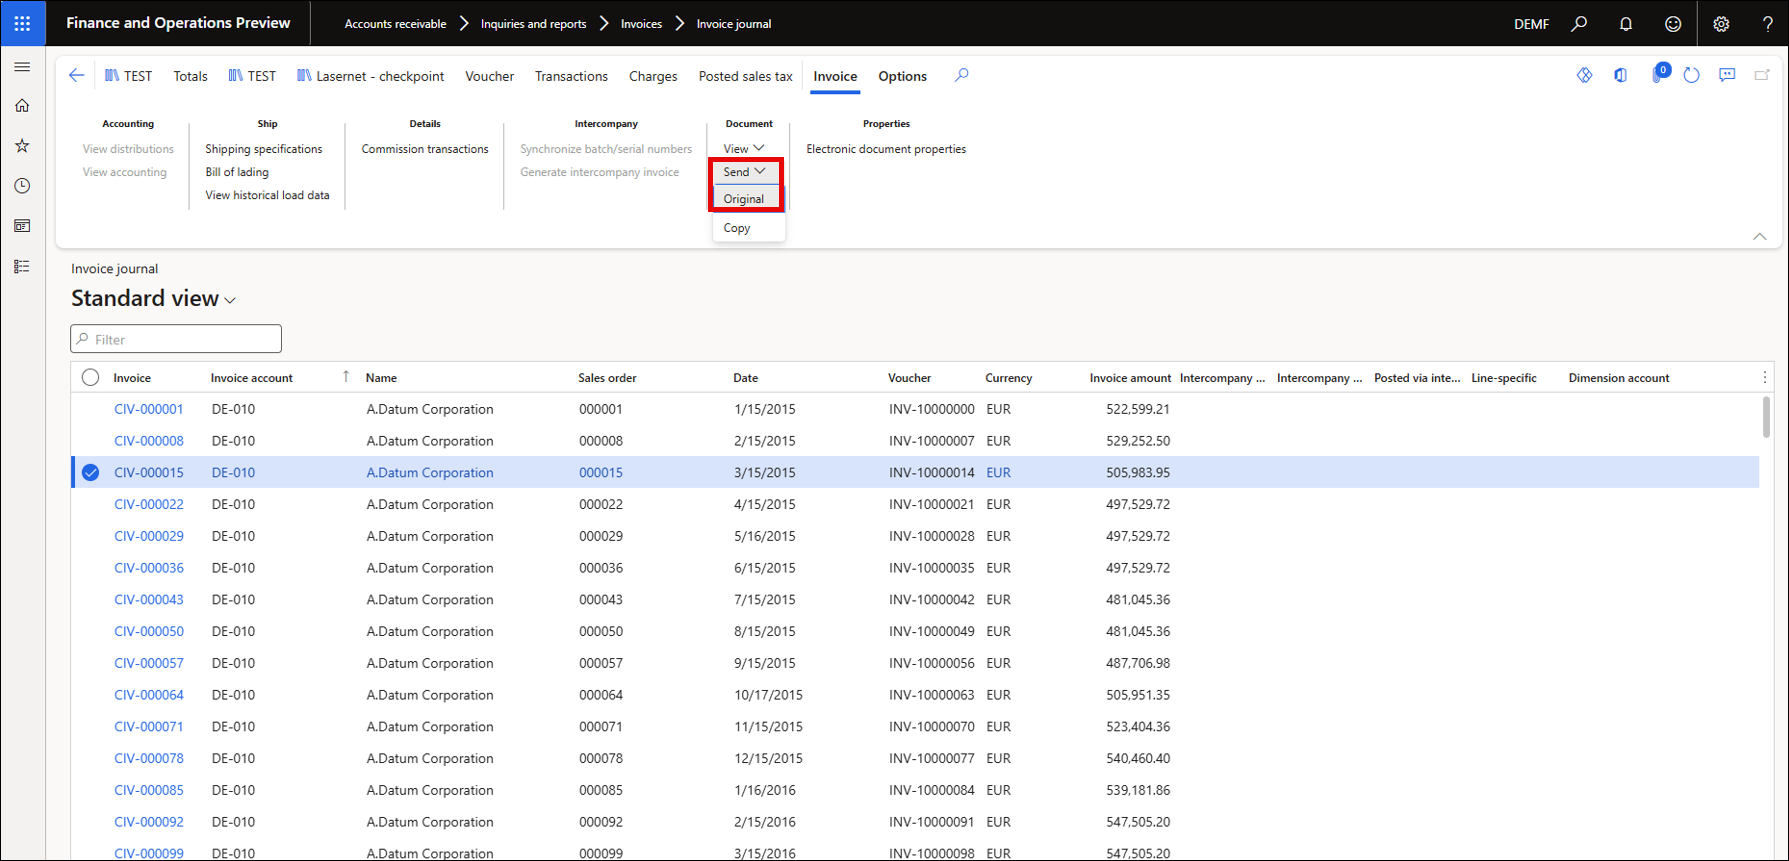
Navigate to Accounts receivable > Inquiries and reports > Invoices > Invoice journal.
Select one of your invoices and click Send > Original to trigger the send of the electronic report.
A message will be displayed: “Invoice added to the queue for processing. The file generation may take a while, depending on the batch job setup.”
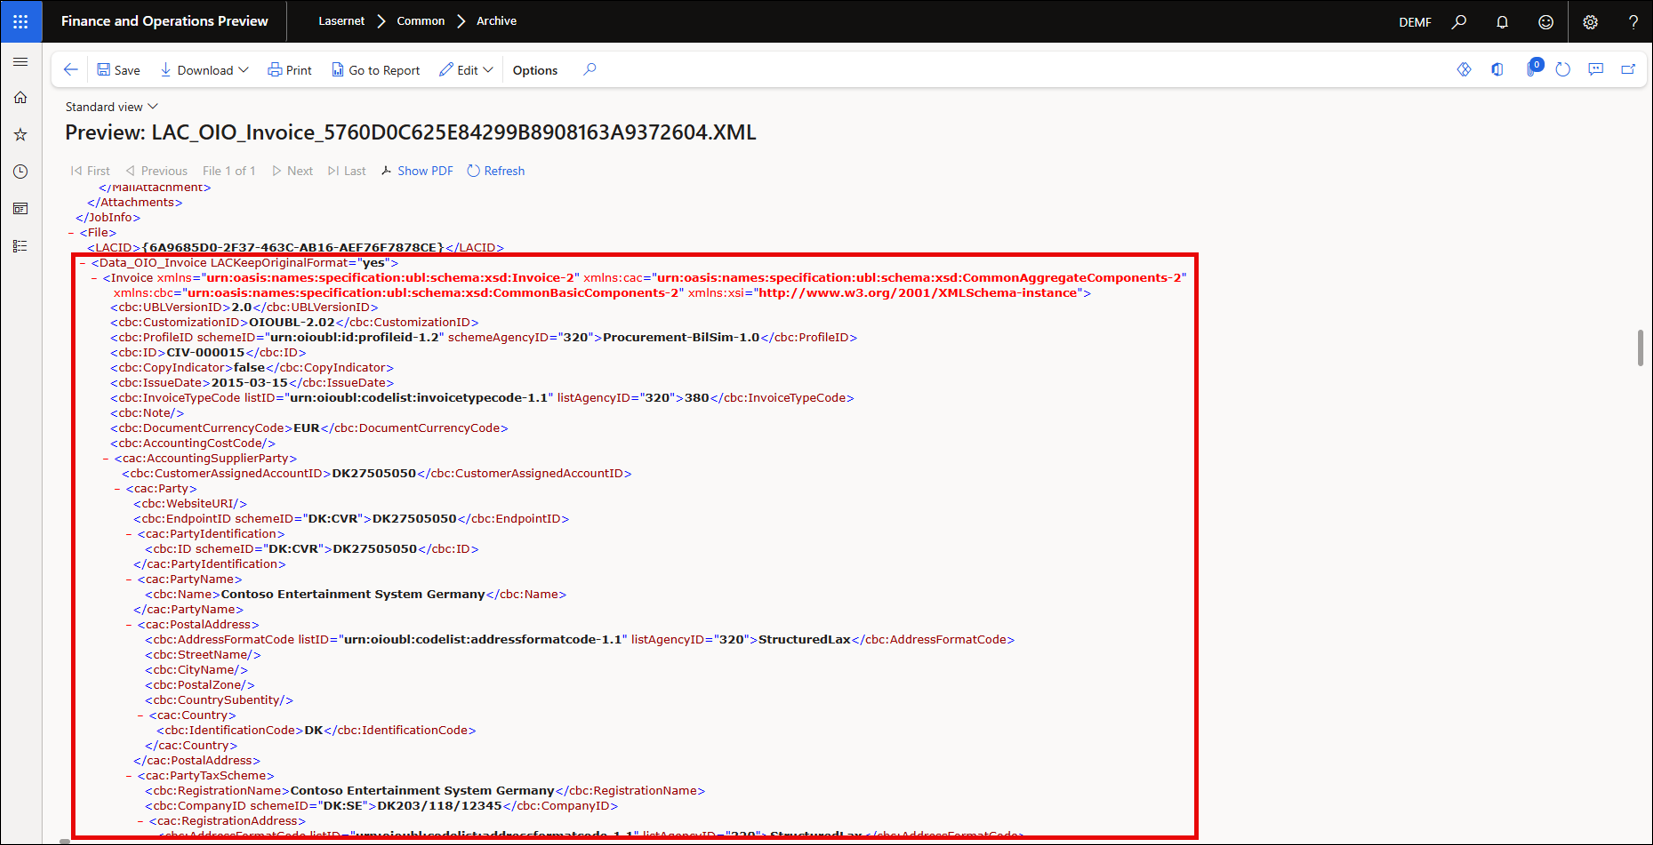
6. Preview and Verify the Report
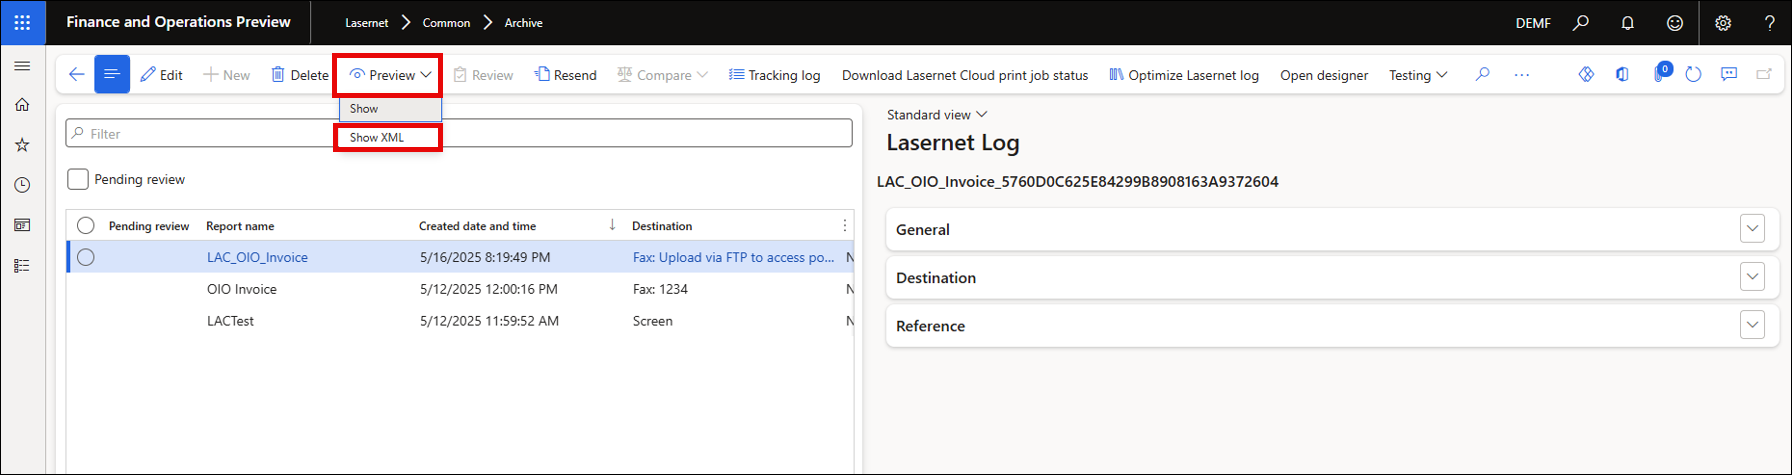
Navigate to Lasernet > Common > Archive.
Once your report is loaded, click Preview > Show XML.
Note
Your report may not immediately show in the Archive. This depends on the recurrence of your electronic report batch job. If you do not see a report, click Refresh.
The XML will include a JobInfo section showing which electronic report was used, and a MailAttachment section with relevant data from the Add as attachment selection.
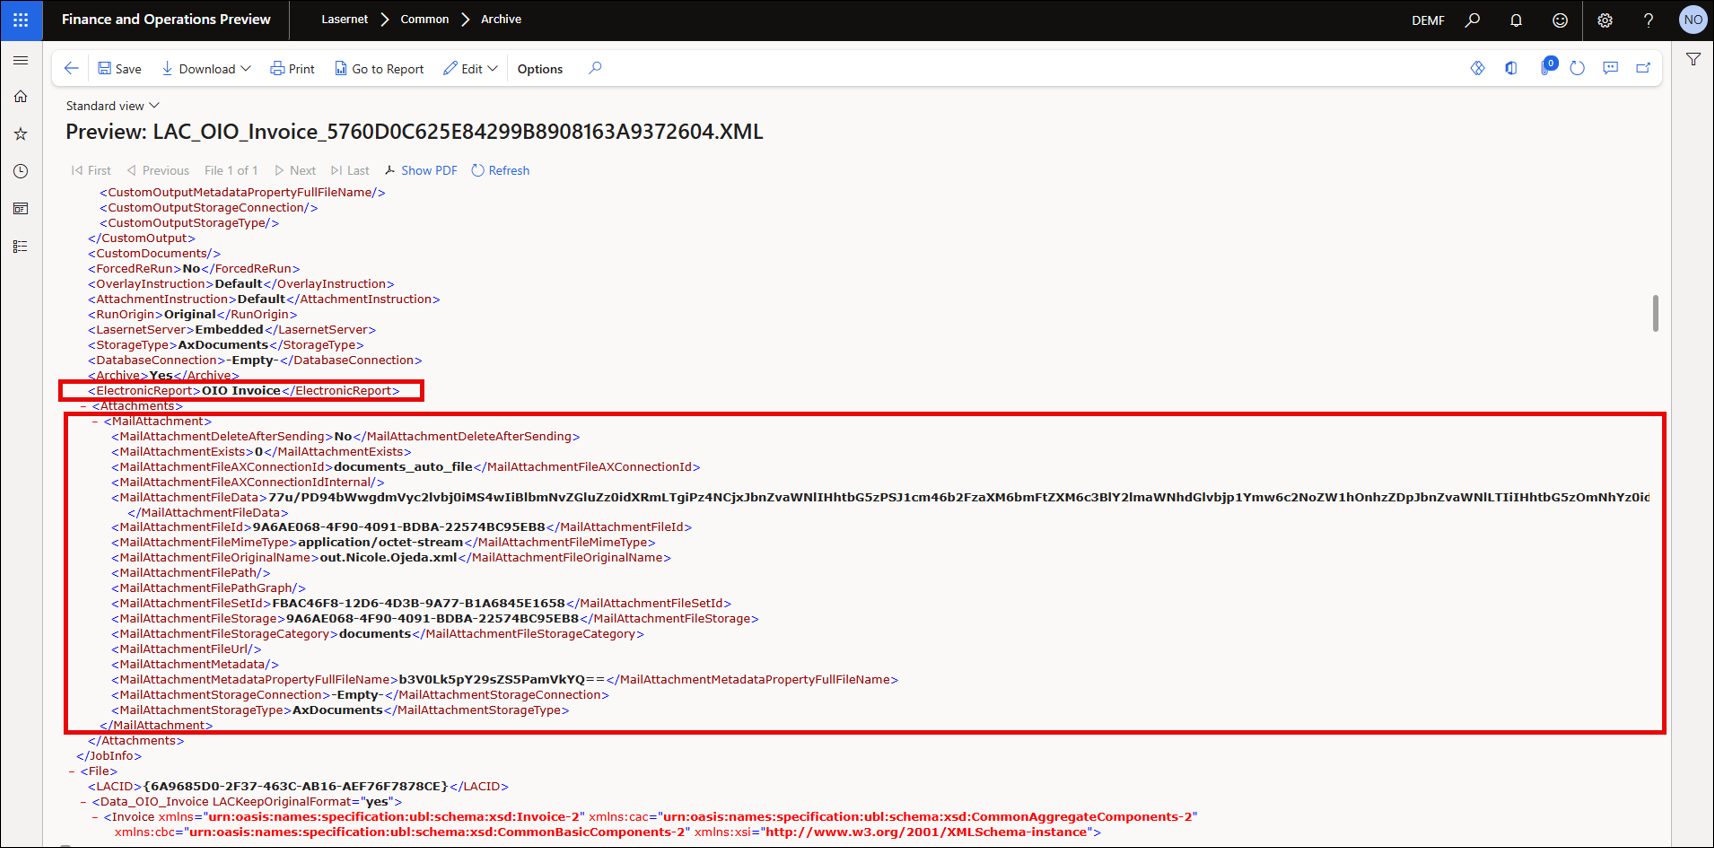
Further down, the XML will also contain the electronic reporting XML details in the node specified from the Add as XML node selection.