- Print
- PDF
For Hosted customers, the Lasernet Server is managed by Formpipe; however, it is still necessary to install a copy of the Lasernet Developer to enable interaction with the Lasernet Configuration.
Install the Lasernet Developer Application
To install the Lasernet Developer application, follow these steps:
From the Lasernet Package zip folder, which was downloaded as part of the prerequisites earlier, double-click the Lasernet Developer file.
(12).png)
Click Next, accept the typical installation, and follow the steps until the Developer is installed.
(12).png)
License Code
Users will now need to activate their Lasernet Developer License. Follow these steps:
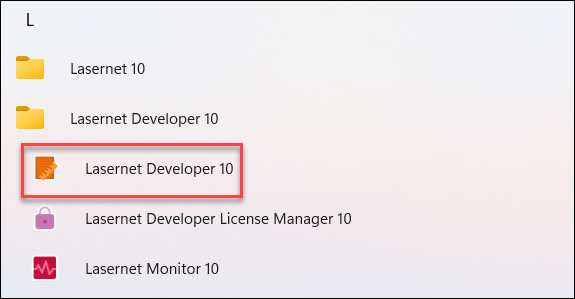
On the machine where you have installed Lasernet Developer, navigate to the Start menu, search for “Lasernet Developer License Manager”, and then open it.
.png)
Select the instance of type Lasernet Developer, click Activate, and copy the Lasernet Developer license key into the window that is shown. This will be the key that begins with “DEV”.
.png)
.png)
Lasernet Developer will now be active.
.png)
Note
A demo license has been used in the screenshot above. Your instance will not say “DEMO”.
For more details on how to use the License Manager, watch our Formbytes Video Tutorials.
Install Default Configuration
Users should now install the default configuration into the Lasernet Developer, which matches the configuration loaded into Finance and Operations earlier.
Open Lasernet Developer and copy the “URL for Lasernet” from the customer information document into the Server field:

(28).png)
Note
The “https://” part of the URL can be ignored.
Click Connect when prompted, enter the login details from the customer information document, and click Next.
(23).png)
On the Start screen, click Import configuration.
.png)
Navigate to the default configurations that were downloaded earlier, and select the LNCONFIGX file (orange logo).
(19).png)
Import this file, and the configuration will open.
Configure Azure Service Bus
In the Developer configuration that opens, select the Servers option from the Tools menu.
(23).png)
Select Default under Servers.
(18).png)
In the right-hand pane, under Instance, double-click Default.
(19).png)
The Default Properties window appears.
Select the server name from the Instance dropdown menu, then click OK.
(21).png)
Navigate to Modules from the Tools menu, and ensure that you have the new server name selected in the top left-hand corner.
(19).png)
Click the Azure Service Bus box located in the workspace.
Paste the Azure Service Bus connection string, which was used for the connection in Finance and Operations, into the connection string box, and select the entity path; there is a Copy button next to the connection string, which can be used to copy the value.
(19).png)
Paste it into the Connection String box.
.png)
Click Test Connection, and the following message is displayed:
.png)
Click OK > Ok.
Configure Azure Storage
Within Lasernet Developer, select the Commands option from the Tools menu and then select Azure Storage.
(16).png)
(16).png)
The Azure Storage Properties window is displayed.
Copy the Azure Storage string from FO and paste it into the Connection string field in the Developer.
(16).png)
The connection string can be copied from the Azure Storage connection in FO by using the Copy icon next to the Type field.
.png)
Or, depending on the version of FO, from within the Lasernet parameters, under the Performance tab.
(16)(1).png)
Click Test Connection within the Azure Storage Properties window and then OK > Ok.
(14).png)
Deploy the Changes
The default configuration in Lasernet is now updated with the appropriate connection information to link it to the Lasernet Connector, which was previously installed in FO. You now need to commit and deploy those changes for them to take effect. Follow these steps to do so:
In Lasernet Developer, click Commit in the top Toolbar.
(14).png)
Within the Commit Changes window, add a message detailing what changes have been made.
(15).png)
When the “Commit complete” message is displayed, click Close.
Click Deploy in the Toolbar, then in the Deploy configuration window, click Ok.
(14).png)
Click Close when prompted that the deployment was successful.
(15).png)
For hosted customers, the deployment of the Lasernet for Dynamics solution is complete. Move forward to the Verify section to confirm the setup and run some tests.

