How Do I Set Up and Use OutFile in the Default Configuration?
- 27 Apr 2026
- 2 Minutes to read
- Contributors


- Print
- PDF
How Do I Set Up and Use OutFile in the Default Configuration?
- Updated on 27 Apr 2026
- 2 Minutes to read
- Contributors
- Print
- PDF
Article summary
Did you find this summary helpful?
Thank you for your feedback
This article describes how the OutFile module is used within the Lasernet 9 Default Configuration for Lasernet FO Connector.
The OutFile output module in the default configuration is used as a type of storage for FO. This type of storage may be used for on-premises solutions that do not use Azure Storage and, instead, use a file system to print reports.
Setup in Lasernet FO Connector
Follow these steps within FO to set up the module:
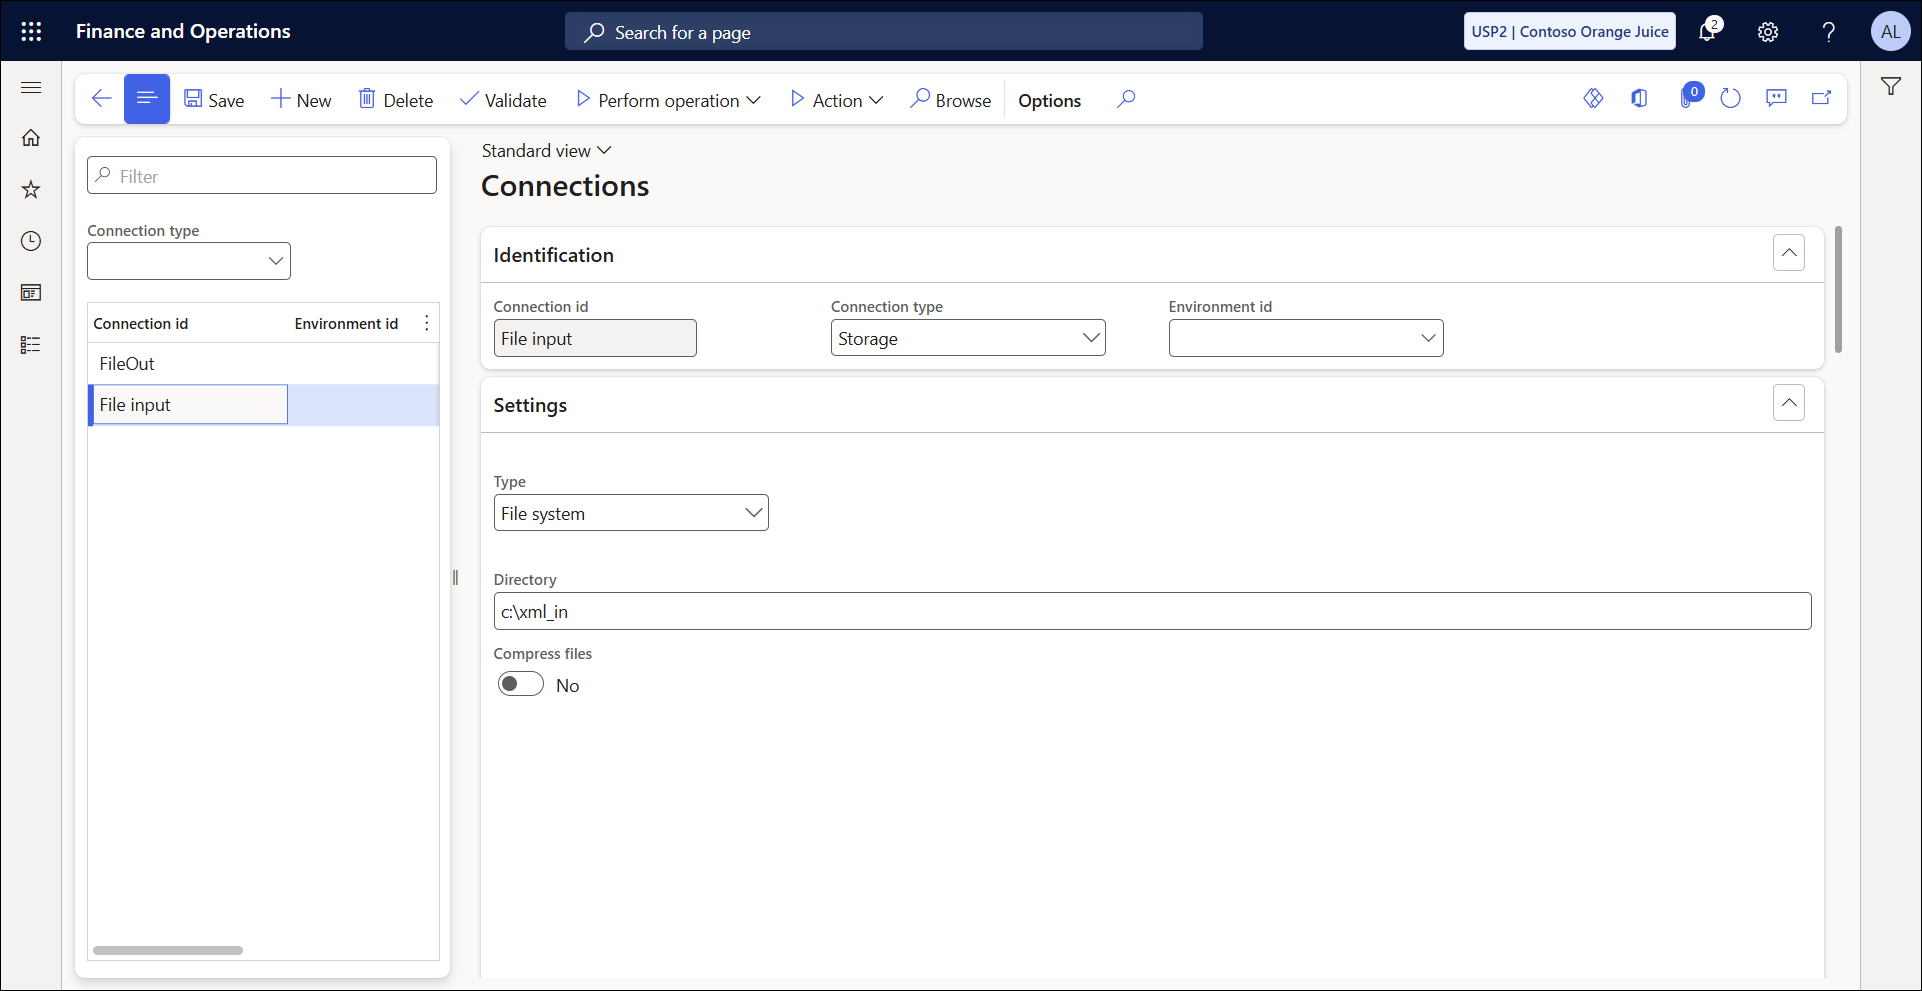
Navigate to Lasernet > Setup > Administration > Connections.
Create a new connection with Connection Type: Storage, Type: File System, and specify a Directory path.
This connection will be Lasernet FO Connector’s output location and the Lasernet input location.
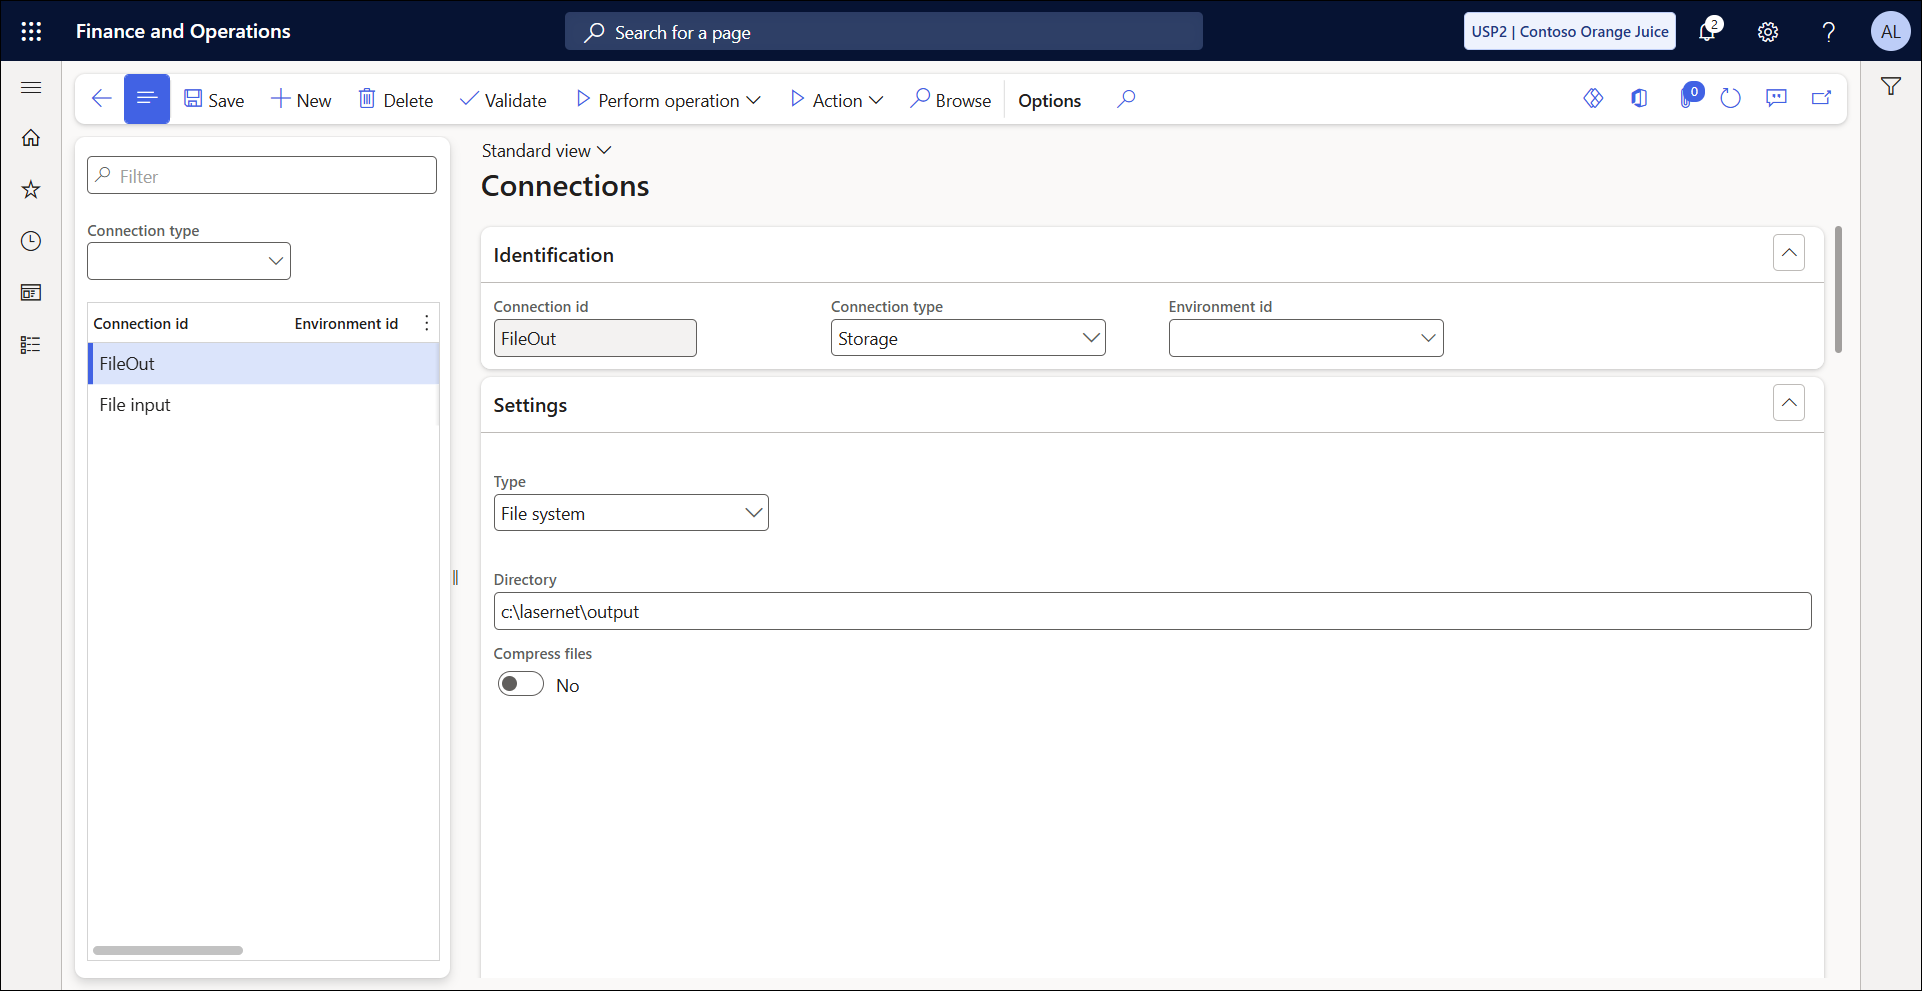
Create another new connection with Connection Type: Storage, Type: File System, and specify a Directory path.
This connection will be Lasernet’s output location and Lasernet FO Connector’s archive location.
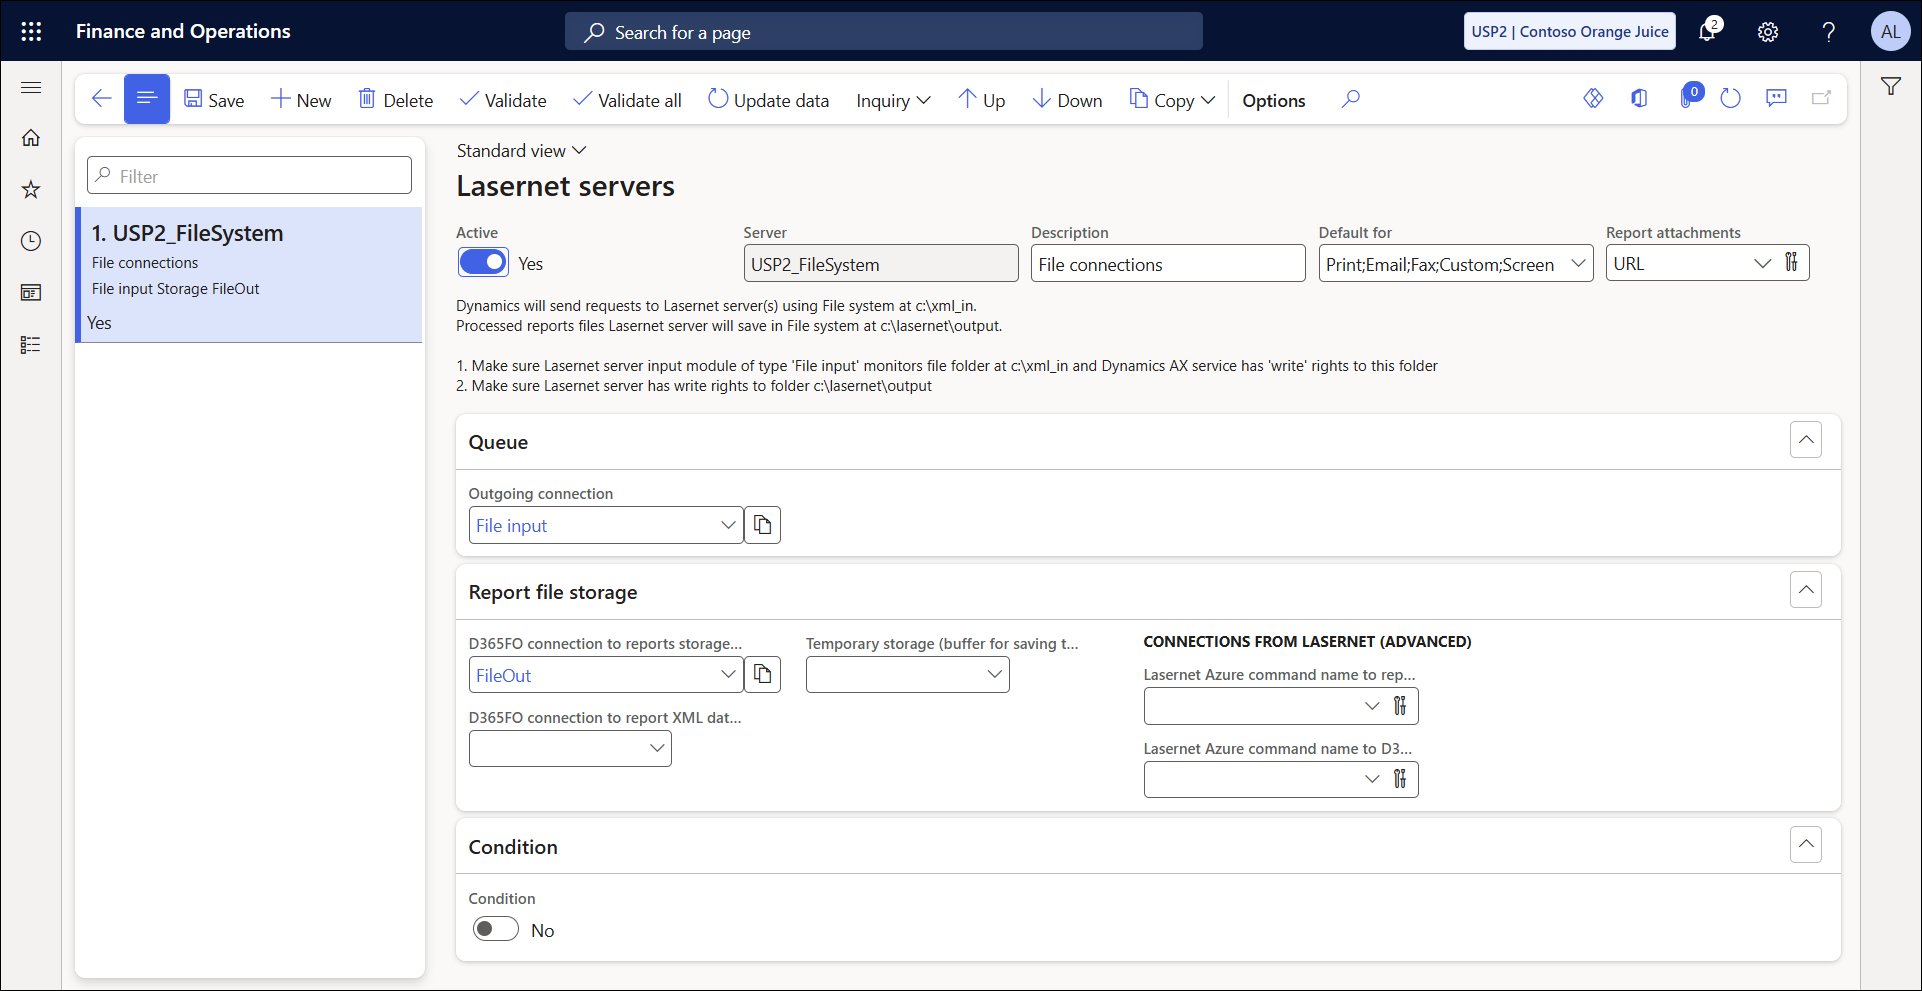
Navigate to Lasernet > Setup > Administration > Lasernet servers.
Create a new Lasernet server. Give it a Server name, Description, Default for, and make it Active.
Set your Outgoing connection to the file input created in step 2.
Set your D365FO connection to reports storage to the file output created in step 3.
The D365FO connection to reports storage’s connection type determines the OutStorageType jobInfo in the XML. In this case, the OutStorageType will be FileSystem.
Navigate to Lasernet Server > Lasernet Developer > Modules, ensure ListeningOnFiles is Active, and the Directory path matches the Outgoing connection on your Lasernet server in step 3. If this is completed and deployed, the Lasernet server in Lasernet FO Connector will validate successfully.

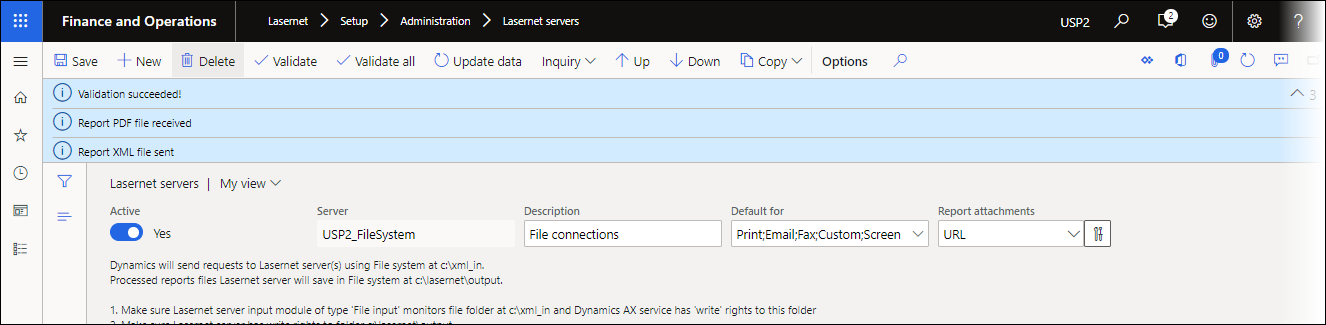
Try printing a report to this server from Dynamics 365 FO. As a test, print to Lasernet Screen.

Review the XML file generated by Lasernet FO Connector. OutputFilePath is populated with the path you determined in the connection. OutFileStorage is populated, and OutputStorageType is FileSystem.

Process in the Lasernet Server
Follow these steps:
Navigate to Lasernet Server > Lasernet Developer > Modules.
Select the Destination selection Pass-Through and open the Destinations tab.
The OutFile output module in the Default Configuration depends on the JobInfo runOutFile = true.

This JobInfo is set in the script setCriteriaVariables().
Close the Destination selection Pass-through, and select Scripts.
Scroll down to LAC Functions and double-click setCriteriaVariables().

Scroll to the line where var runOutFile is set. Variable runOutFile will only be true if the JobInfo OutStorageType is FileSystem, the job is not a printOut, the file is a PDF, and both OutFileStorage and OutFilePath are not empty. All these conditions are met with the setups carried out in Lasernet FO Connector.

You can verify the value for runOutFile in Lasernet Monitor.

If runOutFile is true, the job is sent to the OutFile module, and the JobInfo OutFilePath is used as the Directory path.

To verify files are being sent to the proper Directory path, navigate to the directory path. The file is saved.

How to Stop XML from Being Saved in the File Output Folder with a PDF
There are two ways to avoid having an XML file saved in the File Output folder with a PDF.
The first way is to disable Archiving. Follow these steps:
Open FO and navigate to Lasernet > Reports > Archive.
In the Archive field, select No.

The second way is to enable Archiving with Save XML disabled. Follow these steps to do so:
Select Default under the Archive field.
Toggle the Save XML button to No.
