- Print
- PDF
How Do I Retrieve Information from Finance and Operations via OData Request?
This article provides a guide on how you can retrieve data from Finance and Operations via an OData request from the FO API. In this example, we will request the Vendor list from All companies.
Create an API Registration
The first step is to create an App registration in your Azure environment. This must be done in the same Azure Tenant as your FO virtual host. Follow these steps:
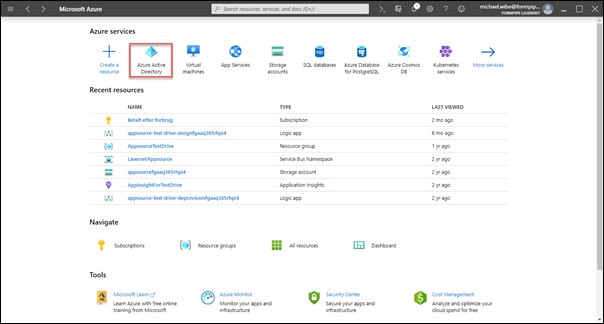
Log in to your Azure portal and open the Microsoft ® Entra ID.
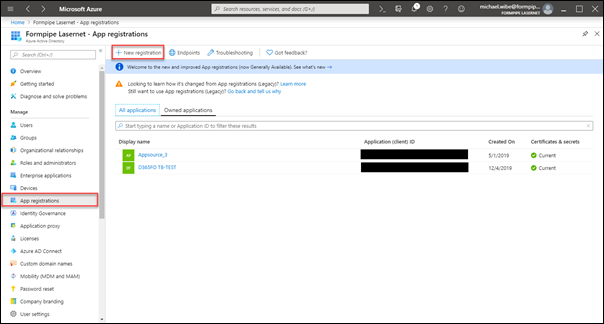
Select App registrations from the left-hand side menu and then New registration from the top menu.
Fill in the Name field for the new app, select an appropriate type from the Supported account types, and then click Register at the bottom of the screen.
Within API permissions, select Add a permission and then choose Dynamics ERP.
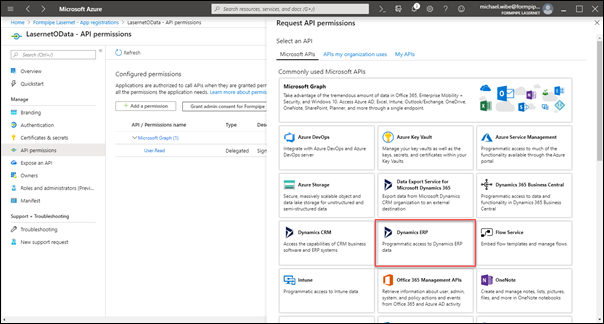
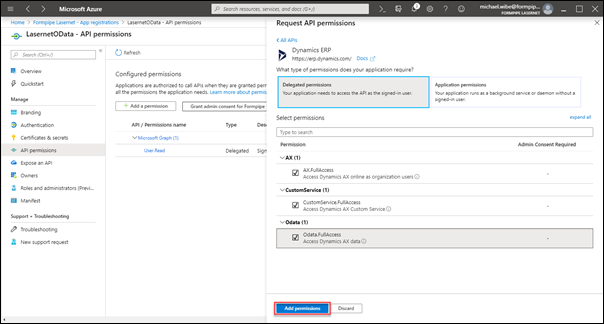
Click Delegated permissions and add all three options, then click Add permissions.
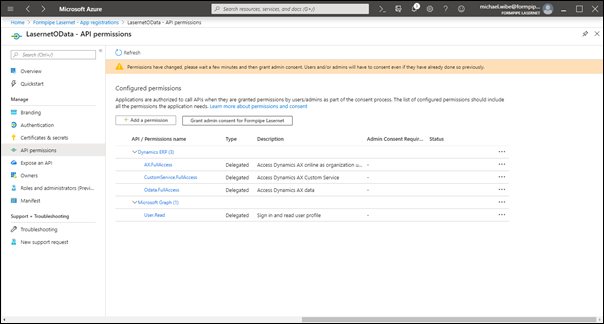
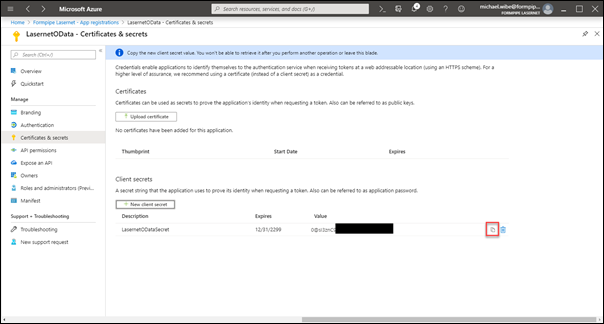
Select Certificates & secrets from the left menu and then New client secret.
Type in a Description, select Never, and then click Add.
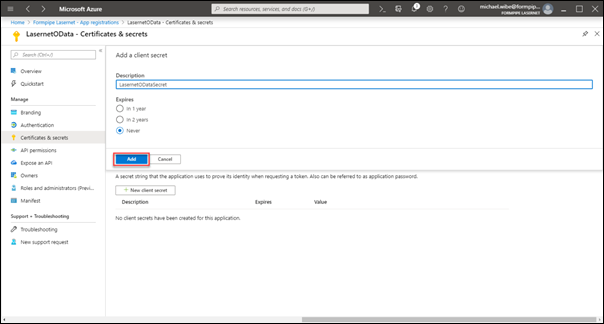
Copy the code and add it to a text editor such as Notepad. We will need the code later, as we cannot read it again when you close the form.
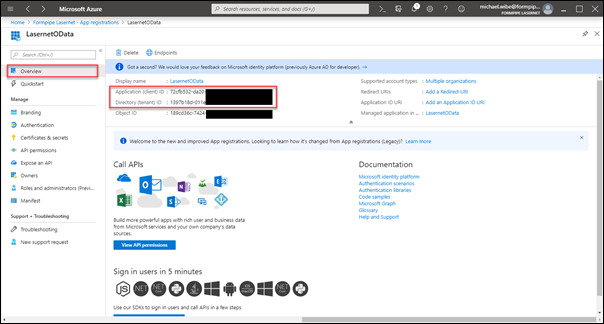
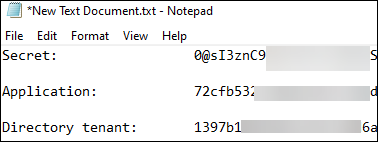
Select Overview from the left-hand side menu and copy Application (Client) ID and Directory (tenant) ID into your Notepad with the Client secret.
Log in to your FO environment with admin rights and navigate to System administration > Setup > Microsoft Entra ID applications.
Click +New from the top menu and copy the Client ID from your Notepad. Give it a name and add a User that the App should run as.
Info
Think about what permissions that user has.

Build the Connection
To build the connection to the App registration in your Lasernet setup, we need to get a Token. Follow these steps:
Open your Lasernet configuration, select Modifiers, add an HTTP modifier, and give it a name.
Open the Setup tab. In the Direction field, select the Output radio button, and in the Verb field, select the POST radio button.
Add a Host and a Remote path. The Remote path should contain your Directory (tenant) ID, so copy that from your Notepad.
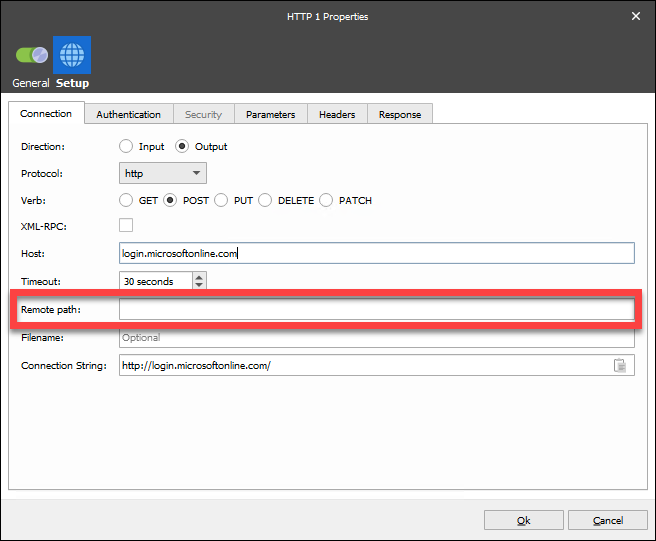
Open the Parameters tab and add the following four parameters:
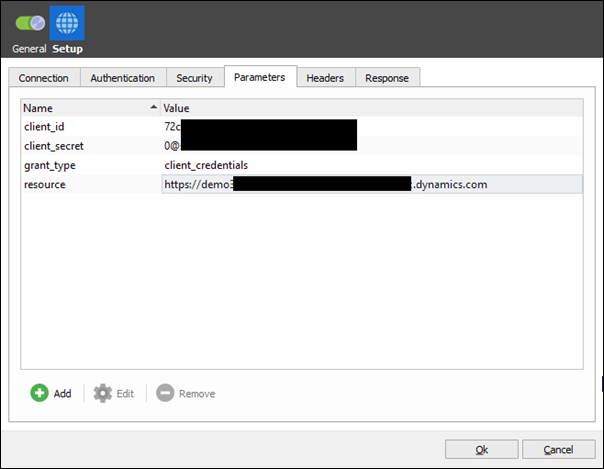
client_id: Your App registrations ID (copy from your Notepad)
client_secret: Your Client secret ID (copy from your Notepad)
grant_type: client_credentials
resource: Your URL to Dynamics 365 Finance and Operations
Open the Headers tab and add the following:
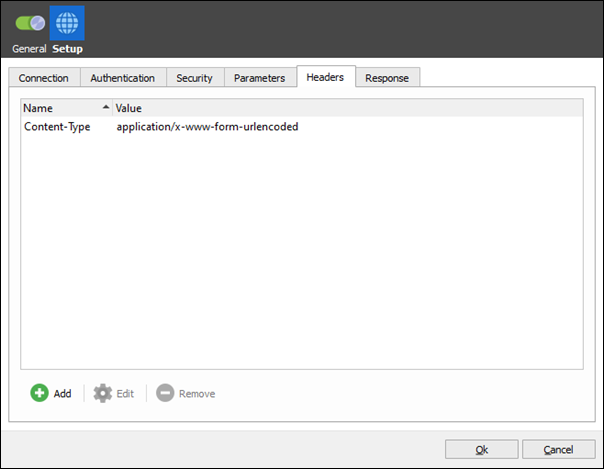
Content-Type: application/x-www-form-urlencoded
Click Ok to close the form, open the HTTP modifier again, and select Run from the menu bar. You should get a positive response. In the Log window, scroll all the way down to the last line, right-click the line, and select Preview.
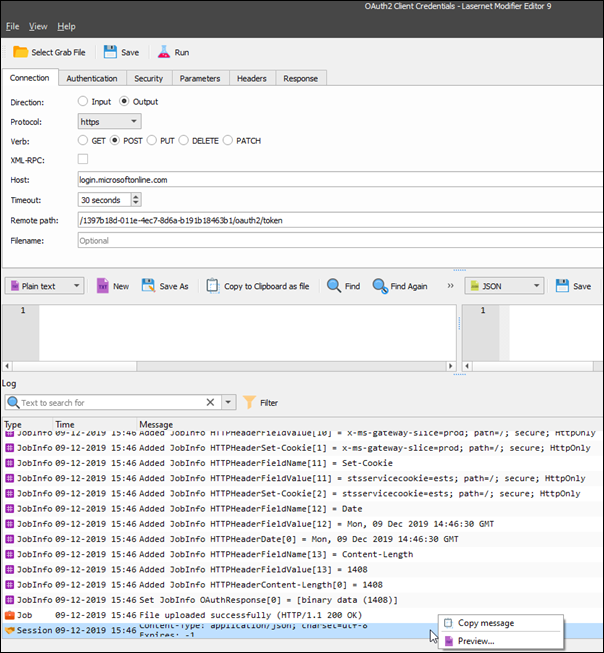
Check that you get a Token. If you do not get a Token, you need to double-check IDs.
Close the form and the HTTP modifier.
Add a new HTTP modifier and give it a name.
Open the Setup tab. In the Direction field, select the Output radio button, and in the Verb field, select the GET radio button.
Add a Host and a Remote path. The Remote path should contain ) }}?cross-company=true if you wish to get data across all companies.
Note
The following image illustrates how it works now, but Microsoft ® will likely change this in the future.
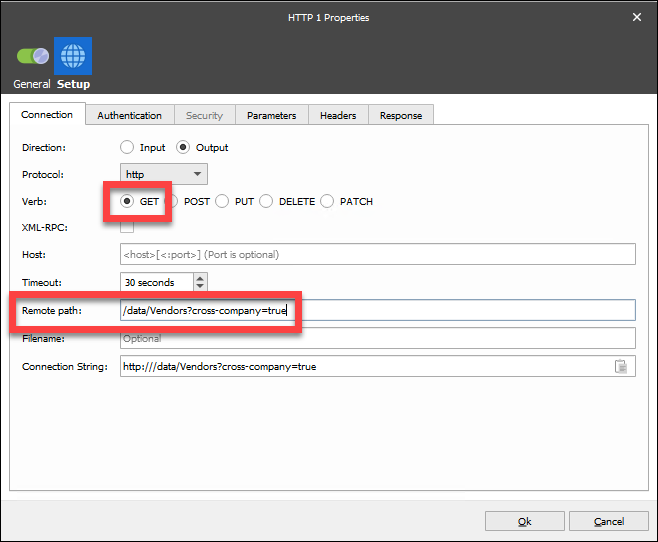
Host: Your Dynamics 365 Finance and Operations URL
Remote path: /data/"Entityname"?cross-company=true
Open the Headers tab and add the following:
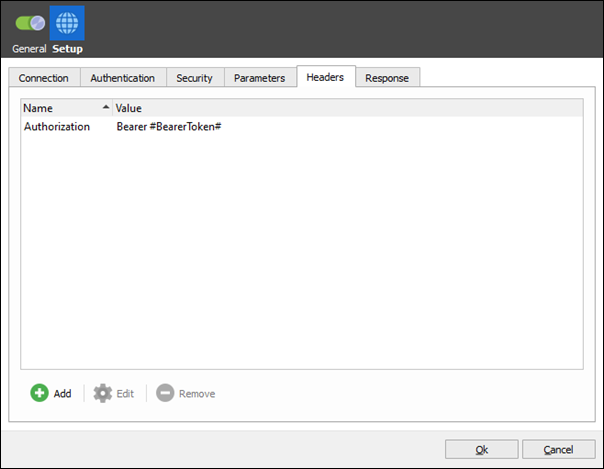
Authorization: Bearer #BearerToken# (this JobInfo will be created from a script that we are adding later)
Click Ok to close the form.
Select Modules from the left-hand side menu.
Add a Scheduler module and give it a name.
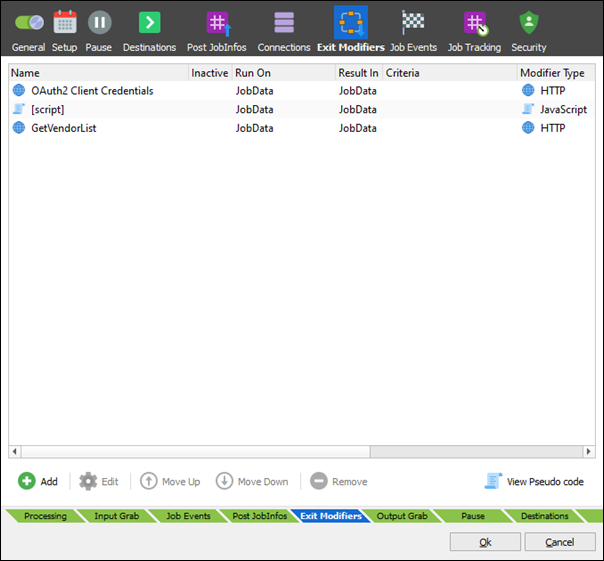
Open the Exit Modifiers tab and add the following modifiers in the same order:
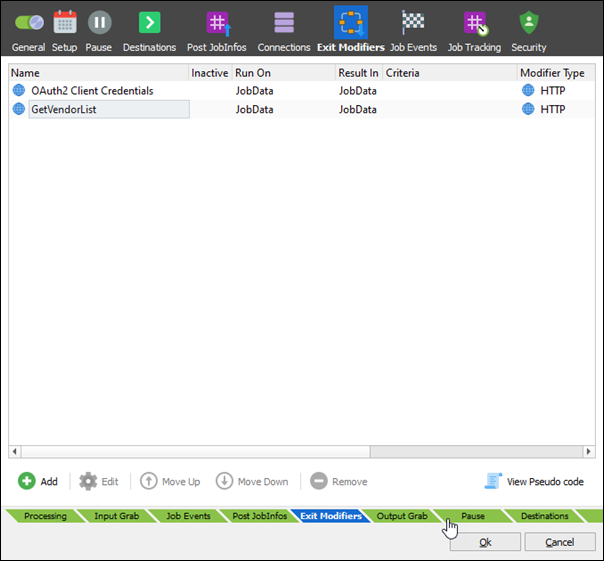
After these modifiers are added, click Add again, click Script, and then Edit.
Add the following script (the script is extracting the access Token from the response):
function extractToken()
{

 //Add the response into a variable
 var response = job.getJobInfo("OAuthResponse");
 //Parse the response variable as JSON
 var json = JSON.parse(response);
 if (json !== '' && json !== '{}' && json.access_token !== '')
 {
 job.setJobInfo("BearerToken", json.access_token, true);
 }
 else
 {
 job.setJobInfo("BearerToken", "", true);
 }
}
extractToken();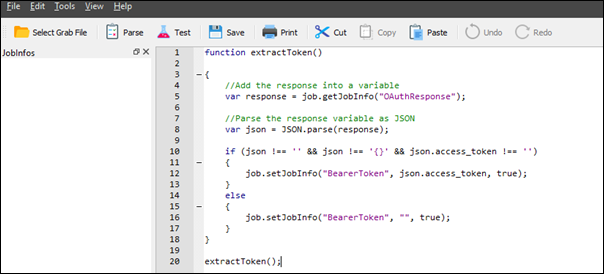
Save, close the script, and click Ok to close the Modifier form.
Move the script modifier so it is placed between the two other modifiers.
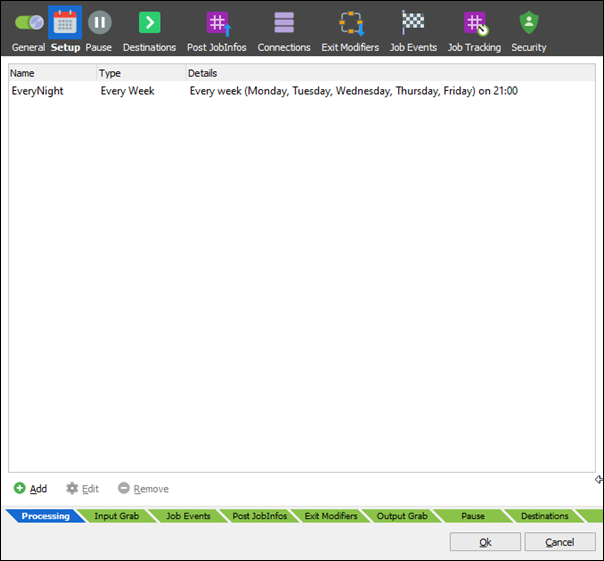
Open the Setup tab, add a time when the scheduler should execute, and then close the scheduler form.
Add a File Output module or another output module where you want your JSON file. Add that destination to your scheduler and update the Lasernet service. You are ready to go.

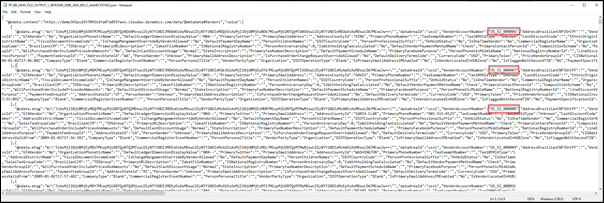
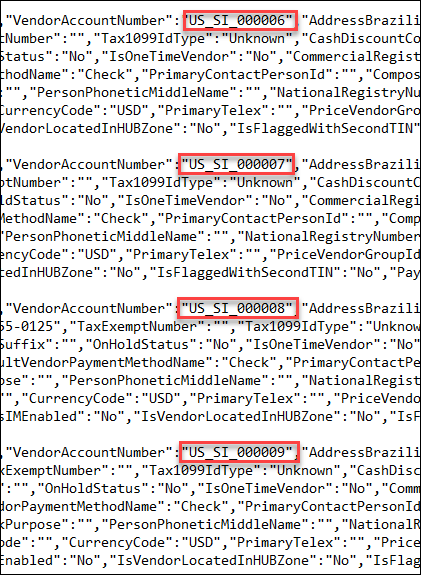
This is a sample of the output:
