- Print
- PDF
The Formatting substitution tool allows you to visually differentiate text within the same rearrange based on definite criteria and using the preferable settings. Changing your document layout in such a way can help you to arranged information in the most logical, easy-to-grasp order.
In this exercise, you can learn how to add a formatting substitution element, specify its settings, and define the required criteria for it. The given example illustrates four different regions. Each region, in turn, is presented by divisions that are all part of the same company. Every division is considered to make a profit per a definite period. So, you are proposed to add and apply formatting substitution elements in such a way that you can see and compare profits of different divisions, what division profits meet/do not meet/exceed expectations, etc
Exercise
Download and import the attached configuration called 37. Formatting Substitution in Lasernet Developer 9. Afterward, navigate to the Forms section and open the Sample form.
Follow these steps to add and then set formatting substitution elements.
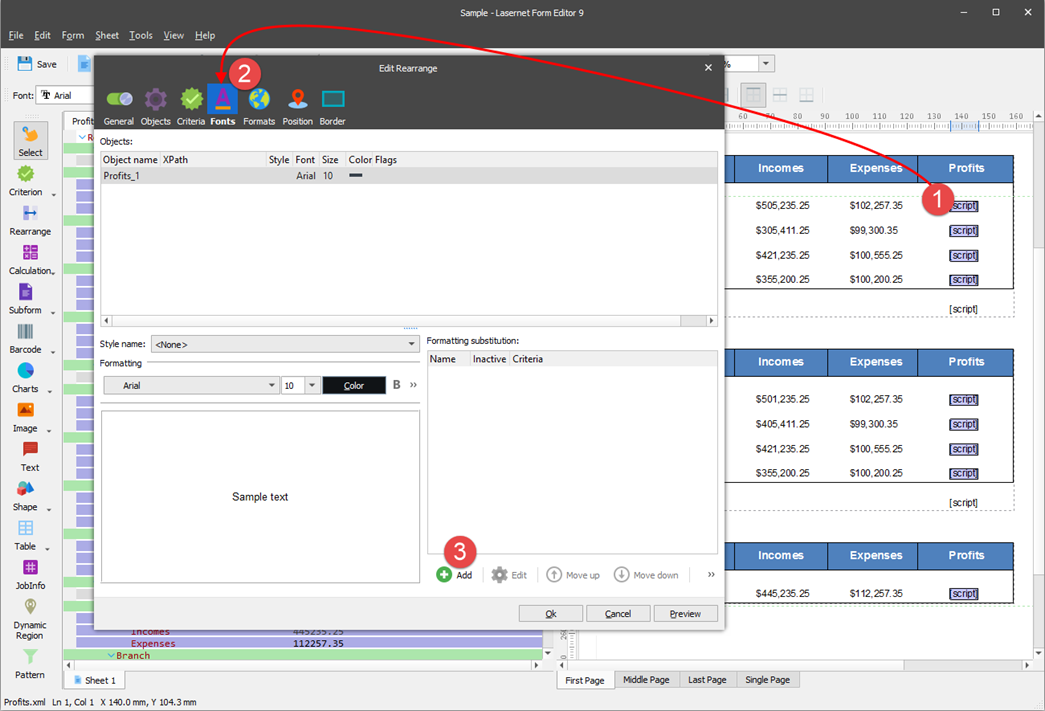
Start by opening the Profits rearrange for editing.
Ensure the Edit Rearrange dialog opens on the Fonts tab.
Under the Formatting substitution section, click the Add button.
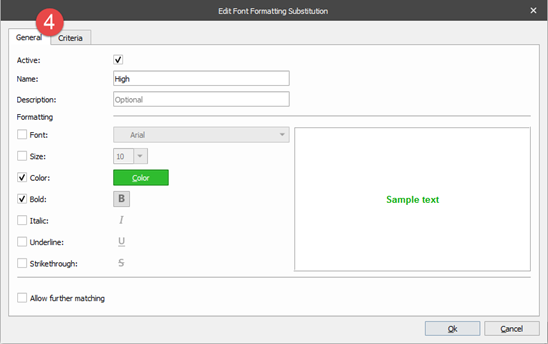
In the Edit Font Formatting Substitution dialog on the General tab, define a name for the formatting substitution and specify the settings, as shown in the following image.
Ensure that, for the Bold setting, both the checkbox is selected and the Bold button is clicked.
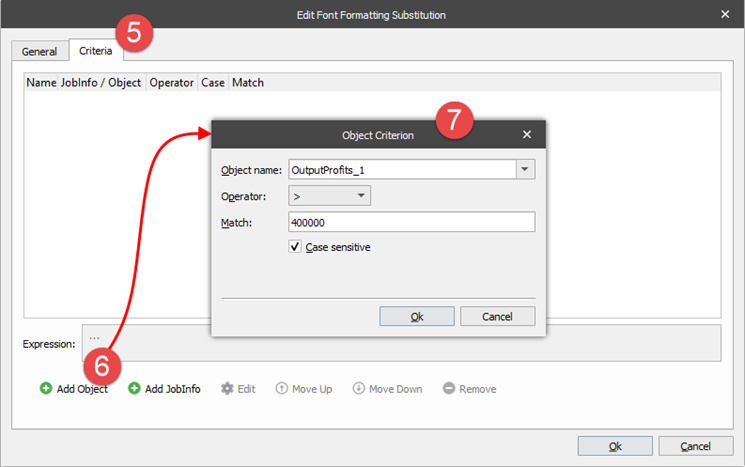
In the Edit Font Formatting Substitution dialog, switch to the Criteria tab.
On the Criteria tab, click the Add Object button.
In the Object Criterion dialog displayed, type the name of the object whose value is to be checked for matching, and specify values for the Operator and Match fields, as shown in the following image. Once you are done, click OK on both dialogs to save the changes you have made.
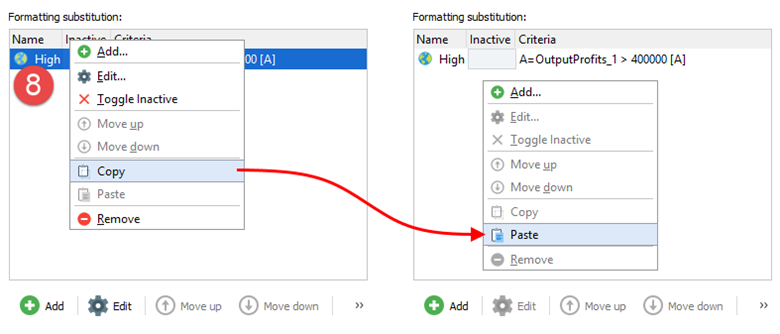
Add one more formatting substitution element by copying the one you have just added. To this end, under the Formatting substitution section, right-click the existing element record and then click Copy in the context menu that appears. Afterward, click anywhere in the Formatting substitution section, and then click Paste in the context menu that appears.
Once you are done, open the record you have just copied for editing. To this end, select the record in the list and then click the Edit button, right-click the record, and then click Edit in the context menu that appears, or double-click the record.
In the Edit Font Formatting Substitution dialog displayed, first, edit the General settings as it is shown in the following image.
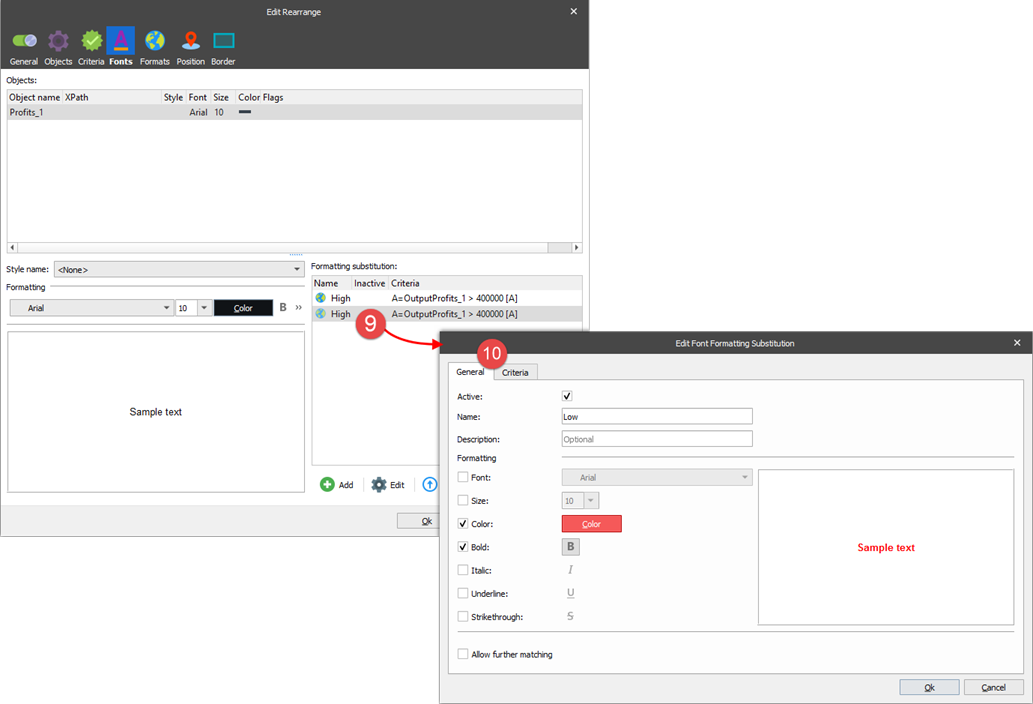
Afterwards, switch to the Criteria tab and edit the object by specifying values as it is shown in the picture below.
.png)
Once you are done, click OK on all dialogs to save the changes you have made, and then run JavaScript (SHIFT+F5 or click Run JavaScript on the View menu) to see the result.
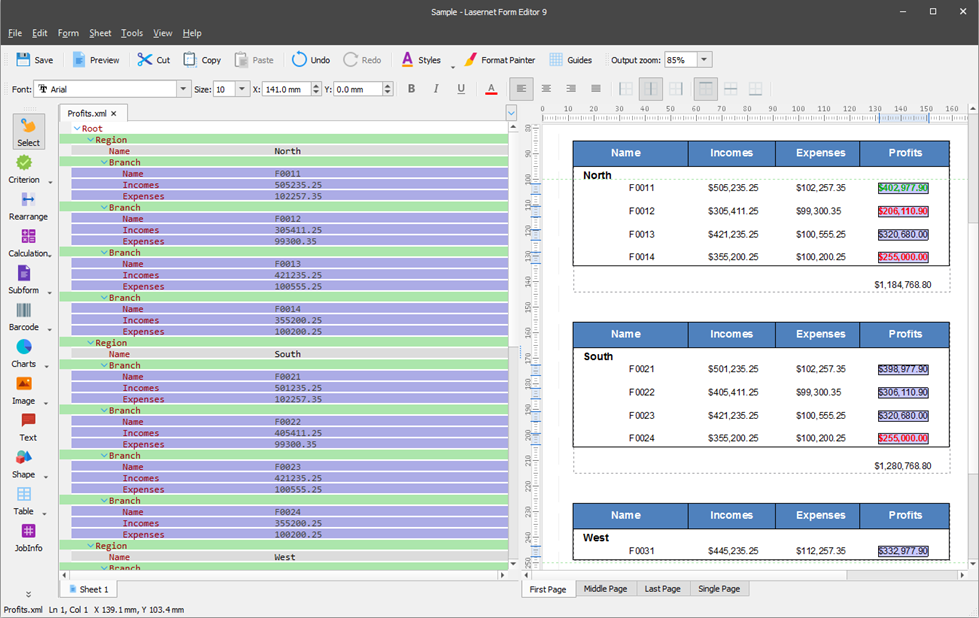
Now, you can add a formatting substitution element, but this time, for the standalone absolute rearrange presenting the total of division profits for each region.
Select the Profits rearrange for which you have just added formatting substitution elements, and then on the toolbar, click Format Painter. You have just copied the Fonts settings of the Profits rearrange.

Click the Profits Total rearrange to apply the Fonts settings of the Profits rearrange. Then, open the Profits Total rearrange for editing, and ensure the Edit Rearrange dialog opens on the Fonts tab.
.png)
Open each record of the Formatting substitution section for editing.
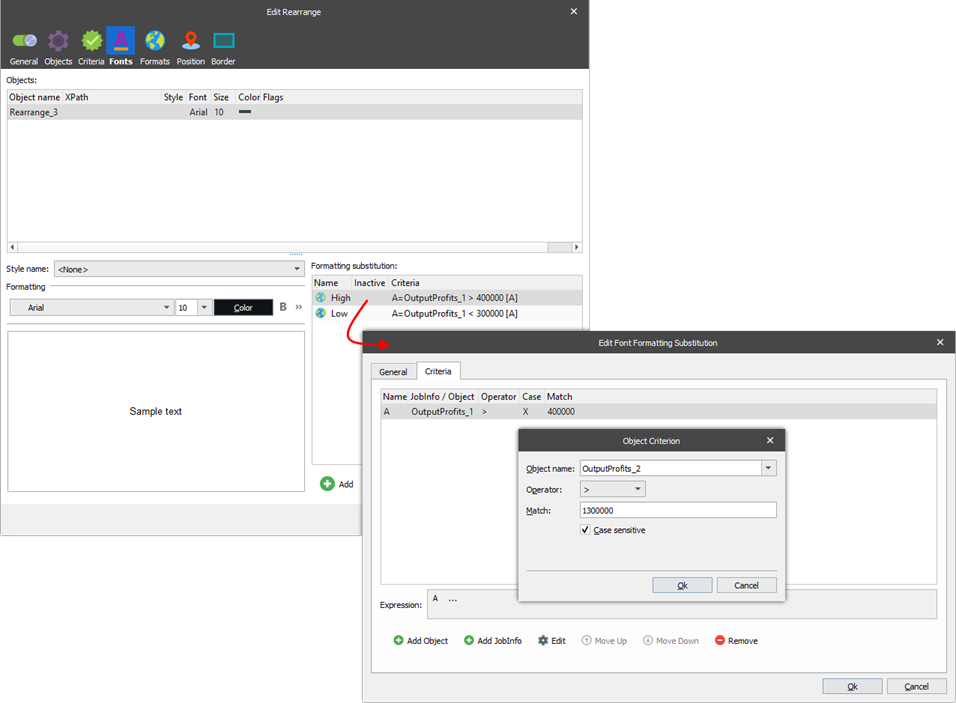
In the Edit Font Formatting Substitution dialog displayed, keep the General settings and do not change them. On the Criteria tab, edit the object by specifying values as shown in the following images:
a) High
b) Low
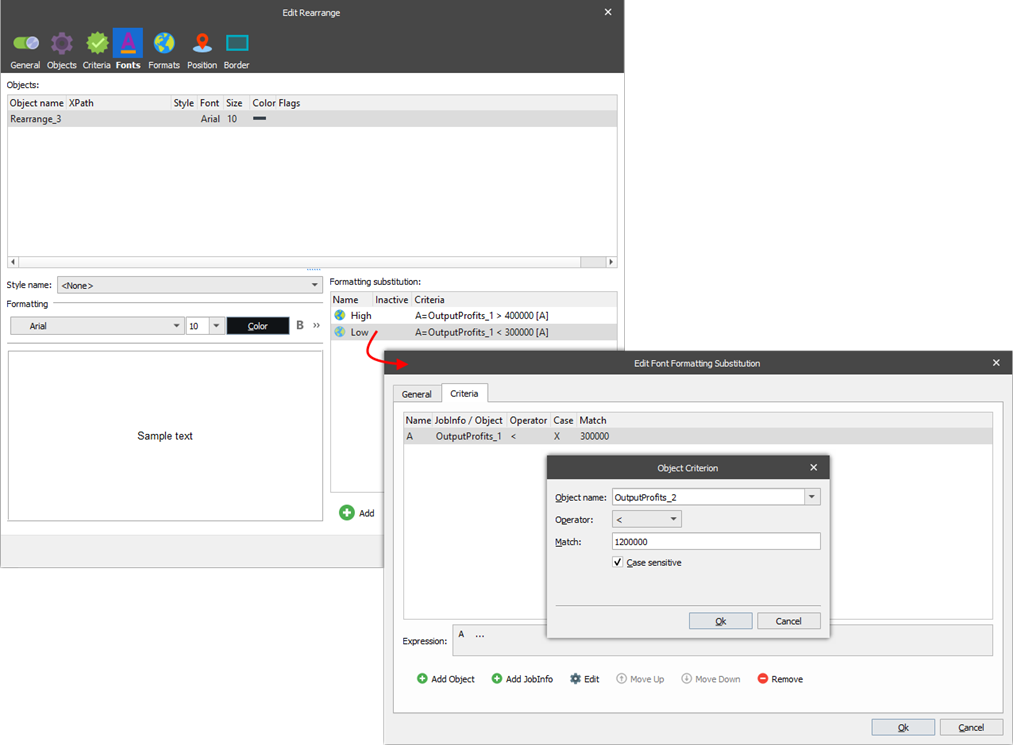
Once you are done, run JavaScript (SHIFT+F5 or click Run JavaScript on the View menu) to see the final result.
.png)

