- Print
- PDF
To find the Administration subsection, navigate to Lasernet > Setup > Administration.
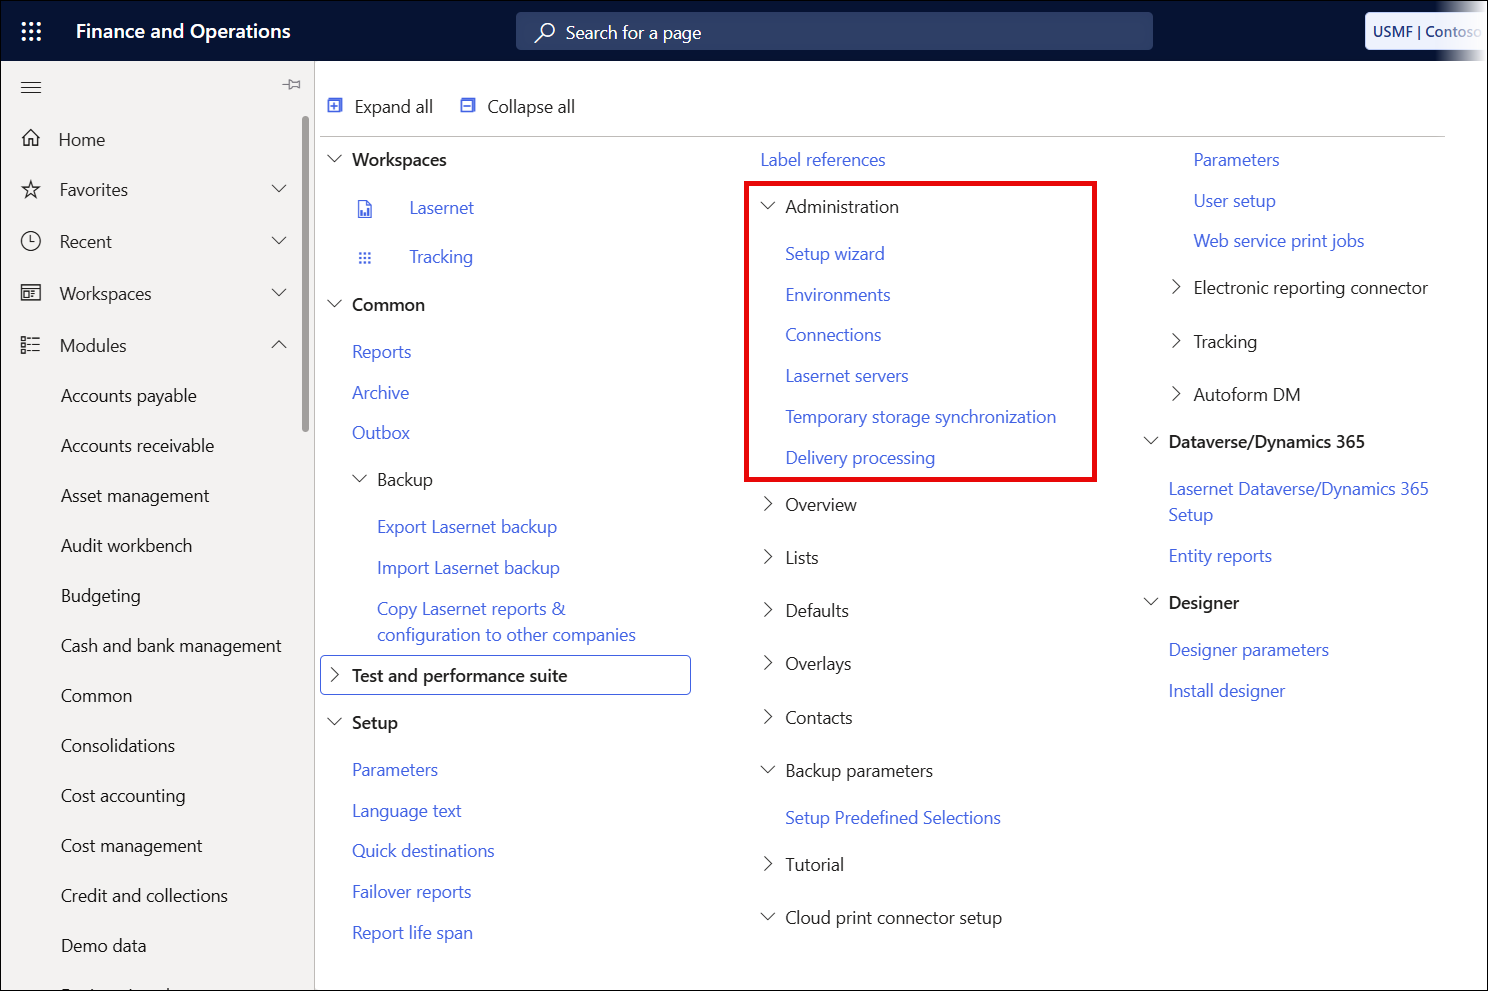
Environment IDs can be used to assign connections for different Dynamics 365 Finance and Operations environments within the same configuration. These connections and their associated environments can be preserved through a refresh.
For more information on this topic, watch our feature video.
Setup Wizard
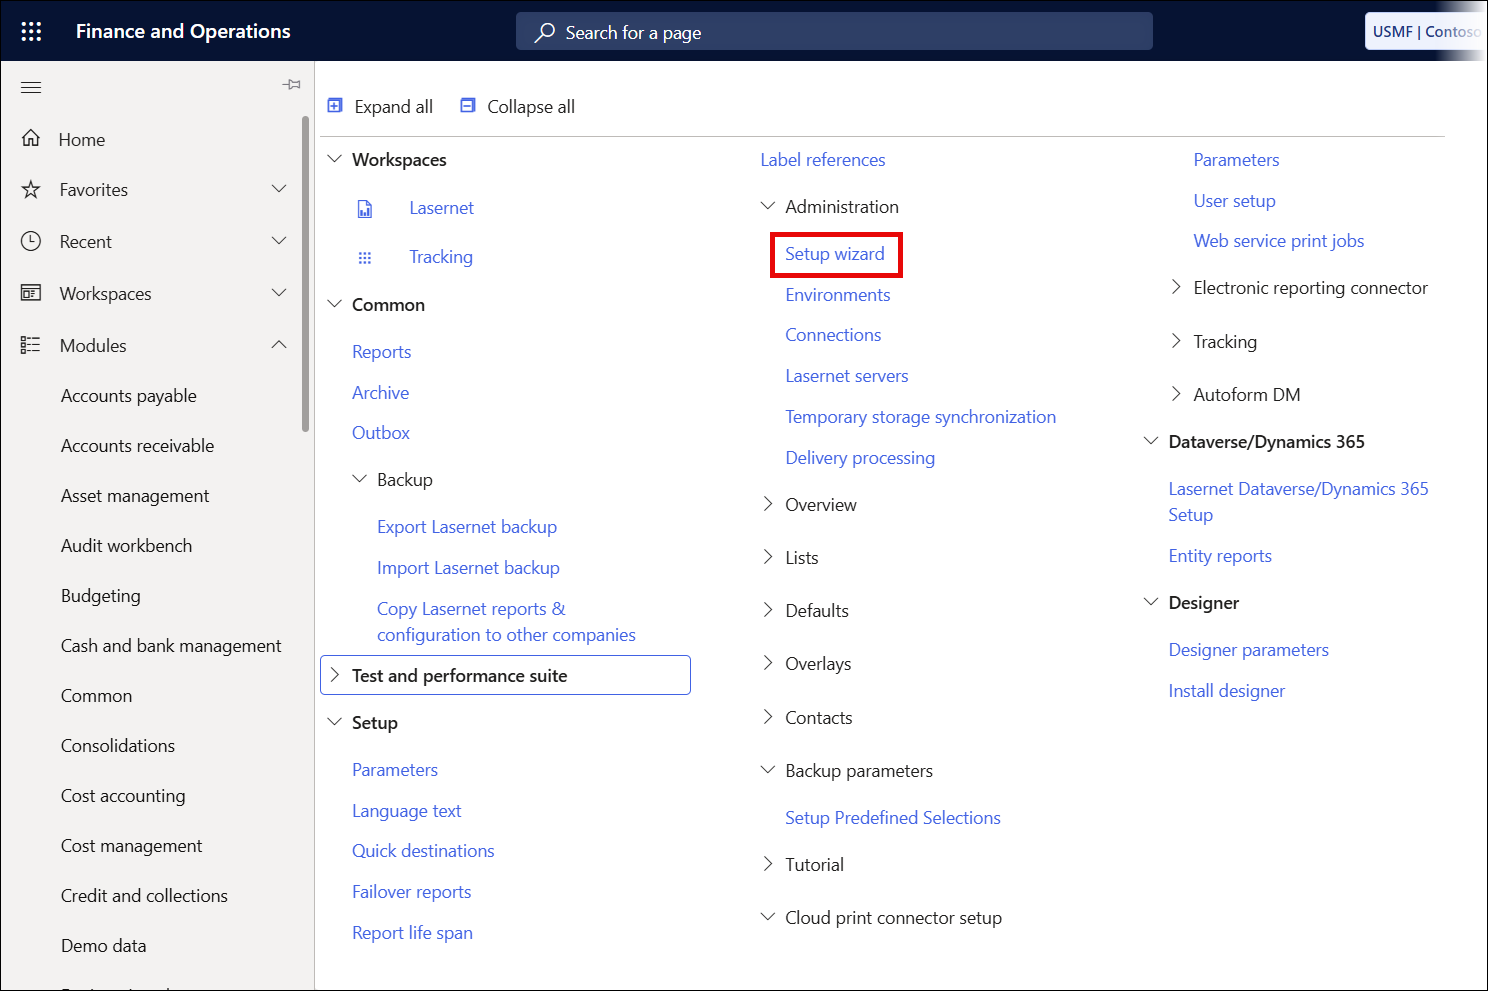
By following the steps in the Setup Wizard, you can be ready to use your Lasernet with Dynamics solution in less than five minutes. The Setup Wizard can be accessed via Lasernet > Setup > Administration > Setup wizard or the Lasernet Enterprise workspace.
Once you have accessed the Setup Wizard, you first have to choose between EMBEDDED ARCHITECTURE and DEDICATED LASERNET SERVER ARCHITECTURE. By choosing the former, the wizard will guide you through the installation process for the Embedded Lasernet server, while with the latter, you will access the installation process for a dedicated Lasernet server.
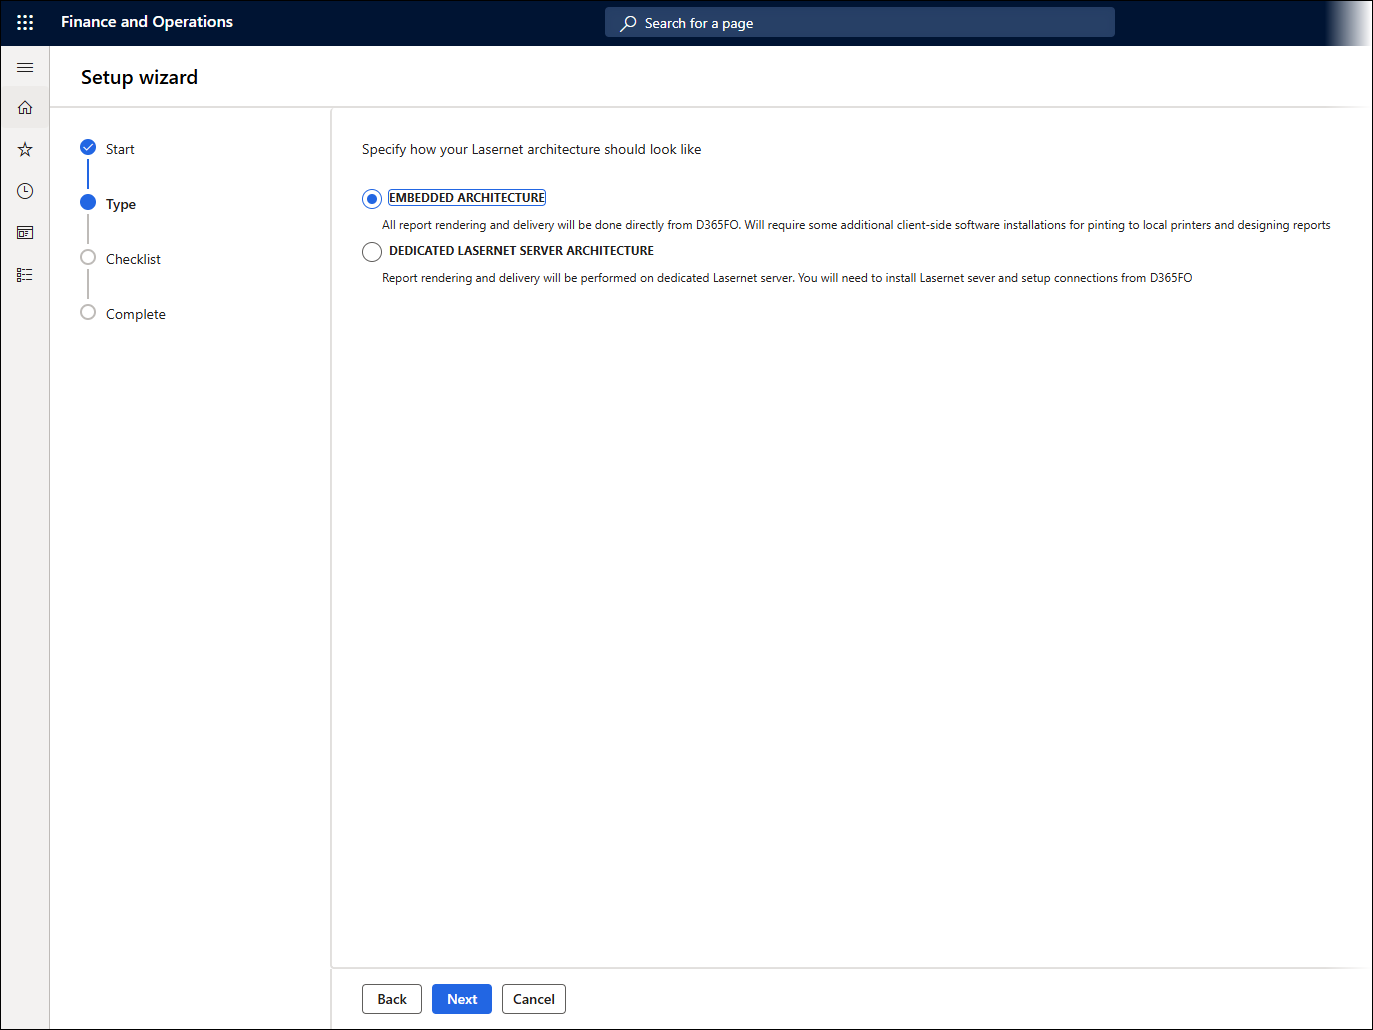
Embedded Architecture - Steps
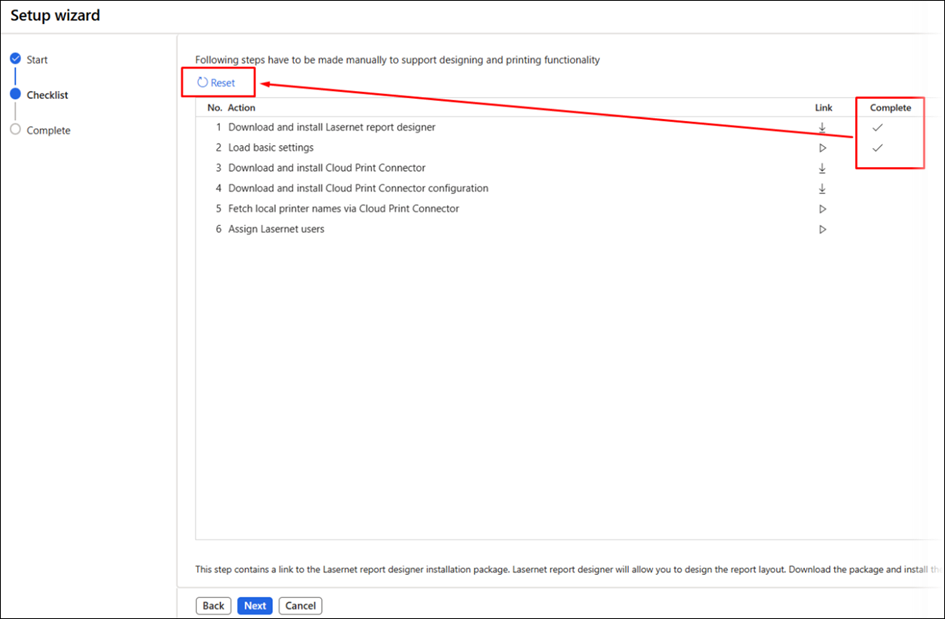
Download and install Lasernet report designer: Required - This step contains a link to the Lasernet Form Editor installation package, which will enable you to design the report layout. Download the package and install the software.
Load basic settings: Required – This step loads the default basic settings from Formpipe Azure Storage. These basic settings include parameters, connections to Formpipe Azure Storage, and configuration settings enabling report execution and printout.
Download and install Cloud Print Connector: Optional but encouraged – This step contains a link to the Cloud Print Connector installation package. Cloud Print Connector is installed on a local computer and waits for print jobs from Dynamics 365. When a report is printed from Dynamics 365, the printout file is sent to your local computer, and Cloud Print Connector redirects it to the chosen printer on your network. Once the Cloud Print Connector installer has been downloaded, navigate to your print server/machine that acts as a print server and install the client. Remember to run it as a System (not User) account.
Download and install Cloud Print Connector configuration: Optional but encouraged – The Cloud Print Connector configuration is a configuration file for Cloud Print Connector. It contains the necessary information to maintain an active connection with Dynamics 365. Ensure you have installed the Cloud Print Connector. Then, pick this option from the same machine running your Cloud Print Connector. It will automatically update its configuration.
Fetch local printer names via Cloud Print Connector: Optional, dependent on steps 3 and 4 – Fetching printers instructs the previously configured Cloud Print Connector to prepare a list of your available printers and load it into Dynamics 365.
Assign Lasernet users: Optional but encouraged – Assign users to the Lasernet User security role. This role only provides access to the Lasernet destinations within the printer dialog. If the reports are not configured for Lasernet, a user of this role has access to the standard destinations (SSRS). If a user is a System Administrator and you do not require further testing, you do not need to complete this step.
Note
For information on how to use Lasernet Cloud Print Connector with External Azure Storage connection strings, consult this article.
The following prompt appears if basic settings are already in place:
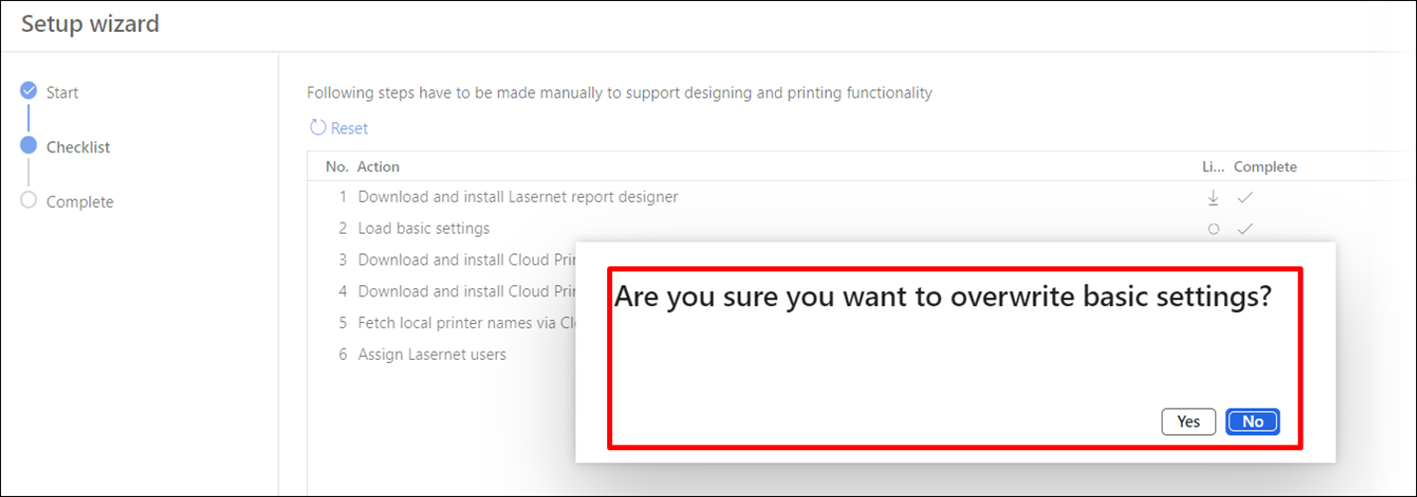
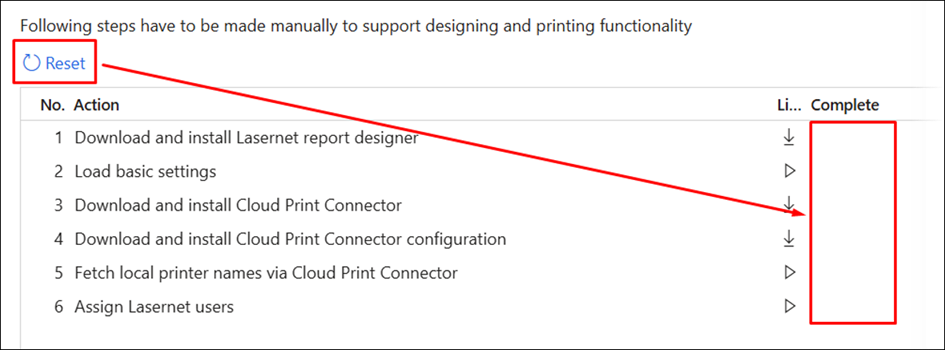
A checkmark in the Complete column indicates that a step has been completed. However, click the Reset button to remove all checkmarks and start over.
Dedicated Lasernet Server Architecture - Steps
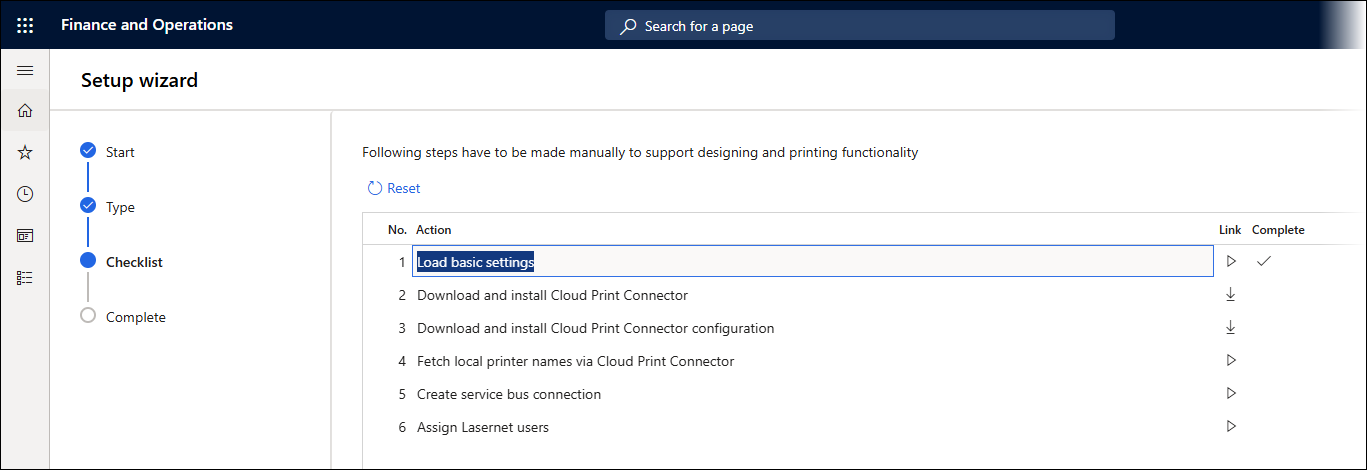
The steps for this option are essentially the same, apart from:
The installation for the Lasernet report designer (Form Editor) is skipped.
The system will guide you through the creation of a Service Bus connection.
Environments
Environment IDs can be found in Lasernet > Setup > Administration > Environments.

The Environment ID is an optional setting. Each Environment ID contains an ID and a URL for identifying the Dynamics 365 Finance and Operations environment. The Environment ID is associated with a connection that is used at runtime to identify the running Dynamics 365 Finance and Operations environment (by using the URL).

Connections
In the Connections section, you can set up communication between FO and various types of services, including storage, queues, Web services, and more. Communication between Dynamics 365 Finance and Operations and the Lasernet server is also configured through the Connections section.
Connections are defined in Lasernet > Setup > Administration > Connections.

Types of Connections
The following connection types are supported in Dynamics 365 Finance and Operations:

Connection type | Details |
|---|---|
Storage | Connection type that can be used for temporary or permanent storage of reports and/or report XMLs. Typically used as storage for temporary files to communicate with the Lasernet server or as an archive to store Lasernet output files. |
Azure service bus queue | Connection type to communicate with the Lasernet server via an Azure Service Bus Queue. |
Azure service bus topic | Connection type to communicate with the Lasernet server via an Azure Service Bus Topic. |
OData | Connection type to communicate with OData. |
Web service | Connection type to communicate with the Lasernet server via Web service. |
Azure hybrid connection | Connection type to communicate with the Lasernet server via an Azure Hybrid Connection. |
Dataverse/Dynamics 365 | Connection type to communicate with another Dynamics instance. Typically, a CE or Sales instance. |
Once connections are created, they can be used in Lasernet > Setup > Lasernet servers to define storage and a queue connection between the Lasernet FO Connector and Lasernet.
When selecting Storage as a Connection type, the following storage types are available for selection in the Type drop-down combo box:

Storage type | Details |
|---|---|
Azure storage | Connection to Azure Storage via a connection string. |
Dynamics 365 Azure storage | Connection to the current Dynamics environment's default Azure Storage account. |
File system | Connection to a file folder system. Typically used for on-premises solutions. |
Database | Connection to an external database. |
SharePoint | Connection to a SharePoint site. |
Autoform DM | Connection to an Autoform DM setup. |
Storage explorer
Browse files within Azure Storage
It is possible to browse files from different storage types, the same storage types that can be used to save the XML file used for the communication between Lasernet FO Connector and Lasernet (File, Azure Storage, and SharePoint).
The feature is found in Lasernet > Setup > Administration > Connections > Browse.

The file explorer opens with the standard file management features:

The file path is clickable, allowing you to navigate back through the directory structure.
The Home button enables you to return to the root directory of the file system quickly and easily.

Filtering/Search
The search feature presents two points of interest: a search Filter field and a condition-based search. Through the search filter, files can be filtered based on their names. Through the condition-based search, conditions can be set for the search.

Lasernet Servers
On the Lasernet servers page, users can set up connections to the Lasernet servers (both in the cloud and on-premises). Users can also add multiple servers to distribute print jobs among multiple Lasernet servers. Some use cases for this may include load balancing, multiple Lasernet test servers, or distributing content to printers across different countries or cities.
To access the Lasernet servers page, navigate to Lasernet > Setup > Administration > Laserent servers.

Add New Server
On the Lasernet servers page, users can add a new record by using the New button in the Menu bar at the top of the page. Once the necessary settings have been defined, remember to save the new server by clicking the Save button.

To complete the creation of a new server record, follow these steps:
Activate the server by toggling the Active button to Yes, and then enter a server name and a description in the corresponding text boxes.

Select the purposes for which the server will be used (print preview and/or distributing the document). Keep in mind that multiple servers can be added, each with a specific purpose.
In the case of a worldwide installation, it is advisable to have two distinct servers: a central Lasernet server for distributing documents (such as Print, Email, Fax, etc.) that does not require high performance, and a local server for print preview. In the following example, only the Lasernet server is present, so all available options are selected:

The following tables explain the controls for specifying settings for a new server record:
Lasernet server | Details |
|---|---|
Active | Use the toggle button to specify whether the server is Active or not. |
Server | Specify a server name within the Lasernet setup. |
Description | Provide a meaningful description of the server you create. |
Default for | Select the purpose for which the server is used: Print, Email, Fax, Custom, Screen. You can select several options at a time. |
Report attachments | Defines the methods of attachments in reports: URL attachments will insert Azure URL path, so Lasernet can pull attachments directly from Azure Storage using Azure connection. Base46 - all attachments will be Base46 encoded, which may cause large XML files. URL XML - especially useful for attachments in SharePoint as it allows parsing the attachments through a reference to a temporary location within the Azure Storage. It will save a copy of the attachments in the Storage specified in the field D365FO connection to report XML data storage. URL Original - especially useful for attachments in SharePoint as it allows parsing the attachments through a reference to a temporary location within the Azure Storage. It will parse a URL to the original location of the document, and Lasernet will use this URL to add the attachment. |
Queue | Details |
|---|---|
Outgoing connection | Define a name for the outgoing connection entry used to send request files to the Lasernet server. Use the drop-down combo box to select an entry. |
Report file storage | Details |
|---|---|
Dynamics connection to storage (optional) | Define the unique connection ID. Use the drop-down combo box to select an entry. |
Lasernet Azure connection name | Define the name of the connection used in Lasernet to connect to the Azure storage. Use the drop-down combo box to select an entry. |
Condition | Details |
|---|---|
Condition | Use the toggle button to define whether to use a condition or not by activating the corresponding status (Yes/No). |
Condition expression | Specify an expression condition for this server. The field becomes available once you toggle the Condition button to Yes. |
Queue and Report File Storage
While creating a new server record, use the Queue and Report file storage groups to specify an outgoing connection and storage. Entries you have added on the Connections page become available as values for:
Queue as Outgoing connection
Report file storage as:
D365FO connection to reports storage (Optional, advanced)
D365FO connection to report XML data files storage (Optional, advanced)
Lasernet Azure command name to report storage
Lasernet Azure command name to D365FO documents storage

For Lasernet FO Connector to work, two connections need to be configured: one for storage and one for the service bus.
Set Up Azure Service Bus
Users must configure the service bus. This is the mechanism that Lasernet FO Connector uses to communicate with Lasernet to send files back and forth.
Once the connection string is obtained, follow these steps:
Navigate to Lasernet > Setup > Administration > Connections.

Because the default configurations are installed in this entity, there are a number of connections already created:

Select AZ Service Bus Queue, leave all the options as standard, and paste the connection string into the AZURE SERVICE BUS QUEUE CONNECTION STRING field.
Click Save, type a sensible queue name into the Queue name field, and click Save again.

The following dialog box appears:

Click Yes in the dialog box.
Click Validate, and a message in the blue bar will appear, indicating that the connection has been successfully validated.

Set Up Azure Storage
Configuring the Azure Storage is now required. In this instance, we are using the storage that comes with Dynamics 365, so there is nothing else to configure outside of the system. Follow these steps:
Navigate to Lasernet > Setup > Administartion > Connections and click New.

Enter the following details into the appropriate fields:
Connection ID: Enter a sensible name
Connection type: Storage
Type: Select Dynamics 365 Azure storage from the dropdown
Click Save, and in the Instance name field, select lasernet from the drop-down menu.

Click Save again and then click Validate. A message in a blue bar is displayed indicating that the validation was successful.

Update Data
Clicking the Update data button on the Menu bar of the Lasernet servers page enables you to receive information about printers, printer profiles, overlays, and custom ports from all added Lasernet servers.

Inquiry
Clicking the Inquiry button on the Menu bar of the Lasernet servers page enables you to select what you wish to receive from the selected Lasernet server: printers and printer profiles, overlay files, or custom ports.

Validate
By clicking the Validate/Validate all buttons on the Menu bar of the Lasernet servers page, all necessary permissions for AOS to access various web services and Azure connections are verified. Any validation information is displayed in the Infolog.

Copy
Use the Copy button on the Menu bar of the Lasernet servers page to copy a server. Then, if you wish, you may change the settings: for instance, you can separate Print, Predefined Destinations, Email, etc., from printing to Lasernet Screen.

Temporary Storage Synchronization
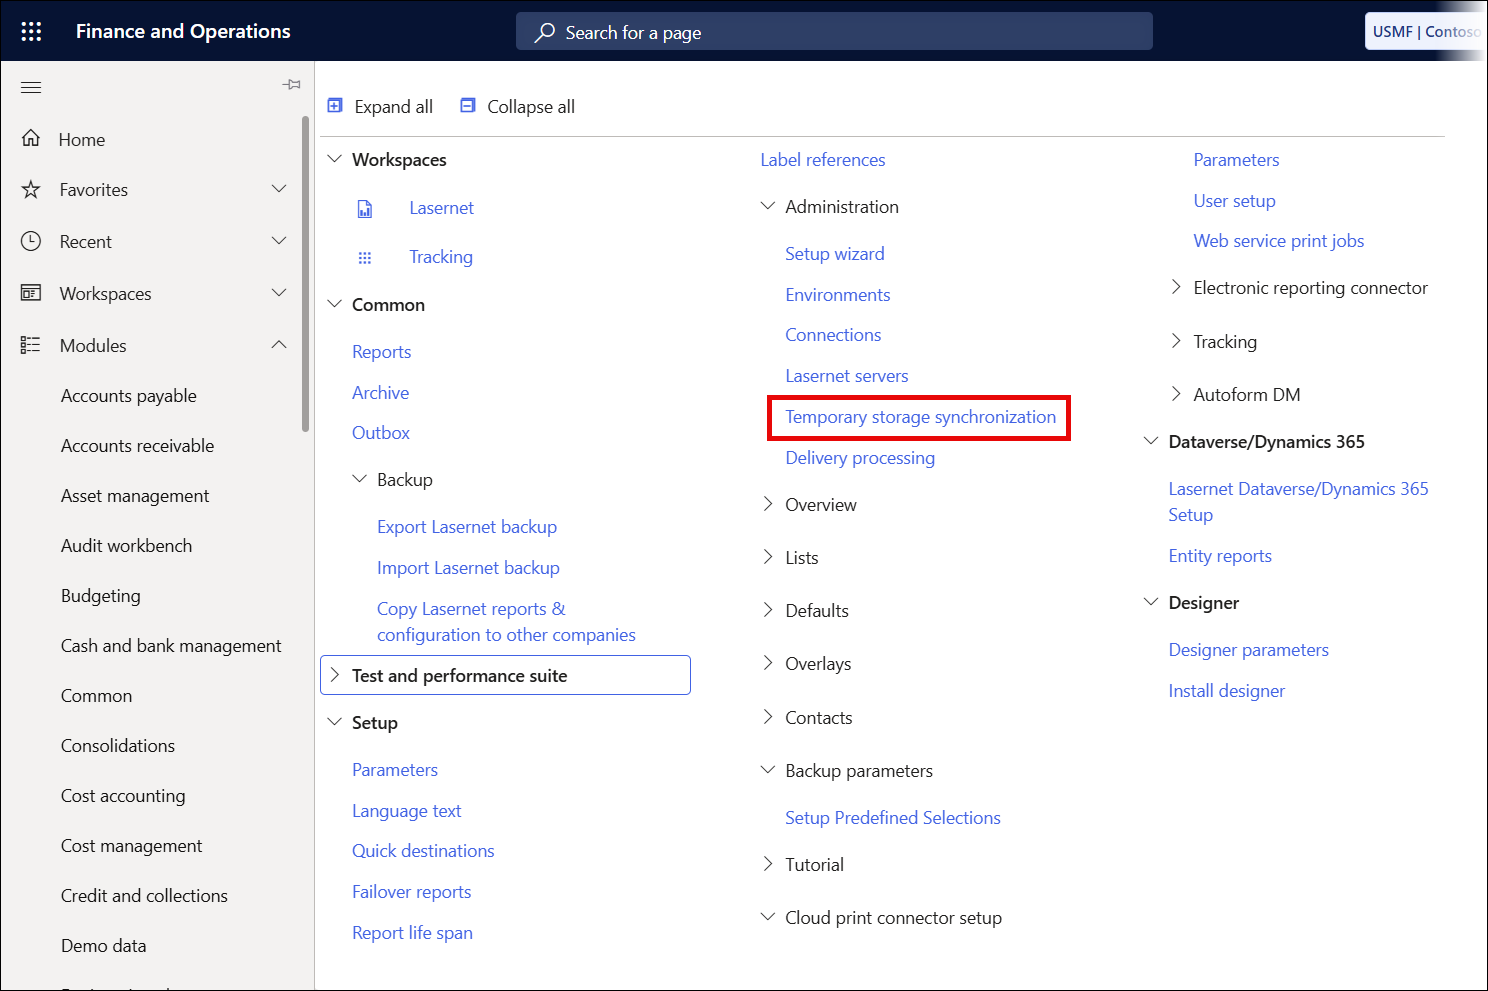
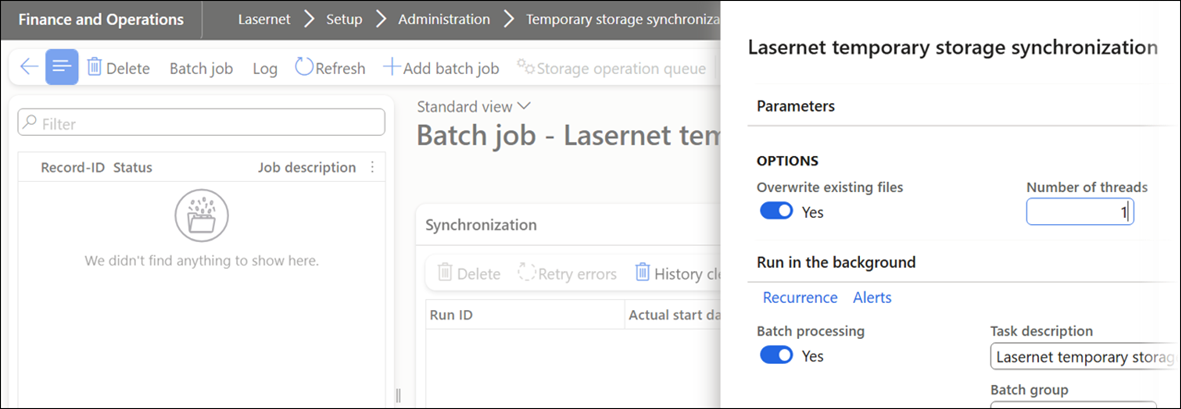
The batch jobs used to migrate documents from the External Azure Storage to the Internal Azure Storage managed by FinOps are located in Lasernet > Setup > Administration > Temporary storage synchronization.
A prompt such as the one below appears if a batch job has not already started, enabling you to specify whether files should be overwritten, the number of threads, and the recurrence.
The default recurrence is every minute, but it is possible to adjust this within the Batch job.
In the Pending files section, it is possible to see what has been queued within the Temporary Azure Storage and, therefore, is ready to be processed:
(5).png)
The prefix “document” indicates that the file is a document intended for Document handling as an attachment and, therefore, should be saved within the Internal Azure Storage managed by FinOps.
(5).png)


