Find Your Way Around the Lasernet Administration Tool
- 02 Mar 2026
- 5 Minutes to read
- Contributors


- Print
- PDF
Find Your Way Around the Lasernet Administration Tool
- Updated on 02 Mar 2026
- 5 Minutes to read
- Contributors
- Print
- PDF
Article summary
Did you find this summary helpful?
Thank you for your feedback
The information below will help you to familiarize yourself with the administration tool.
Manage
The home page provides quick access to commonly used areas. Other parts of Manage focus on specific areas of functionality.
Home Page
.png)
Number | Item | More information |
|---|---|---|
1 | Actions area | The tiles in this area provide access to commonly used areas of Manage. |
2 | View Job Status | View job queues and perform basic tasks like:
For more information, see Manage Lasernet Jobs. |
3 | Manage System Configuration | Navigate to the System Configuration area, where you configure and administer the Lasernet Core system. |
4 | Manage All Users | Navigate to the All Users area, where you create and manage users and user groups. |
5 | Manage Security Roles | Navigate to the Security Roles area, where you create and manage security roles. |
6 | View Logs | View Lasernet environment logs. For more information, see Lasernet Environment Logging. |
7 | Search box | For quick access to a Manage area (such as the license management or security role area), click the search box (or press Ctrl + K) and then enter the page name. |
8 | Deploy | Deploy a configuration to a Lasernet environment. For more information, see Deploy a Configuration to a Production Environment. |
9 | Dark mode switch | |
10 | Account | To open the Account info pane and access the Sign out button, click this button. The Session Details area of the pane displays the name of the currently logged-in user and the current Lasernet version. The General Documentation area provides a link to the Lasernet Knowledge Base. |
11 | Return to home page | At any time, click Home to return to this home page. |
12 | Job Status | View job queues and perform basic tasks, such as:
For more information, see Manage Lasernet Jobs. |
13 | System Configuration | Navigate to the System Configuration area, where you configure and administer the Lasernet Core system. |
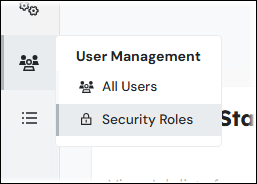
14 | User Management menu | Access the All Users and Security Roles areas.
|
15 | Logs | View Lasernet environment logs. For more information, see Lasernet Environment Logging. |
16 | Settings | |
17 | Expand | To expand the left-side menu so that it displays icon names alongside icons, click Expand. |
18 | Side menu | Provides access to all areas of Manage. |
System Configuration Area
The System Configuration area enables you to manage important aspects of the Lasernet system, such as adding licenses, assigning licenses to Lasernet environments, managing Lasernet Configurations, and creating app registrations.
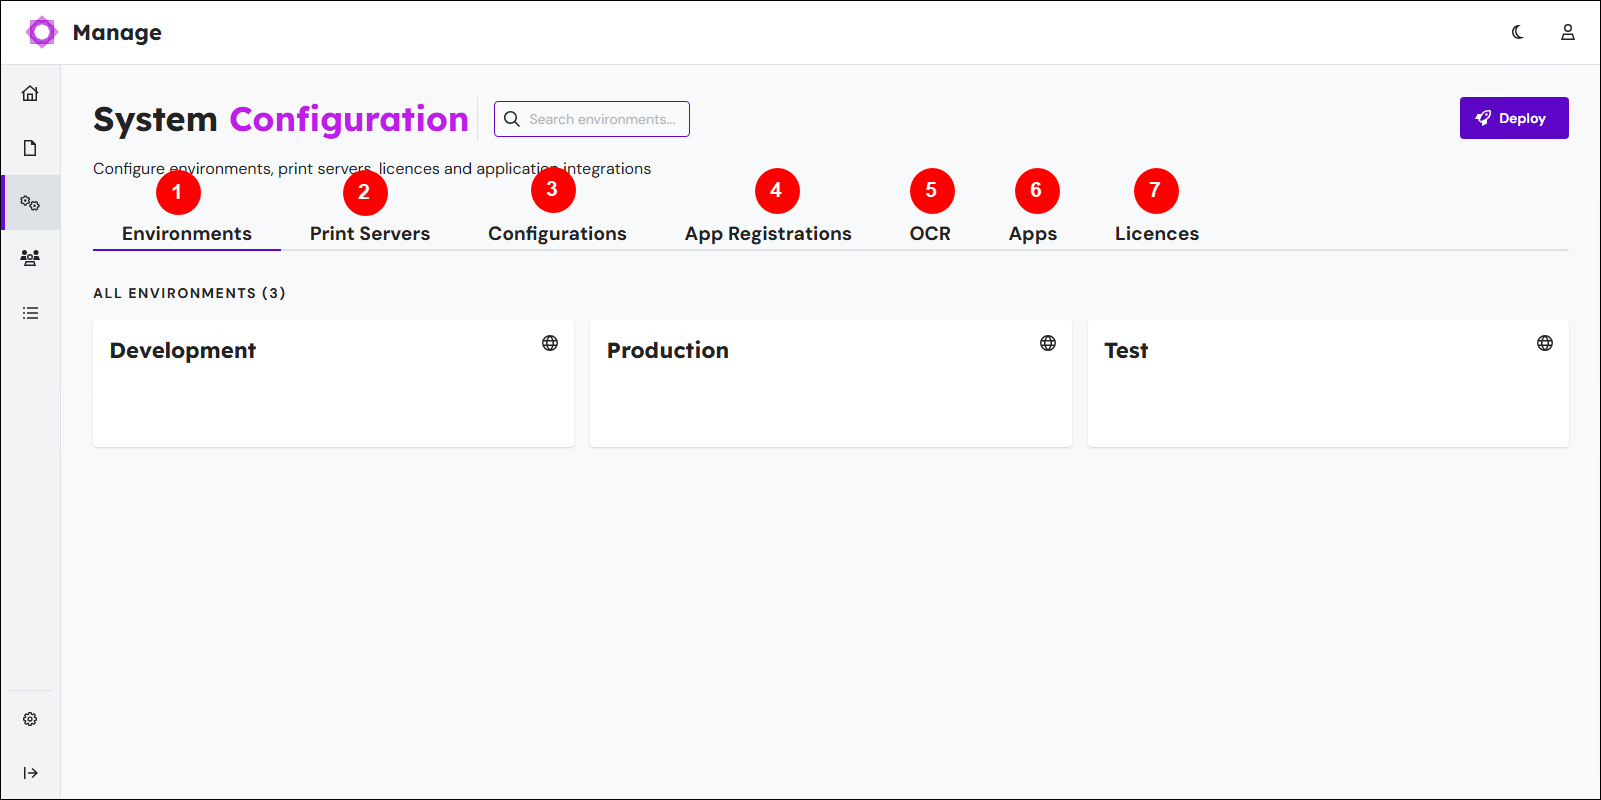
Number | Item | More information |
|---|---|---|
1 | Environments | Administer Lasernet environments: |
2 | Print Servers | |
3 | Configurations | See a list of the Lasernet configurations that are stored in the repository of this Config Server. The configurations can be deployed to the environments listed on the Environments page. In the Lasernet Configuration pane that opens when you click a configuration’s tile, the Revisions area lists each revision with its number and other details. |
4 | App Registrations | |
5 | OCR | Manage OCR form lists and OCR identifiers. |
6 | Apps | Specify CORS allowed origins. |
7 | Licences | Add Lasernet licenses to the Config Server, view important license information (such as current usage and expiry date), and manage licenses (for example, remove licenses or synchronize license features with the Lasernet Group license server). For more information, see: |
All Users Area
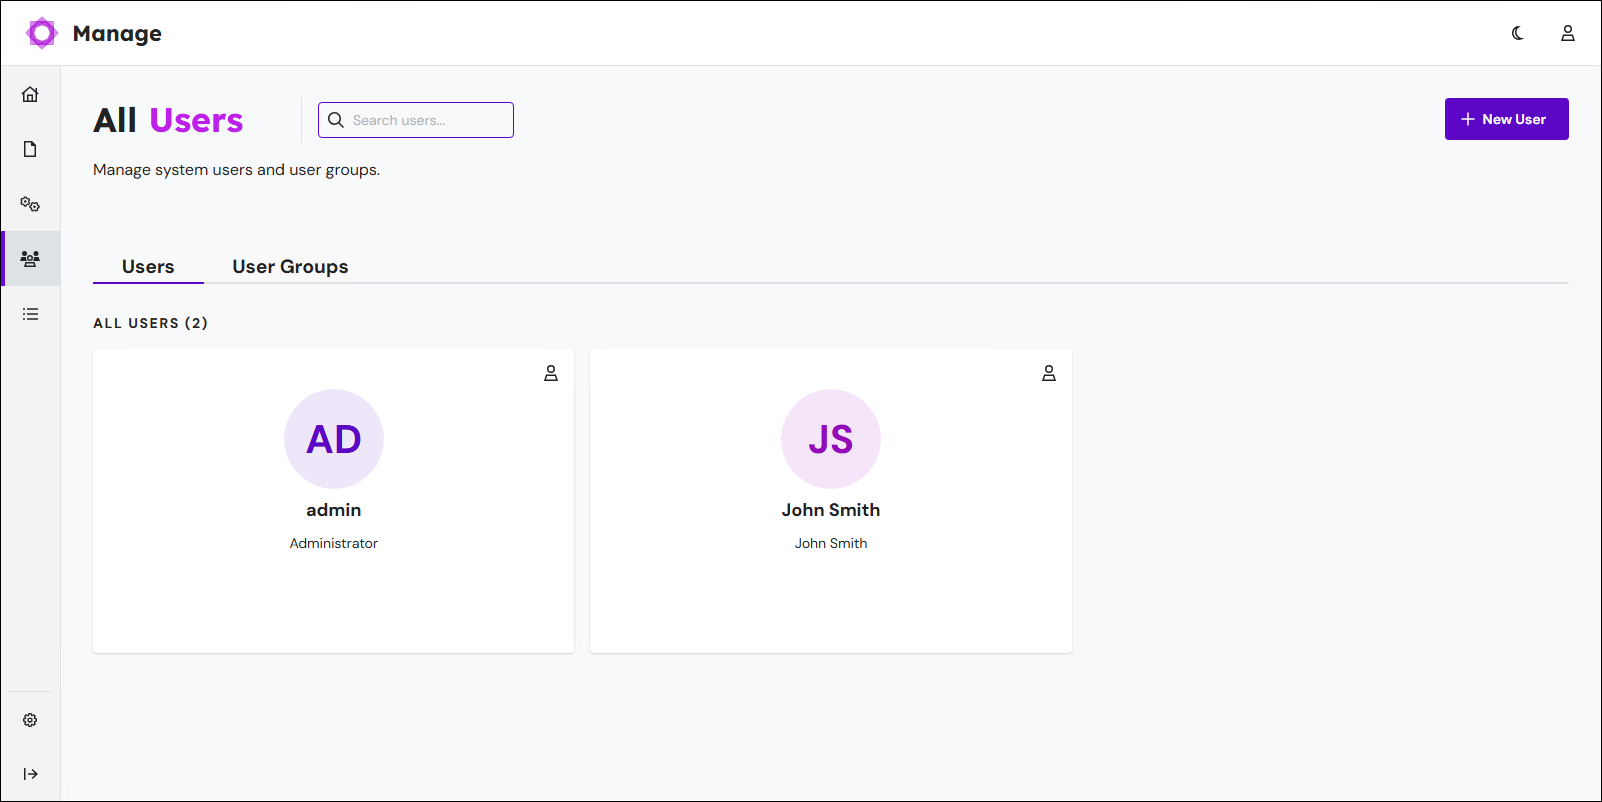
The All Users area enables you to create and manage users and user groups.
The search box enables you to find users and user groups on the page.
For more information, see Configure Users, Groups, and Security Roles.
Security Roles Area
.png)
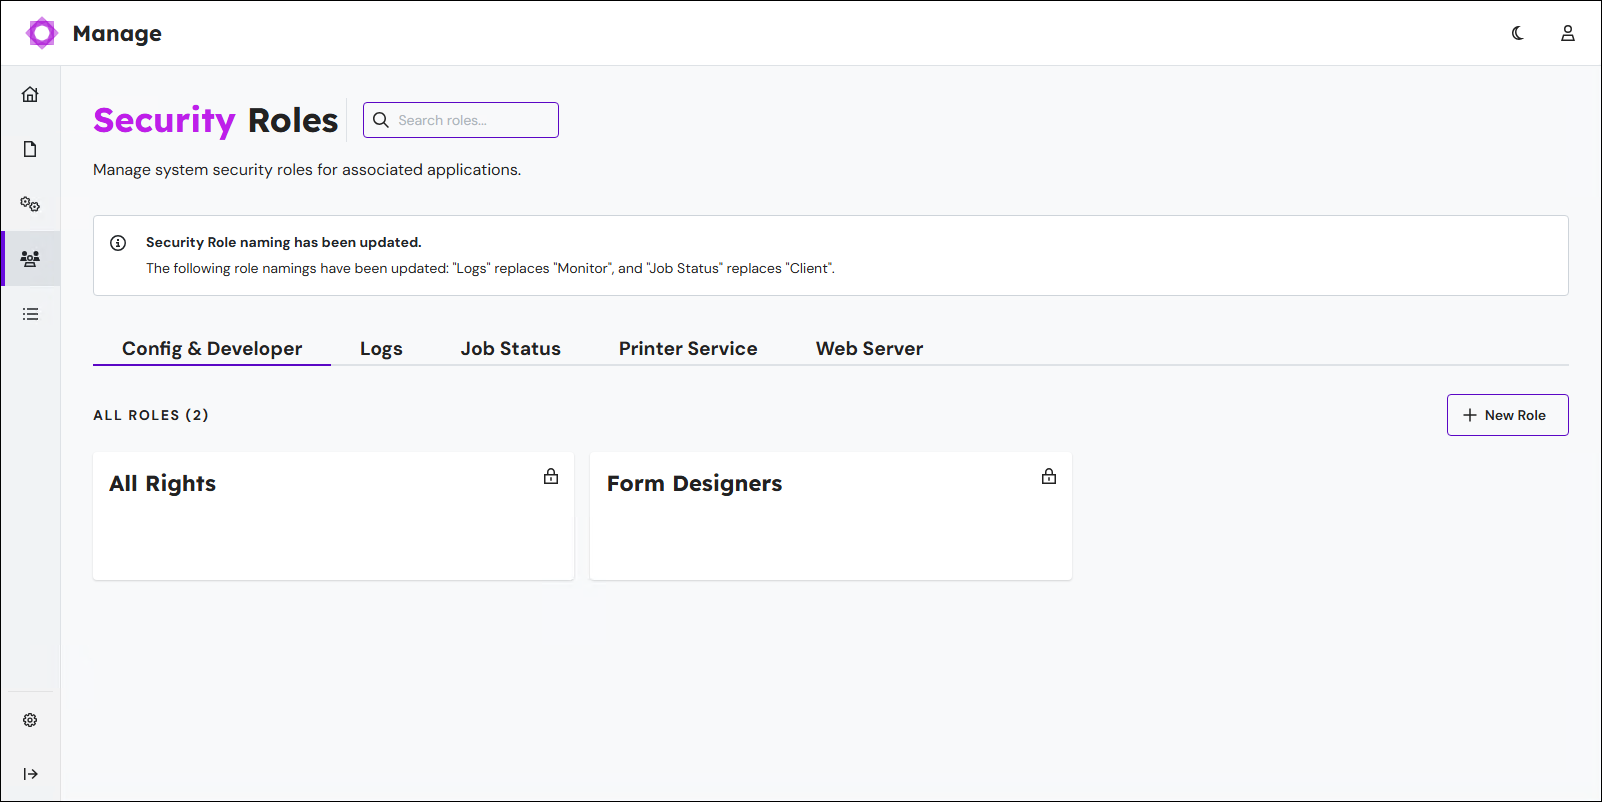
The Security Roles area enables you to create and manage the security roles that control users’ and apps’ permitted capabilities.
The search box enables you to find roles on the page.
For more information, see Configure Users, Groups, and Security Roles.
Logs
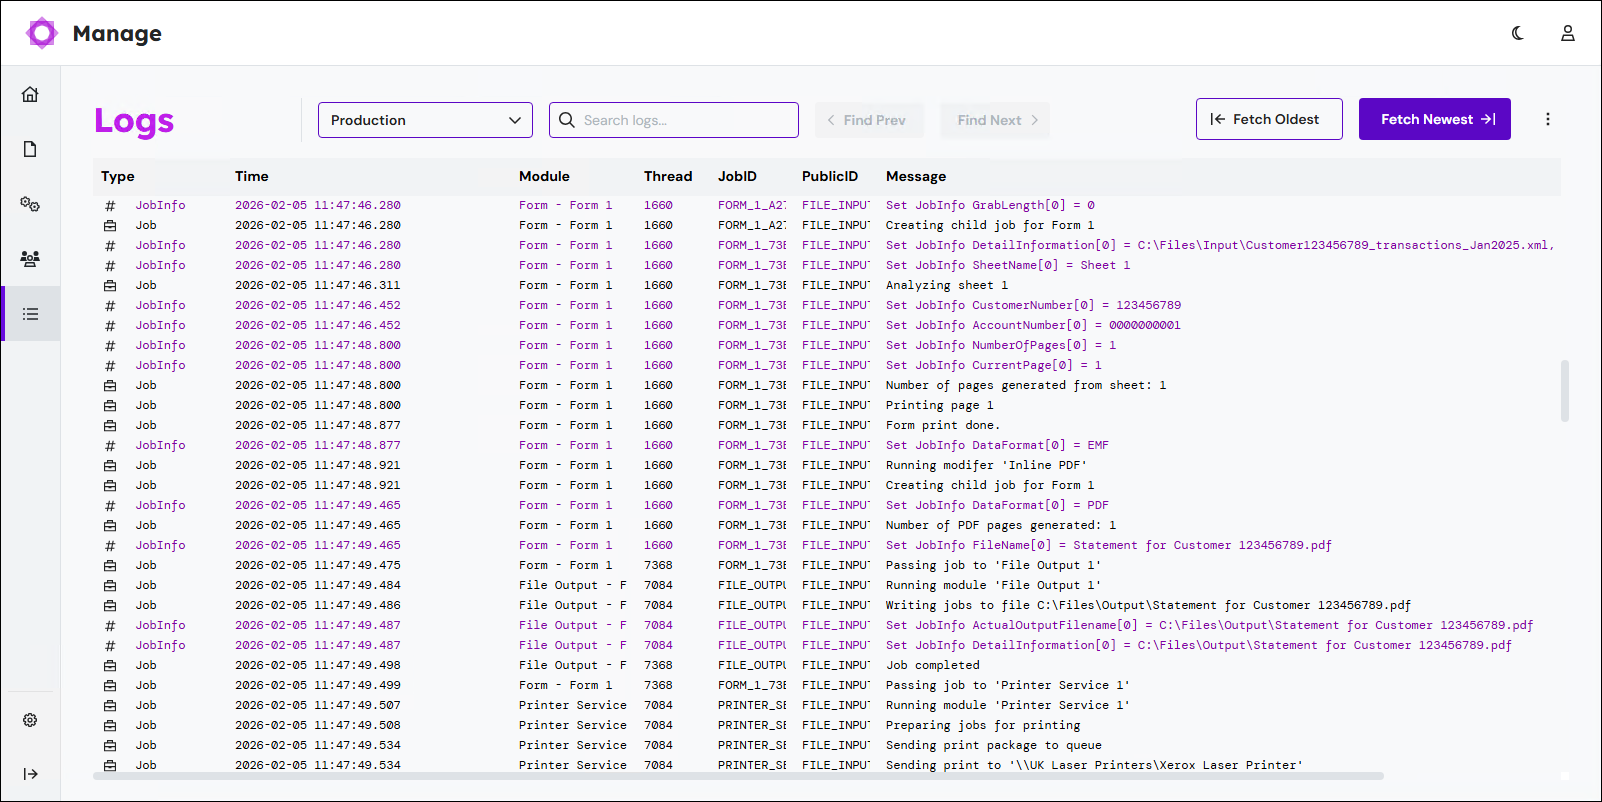
The Logs area displays activity logs for Lasernet environments.
For more information, see Lasernet Environment Logging.
System Settings
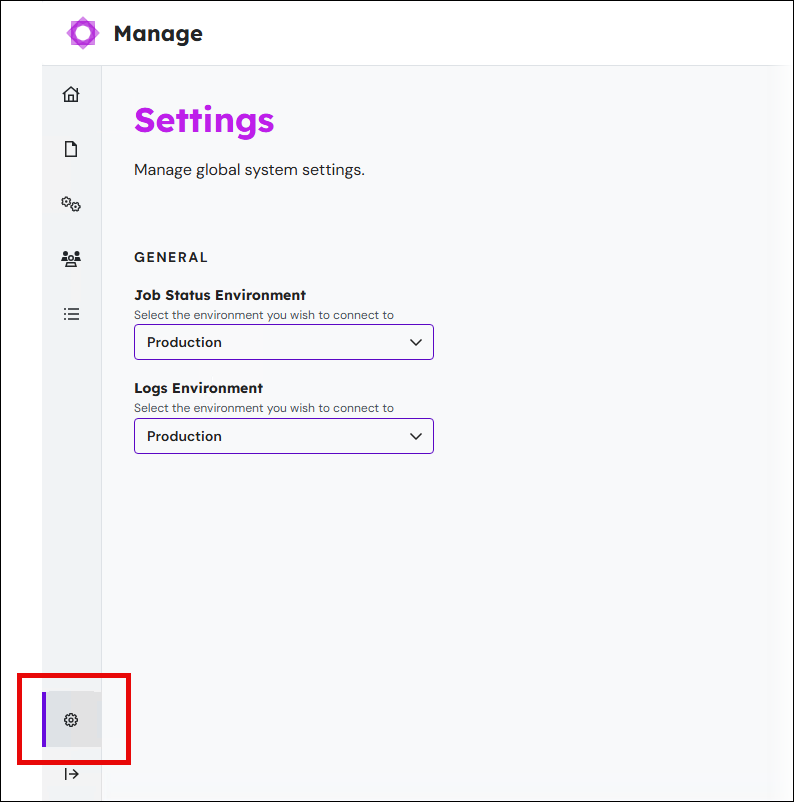
The Settings area enables you to modify Manage system settings.
Setting | Description |
|---|---|
Job Status Environment | Select which environment Manage shows you information for when you navigate to the Job Status page. |
Logs Environment | Select which environment Manage shows you information for when you navigate to the Logs pages. |
Next Steps
The next step of the Lasernet 11 installation and setup process is to apply licenses to Lasernet services.
Lasernet Config Web App
Note
The Lasernet Config web app was provided with earlier versions of Lasernet. It is a legacy web app and will be deprecated in a future version of Lasernet Core.
Expand for information
The information below will help you to familiarize yourself with the parts of the Lasernet Config app.
.png)
Number | Element |
|---|---|
1 | The Deploy button opens the Deploy Configuration window. In that window, you can select a Lasernet configuration and deploy it to one or more Lasernet environments. |
2 | Click Refresh to reload the data in the area of the Lasernet Config app you are working in. |
3 | The buttons that are present in this main toolbar vary depending on which area of the Lasernet Config app you are working in. For example:
|
4 | The Environments page lists the Lasernet environments that this Config Server manages. For each environment, the table displays relevant information, such as the configuration (with revision number) that is deployed to it. To edit an environment’s settings (for example, to turn on grab mode for it, apply a license to the environment, turn on logging, create JobInfos at Config Server level, and view configuration deployment history for that environment), select the environment in the list and then click Edit. |
5 | The Print Servers page enables you to manage the name of Windows printer servers and connection strings for printing via cloud or on-premises. |
6 | The Configurations page lists the Lasernet configurations that are stored in the repository of this Config Server. Users can save revisions of configurations to the repository and access these configurations when needed. The configurations can be deployed to the environments listed on the Environments page. The Revision column in the table displays the revision number of each configuration’s latest revision. |
7 | The Users and Groups page enables you to manage the users and groups defined for this Config Server. The groups defined here can be assigned to the roles defined on the Security Roles page. |
8 | The App Registrations page enables you to create app registrations that enable third-party apps to authenticate with and then integrate with Lasernet. |
9 | The Security Roles page enables you to manage the security roles defined for this Config Server. When you edit a role, you can assign groups (that you defined on the Users and Groups page) to the role. |
10 | The OCR page enables you to manage OCR form lists and OCR identifiers. |
11 | The Apps page enables you to manage the shortcuts that are displayed in the Apps menu (at the upper-left corner of the application). |
12 | The Licenses page enables you to add Lasernet licenses to the Config Server, view important license information (such as current usage and expiry date), and manage licenses (for example, remove licenses or synchronize license features with the Lasernet Group license server). For more information, see Apply Licenses to Lasernet Services. |
Note
The Lasernet Config app’s permissions configuration determines which parts of the Lasernet Config app are shown to each user.
For example, the Lasernet Config app can be configured to hide the Licenses page from users who are not administrators.
The next step of the Lasernet 11 installation and setup process is to apply licenses to Lasernet services.