Email Setup
- 04 Feb 2026
- 4 Minutes to read
- Contributors

- Print
- PDF
Email Setup
- Updated on 04 Feb 2026
- 4 Minutes to read
- Contributors
- Print
- PDF
Article summary
Did you find this summary helpful?
Thank you for your feedback
Set Up an Email Account
Within the Lasernet solution, there are two places where you need to add an email account to be able to send an email.
If your BC version is older than 18.0, follow steps 1 to 4. If you have a newer version, go to step 5.
Within BC, search for SMTP and open the SMTP Mail Setup menu.

Type in the relevant information.

On the top menu, click Test Email Setup and follow the instructions to send a test email.

When done, you can use the Send by Email function.

Note
Using this email function, Lasernet will create the PDF, and BC will send the email with the Lasernet PDF attached.
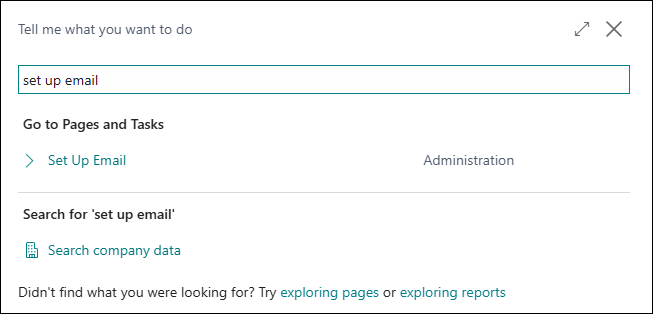
Within BC, search for email and open the Set Up Email menu.
Click Next.
(13).png)
Select Use SMTP to send emails and click Next.
(12).png)
Type in the relevant information.
(12).png)
Click Send Test Email and follow the instructions to send a test email.
.png)
When done, you can use the Send by Email function.

The next step is to open Lasernet Developer and then the configuration.
Select Modules from the Tools menu and then open up the Mail Output module.

Type in the relevant information. It makes sense to use the same settings as BC.


Now, you can use the email function.


Email Placeholders and Email Templates
Within Lasernet BC Connector, you can specify your own email body and subject in different languages and use placeholders as variable fields/words in your email template to personalize the email for your customer or vendor.
Placeholders
To set the email templates, you will first need to specify your placeholders. Placeholders are fields from a table that you want to use in your email template, like Customer Name, Document Number, or Username. Placeholders provide one record rather than multiple. For example, you can use fields from Header tables and not Lines. If you want a date from a Line, you can select an option to receive either the first or final record. This means that you still only receive one record/field that you can use within your email templates.

(11).png)
To use placeholders successfully, follow these steps:
Locate and open Lasernet Placeholder Sets.
If no records appear, click the Suggest Placeholders button on the top menu.

Select a record that matches the report you wish to customize for the email subject and body. SALESHEADER is used for many reports, such as Salesorder, PickInstruction, Workorder, Proforma, and Draft Invoice.

On the top menu, click Manage, then Edit.

The top table (Sales Header) is already added to the Tables section.
If you need to use data from Sales Header, add it to the table. Go to step 13.
If you need to use data as variable fields in your email subject or body, click Manage, then Add.

On the new record, select the … (three dots) button in the Table No. column.
(11).png)
Select the table from the list. You can use the search function on the top menu to locate it.
.png)
The next step is to create a connection between two tables. It must be a unique key in order to filter the exact record and not retrieve too many records. If the key fields have already been identified for the table added, then it is only necessary to define the Field No or Filter value on the header table.
Change the Filter Type to Filter String (Placeholders).
.png)
Three Filter Type options are available:
Field Value: Select a Field from a table.
Filter String: Type in a manual Filter.
Filter String (Placeholders): Use a System Field as Filter.
Within the Field No./Filter Value column, click the … (three dots) button.
(11).png)
Select Current User Security ID from the list and click OK. Then, filter the BC users for the email.
.png)
.png)
Add the fields from the User Table by clicking Manage, then Add. These buttons are located under the Entries section.
.png)
On the new record, select the … (three dots) button in the Field No. column.

Select the field that you wish to use in your email template.

Continue to add all the fields you want to use from the User Table. Once you are finished, close the Lasernet Placeholder Set form.
In the overview, you can see all the fields from the set.
.png)
Email Templates
The next step is to create your email template. You can use and import an HTML email or create your own with our tool. You can also ensure that customers and vendors get the correct email in their desired language.
Locate and open Email Templates. If you do not see any records, click the Suggest Email Templates button on the top menu.

You have the option to either select a record from the list or create your own by clicking Modify or New on the top menu.

We have created an email template that includes all languages. The default language is English. To change it, select the report you want and choose Modify.
If you wish to add a new language, select New at the bottom of the drop-down menu.

In this guide, we choose to create a new record. To do so, click New.

From the Document Type drop-down list, select Sales Order.

This guide will use the Danish language as an example. To produce a Danish-language email, type DAN in the Language Code column and fill out the Name and Description. Then, select the Active checkbox.
(7).png "image (17)(7).png")
On the top menu, click Modify.
(8).png "image (18)(8).png")
Define a Placeholder Set by clicking SALESHEADER within the Placeholder Set Code field.
.png)
The Placeholders fields should now appear at the bottom of the screen.
.png)
Enter the text for the email subject.
.png)
If you require a field such as the document number, select it from the Placeholders list and then click the Placeholder to Subject button.
.png)
Enter the email content and add the placeholders to the template. To add a placeholder, select the placeholder at the bottom of the screen and then click the Placeholder to Body button.
.png)
Close the email template form and follow the same process for the other languages you want to use.
.png)
In this example, an email template has been created for Danish customers. Customers using different language codes will receive an English-language email, as this is the default setting.
.png)