Create XML Output (Template and Node Settings)
- 06 Mar 2026
- 2 Minutes to read
- Contributors


- Print
- PDF
Create XML Output (Template and Node Settings)
- Updated on 06 Mar 2026
- 2 Minutes to read
- Contributors
- Print
- PDF
Article summary
Did you find this summary helpful?
Thank you for your feedback
Applies to: Lasernet 9
Using the Lasernet Form Editor application, you can produce files in XML format. The Form Engine retrieves data from an input grab file, processes it, and maps it to fields in the output.
In this exercise, you will create a structure of the output in the XML format.
Note
This article describes a software version that is no longer supported. Although the software will no longer receive updates or technical support, existing documentation, such as this article, will be retained for reference purposes but will no longer be updated. If you have any questions, contact Lasernet Support.
Exercise
Download and import the attached configuration called 05. Create XML Output (Template and Node Settings) in Lasernet Developer 9. Afterward, navigate to the Forms section and open the Sample form.
Lasernet supports loading pre-defined XML templates. So, if you have an XML template file received, for example, from a customer or a business partner, you can import it to your Lasernet project and, thereby, achieve significant time savings in the design phase.
Start by opening a template based on which you can create the required structure of your XML output. First, make sure you are on the XML tab in the output, and then, on the toolbar, click Open Template.
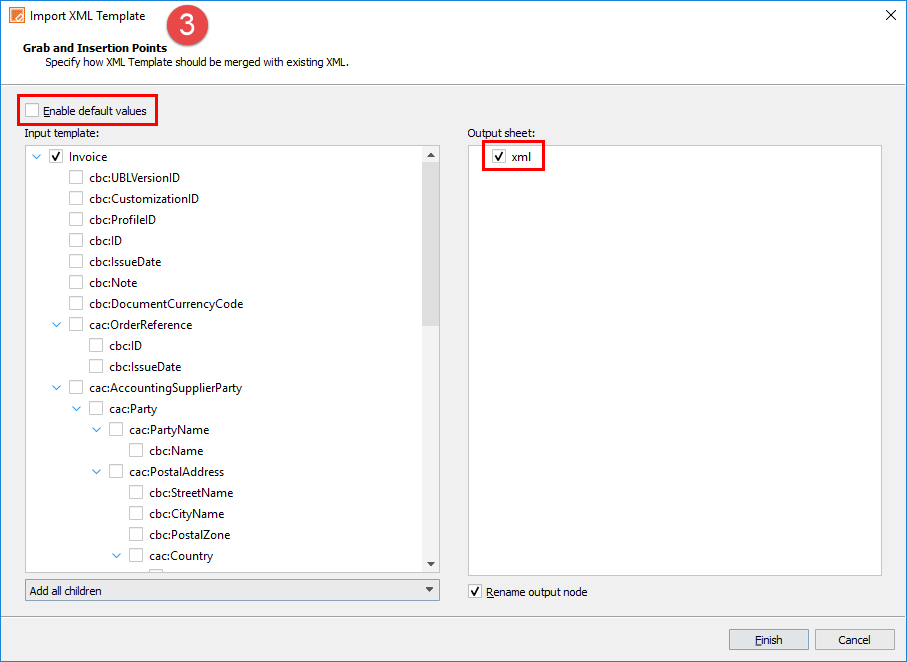
In the Open Template dialog displayed, select the template, and then click Open.

In the Import XML Template dialog displayed, leave the Enable default values check box cleared, and select the xml checkbox in the Output sheet section. Once you are done, click Finish.
In the output, switch to the Template tab.
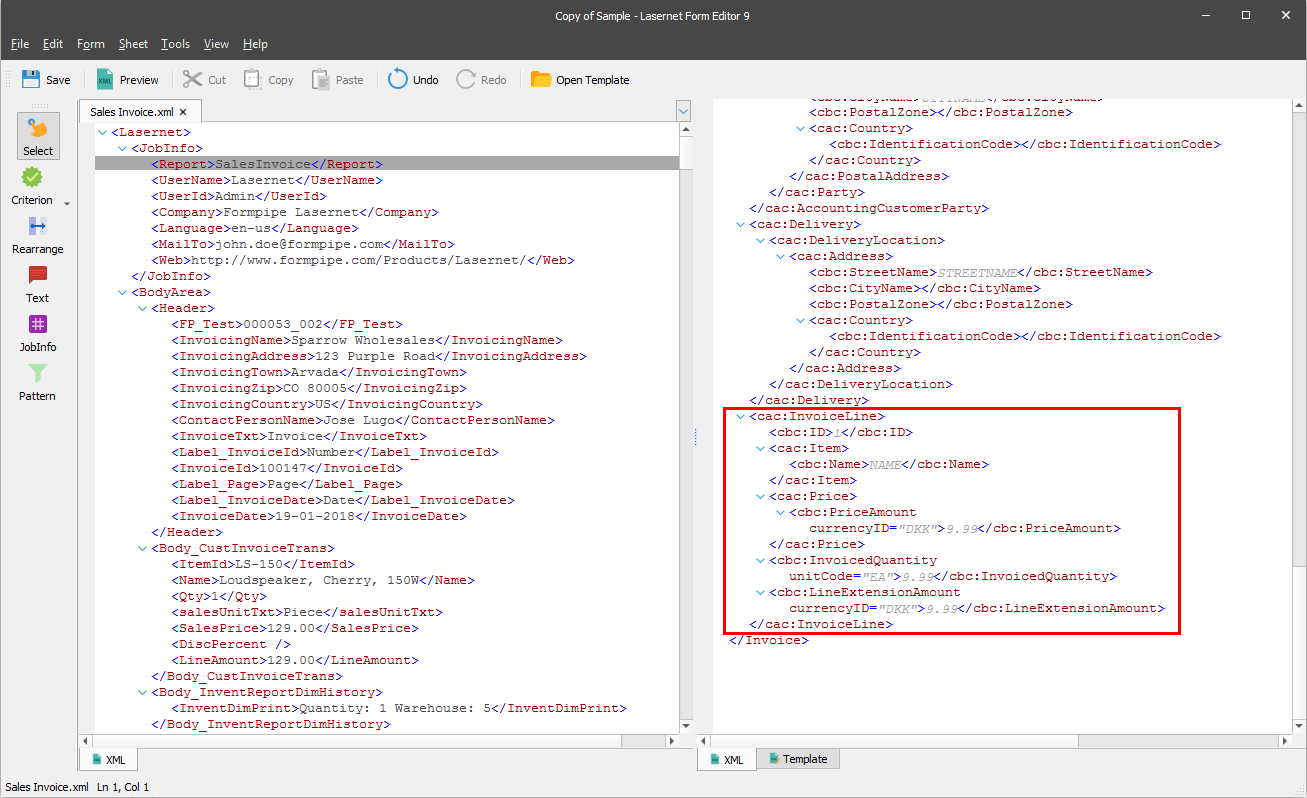
On the Template tab, you can directly edit a plain text representation of the XML output file. To this end, scroll down the output to the bottom and insert the following nodes after the <cac:Delivery> one:
<cac:InvoiceLine>

    <cbc:InvoicedQuantity unitCode="EA">9.99</cbc:InvoicedQuantity>

    <cbc:LineExtensionAmount currencyID="DKK">9.99</cbc:LineExtensionAmount>

    <cac:Item>

      <cbc:Name>NAME</cbc:Name>

    </cac:Item>

    <cac:Price>

      <cbc:PriceAmount currencyID="DKK">9.99</cbc:PriceAmount>

    </cac:Price>

  </cac:InvoiceLine>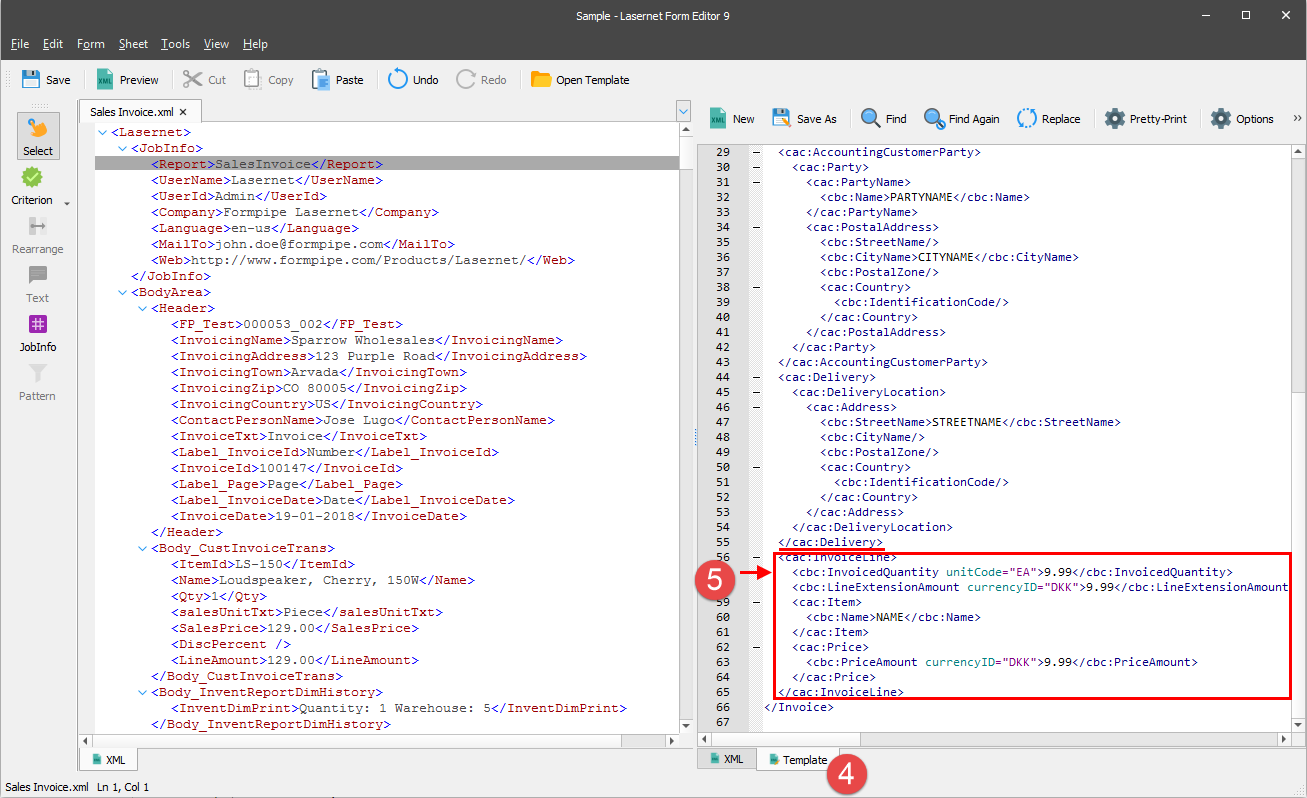
Tip: You can always click the Pretty-Print button to adjust the spacing and formatting in the preview. The XML structure will contain the same standard formatting convention for all lines afterward.
Switch to the XML tab.
Right-click the <Invoice> node, and then click Expand All in the context menu that appears.
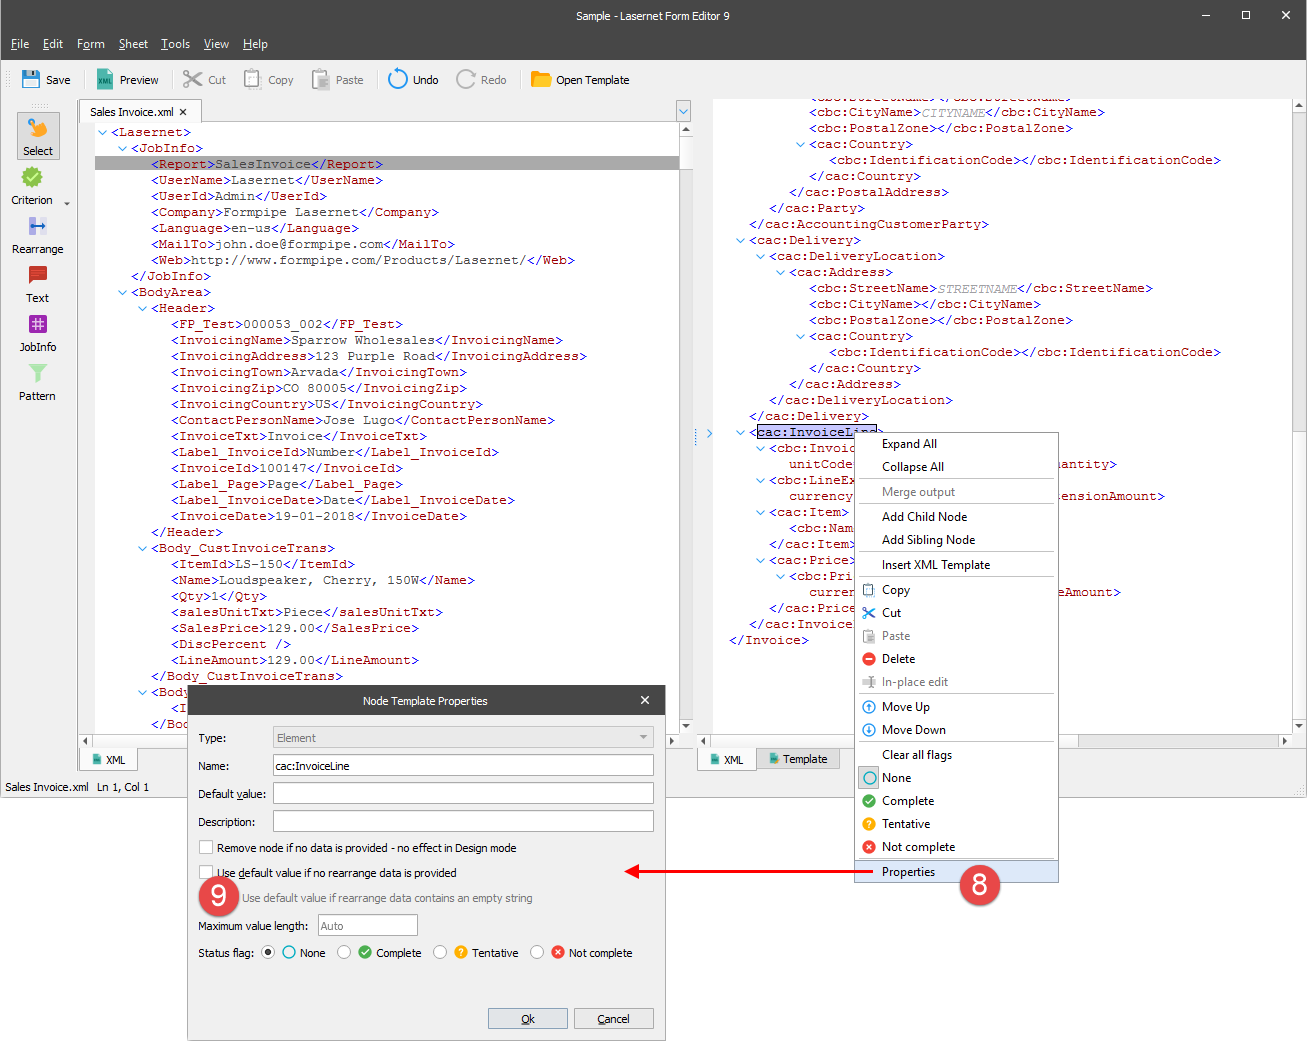
Scroll down the output to reach the <cac:InvoiceLine> node. It is now proposed that properties for each node of those ones you have added be changed to disable their default values, if any. To this end, right-click a node and then select Properties in the context menu that appears.
In the Node Template Properties dialog box displayed, clear the Use default value if no rearrange data is provided checkbox.
Make this change for every node you have added.
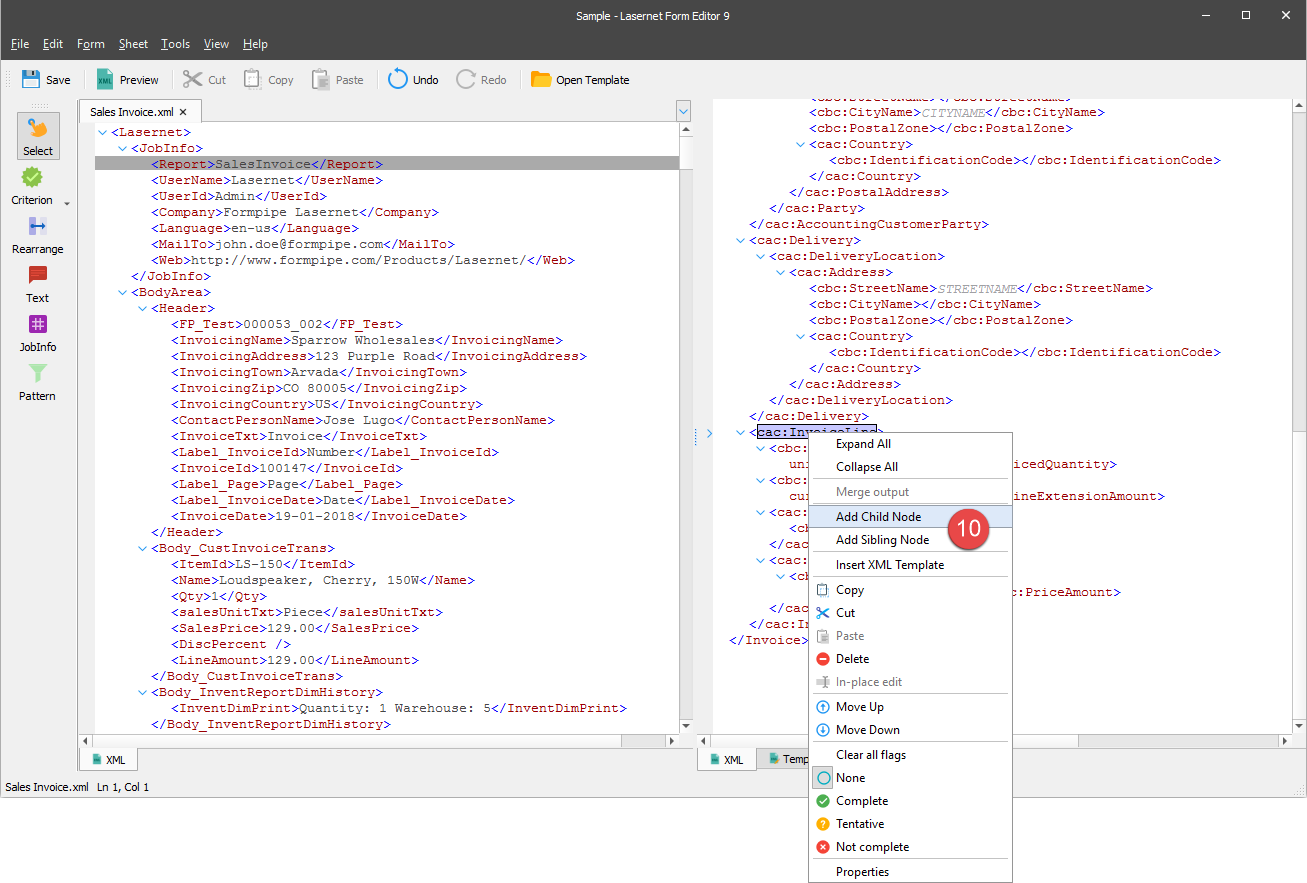
You are now proposed to add one more child node to <cac:InvoiceLine>. To this end, right-click the <cac:InvoiceLine> node, and then select Add Child Node in the context menu that appears.
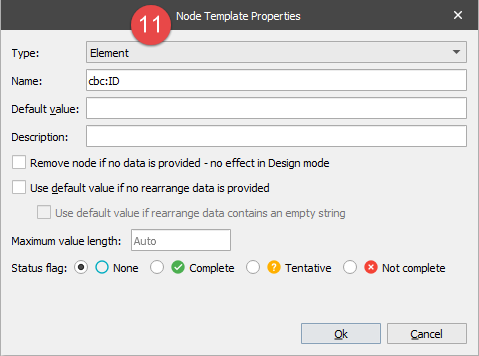
In the Node Template Properties dialog box displayed, specify the following values:
Type cbc:ID as a node name.
Clear the Use default value if no rearrange data is provided checkbox.
Once you are done, click the Ok button.
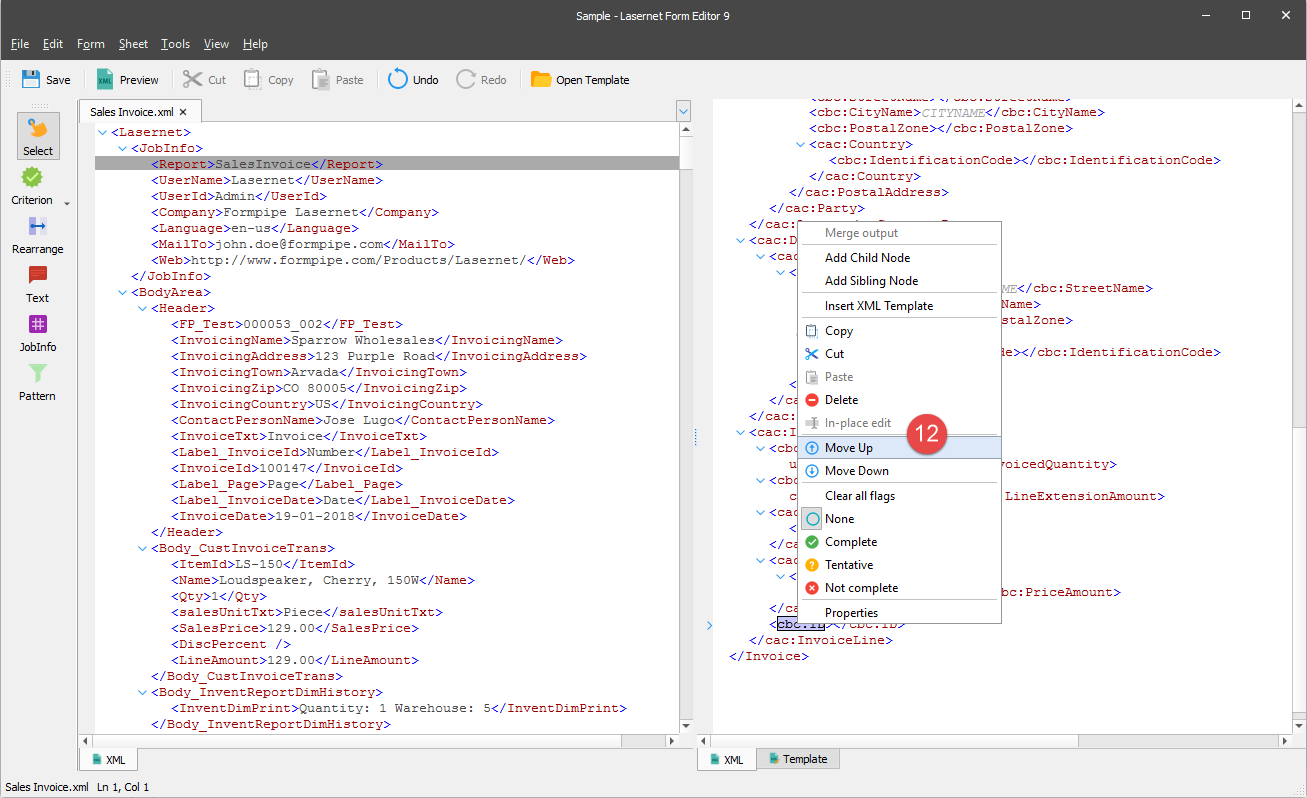
You can change the order of child nodes that belong to the <cac:InvoiceLine> one. To this end, right-click a child node and then click Move Up or Move Down, depending on the direction in which you want to move a node.
As a result, you have the following structure of the <cac:InvoiceLine> node: