Create XML Output (Patterns and Rearranges)
- 06 Mar 2026
- 6 Minutes to read
- Contributors


- Print
- PDF
Create XML Output (Patterns and Rearranges)
- Updated on 06 Mar 2026
- 6 Minutes to read
- Contributors
- Print
- PDF
Article summary
Did you find this summary helpful?
Thank you for your feedback
Applies to: Lasernet 9
In this exercise, you are proposed to create a structure of the output in the XML format by adding patterns and rearranges, adding a regional profile and applying it to objects to change the regional settings for numbers and dates, as well as activating node values for which a rearrange is not presented.
Note
This article describes a software version that is no longer supported. Although the software will no longer receive updates or technical support, existing documentation, such as this article, will be retained for reference purposes but will no longer be updated. If you have any questions, contact Lasernet Support.
Exercise
Download and import the attached configuration called 06. Create XML Output (Patterns and Rearranges) in Lasernet Developer 9. Afterward, navigate to the Forms section and open the Sample form.
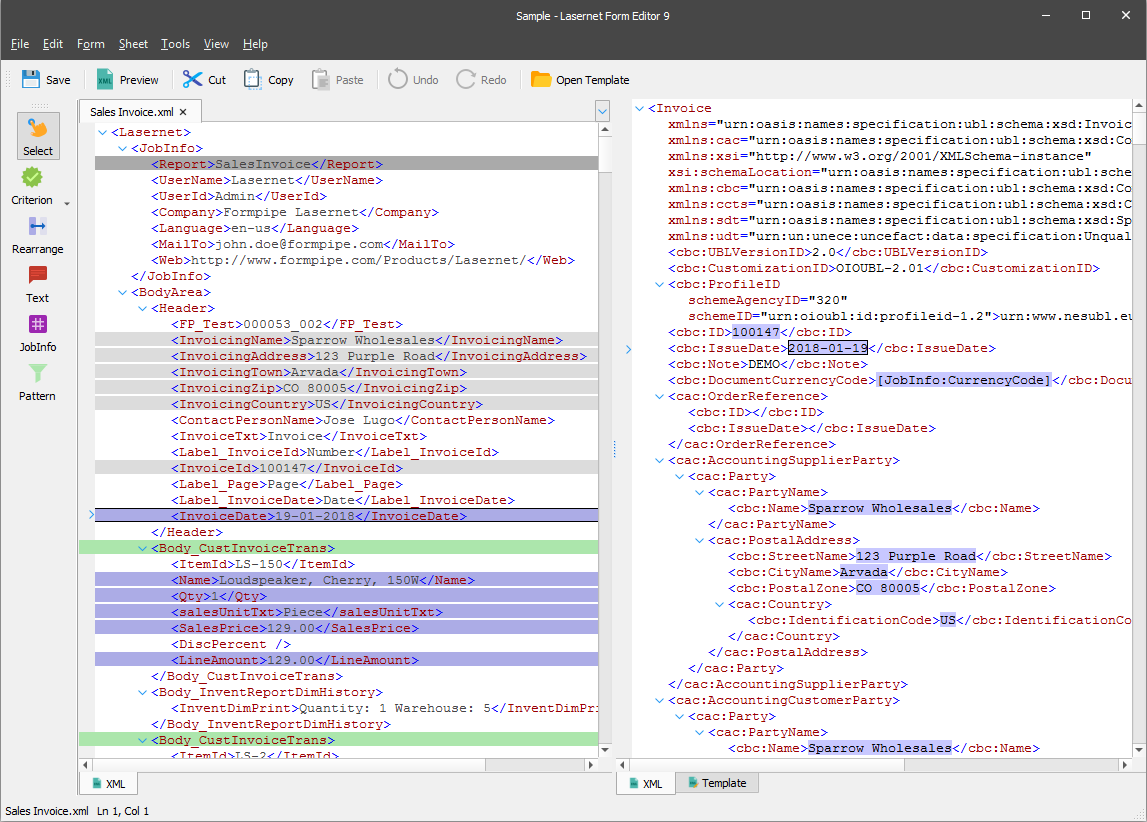
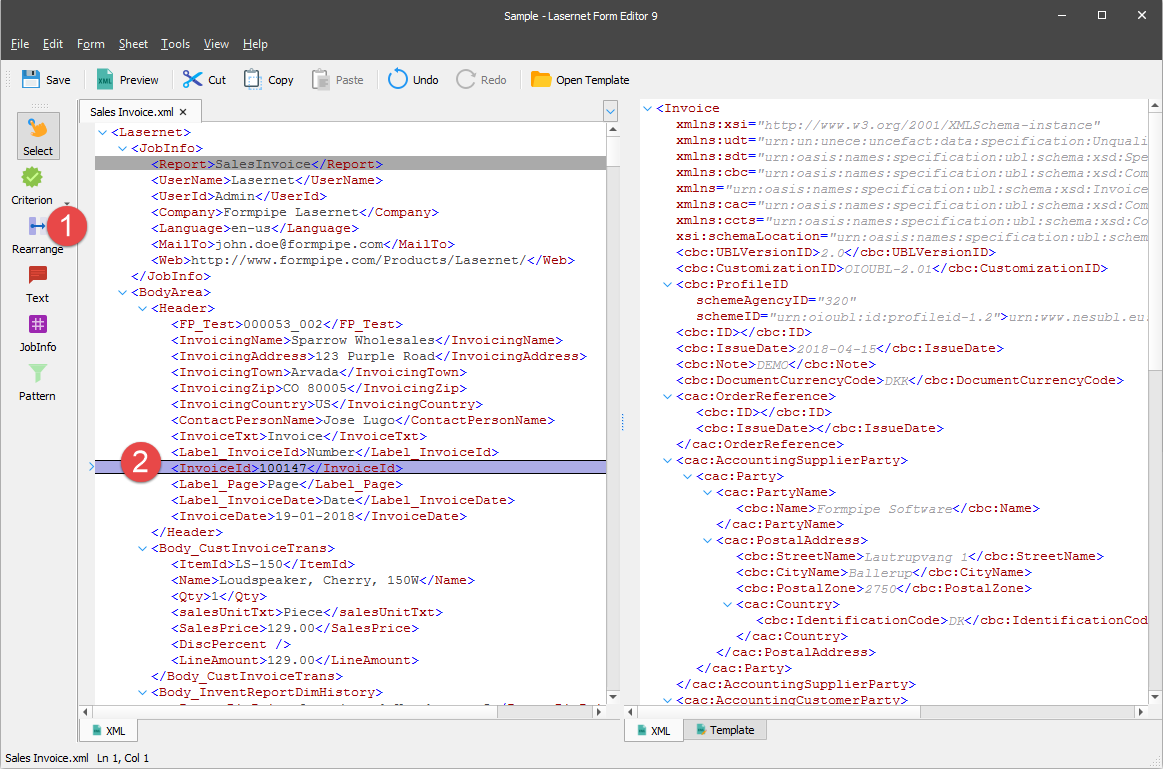
Start by adding rearranges to the input. To this end, in the input, add a rearrange to the InvoiceId node. On the Developer toolbar, click Rearrange.
When a pointer becomes a cross, click the InvoiceId node.
Once a rearrange is added to the input, you shall add it to the required node in the output. You have two options:
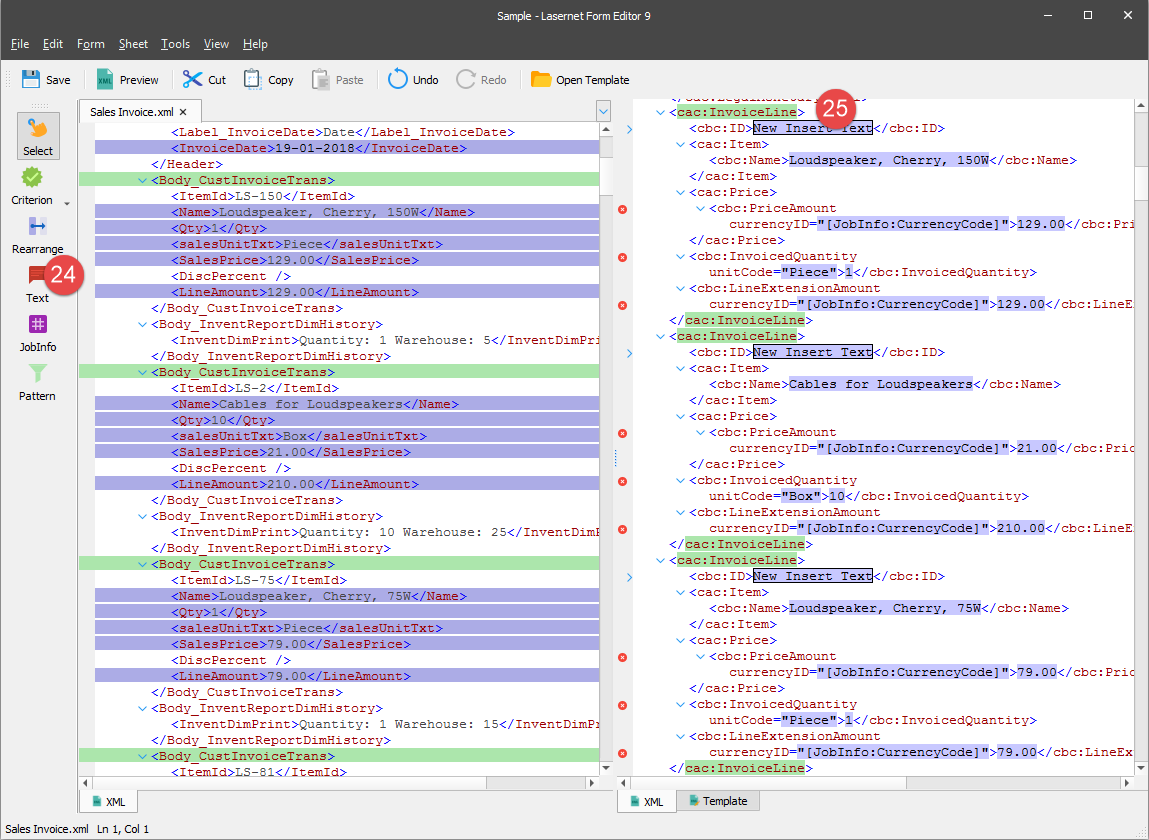
Right-click the rearrange in the input and then click XML in the context menu that appears. The Edit XML Rearrange dialog will open on the XML tab.
Select the cbc:ID checkbox, which denotes the name of the node in the output to which you add the rearrange. Once you are done, click Ok.
As a result, the rearrange is added to the cbc:ID node in the output.
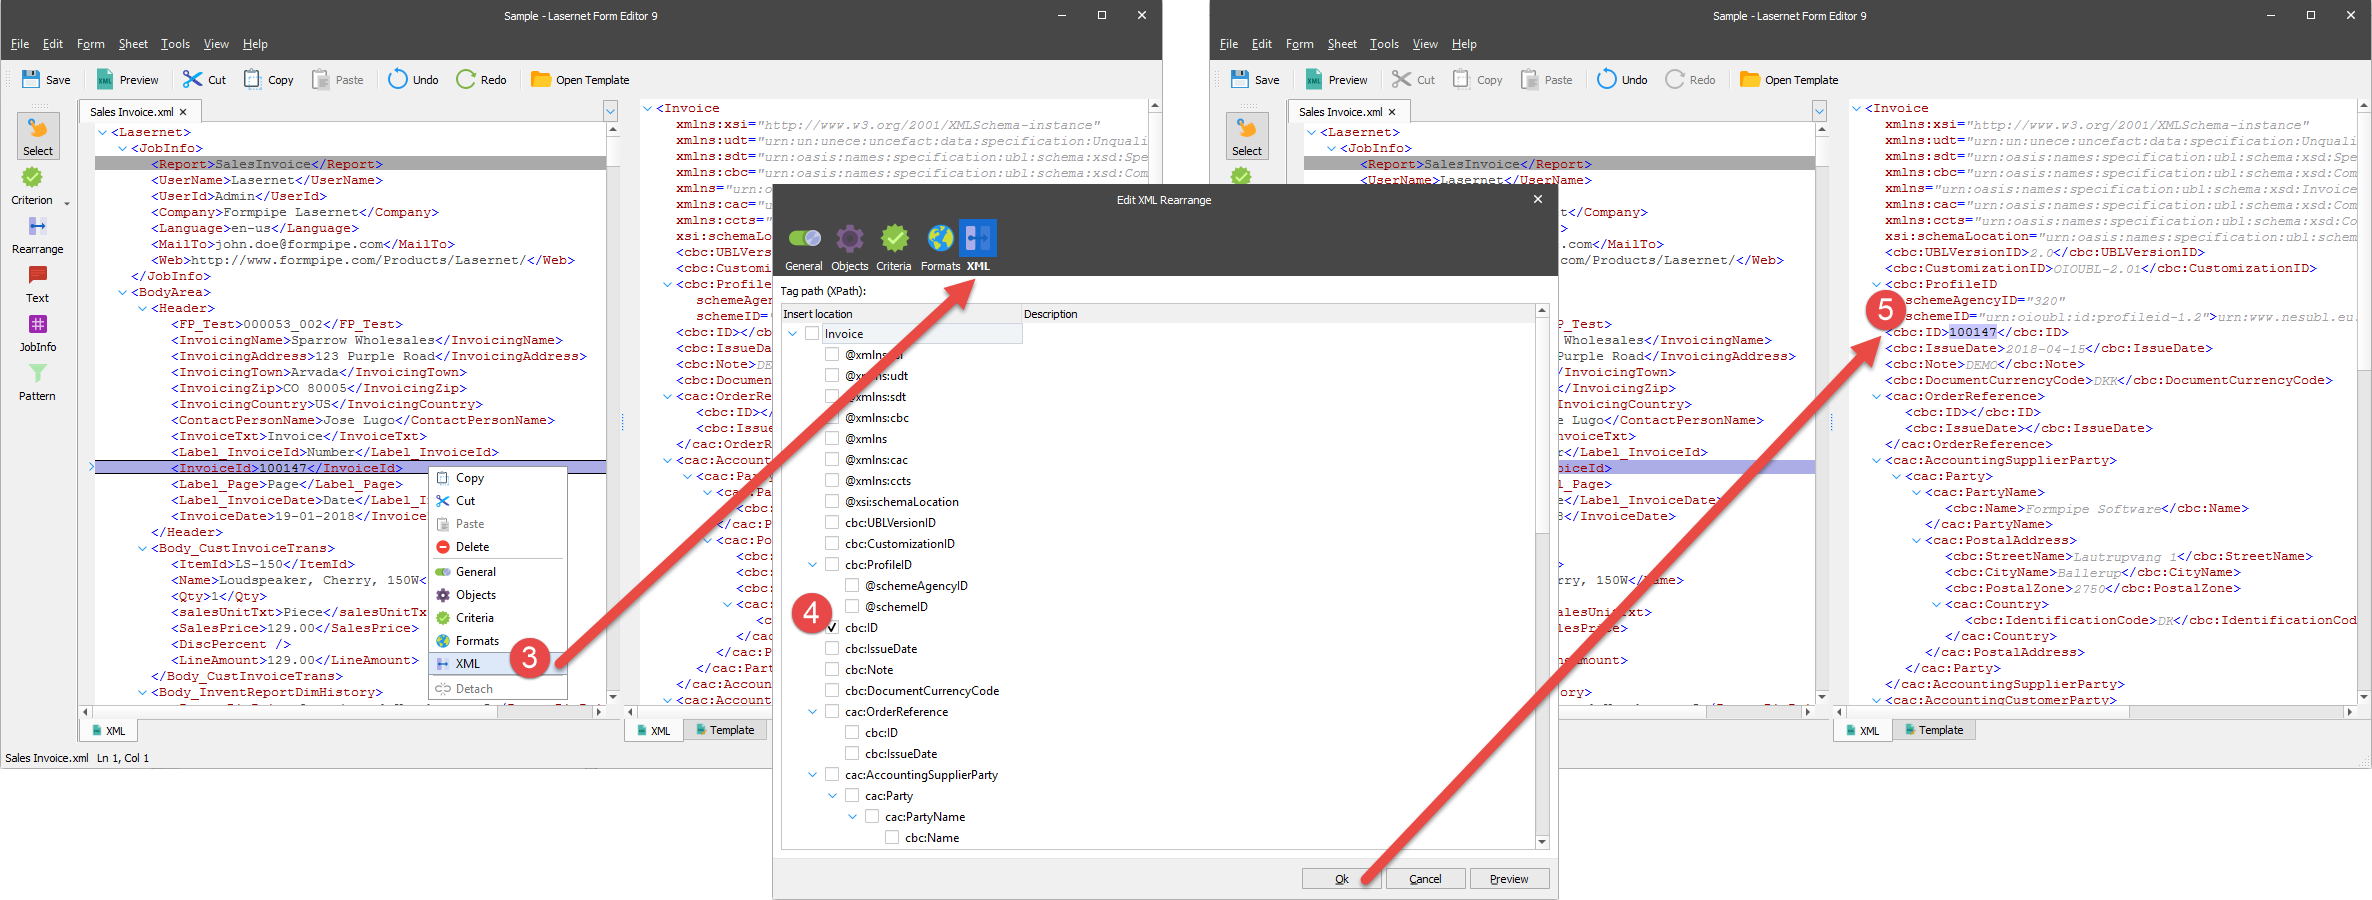
Otherwise, you can drag a rearrange from the input to the required node in the output.
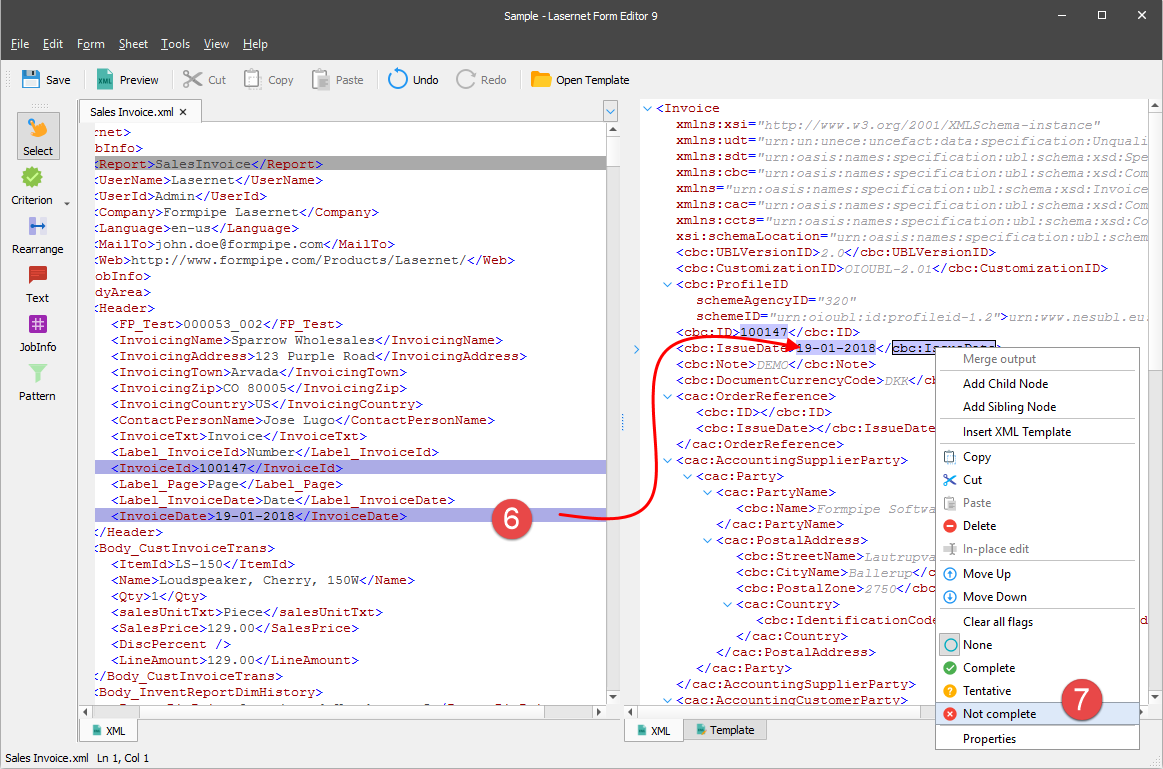
Use the steps described above to add a rearrange to the InvoiceDate node in the input, and then add the rearrange to the cbc:IssueDate node in the output.
The cbc:IssueDate node contains a date value for which you are to specify an appropriate format and a regional profile. You can do it later. In the meantime, you are proposed to mark the node as incomplete. To this end, right-click the node and then click Not complete in the context menu that appears.
Add two rearranges to the InvoicingName node in the input. When more than one rearrange is added to a node, its record becomes grey-highlighted.

First, drag the rearrange to the cbc:Name node available under the cac:AccountingSupplierParty node in the output. Afterward, hold down SHIFT and click the InvoicingName node in the input once again, but now drag it to the cbc:Name node available under the cac:AccountingCustomerParty node in the output.
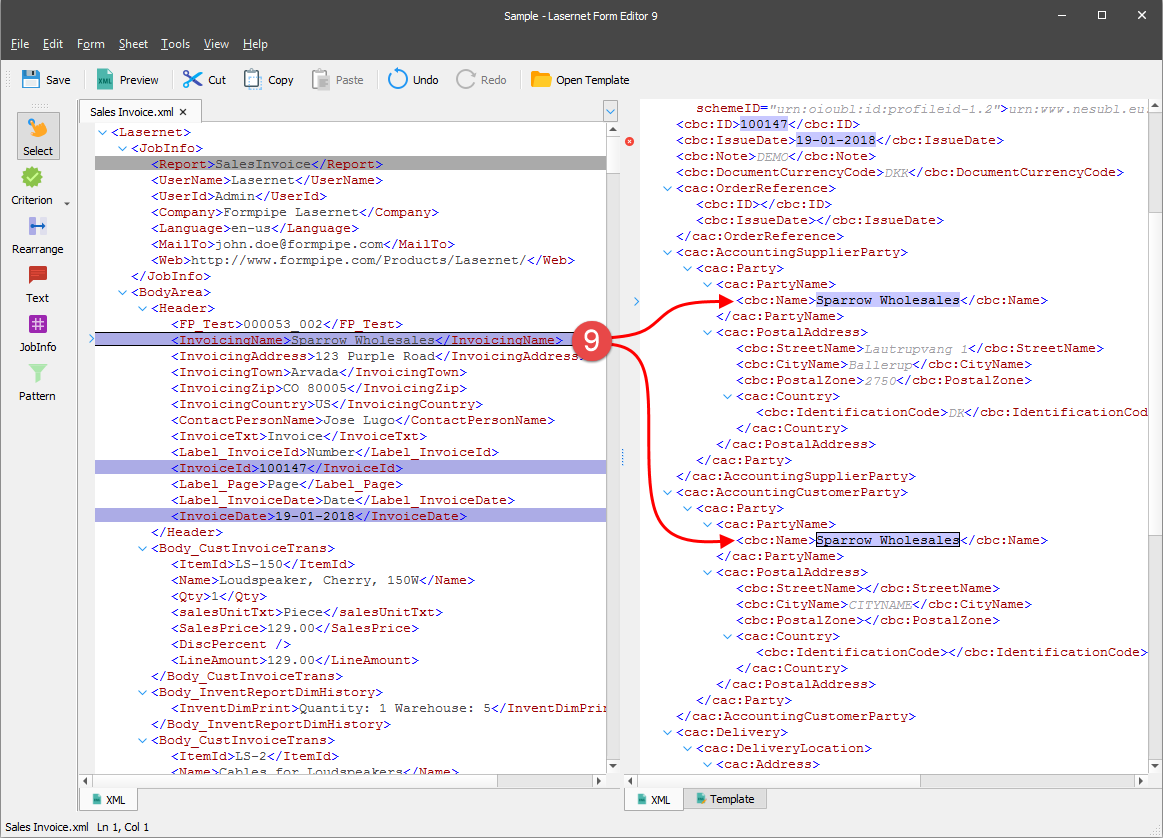
To switch between rearranges in the output, in the input, click the node to which both rearranges of the output belongs and then click the node holding down SHIFT. As a result, you can see a focus (a black rectangle) moves from one rearrange in the output to another.
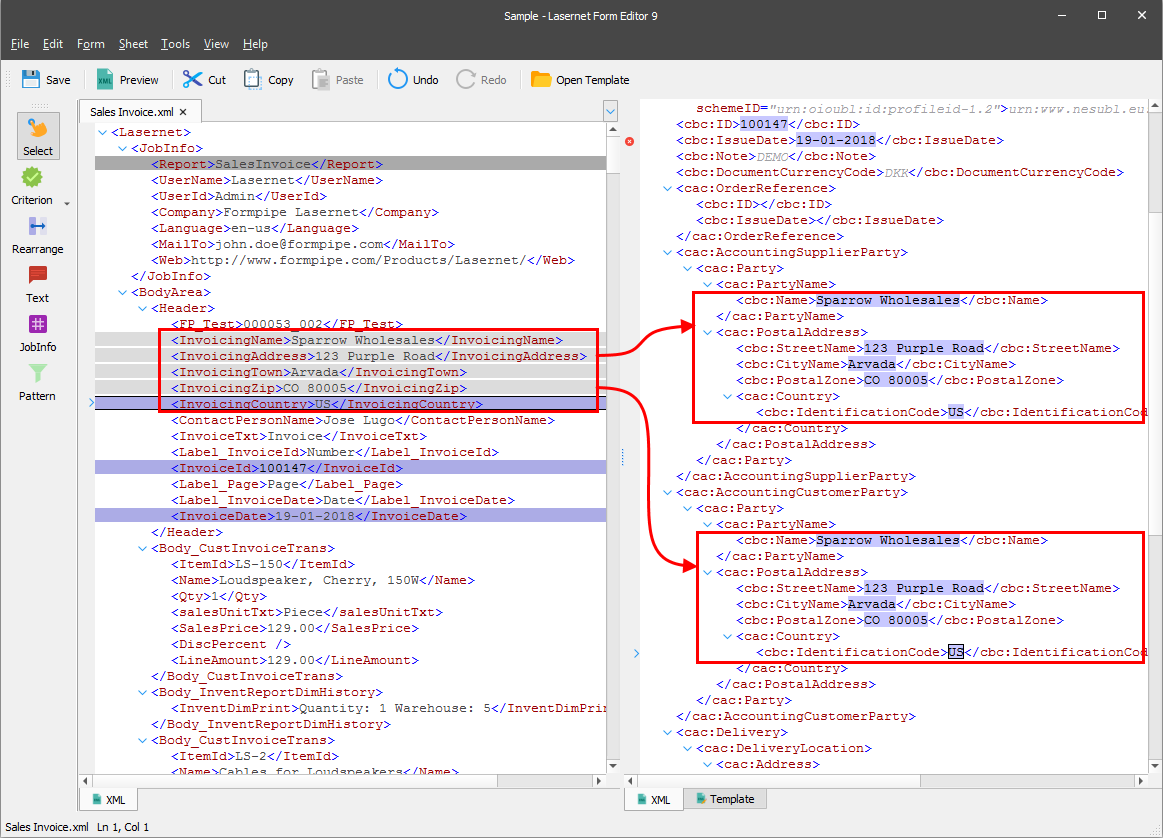
Afterward, follow steps 8-9 to add rearranges to the nodes both in input and output, as shown in the following image:
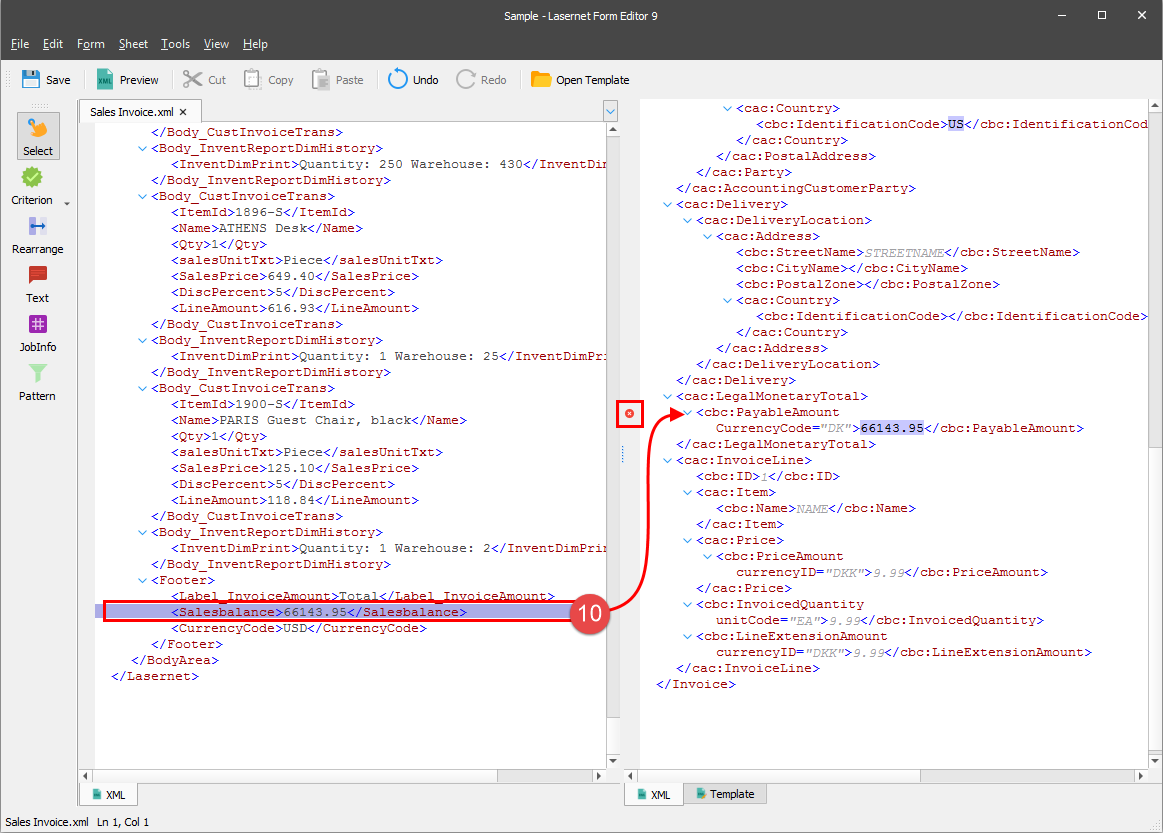
In the input, add a rearrange to the Salesbalance node and drag it to the cbc:PayableAmount node in the output. Afterward, mark the cbc:PayableAmount node as Not complete.
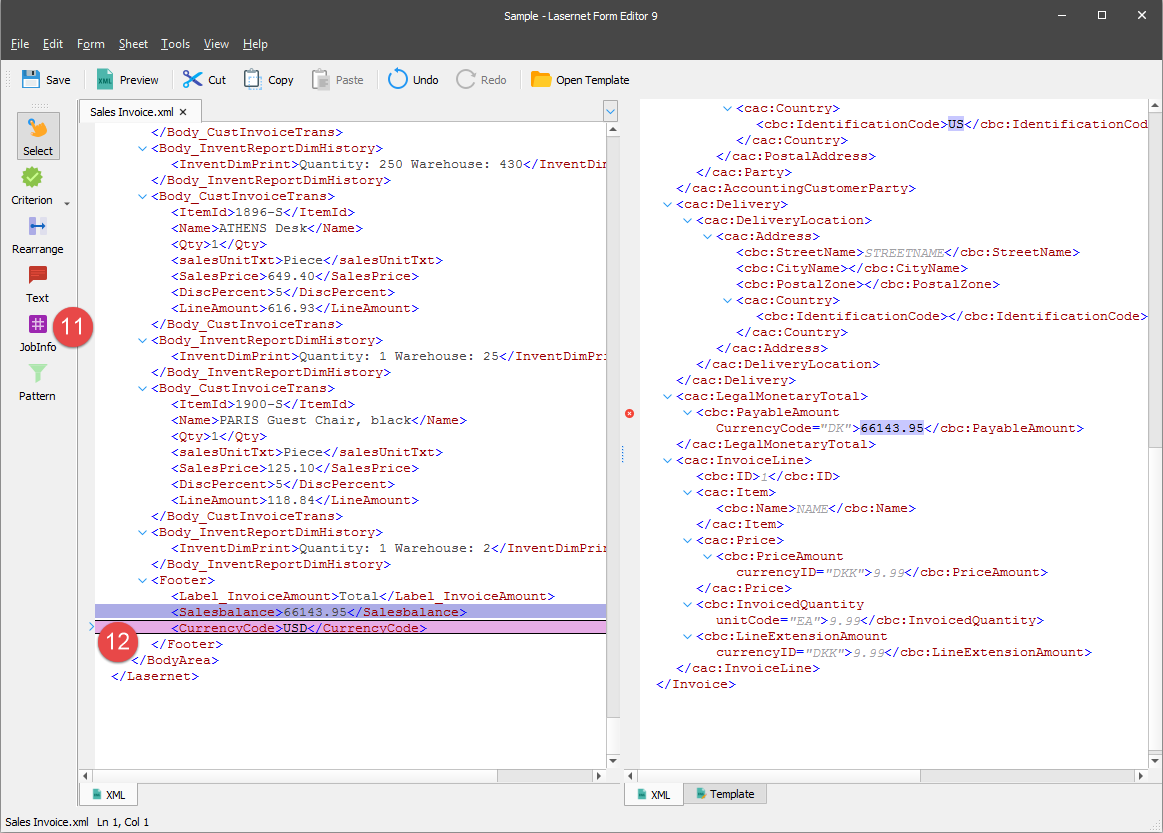
You are now proposed to add a JobInfo to the input. To this end, follow these steps:
On the Developer toolbar, click JobInfo.
When a pointer becomes a cross, click the CurrencyCode node.
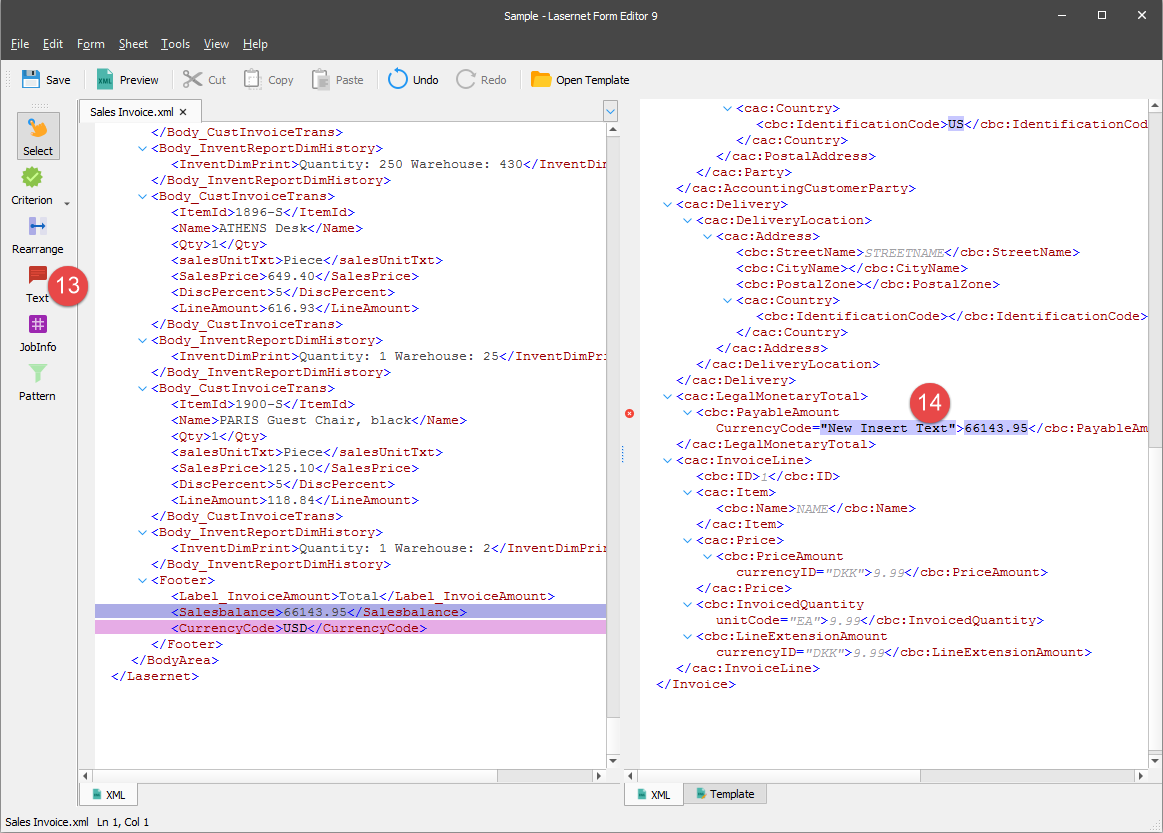
Proceed to add a JobInfo value to the CurrencyCode node attribute in the output. To this end, follow these steps:
On the Developer toolbar, click Text.
When a pointer becomes a cross, click the CurrencyCode node attribute in the output. As a result, New Insert Text is added.
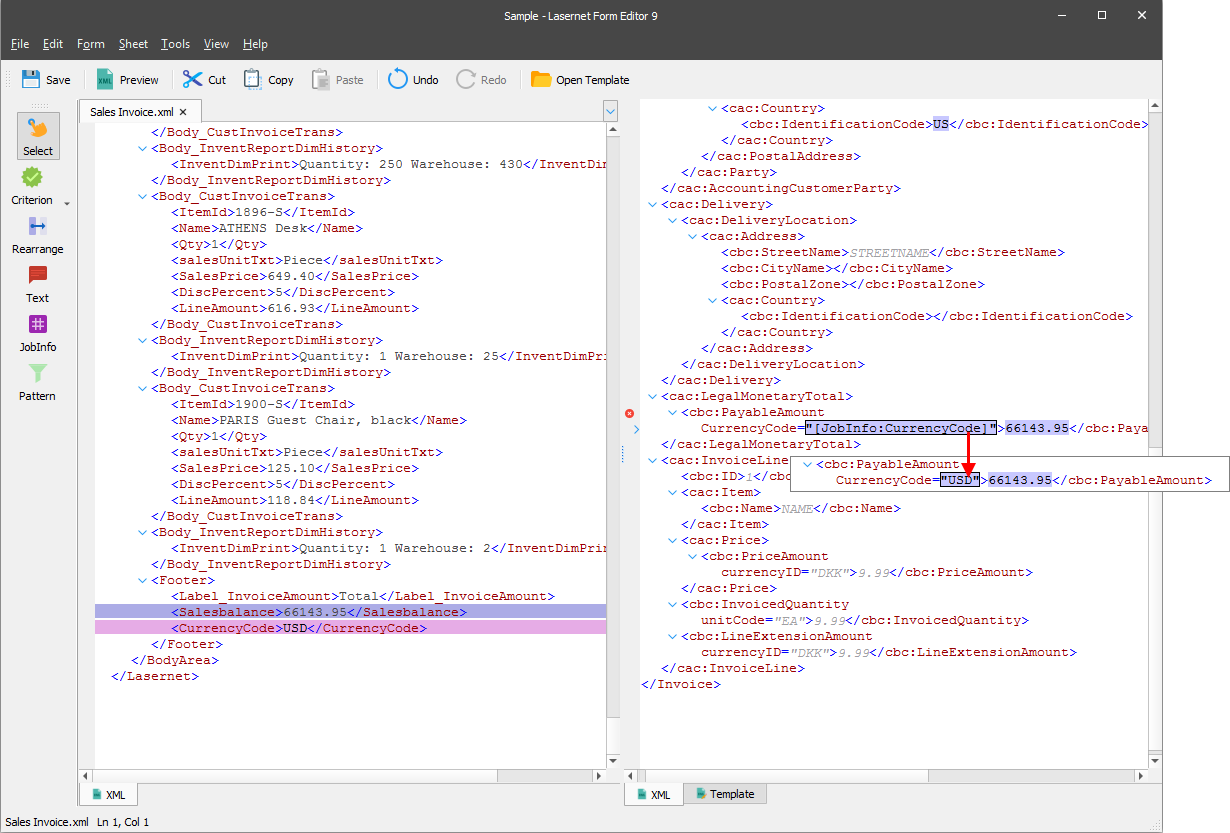
Double-click New Insert Text. The Edit XML Rearrange dialog box opens with the Objects tab.
From the Object type drop-down combo box, select JobInfo. Afterwards, type CurrencyCode in the text box below. Once you are done, click Ok.

To view the CurrencyCode node attribute value, press SHIFT+F5. Otherwise, on the View menu, click Run JavaScript.
Proceed to add a pattern to the Body_CustInvoiceTrans node in the output. To this end, follow these steps:
On the Developer toolbar, click Pattern.
When a pointer becomes a cross, click the Body_CustInvoiceTrans node in the input, and then click Ok in the Pattern Properties dialog that appears.
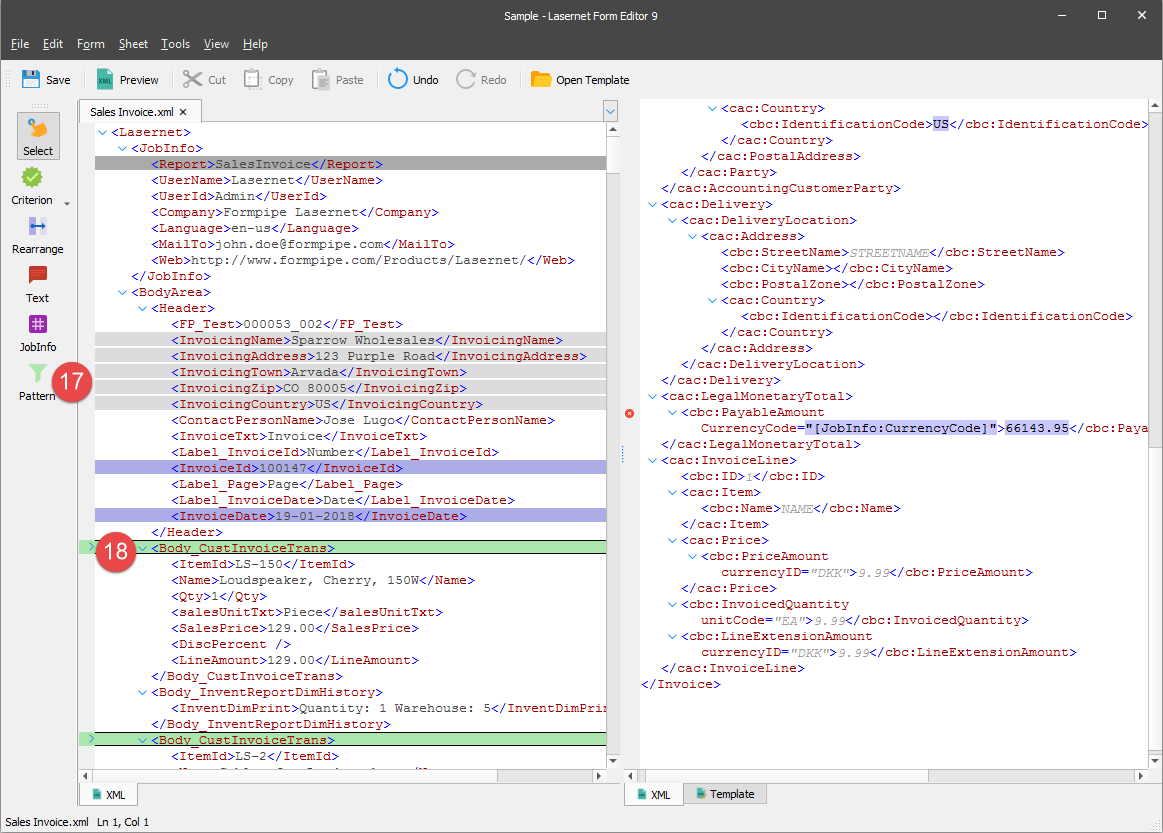
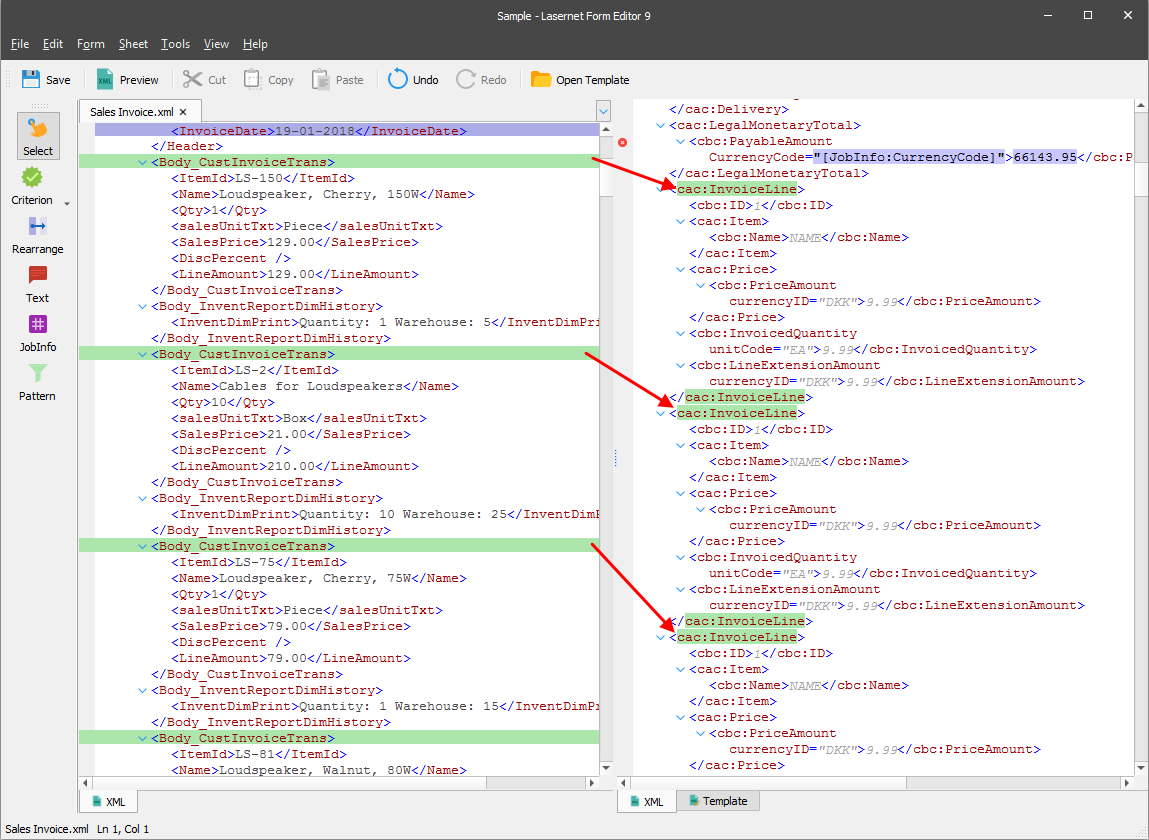
Add the pattern to the cac:InvoiceLine node in the output by dragging it from the input.
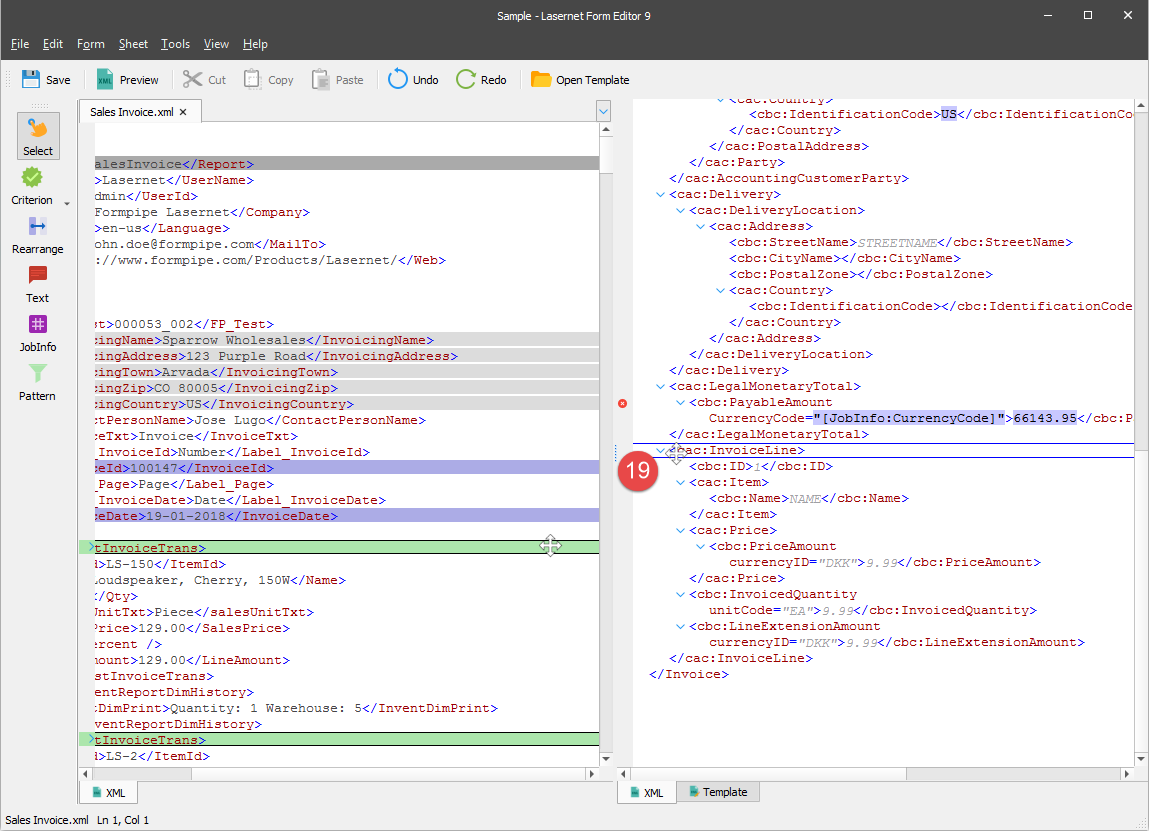
As a result, a multi-lined pattern is added to the output, and the cac:InvoiceLine node is shown as many times in the output as many lines belong to the pattern in the input.
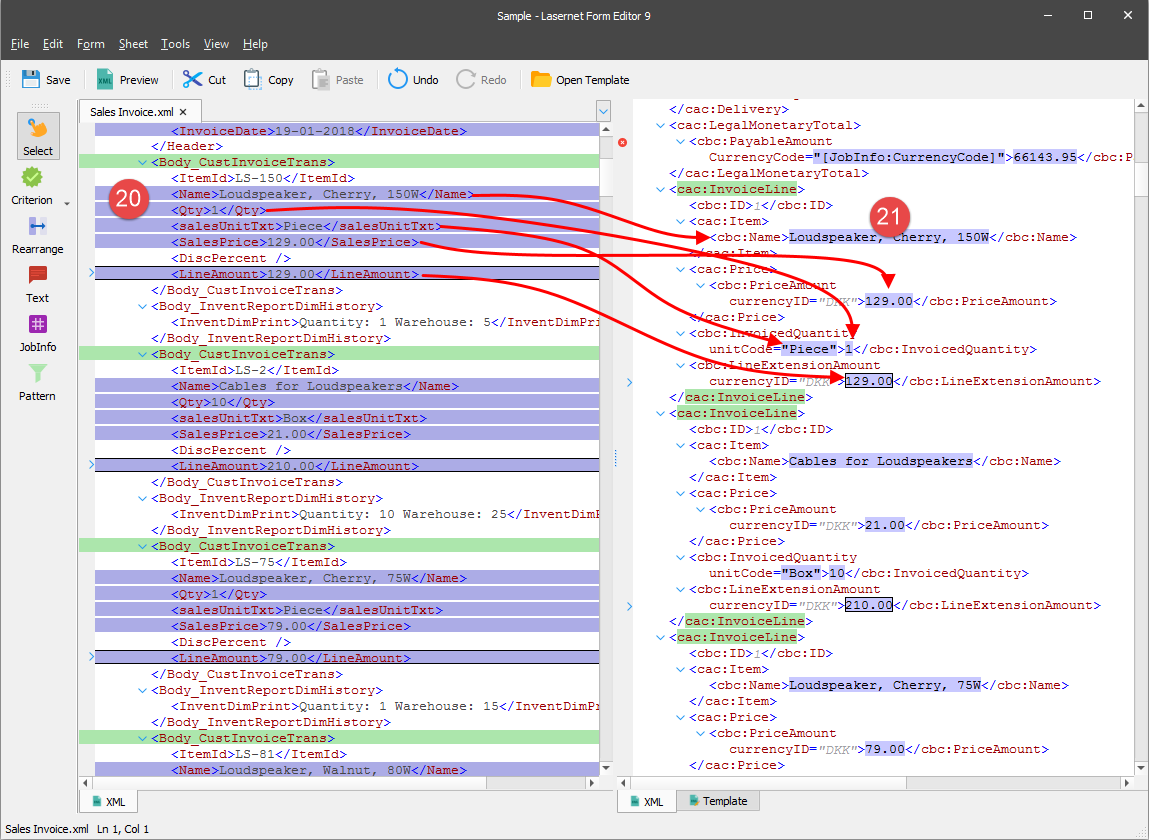
Proceed to add rearranges to the pattern in the input, as shown in the following image.
Once you are done, use any of the available ways to add rearranges to the output:
Input | Output |
|---|---|
Name | cbc:Name |
Qty | cbc:InvoicedQuantity |
SalesUnitTxt | cbc:InvoicedQuantity (the unitCode attribute) |
SalesPrice | cbc:PriceAmount |
LineAmount | cbc:LineExtensionAmount |
Mark nodes containing number values as incomplete by right-clicking each node and then clicking Not complete in the context menu that appears.
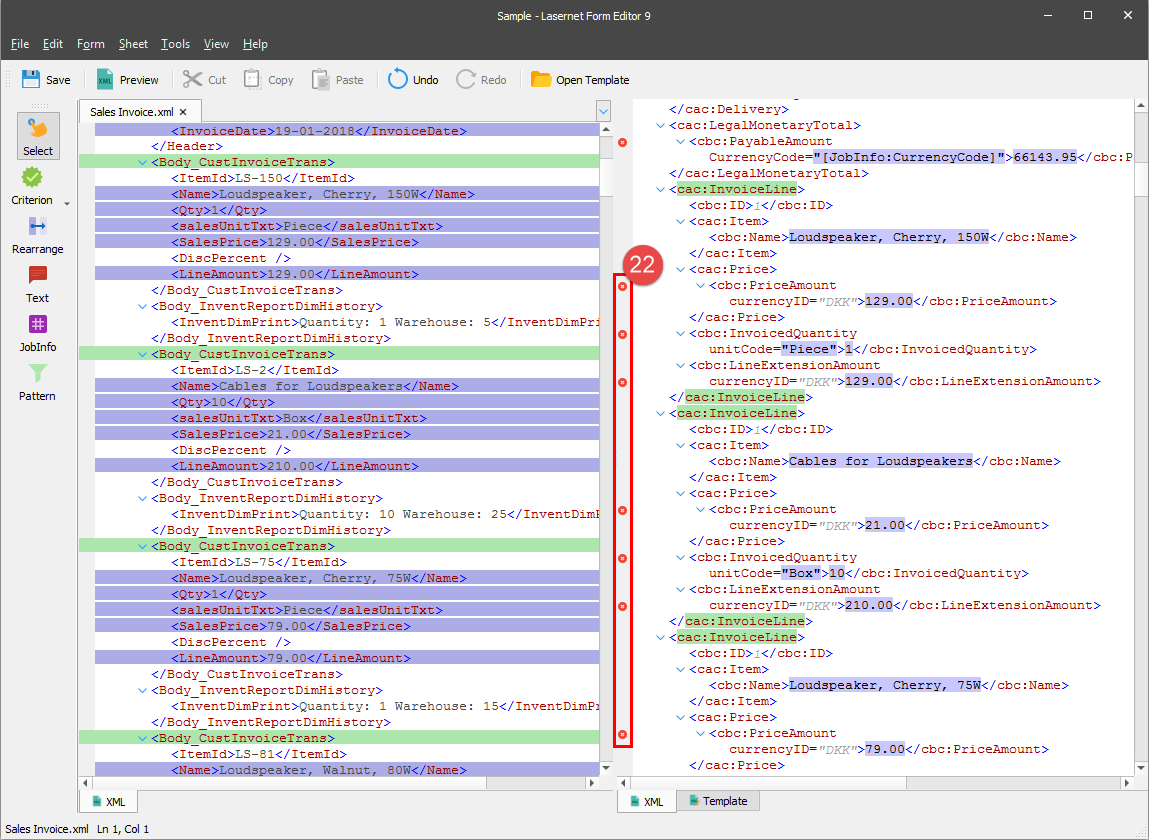
Info
Status flags are a reminder tool only, to define the status of your work, and will have no effect on the final parsing.
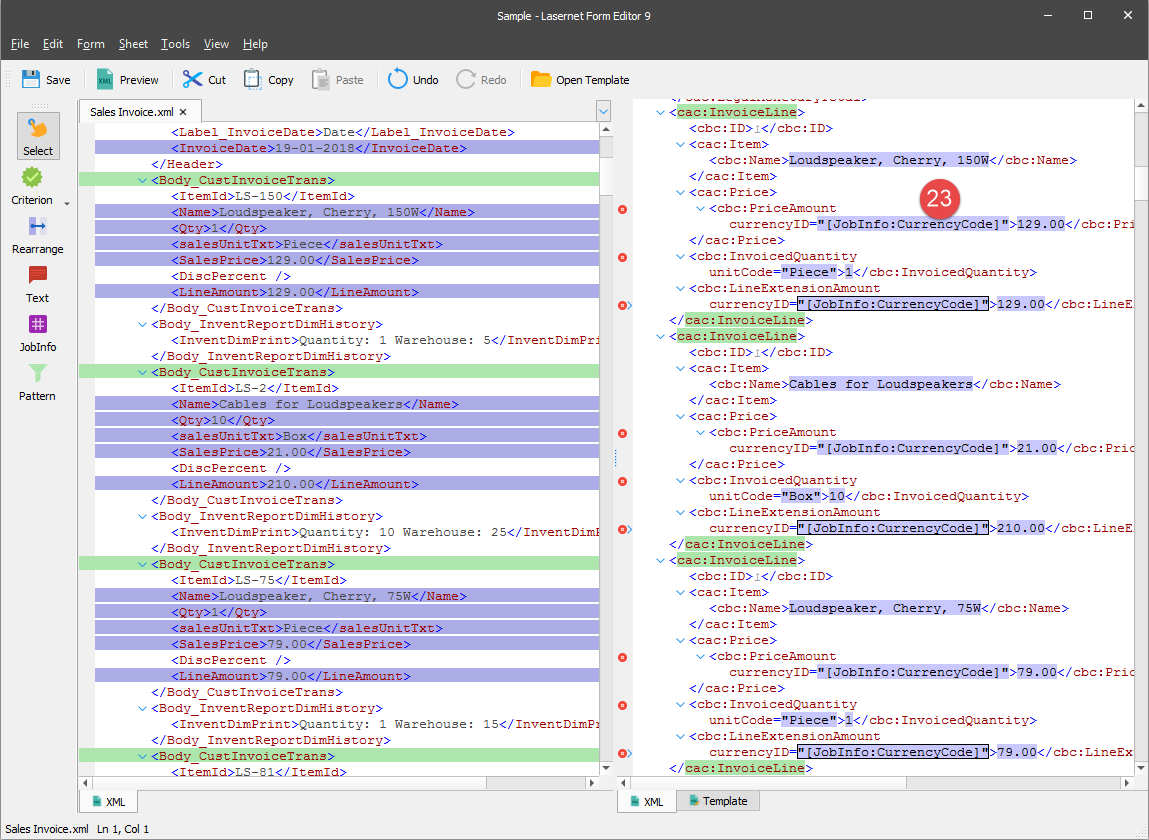
Follow steps 13-16 to add a JobInfo value as a currencyID attribute to the cbc:PriceAmount and cbc:LineExtensionAmount nodes in the output.

As a result, a JobInfo is added as a currencyID attribute to the cbc:PriceAmount and cbc:LineExtensionAmount nodes.
You are now proposed to add a script to the cbc:ID node in the output. To this end, follow the steps listed below.
On the Developer toolbar, click Text.
When a pointer becomes a cross, click the cbc:ID node in the output. As a result, New Insert Text is added.
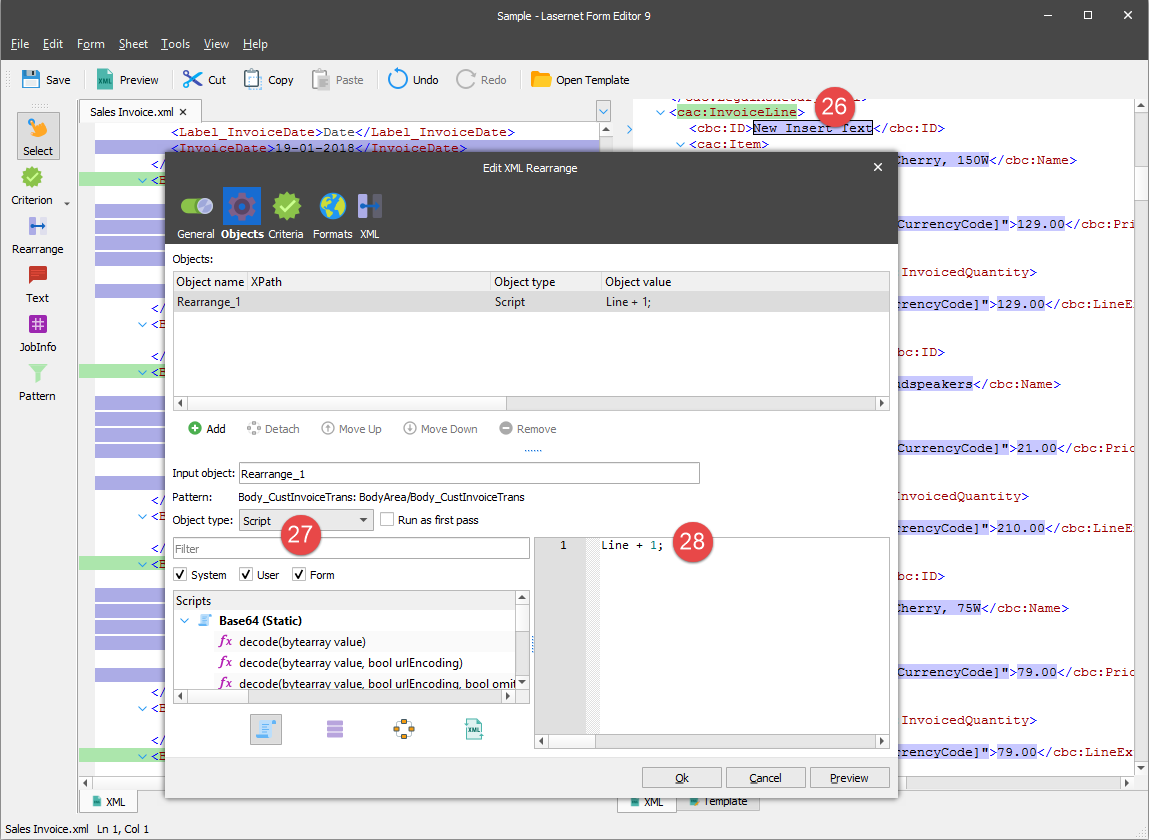
Double-click New Insert Text. As a result, the Edit XML Rearrange dialog box opens with the Objects tab.
From the Object type drop-down combo box, select Script.
To add a line counter, type Line + 1; in the text box to the right. Once you are done, click Ok.
To view the cbc:ID node value, press SHIFT+F5. Otherwise, on the View menu, click Run JavaScript.
It is time now to come back to the nodes containing date and number values and specify an appropriate format and a regional profile for them.
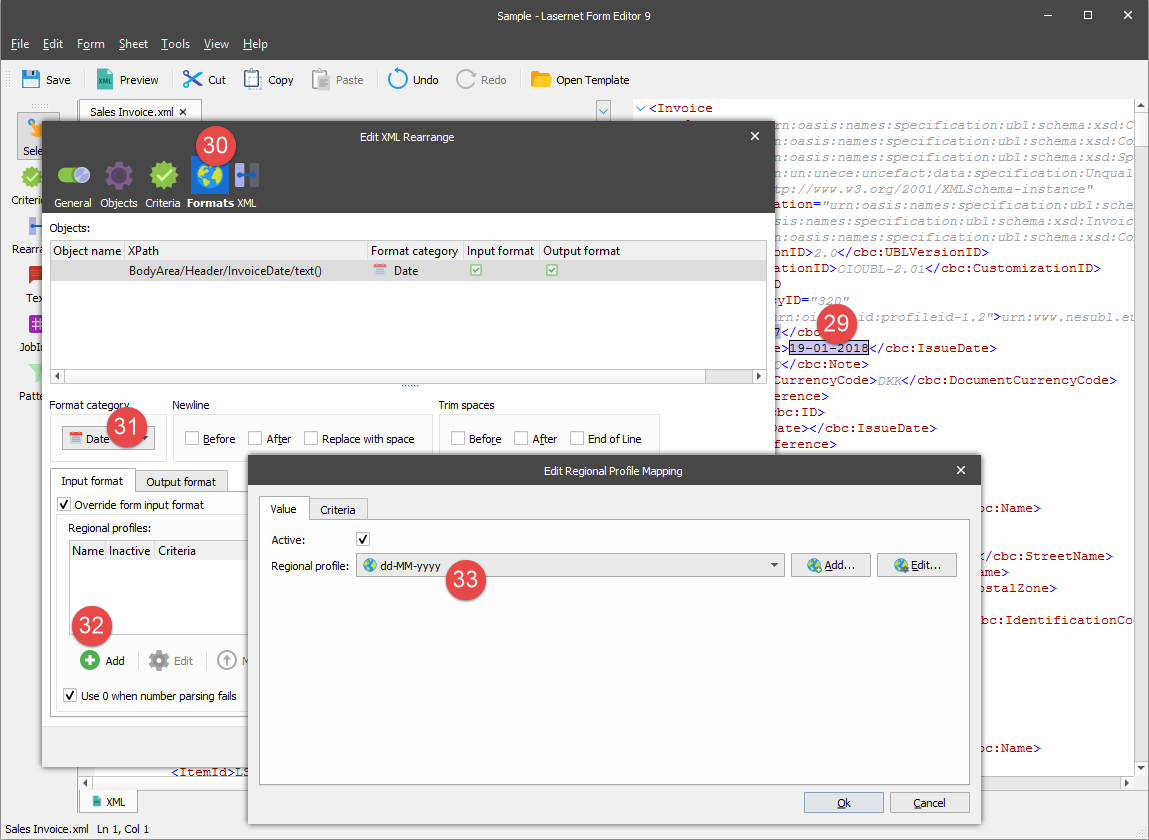
First, go to the cbc:IssueDate node in the output and double-click its value.
In the Edit XML Rearrange dialog box that appears, switch to the Formats tab.
From the Format category drop-down combo box, select Date.
On the Input format tab, select the Override form input format checkbox, and then click the Add button.
In the Edit Regional Profile Mapping dialog box that appears, select dd-MM-yyyy from the Regional profile drop-down combo box.
Once you are done, click Ok on both dialog boxes.
Proceed to the nodes containing number values and specify an appropriate format and a regional profile for them.
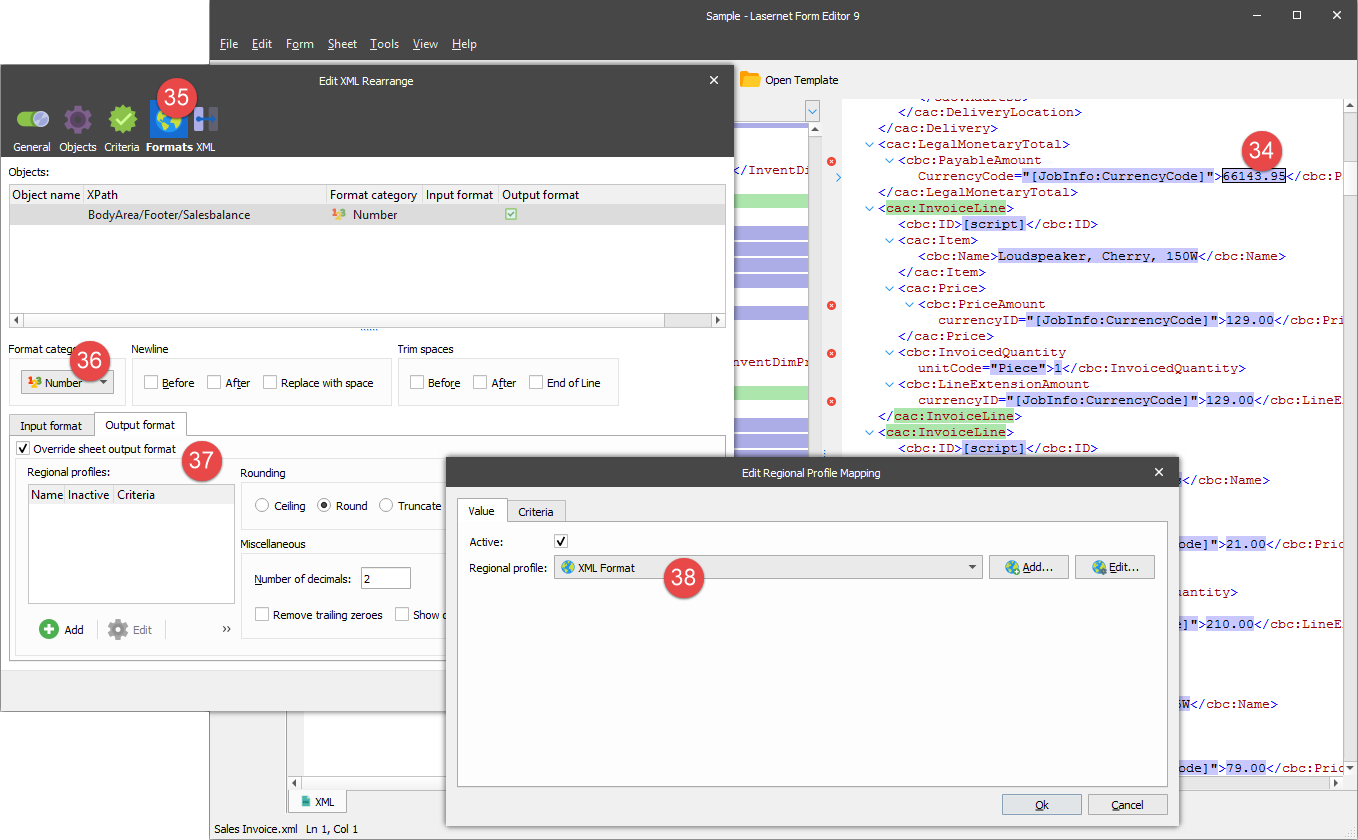
Navigate to the cbc:PayableAmount node in the output and double-click its value.
In the Edit XML Rearrange dialog box that appears, switch to the Formats tab.
From the Format category drop-down combo box, select Number.
On the Output format tab, select the Override sheet output format checkbox, and then click the Add button.
In the Edit Regional Profile Mapping dialog box that appears, select XML Format from the Regional profile drop-down combo box.
Once you are done, click Ok on both dialog boxes.
Perform steps 34-38 for those nodes that have number values and the CurrencyCode attribute. For the cbc:InvoicedQuantity node, follow the same steps, but on step 37, additionally type 0 in the Number of decimals text box.
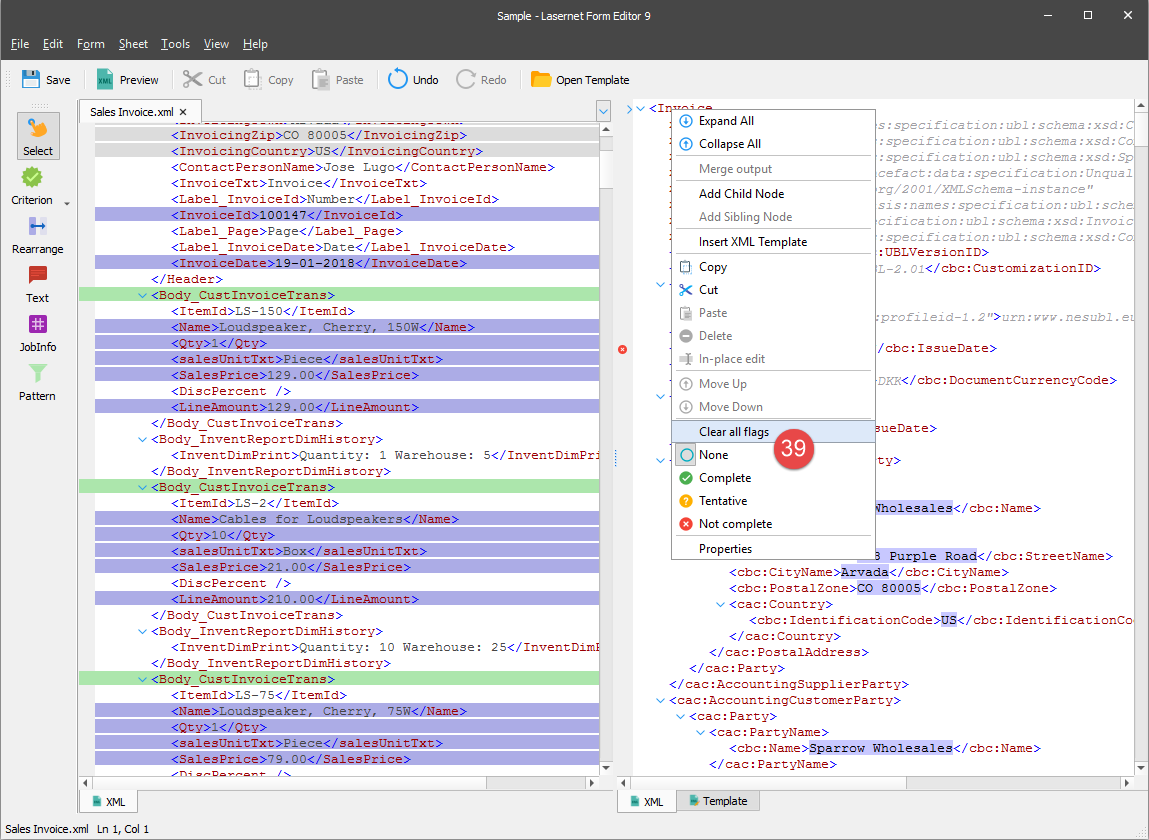
Once you are done specifying formats for the node values, you can remove the Not complete flag for those nodes. To this end, scroll up the output to the top, right-click the Invoice node, and then click Clear all flags.
In the following step, you are proposed to modify the rest of the nodes for which no rearranges are added in such a way that they can take their default values. To this end, follow the steps listed below.
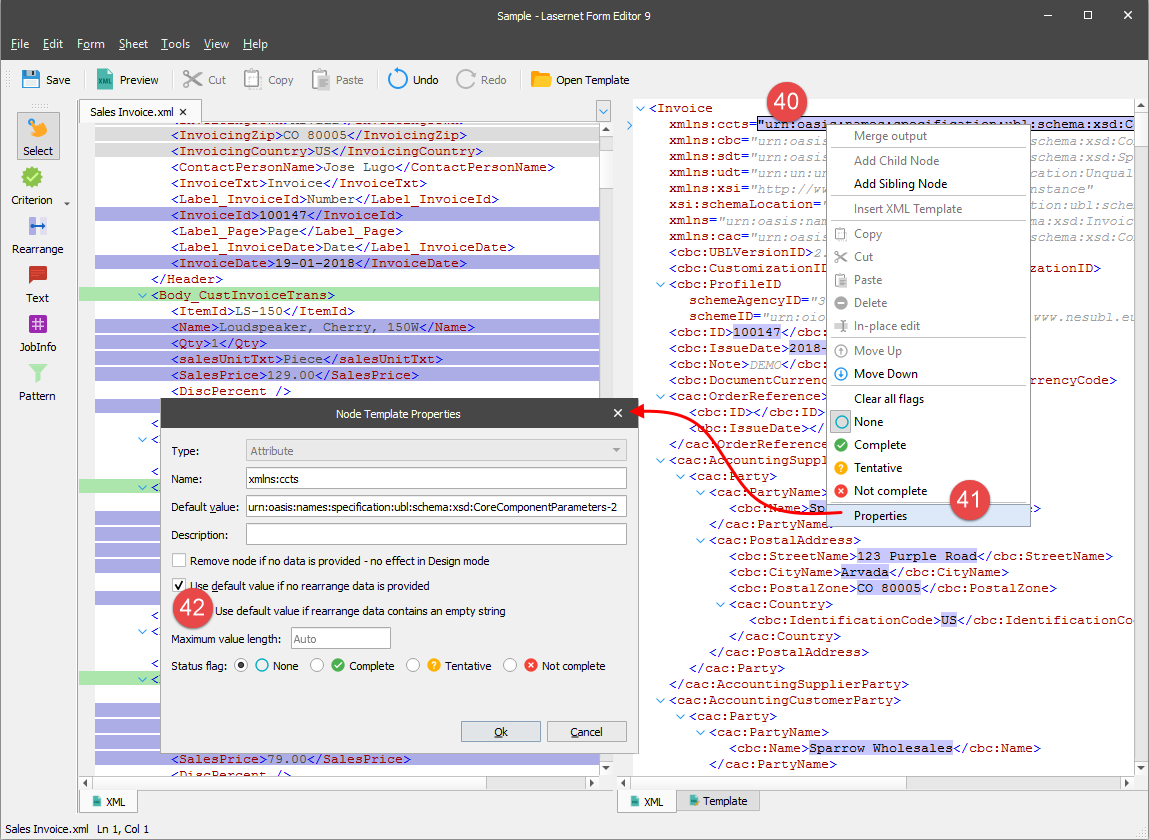
Go to the xmlns:ccts attribute of the Invoice node and right-click its value.
In the context menu that appears, click Properties.
In the Node Template Properties dialog box, select the Use default value if no rearrange is provided check box. Once you are done, click the Ok button.
Here is the final view of your document after all the proposed alterations.