Create an OData Direct Submit
- 08 Dec 2025
- 1 Minute to read
- Contributors

- Print
- PDF
Create an OData Direct Submit
- Updated on 08 Dec 2025
- 1 Minute to read
- Contributors
- Print
- PDF
Article summary
Did you find this summary helpful?
Thank you for your feedback
This article provides step-by-step instructions on how to create a new OData Direct Submit record as a part of the Lasernet Connector configuration within Microsoft Dynamics 365 Customer Engagement (CE).
An OData Direct Submit is an action button configured within Dynamics that has a predefined destination configured in the Lasernet Connector for Dynamics 365 Finance and Operations (FO). Data is received from the CE entities.
To create a new OData Direct Submit record, follow these steps:
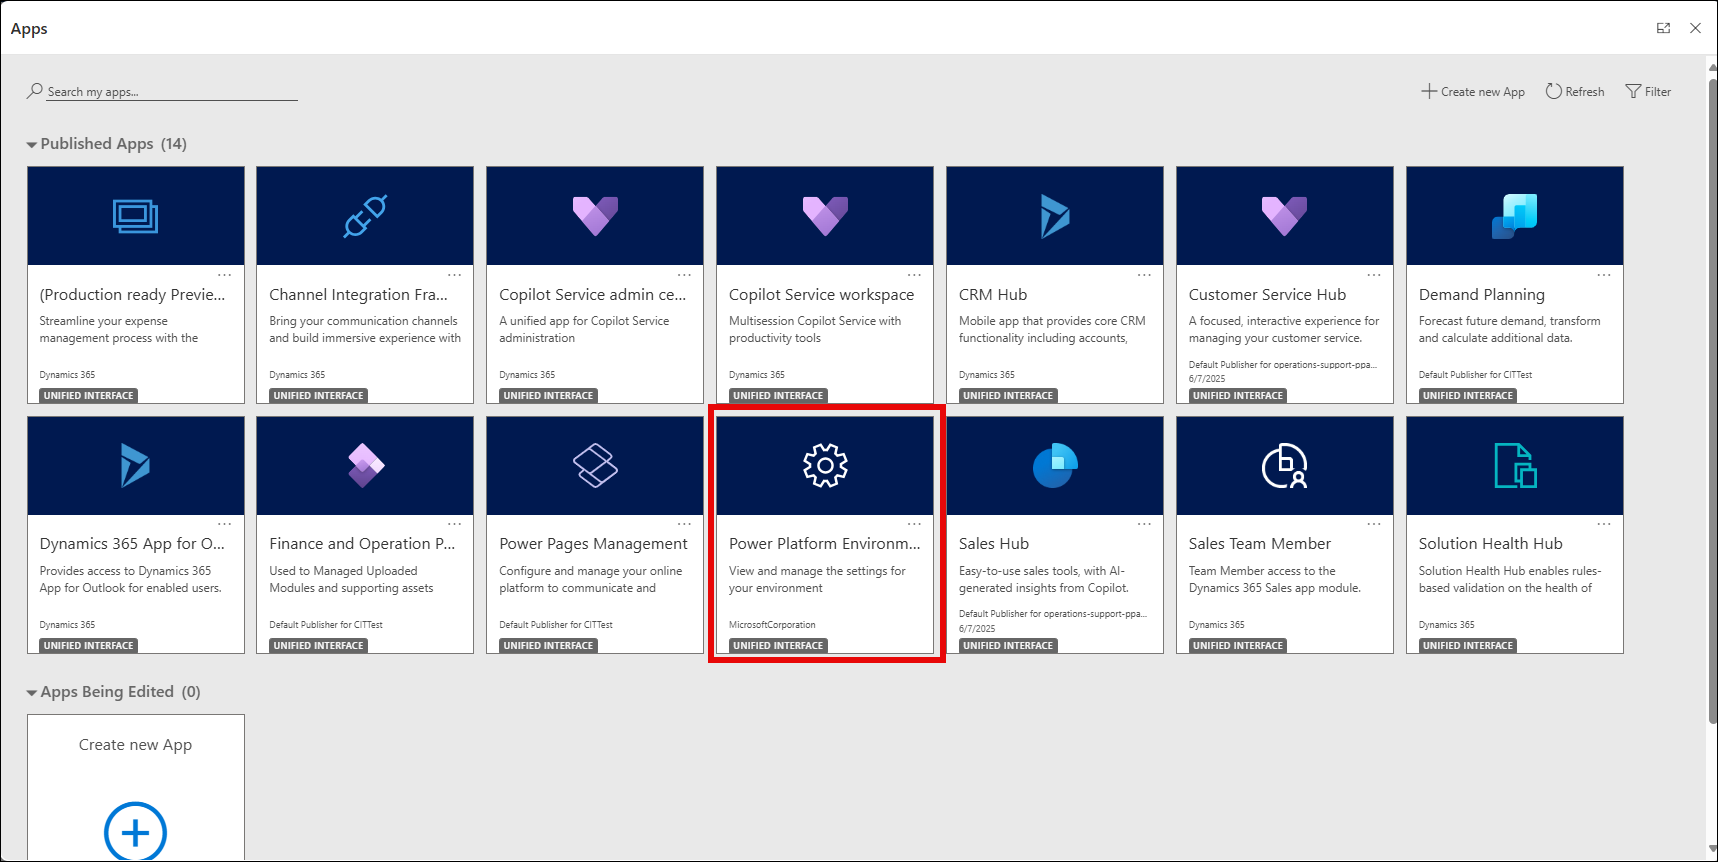
Sign in to your Customer Engagement system. From the Published Apps menu, open the Power Platform Environment Settings app.
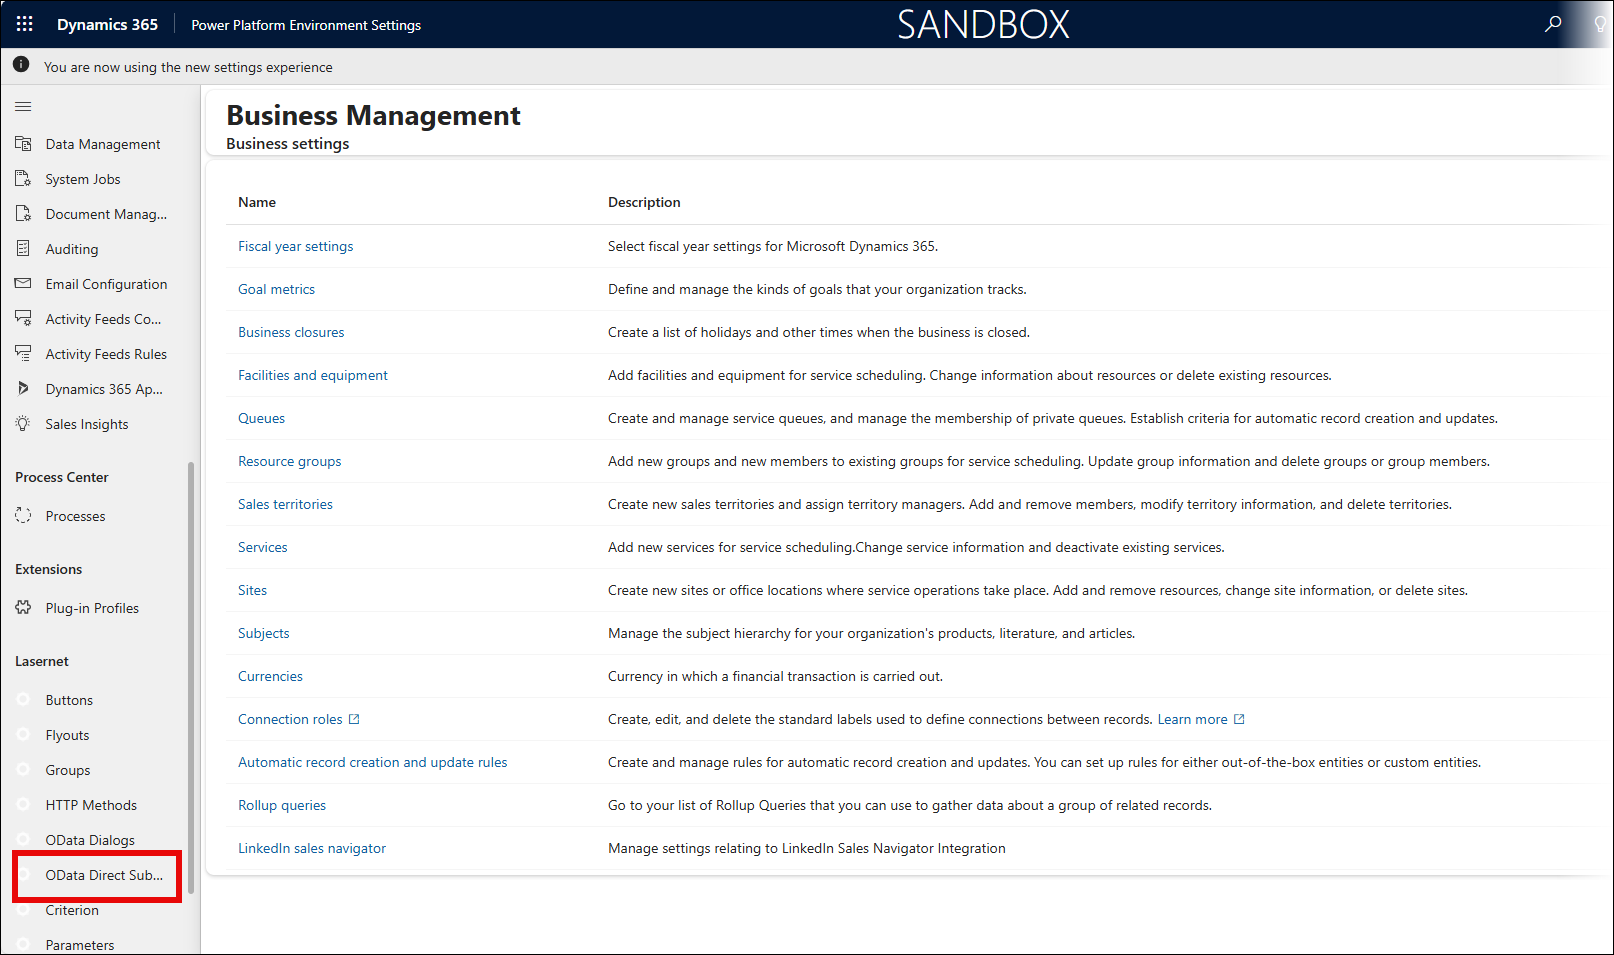
Select OData Direct Submit from the Lasernet menu.
On the Active Lasernet OData Direct Submits page that opens, click New.
Fill in all the required fields, and then click Save.
In the OData Submit Endpoint text box, enter the URL composed of the Finance and Operations environment URL and the API interface to your Lasernet service. The latter is a fixed part, such as:
.../api/services/LACCRMServiceGroup/LACCRMReportExecuteService/executeReportPreDefined

As a result, a new OData Direct Submit record is listed on the Active Lasernet OData Direct Submits page.

From the Active Lasernet OData Direct Submits list, click the OData Direct Submit record you have just added. The OData Direct Submit page opens for editing.
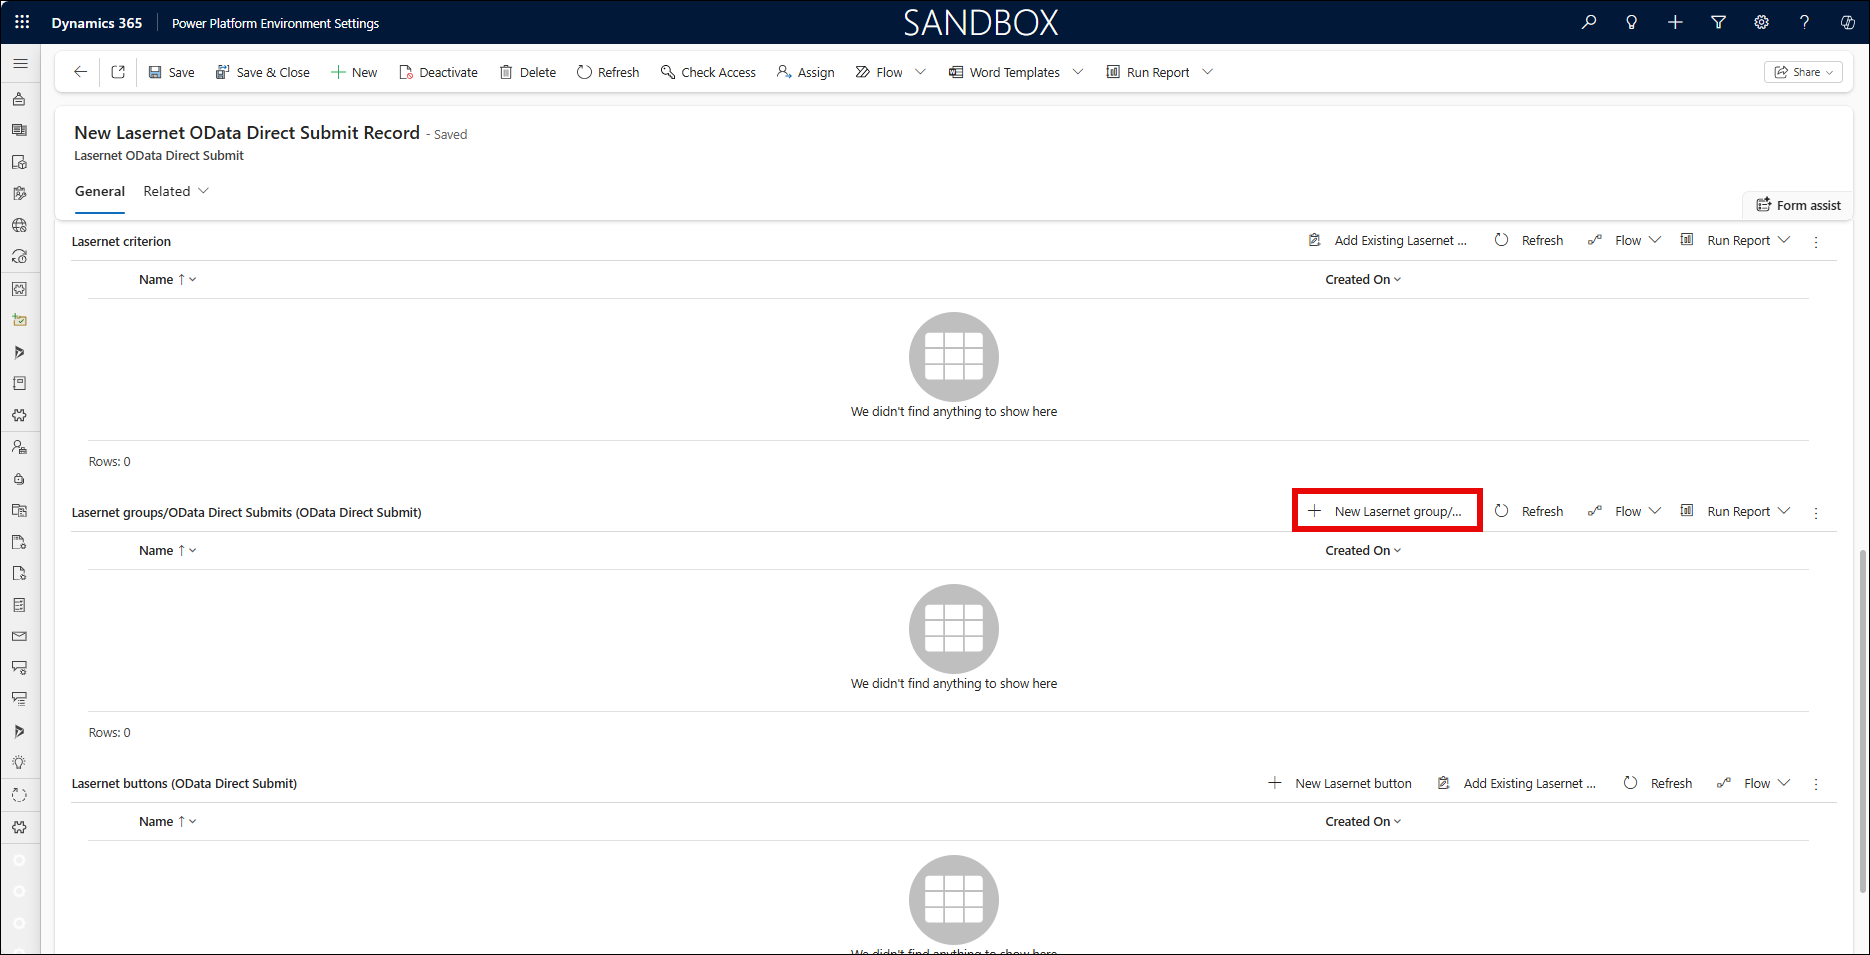
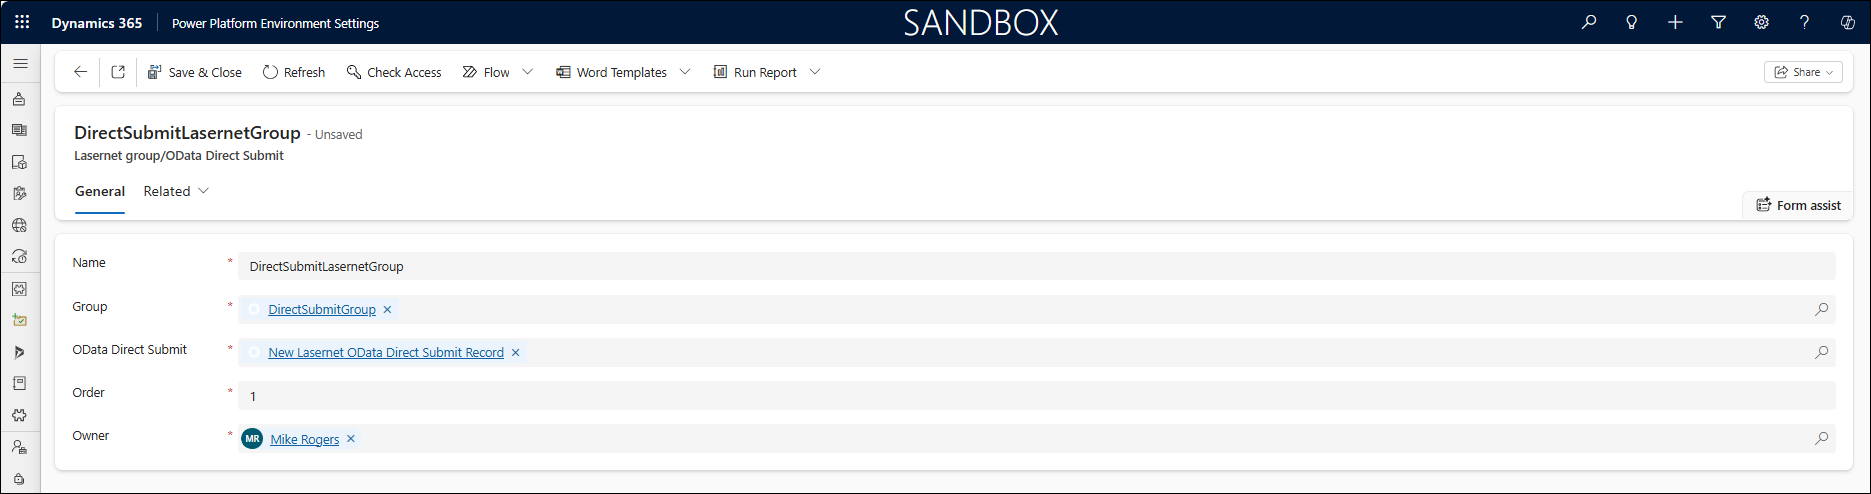
From the Lasernet Groups/OData Direct Submits (OData Direct Submit) section, click New Lasernet group/OData Direct Submit record.
The New Lasernet group/OData Direct Submit form opens. Provide a Name for it.

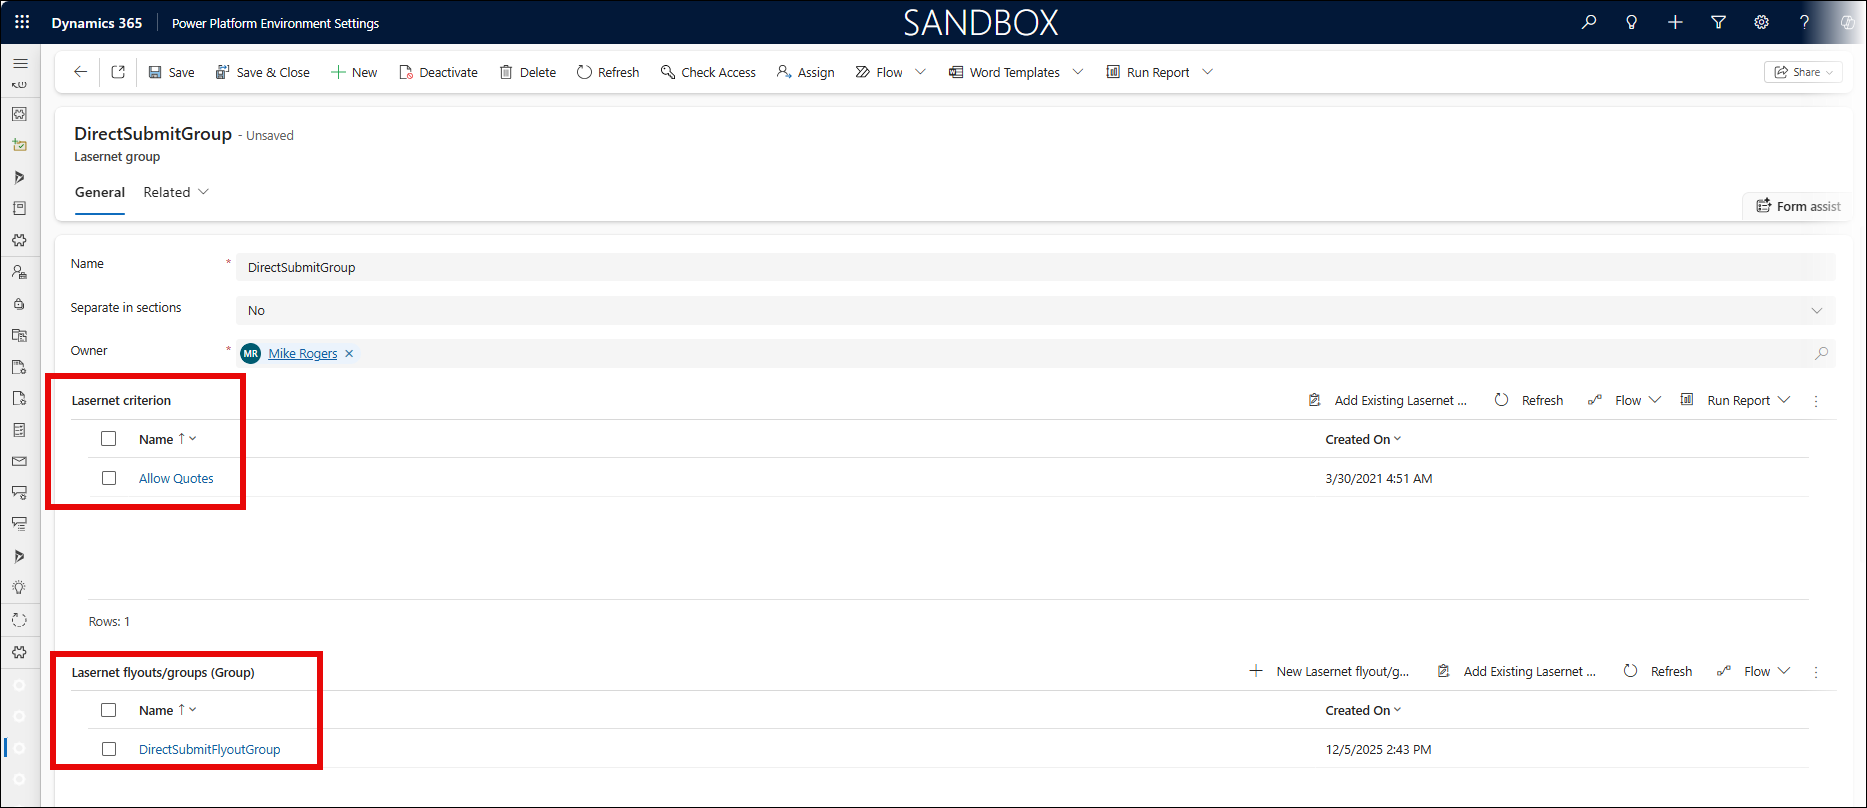
Use the dropdown search option for the Group field to find an existing group or click New to create a new group.

Ensure the group has a Lasernet criterion and a Lasernet flyout/groups (Group). For more information on how to configure Lasernet flyouts and groups, refer to this guide.
On the Lasernet group/OData Direct Submit page, provide a value for the Order field and then click Save&Close.
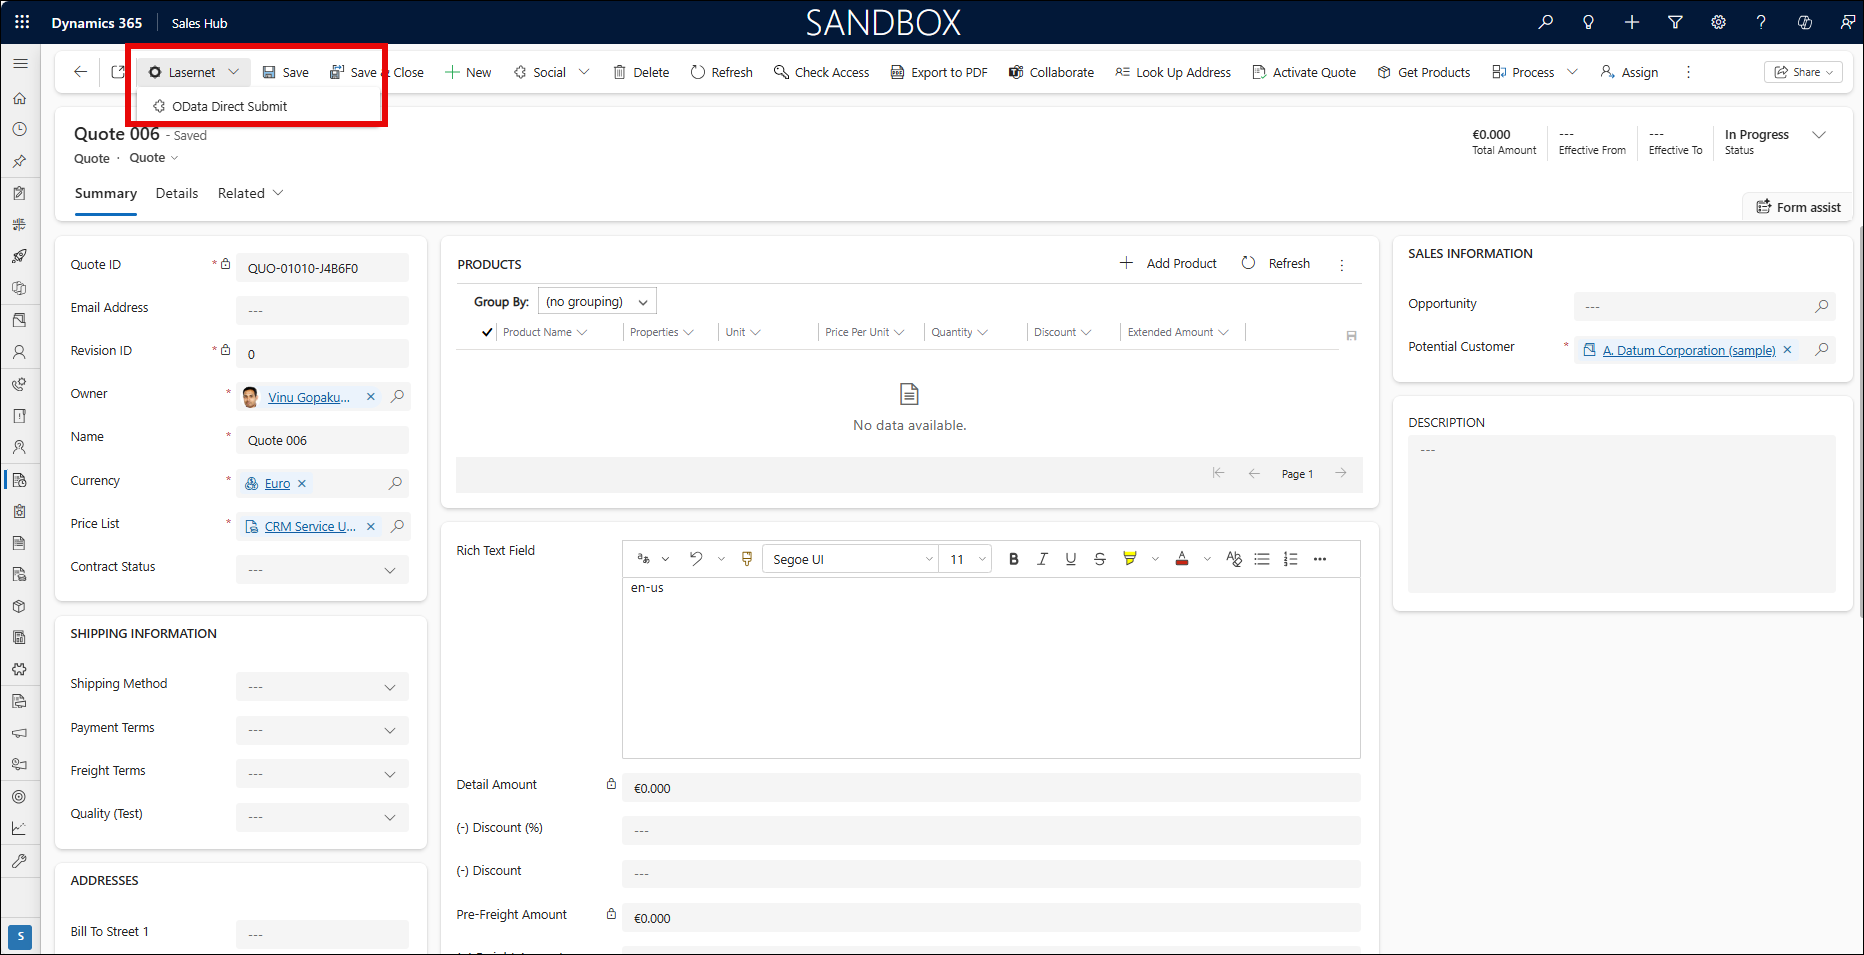
Your OData Direct Submit button is now available for selection within CE.