Create a Test Report
- 01 Dec 2025
- 4 Minutes to read
- Contributors

- Print
- PDF
Create a Test Report
- Updated on 01 Dec 2025
- 4 Minutes to read
- Contributors
- Print
- PDF
Article summary
Did you find this summary helpful?
Thank you for your feedback
Populate the Entity Report
It is now necessary to send a message between the two systems through the user interface.
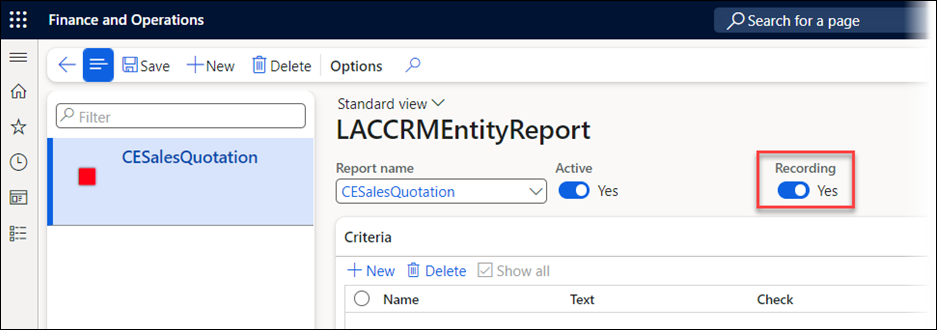
Previously, the Entity Report's Recording button was toggled to Yes:
This is where the message from CE will be received in FO.
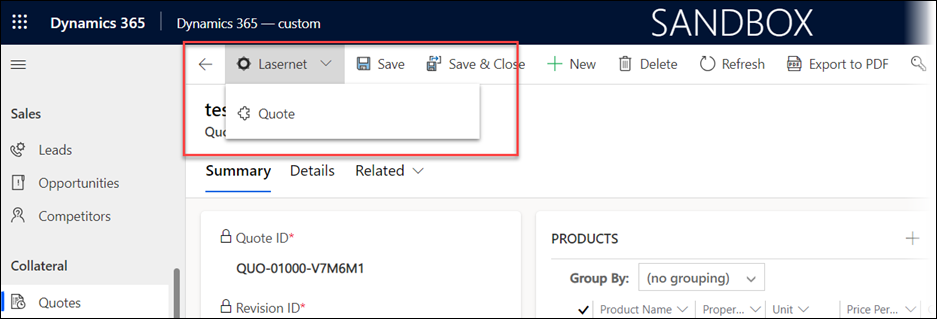
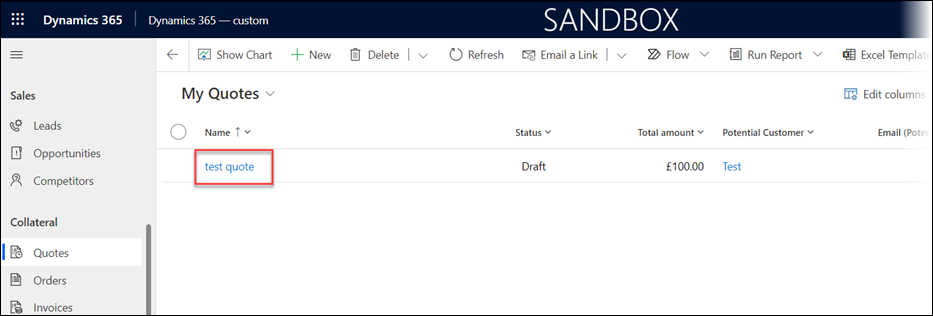
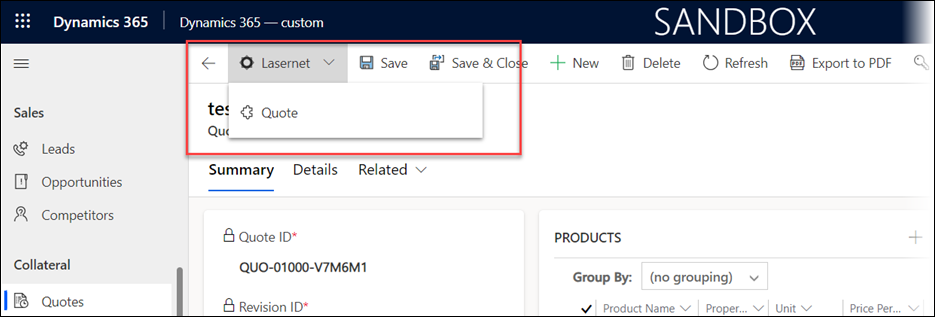
Navigate to the Quotes entity in CE.
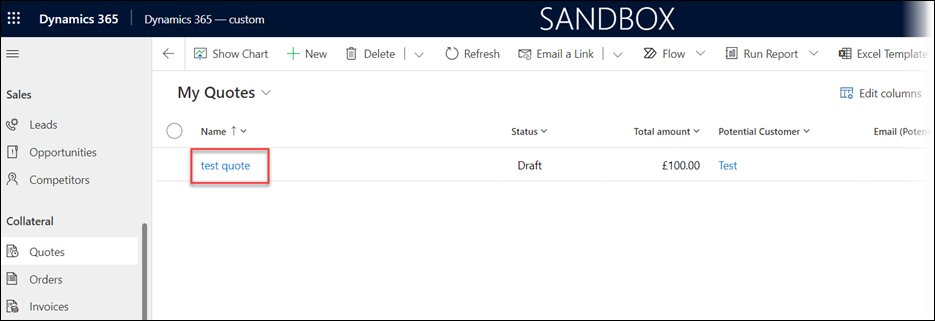
Double-click a quote to open it.
On the Quotes form that opens, click the Lasernet button and then click Quote.
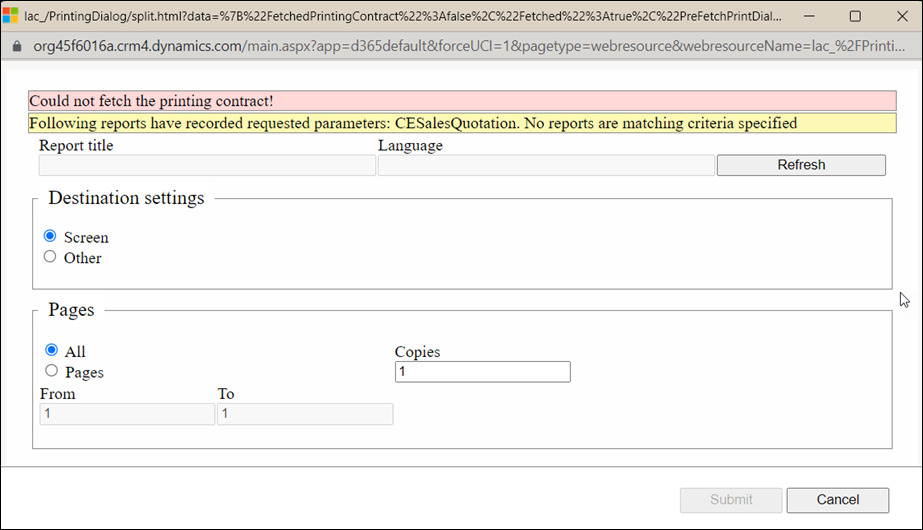
The following window will be displayed. These errors are expected:
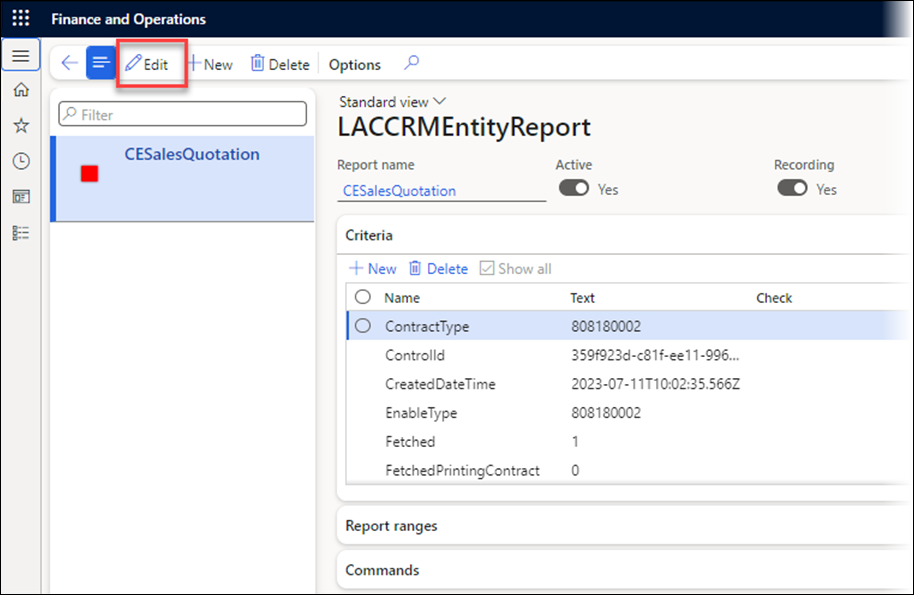
Close the dialog box and open Finance and Operations. There, navigate to Lasernet > Setup > Dataverse/Dynamics365 > Entity reports.
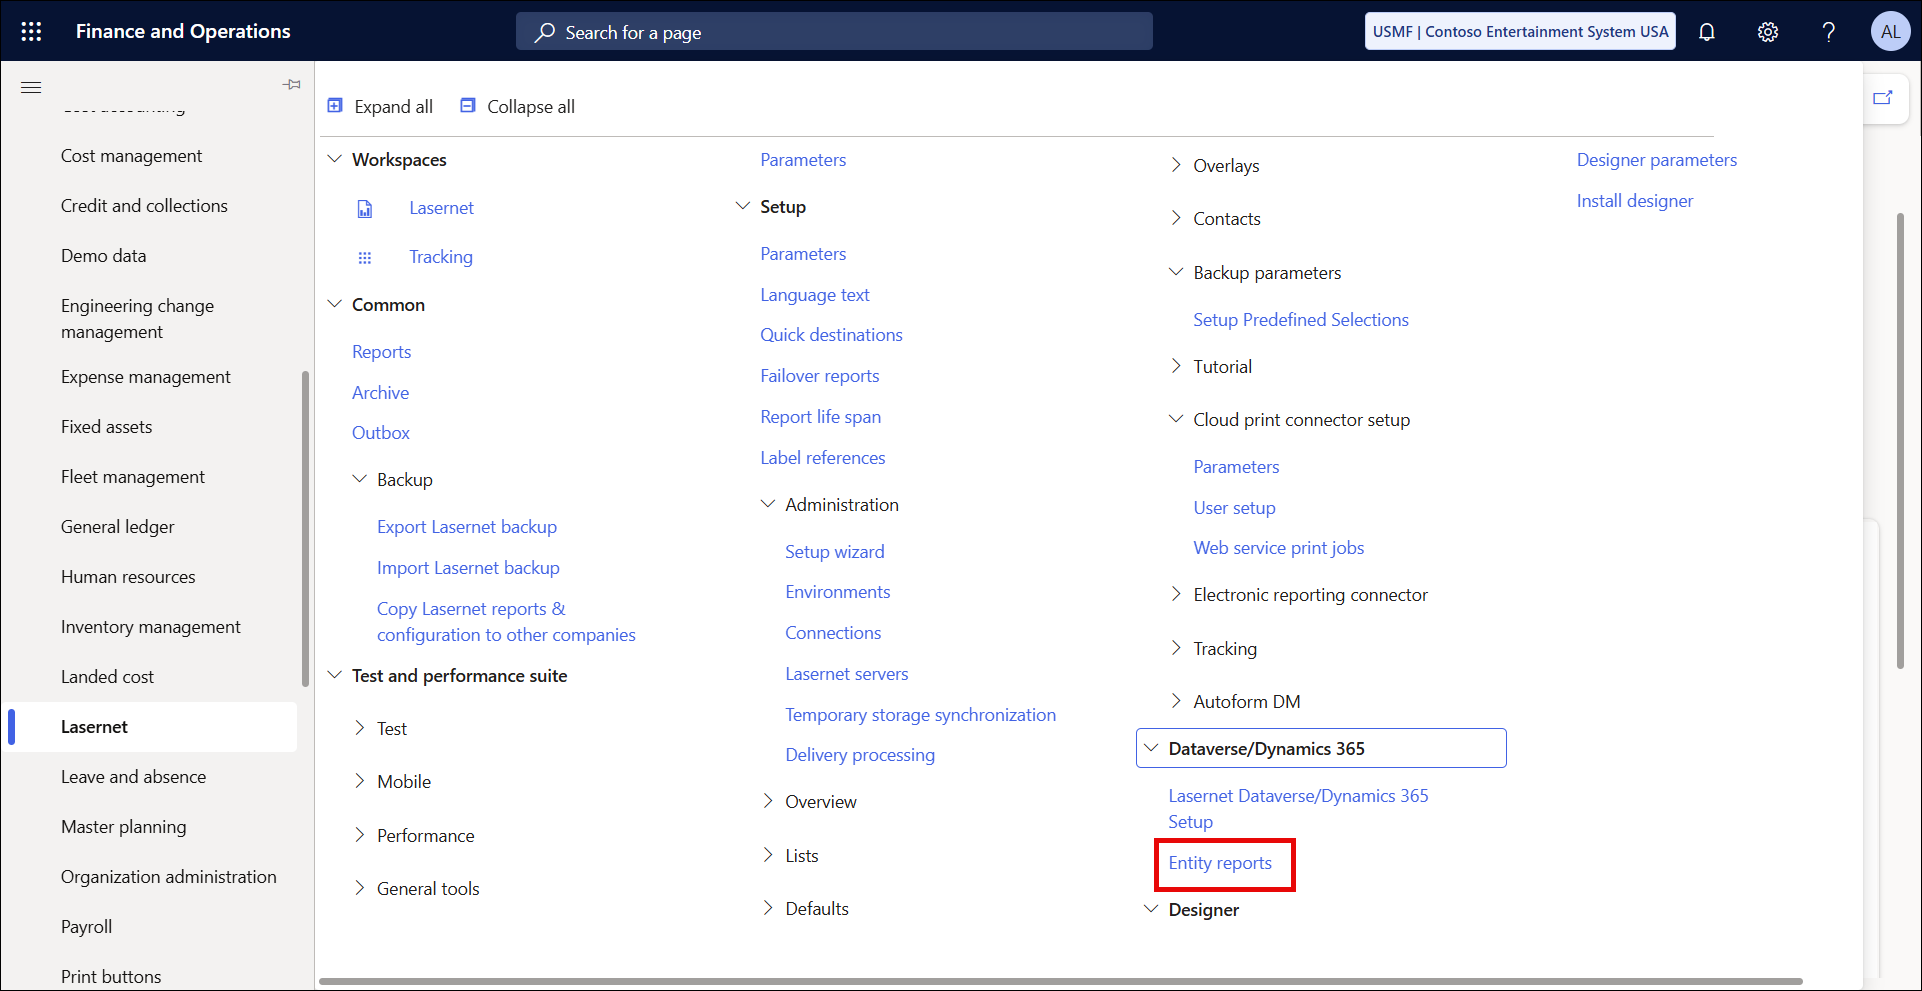
Select the Entity Report created earlier.
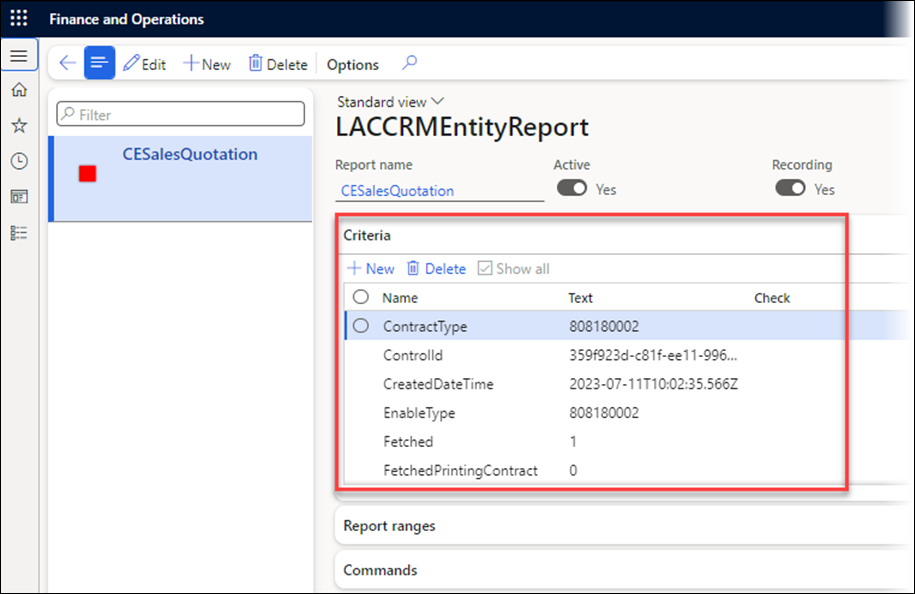
You can see that the criteria of this entity report have been filled in; this is the message that was sent from CE to FO. The connection is working well.
Click Edit.
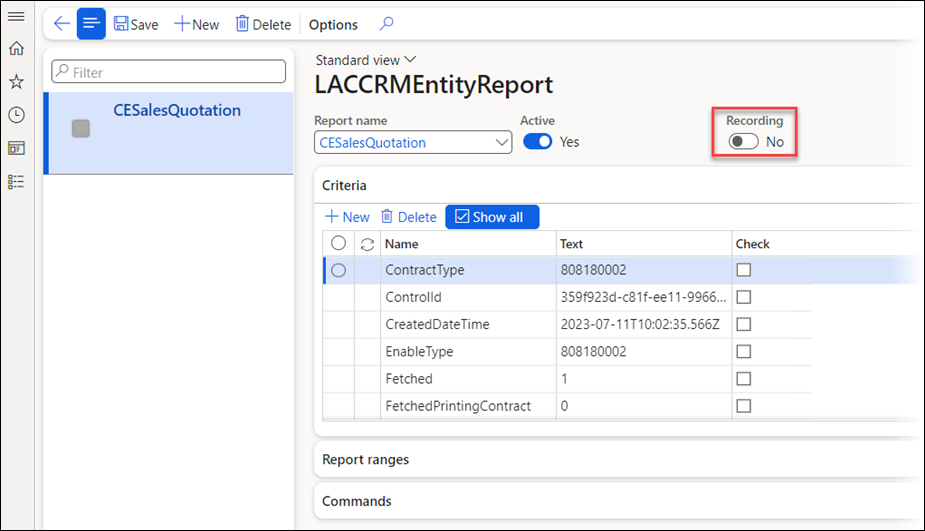
Toggle the Recording button to No.
Scroll down through the criteria until you find PassThroughData. Select the checkbox within the Check column.
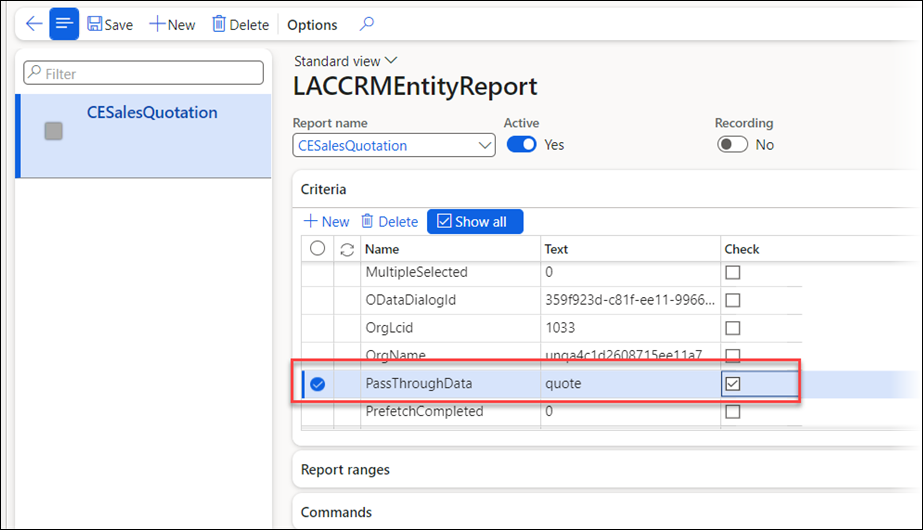
Click Save and close the form.
Return to CE and navigate to the Quotes entity.
Double-click a quote to open it. On the Quotes form that opens, click the Lasernet button, then click Quote.

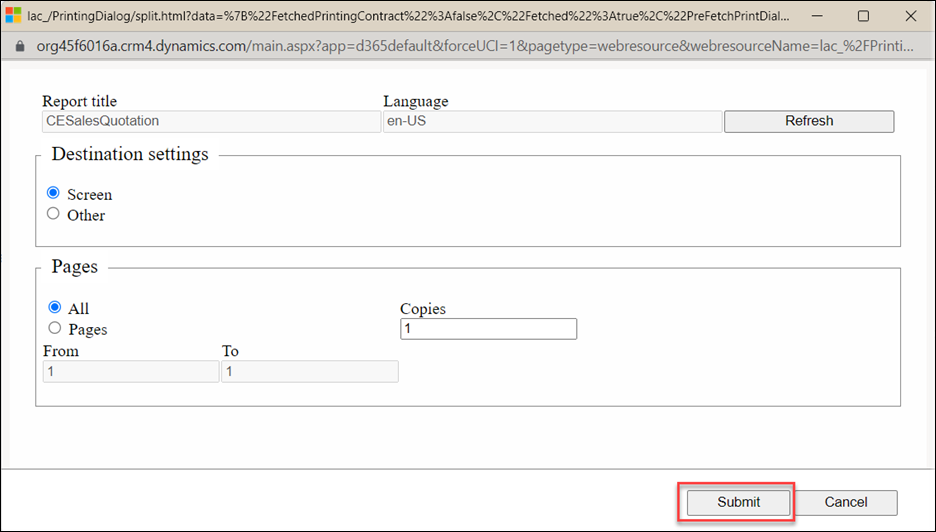
A dialog box will be displayed again:

This time, no errors occurred. Click Submit.
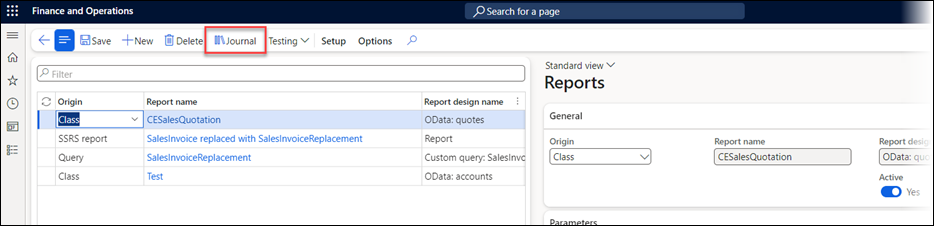
The CE report will run, and the dialog box will disappear. To check this, return to FO, navigate to Lasernet > Common > Reports, and then select the CESalesQuotation class report that was created earlier.
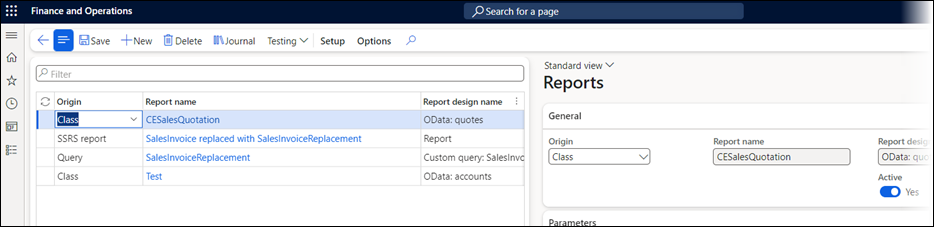
Click Journal to display the list of the previous runs of this report.

From within the Journal screen, you can view the previous runs of the report. Here, the timestamp on the top record matches the time the report was run from CE. This confirms that the integration is working as expected.

Run a Test Report
The following steps will help confirm that the contents of the report are as expected:
Return to CE and navigate to the Quotes entity.

Double-click a quote to open it. On the Quotes form that opens, click the Lasernet button, then click Quote.

A dialog box will be displayed again:
This time, no error occurred. Click Submit.
The CE report will run, and the dialog box will disappear again.
As before, check this by returning to FO, navigating to Lasernet > Common > Reports, and then selecting the CESalesQuotation class report, which was created earlier.

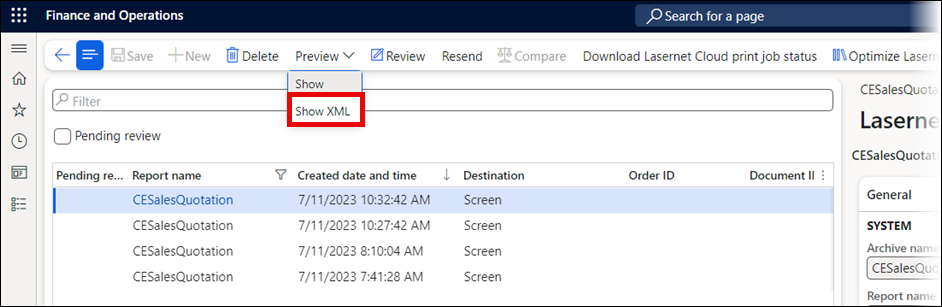
Click Journal to display the list of the previous runs of this report.

From within the Journal screen, select the most recent run of the report.
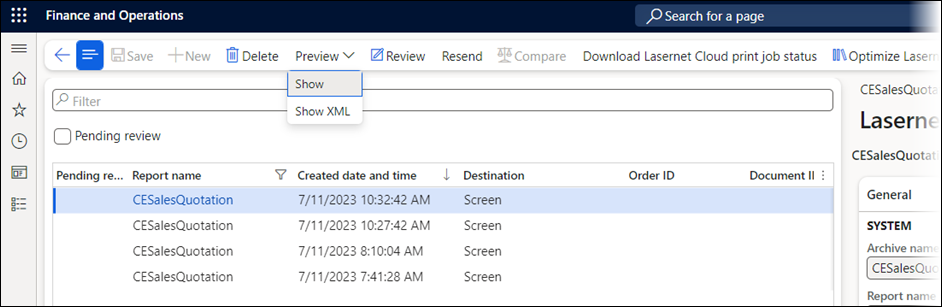
Click the Preview dropdown menu and then select Show XML to display the generated XML.
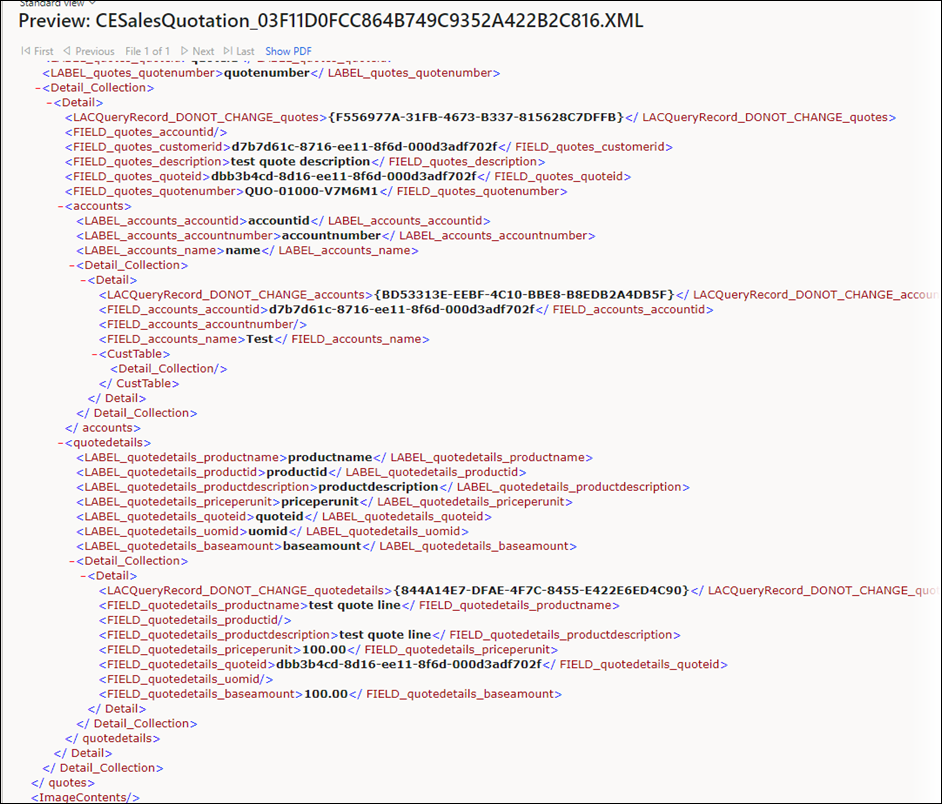
As in the previous test, the XML preview displays all the information that would be expected in the usual XML message generated by the Lasernet Connector, including all the fields defined in our query.
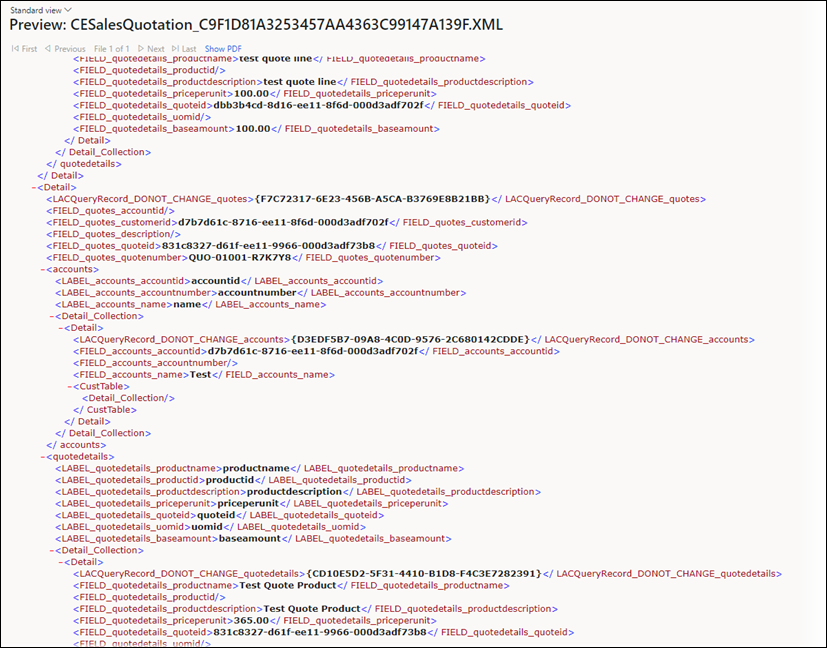
However, this XML contains information for all the quotes in CE rather than just for the record that we selected when the report was run.
Define Parameters for the Entity Report
The following steps will define parameters for the entity report within Lasernet CE Connector:
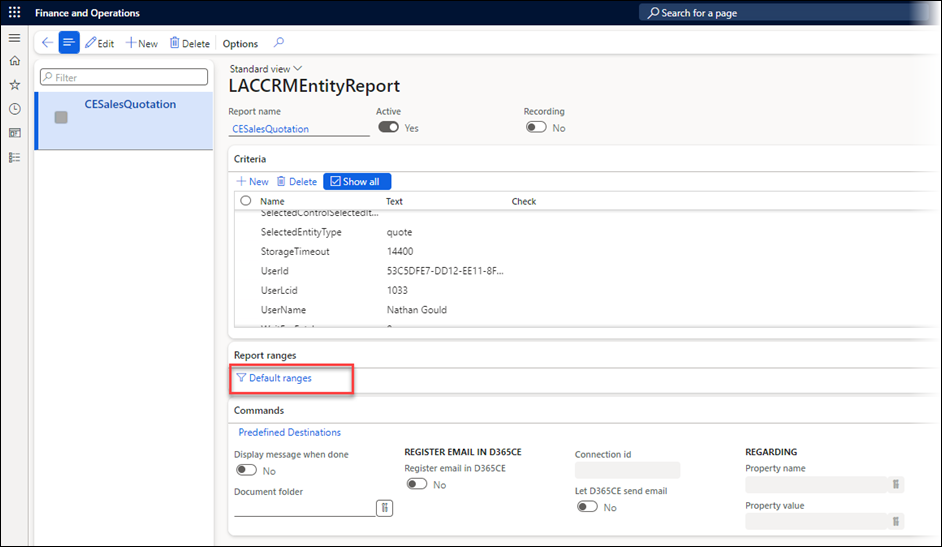
In FO, navigate to Lasernet > Setup > Dataverse/Dynamics 365 > Entity reports.
Expand the Commands and Report ranges FastTabs.
Click Predefined Destinations, and for the purposes of testing, select Lasernet Screen.
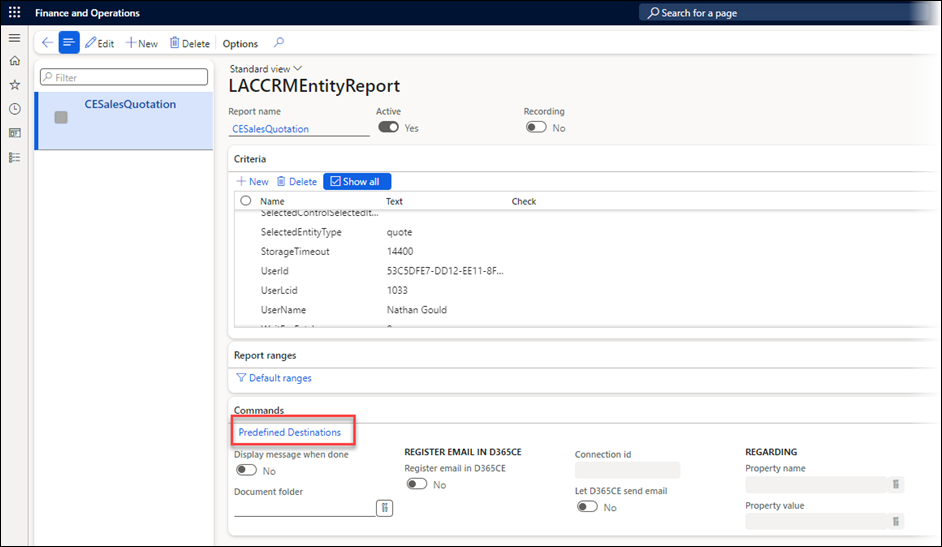
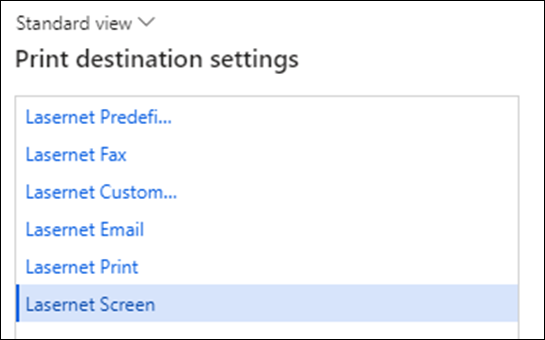
Click OK.
On the Entity Report, click Default ranges.
Here, we define which records will be included in the XML message sent to Lasernet. By default, this range is empty, which is why, during the test run of the report, all CE quotes were included in our XML, rather than just the one we had selected.
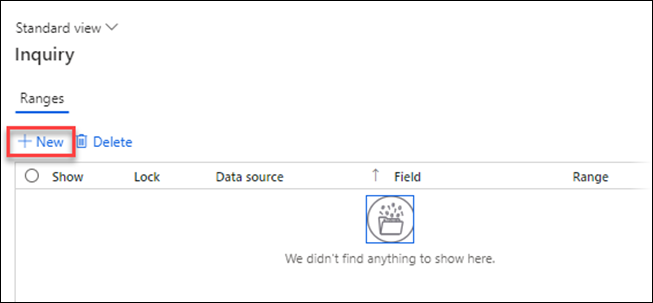
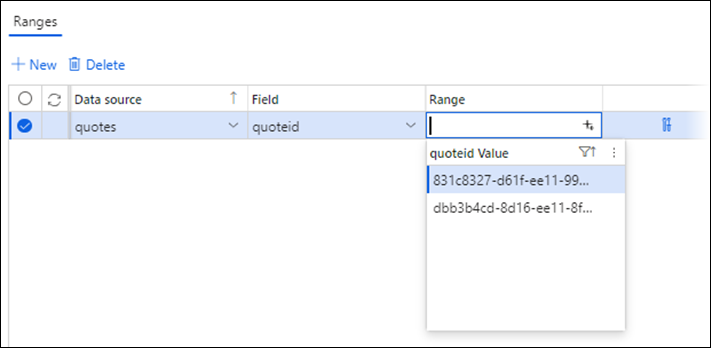
Click New.
On the displayed line, select the Field column and then quoteid.
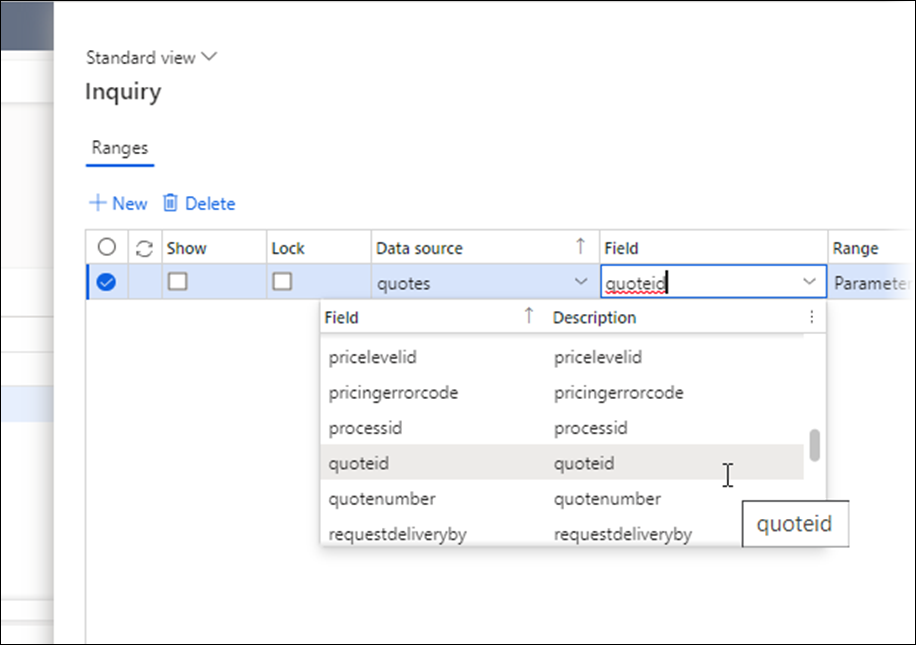
Click the + icon in the Range column. You will see that this quote ID value corresponds to the GUID in CE, which is the unique identifier for the quote.
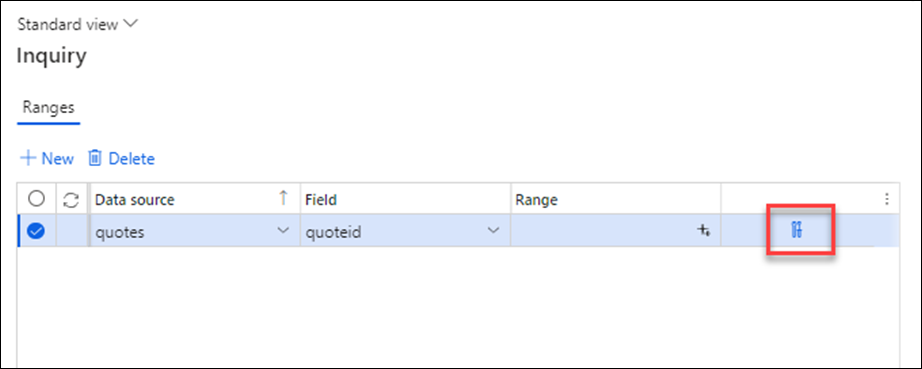
When we run our report, we want to run it only for the quote ID linked to the Quote that we have selected. To do this, click the Expression editor icon next to the Range column.
The Expression Editor opens.
Click the Select value dropdown.
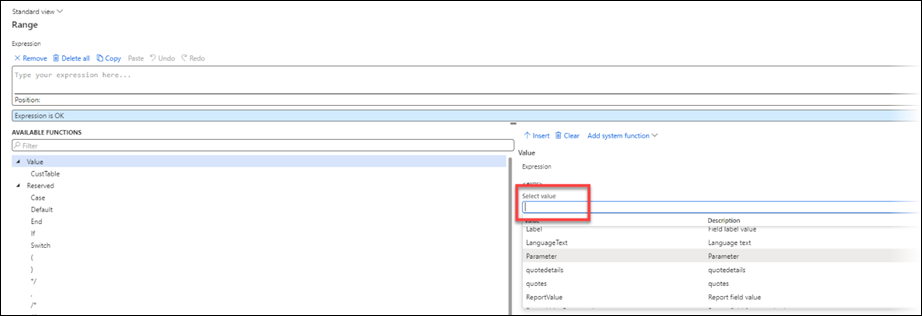
Select Parameter from the list.
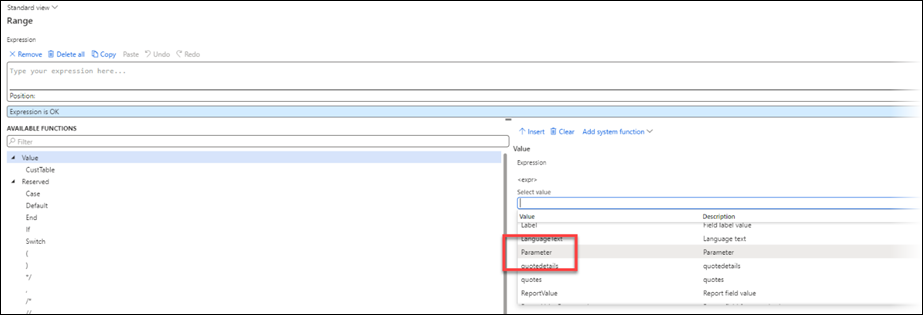
Select PrimaryItemIds from the available parameters. The expression will validate.
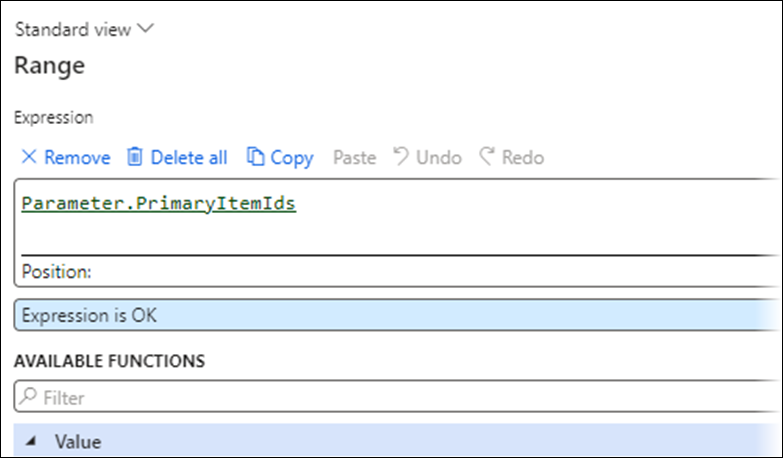
Click OK and OK again.
Save the form, then close it.
Run the Final Report Through Lasernet CE Connector
Follow these steps to run the report one last time to check that the outcome is as expected:
Return to CE and navigate to the Quotes entity.

Double-click a quote to open it. On the Quotes form that opens, click the Lasernet button, then click Quote.
A dialog box will be displayed again:
Click Submit.
The CE report will run, and the dialog box will disappear. Depending on your browser settings, the output will either download or be displayed on the screen.
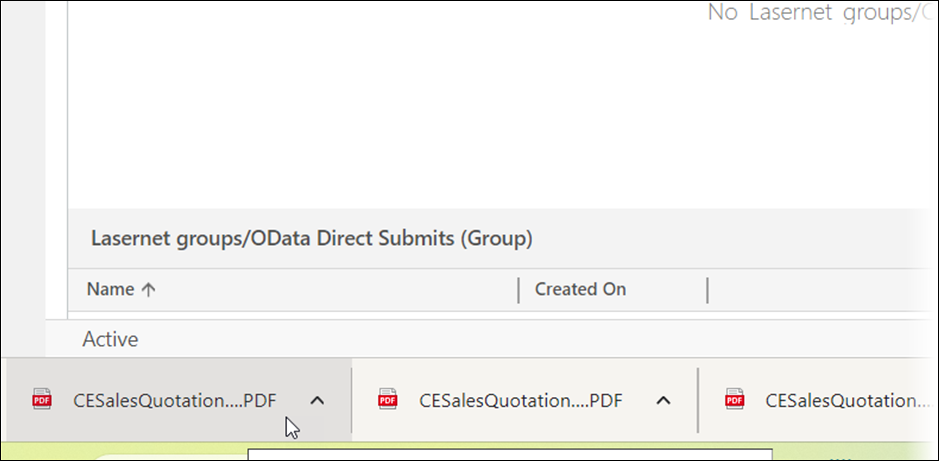
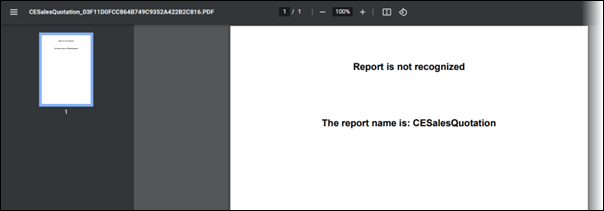
This Report is not recognized output is expected here, as no Lasernet form output has been defined yet.
Check the XML Message in FO
To check the XML message in FO to ensure the filters applied in the previous step are working as expected, follow these steps:
Return to FO, navigate to Lasernet > Common > Reports, and then select the CESalesQuotation class report that was created earlier.

Click Journal to display the list of the previous runs of this report.
From within the Journal screen, select the most recent run of the report.
Click the Preview dropdown menu and select Show XML to display the generated XML.