Configure Email Tracking with Azure Web App in Finance and Operations
- 02 Oct 2025
- 4 Minutes to read
- Contributors


- Print
- PDF
Configure Email Tracking with Azure Web App in Finance and Operations
- Updated on 02 Oct 2025
- 4 Minutes to read
- Contributors
- Print
- PDF
Article summary
Did you find this summary helpful?
Thank you for your feedback
This section of the Email Tracking guide will walk you through the process of setting up the Email Tracking Web Application URL in Dynamics 365 Finance and Operations. To do this, you create and configure an Azure Web App and then deploy the necessary application files.
Prerequisites
Access to Dynamics 365 Finance and Operations with administrative privileges.
Access to an Azure subscription with permissions to create App Services and Resource Groups.
The
DAZDocuViewApp.zipfile (or similar, as downloaded during the process).
Part 1 — Navigate to Tracking Parameters in Finance and Operations
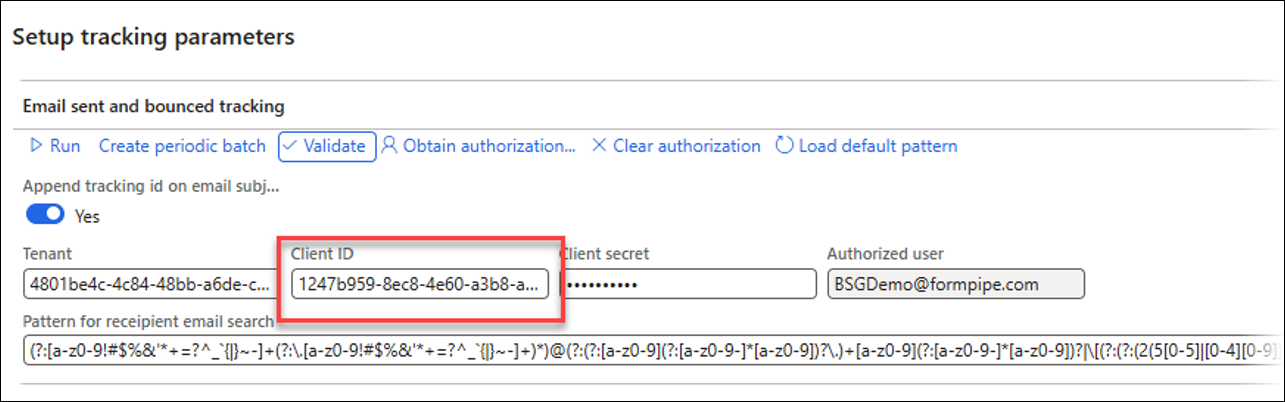
In Dynamics 365 Finance and Operations, navigate to Lasernet > Setup > Tracking > Tracking parameters.

In the Azure Portal, follow the steps in part 2 (below) to prepare the URL to enter into the Email tracking web application URL field.

Part 2 — Create the Web App in the Azure Portal
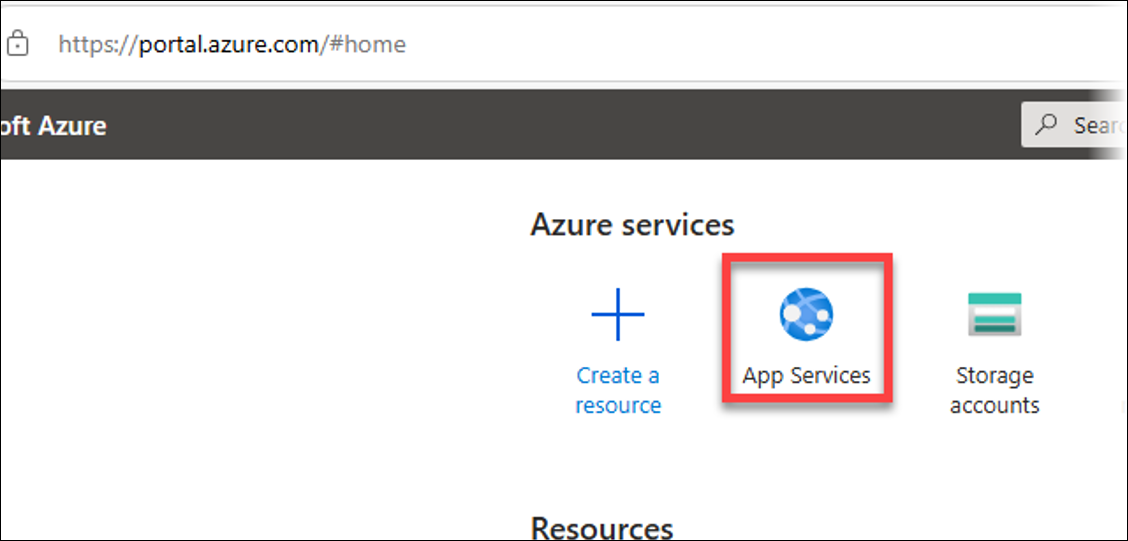
Open your web browser and navigate to the Azure Portal.
On the Azure Portal dashboard, click App Services. If the tile is not visible, search for it in the top search bar.
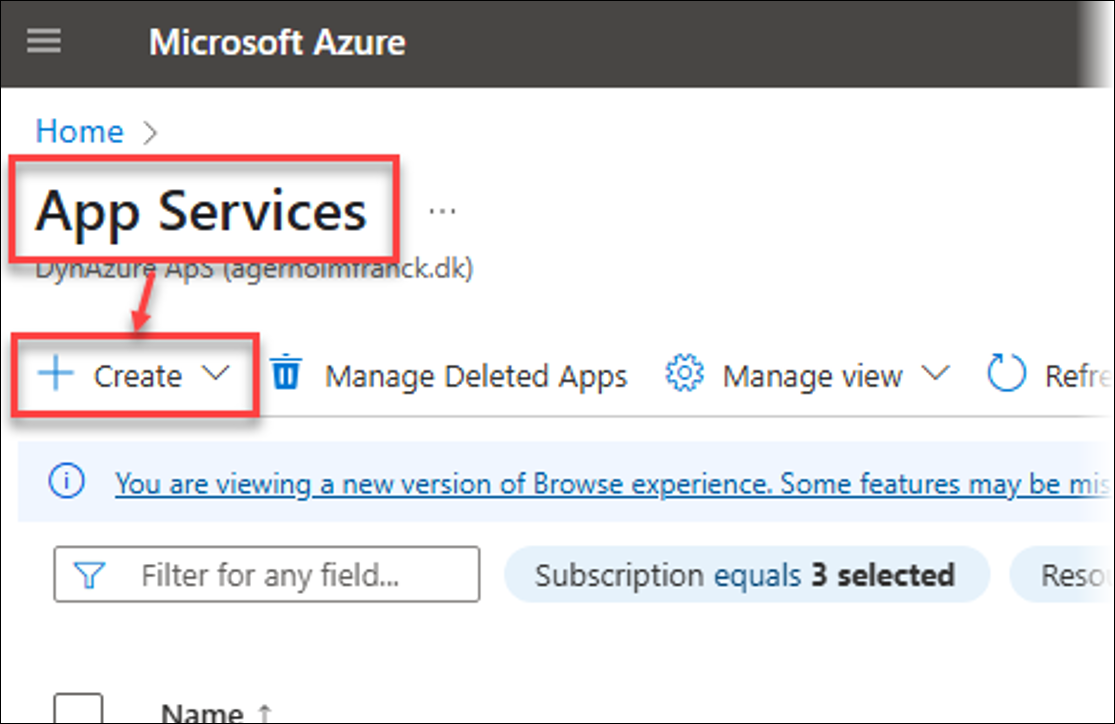
On the App Services page, click Create.
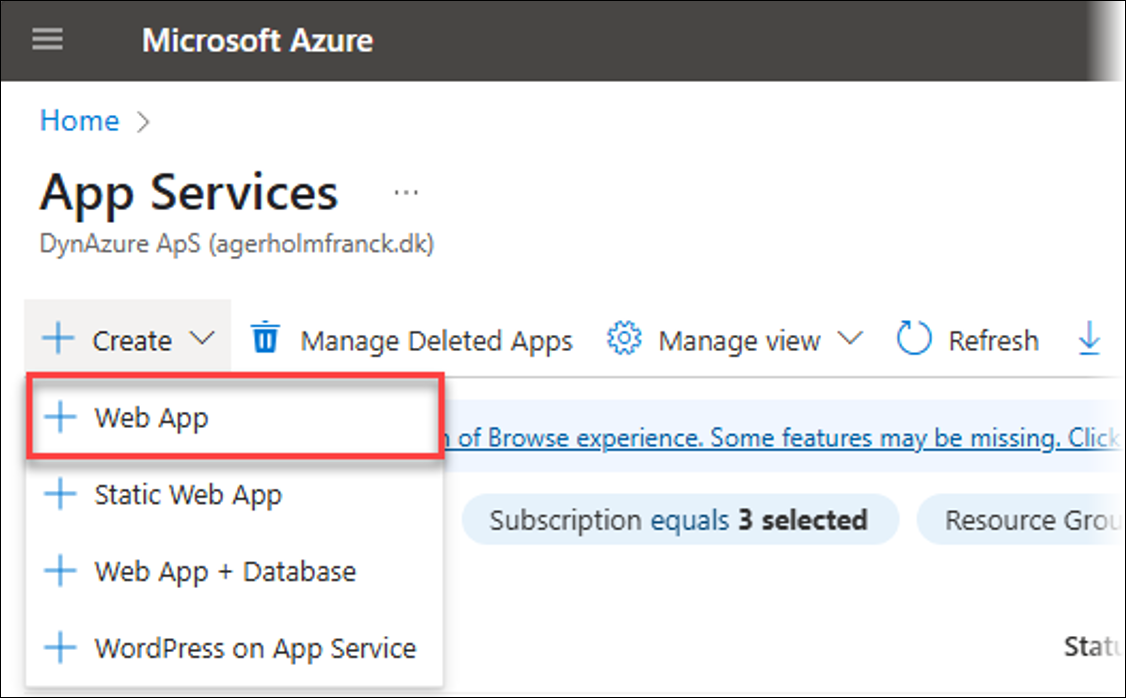
From the dropdown, select Web App.
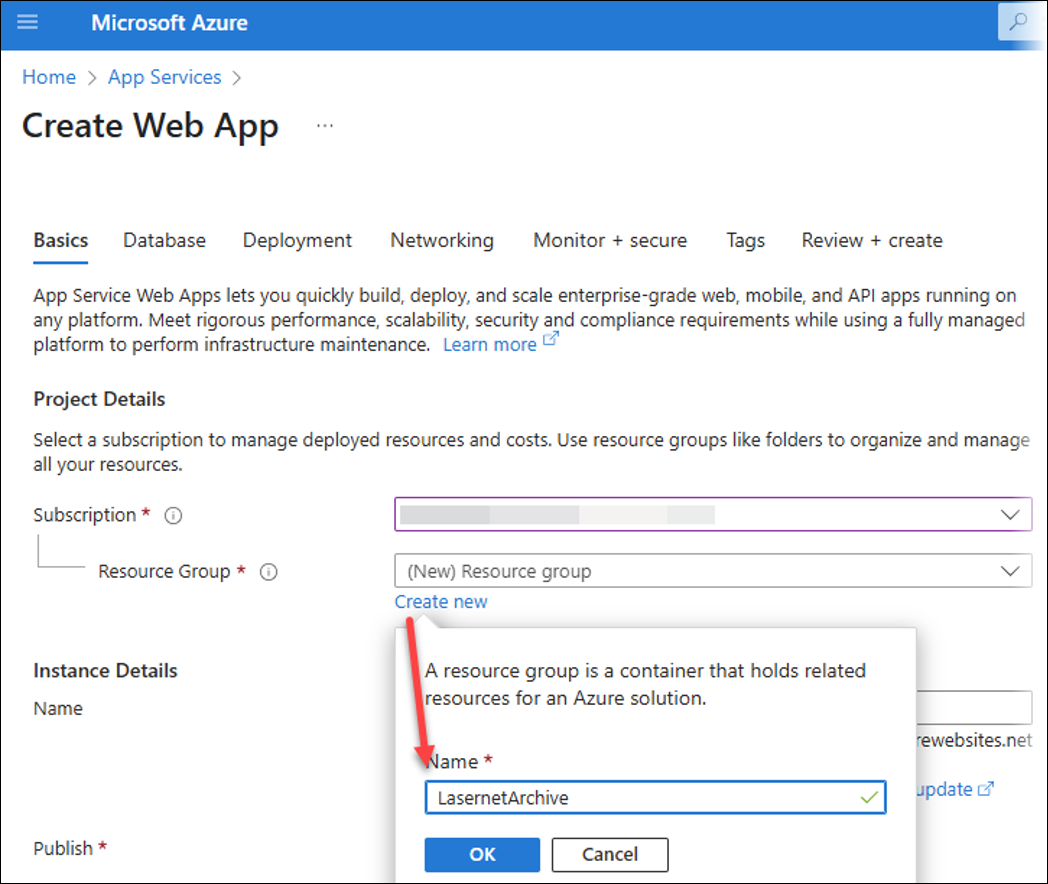
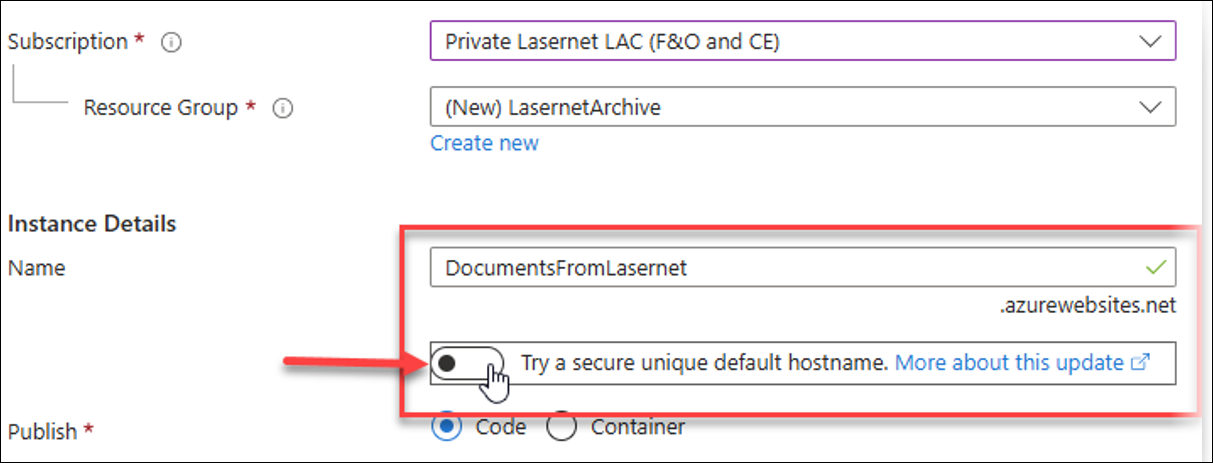
Configure the Web App details:
Subscription: Select your Azure subscription.
Resource Group: Reuse an existing resource group or create a new one:
Click Create new.
Enter a name, for instance, LasernetArchive.
Click OK.
Instance Details:
Name: Enter a globally unique name for your web app, for instance, DocumentsFromLasernet. This will form part of the URL (for instance,
documentsfromlasernet.azurewebsites.net).Try a secure unique default hostname: Disable this toggle button.
Publish: Click the Code radio button.
Runtime stack: Select .NET 8 (LTS) or the version specified by your application requirements.
Operating System: Select Windows.
Region: Select the appropriate region for your location, for instance, West Europe.
Pricing plans: Choose an appropriate App Service Plan (in the screenshot, an existing one is used, but a default can be created based on the region).
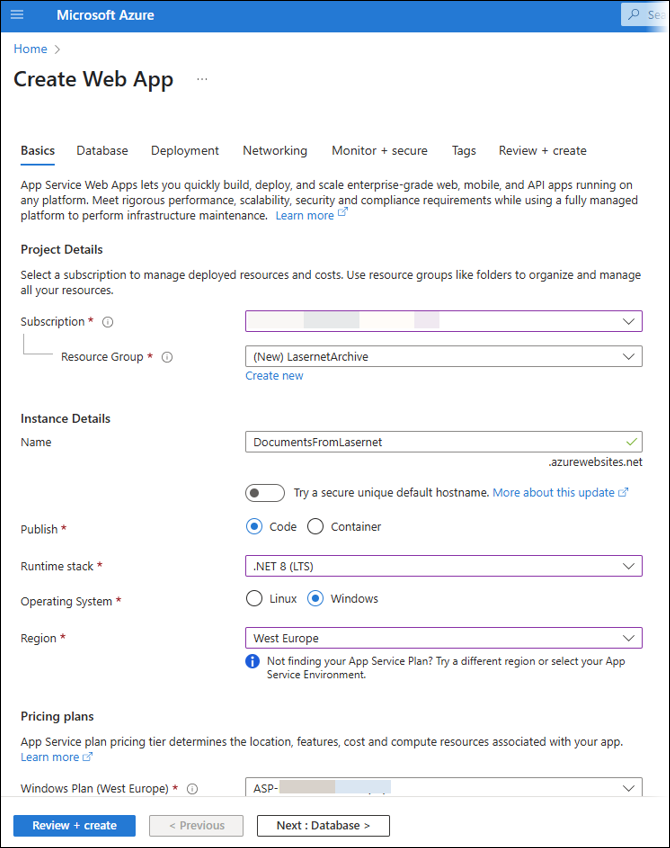
Click Review + create.
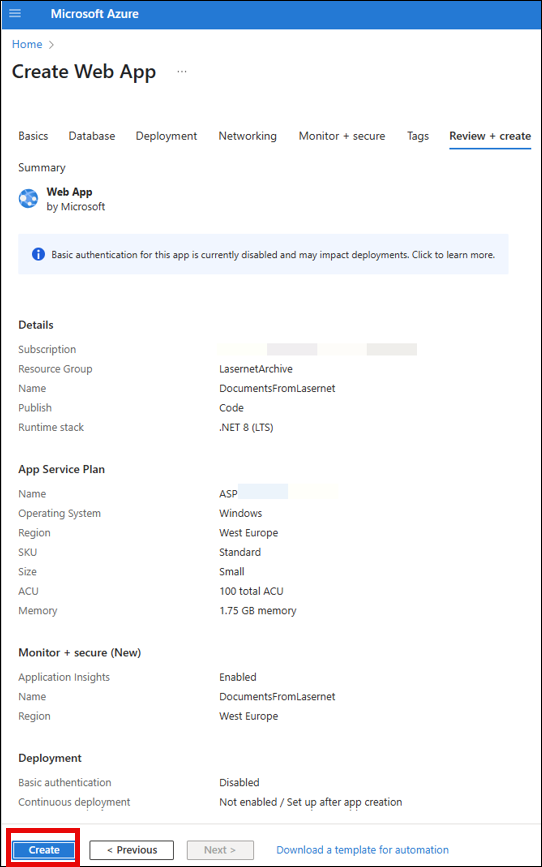
Azure will validate the settings.
Once everything has been validated, review the summary and click Create.
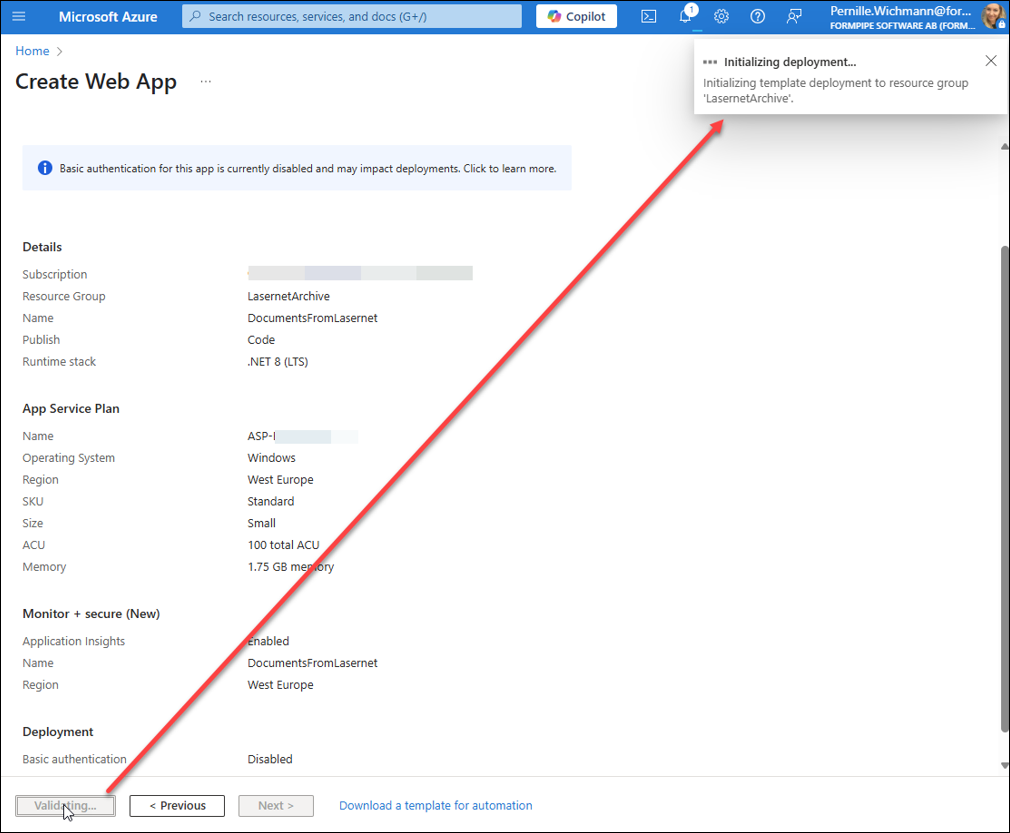
Wait for the deployment to initialize and be complete. You will see an "Initializing deployment..." notification.
Part 3 — Configure Microsoft Entra ID Application in Dynamics 365
This part of the configuration can be carried out while the Azure deployment is in progress.
Navigate to the Tracking parameters page in Dynamics 365 Finance and Operations.
From the Email sent and bounced tracking section, copy the Client ID value.
Click the Microsoft Entra ID applications button found at the top of the Email download of documents tracking page.

On the Microsoft Entra ID applications page, click New.
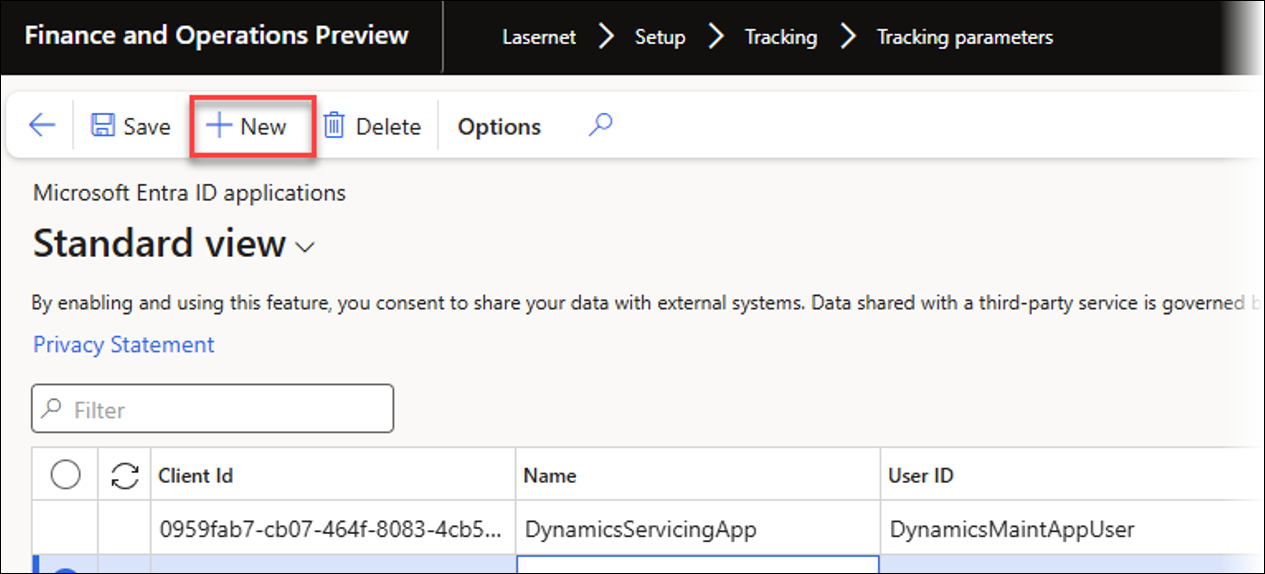
In the newly created row, enter the following values:
Client ID: Paste the Client ID you copied in step 2.
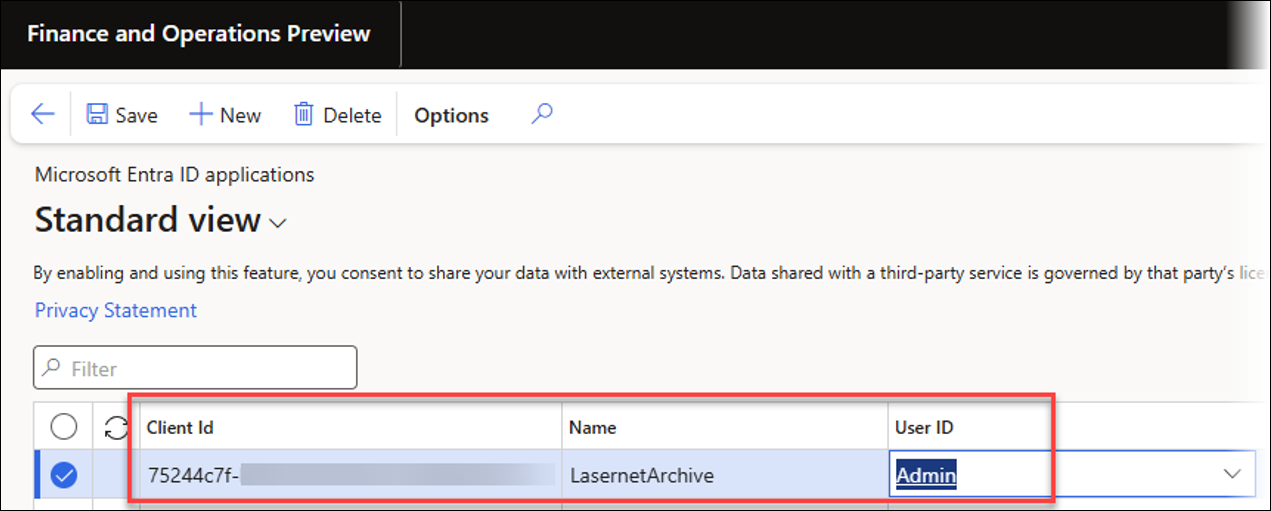
Name: Enter a descriptive name, for instance, LasernetArchive.
User ID: This field will populate automatically. Otherwise, a specific value can be selected if needed.
Click Save.
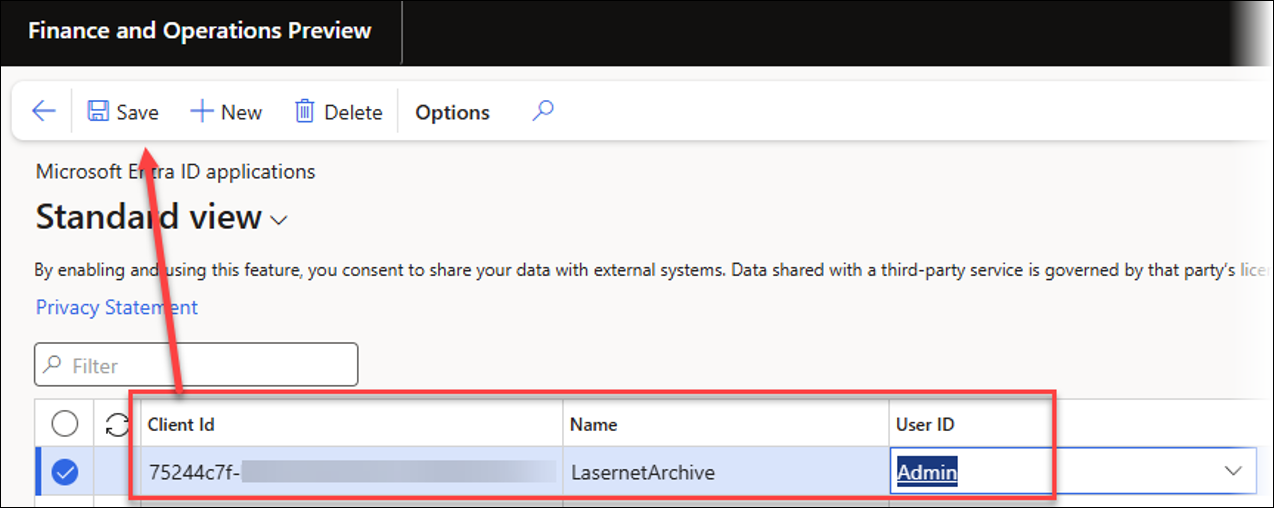
Close the Microsoft Entra ID applications page to return to the Tracking parameters form.
Part 4 — Finalize Web App URL and Deploy Application Files
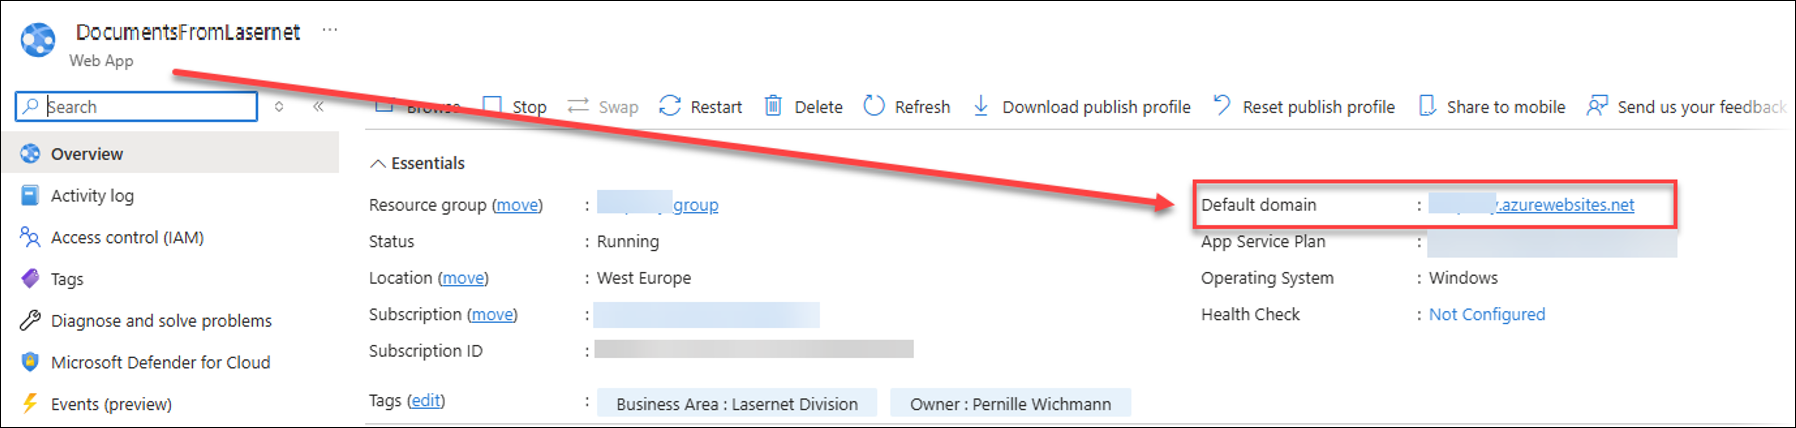
Open the Azure Portal. Once the Web App deployment is complete, you will see a "Your deployment is complete" message. Click Go to resource.
On the Overview page for your newly created Web App, find the Default domain URL (for instance,
https://documentsfromformpipe.azurewebsites.net). Copy this URL.
Return to the Tracking parameters page in Dynamics 365.
Paste the copied Azure Web App URL in the Email tracking web application URL field.
Append "https://" to the start and "/document/" to the end of this URL. For example,
https://documentsfromlasernet.azurewebsites.net/document/.

Click the Validate button.
At this point, you will receive an error message:
Error
Attempt to load file from tracking URL failed.
This is expected because the application files have not been deployed to the Azure Web App yet.
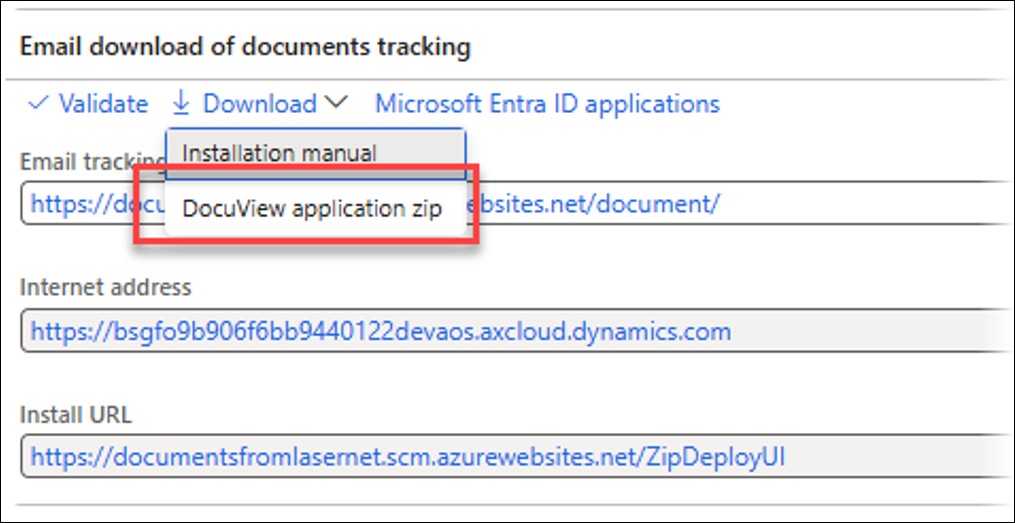
Click the Download dropdown menu and select DocuView application zip.
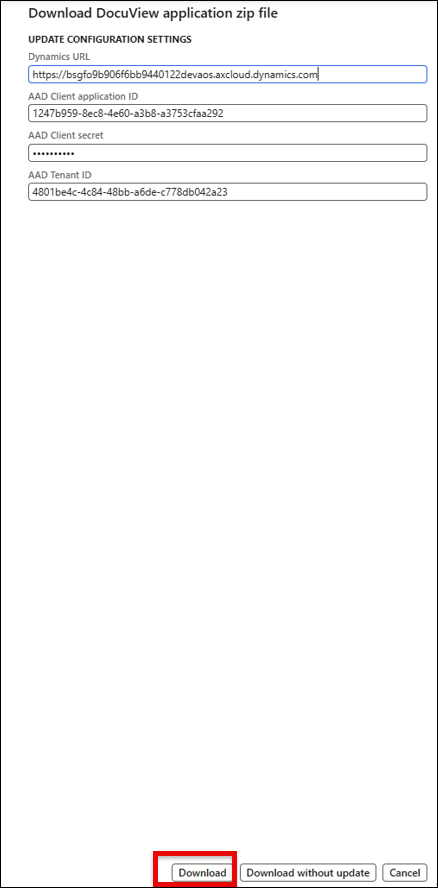
The Download DocuView application zip file dialog opens. Click the Download button. Save the .ZIP file (for instance,
DAZDocuViewApp(18).zip) to your computer.
On the Tracking parameters page in Dynamics 365, locate and click the link in the Install URL field. This link is usually found below the Internet address field and is similar to
https://documentsfromlasernet.scm.azurewebsites.net/ZipDeployUI.
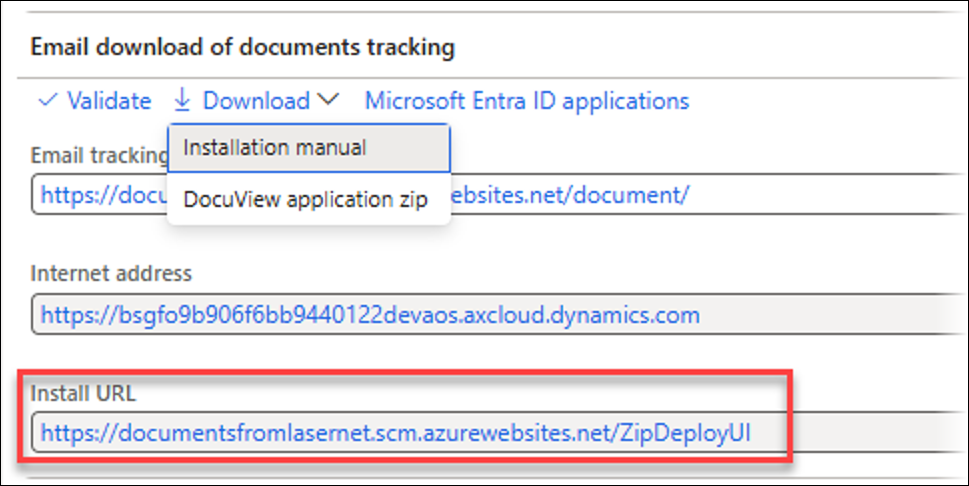
This will open the Kudu services (ZipDeployUI) for your Azure Web App in a new browser tab.
Note
Kudu is a tool used by Azure. To learn more about Kudu, consult Microsoft's documentation.
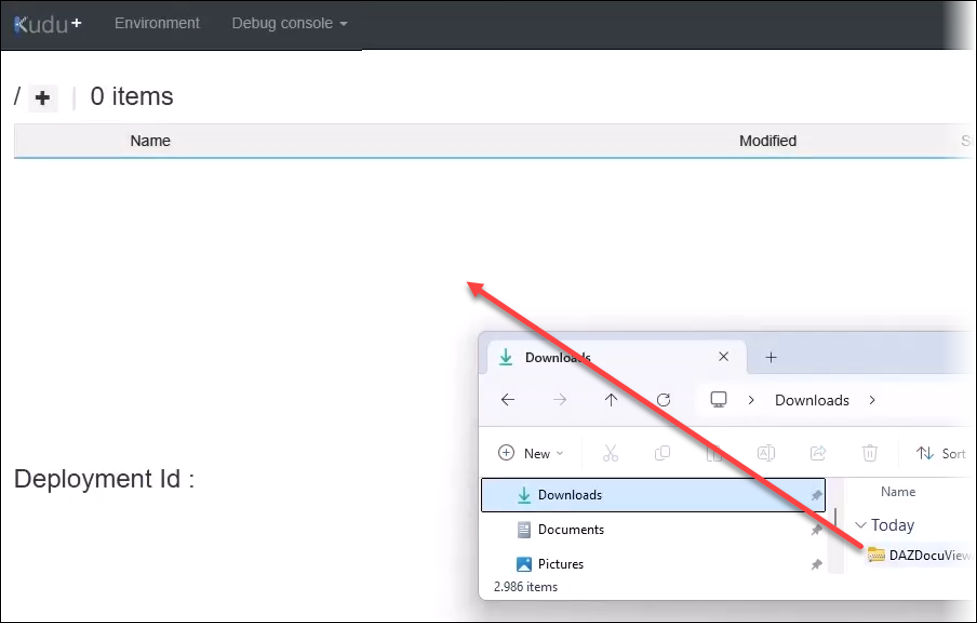
Open your machine’s File Explorer and navigate to where you saved the downloaded .ZIP file (for instance,
DAZDocuViewApp(18).zip).Drag the .ZIP file from File Explorer and drop it into the designated area in the Kudu (ZipDeployUI) browser tab (usually a large area named "Drag here to deploy your ZIP" or similar).
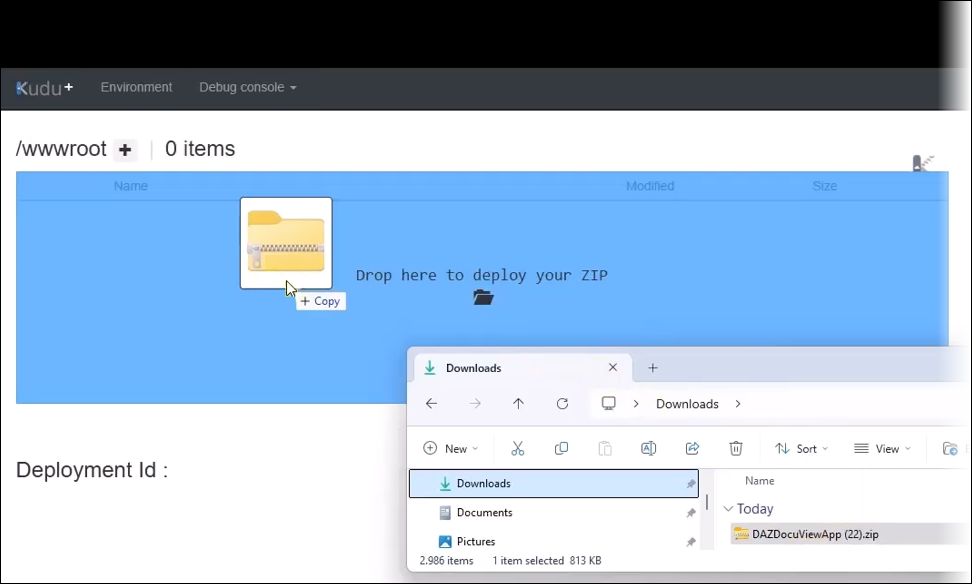
Wait for the deployment to be complete. The Kudu interface will show the files being extracted and deployed. Once finished, you will see a list of files (for instance,
appsettings.json,DAZDocuView.dll, and others) in the/wwwrootdirectory.
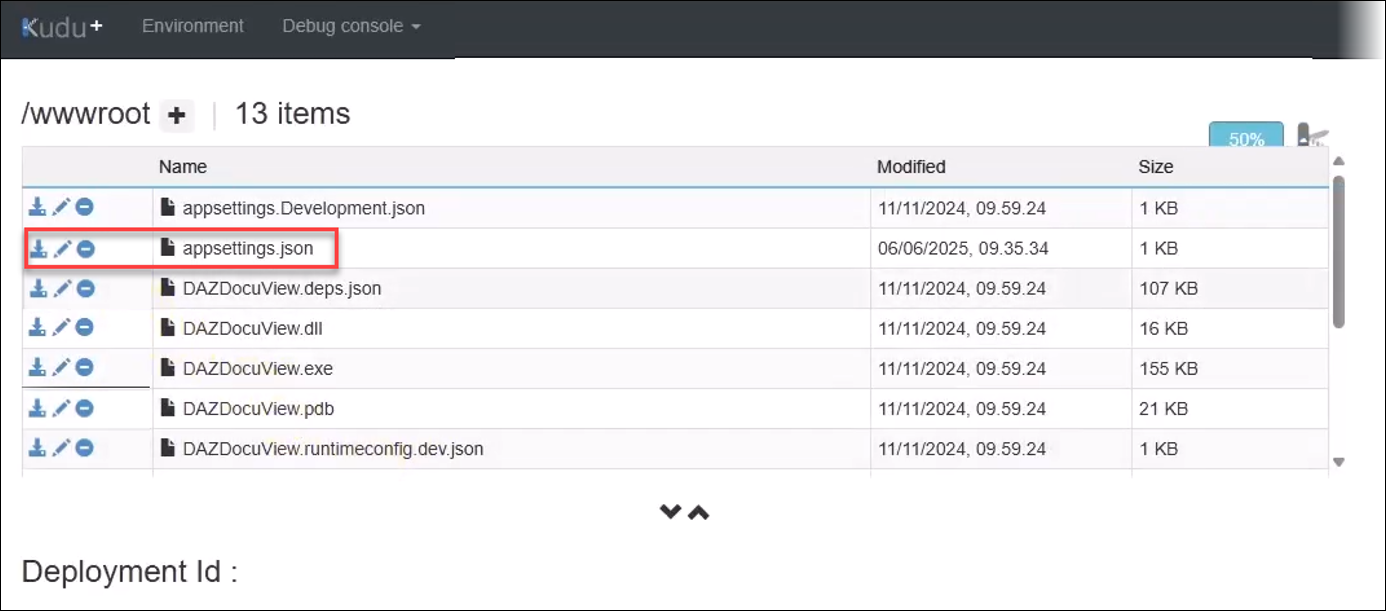
Click the Edit icon located on the left of
appsettings.jsonto validate that the information is correct.

Close the Kudu (ZipDeployUI) browser tab.
Return to the Tracking parameters page in Dynamics 365.
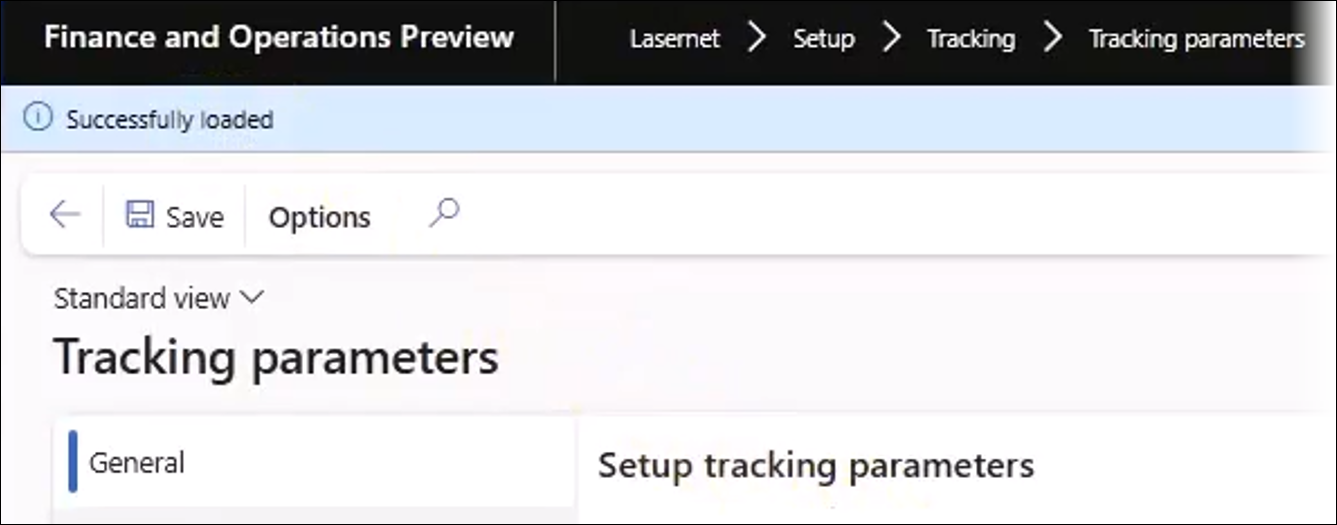
Click the Validate button again.
This time, the validation is successful:
Click the Save button on the Action pane to save your tracking parameters.
You have successfully configured the Email tracking web application URL in Dynamics 365 by creating an Azure Web App and deploying the necessary application files.
Now, all Email Tracking features function correctly.