- Print
- PDF
Cloud Print Connector: Data Refresh Best Practices
This page explores the best practices to follow for Lasernet Cloud Print Connector settings after a Dynamics 365 Finance and Operations database refresh from Production to a Sandbox environment.
Note
The following steps all occur in SandBox. No changes are made in Production.
Prerequisites
You must have separate and valid Azure Service Buses and Azure storages for Sandbox and Production cloud printing. These can be found in Lasernet > Setup > Administration > Connection.
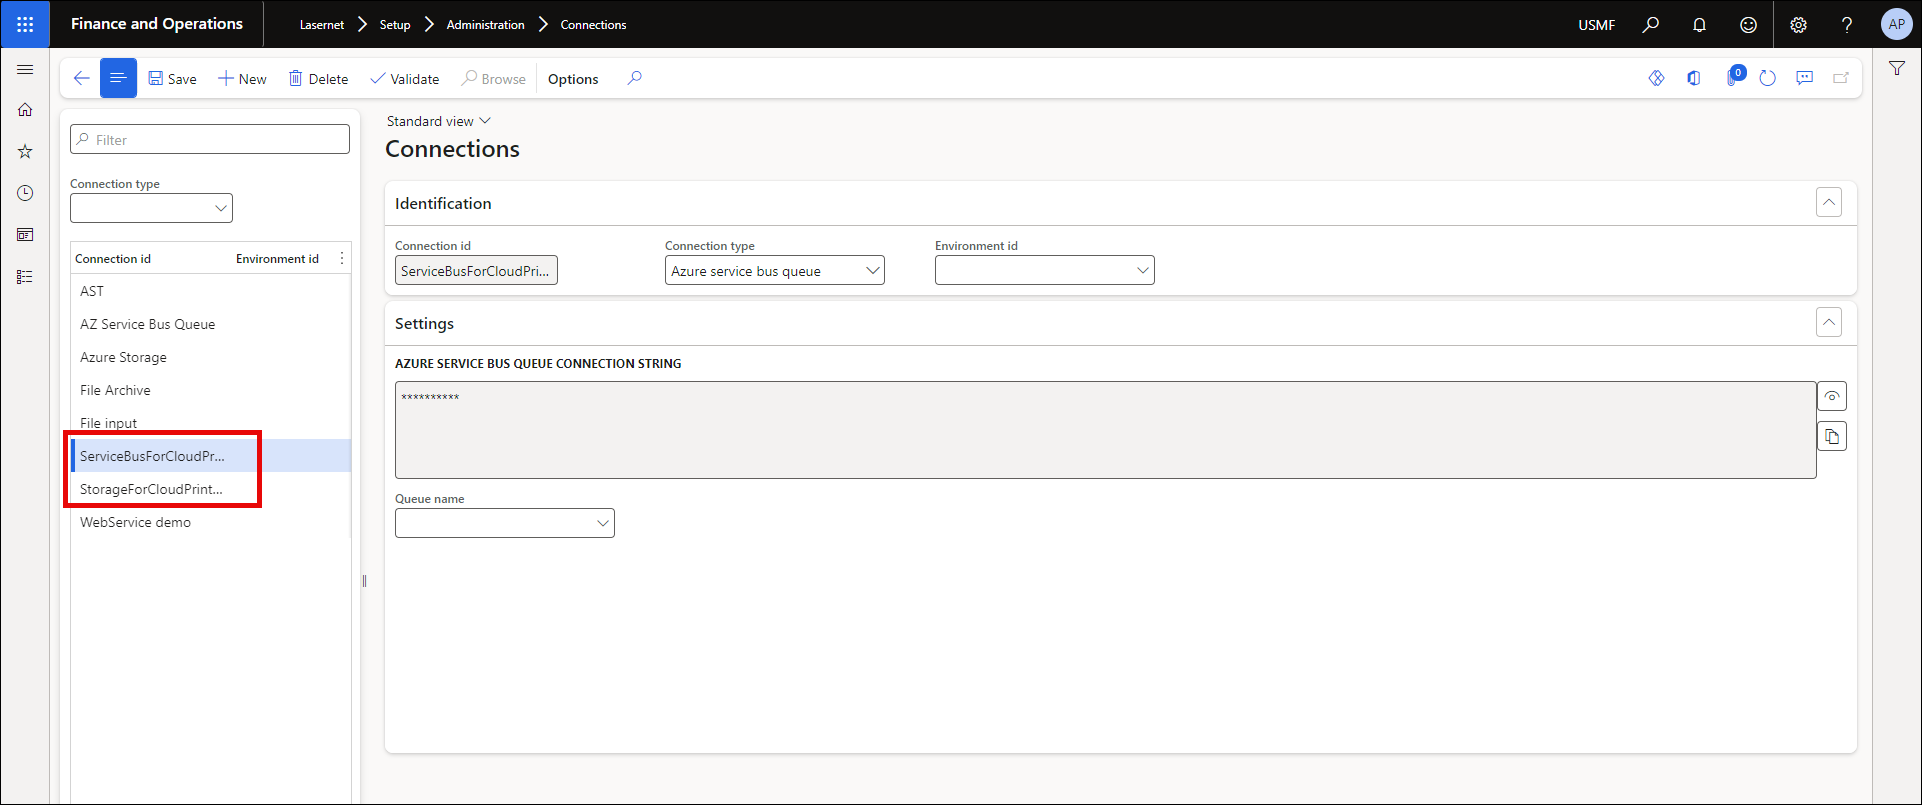
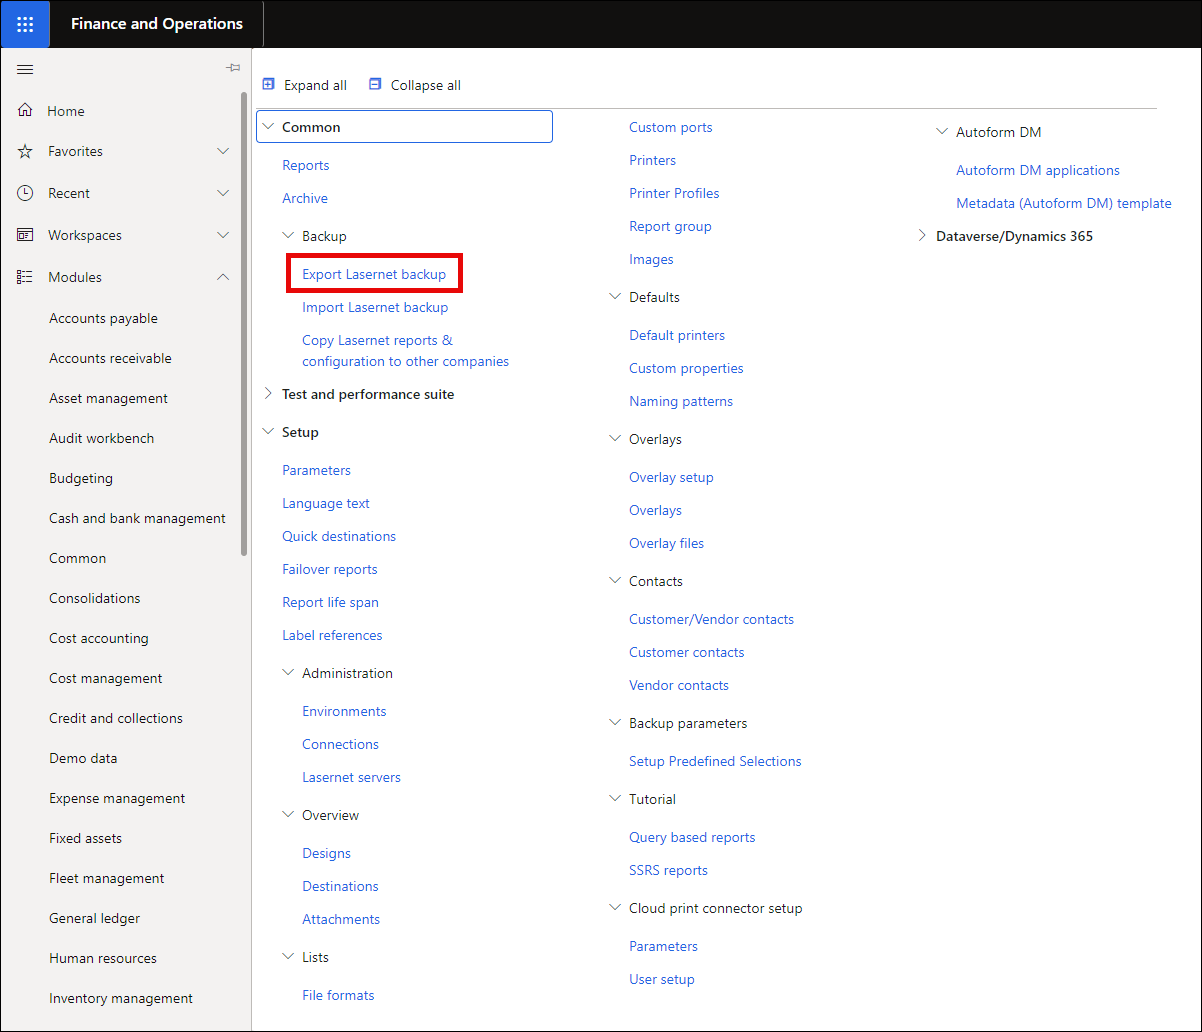
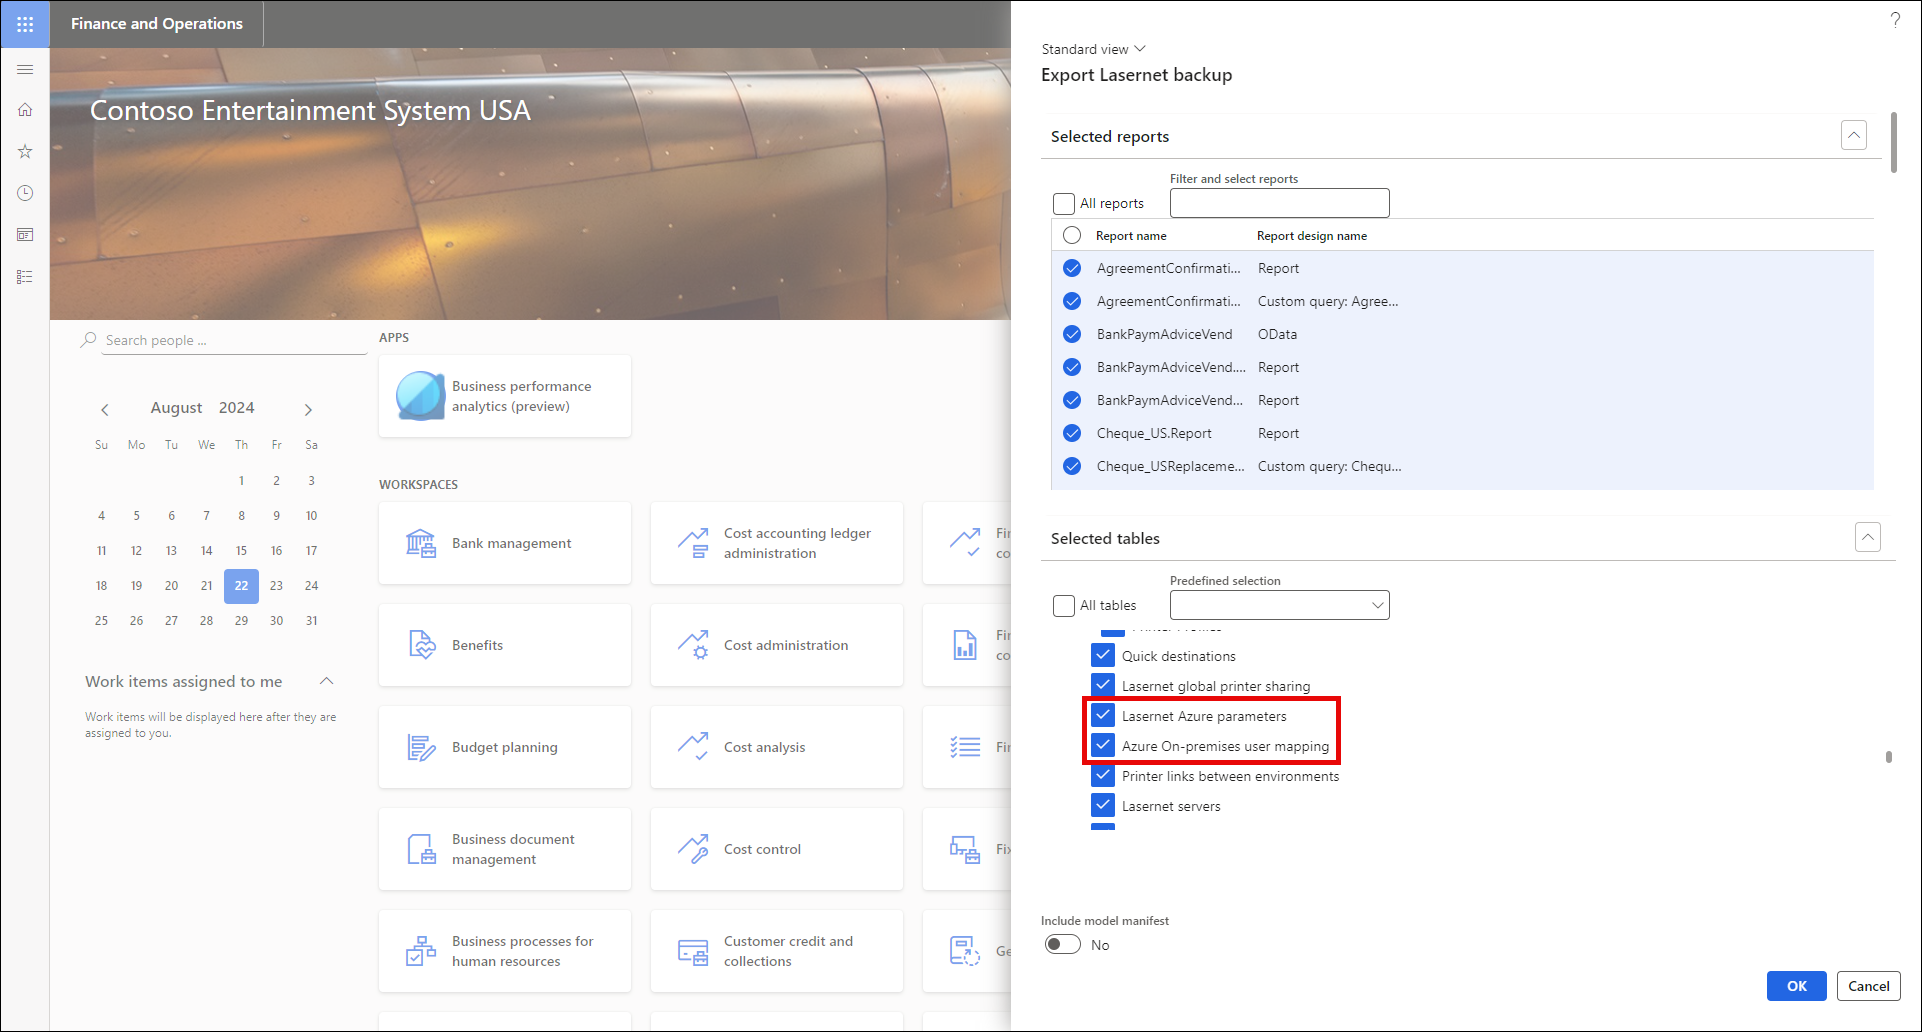
In Sandbox, export the Lasernet backup with Lasernet Azure parameters and Azure On-premises user mapping.
Navigate to Lasernet > Common > Backup > Export Lasernet Backup.
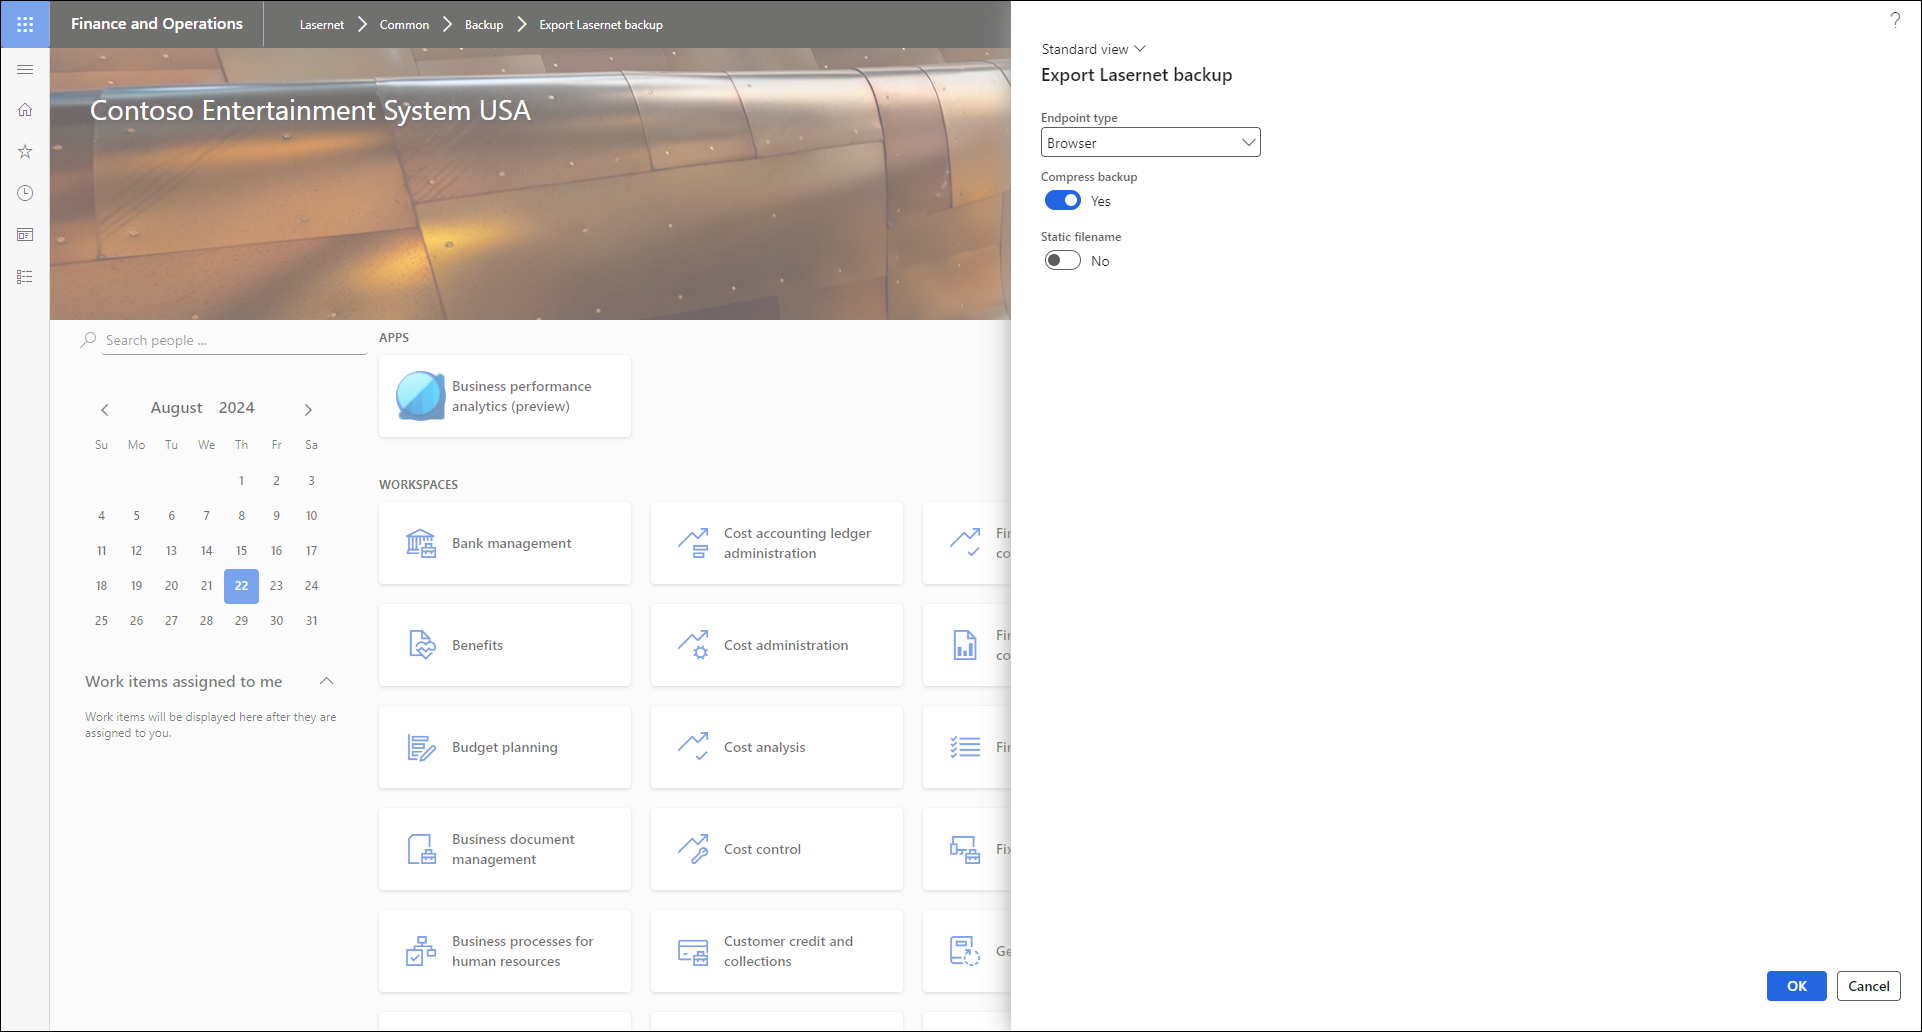
Select the Endpoint type from the dropdown.
Ensure that Lasernet Azure parameters and Azure On-premises user mapping are selected.
Steps in Sandbox Environment
After a DB refresh from Production to Sandbox:
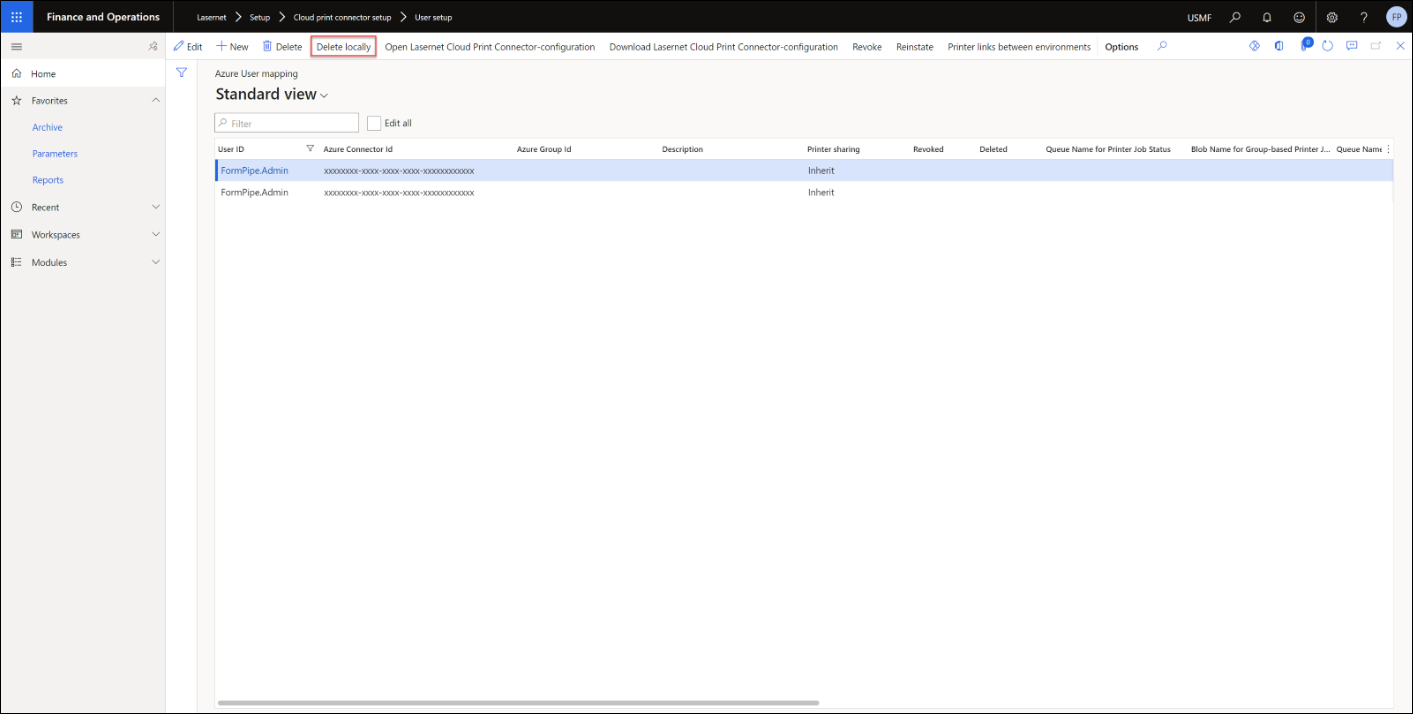
Navigate to Lasernet > Setup > Cloud print connector setup > User setup.

Click Delete locally on the Azure User mapping for Production’s cloud printing. This will delete the mapping details in the Sandbox environment but will not affect the queue in Azure or Production.
Warning
Do not click Delete, as this will remove the Azure user mapping in Azure.
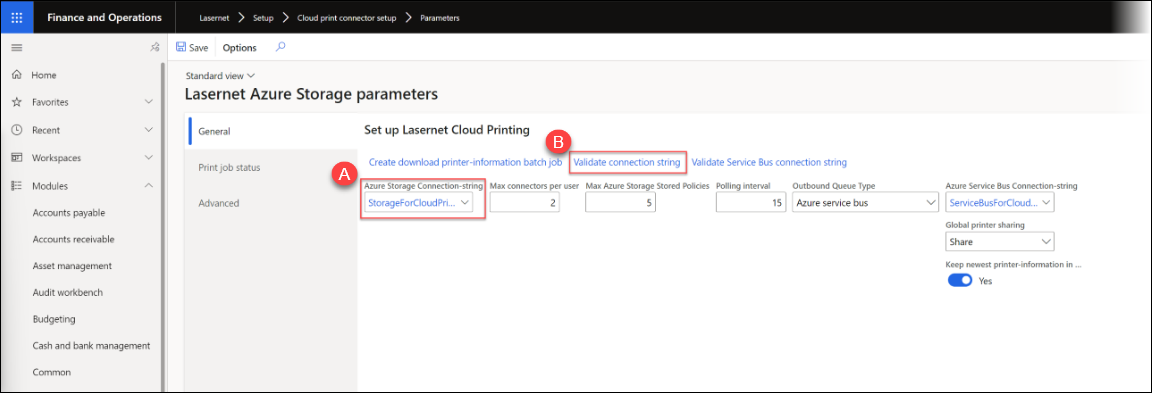
Navigate to Lasernet > Setup > Cloud print connector setup > Parameters and replace the Azure Storage Connection-string connection (A) with the Sandbox environment's Azure connection string connection.
Click Validate connection string (B).
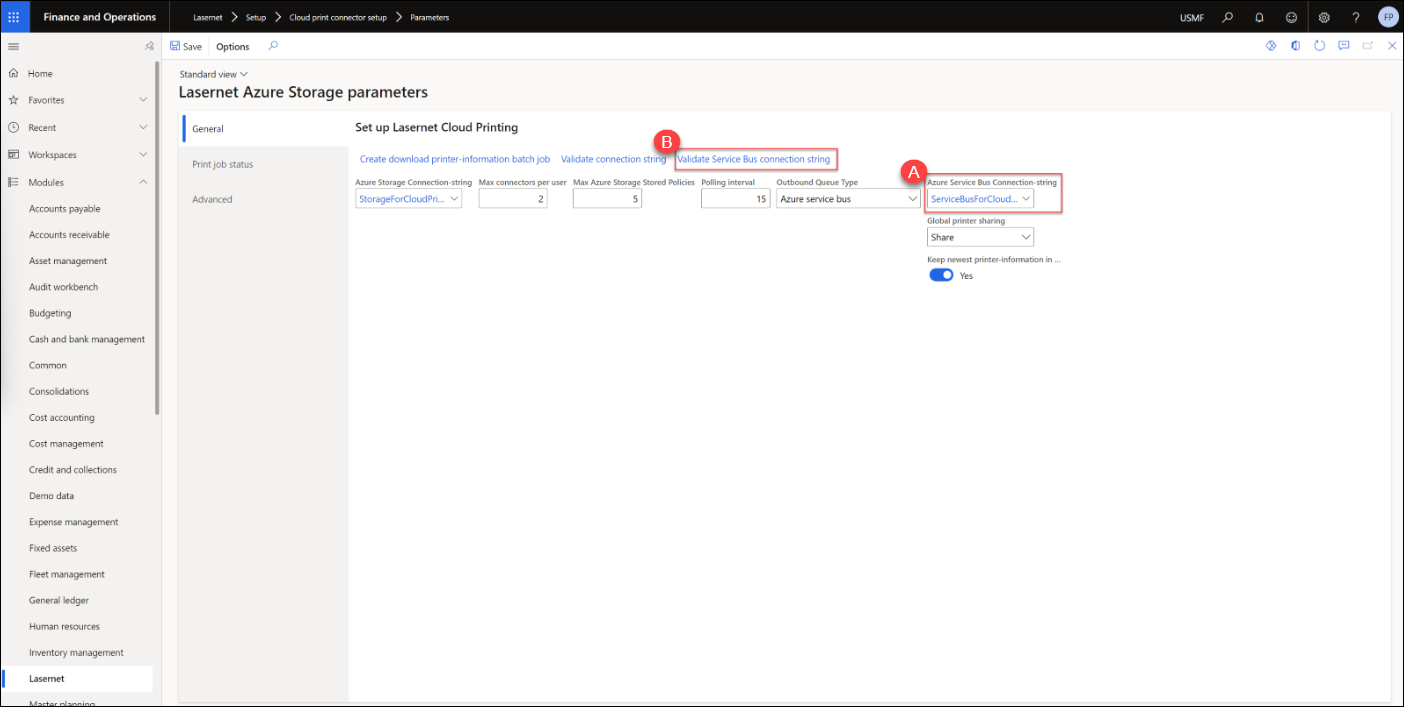
Replace the Azure Service Bus Connection-string connection (A) with the Sandbox environment's Azure Service Bus connection string connection.
Click Validate Service Bus Connection String (B).
The Sandbox cloud parameters are no longer connected to the Production Azure storage and Azure Service Bus for cloud printing.
Clean up the printer list in Sandbox by navigating to Lasernet > Setup > Lists > Printers. Select all the cloud printers and click Delete on the top menu. These printers are associated with the Production Azure storage and Azure Service Bus.

To bring back the Sandbox cloud printing setups, import the Lasernet backup from Sandbox from the prerequisites section.
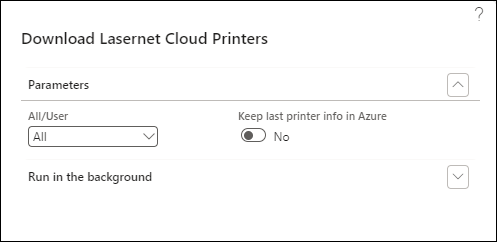
To update the printer list, navigate to Lasernet > Setup > Lists > Printers and click Download Lasernet Cloud printers.

On the dialog that pops up, click All from the All/User field and click Ok.
Note
If the printer list does not update with the cloud printers for Sandbox, enable Keep last printer info in Azure on the Download Lasernet Cloud Printers dialog. This will delete all data in Azure except for the newest printer information for each Cloud Print Connector ID.
Now, the cloud print settings and printers have been updated in Sandbox.
Important notes
Revoke: This option revokes the Azure permissions for the selected record, making the connection strings in the previously downloaded CPC configuration useless. Do not select Revoke twice consecutively. This will result in the queue being deleted in Azure.
Reinstate: This option re-applies the Azure permissions.
Delete: This option attempts to delete the queues/blobs in Azure associated with the selected record. It is followed by a local delete (when Azure delete was successful), or simply marking the record as deleted (when Azure delete was unsuccessful).
Delete locally: This option was added in Lasernet FO Connector 6.1.0.3, and it deletes the record in the current environment, without impacting anything in Azure or any other Dynamics 365 Finance and Operations environment.

