Attachments
- 04 Mar 2026
- 5 Minutes to read
- Contributors

- Print
- PDF
Attachments
- Updated on 04 Mar 2026
- 5 Minutes to read
- Contributors
- Print
- PDF
Article summary
Did you find this summary helpful?
Thank you for your feedback
The Attachments functionality in Lasernet FO Connector enables users to pick up files linked to specific records within Dynamics 365 Finance and Operations and attach them to reports sent with Lasernet.
For more information on the topic, watch our feature video.
Attachment Settings
When using attachments, you can customize the setup criteria to define how they are used in a report.
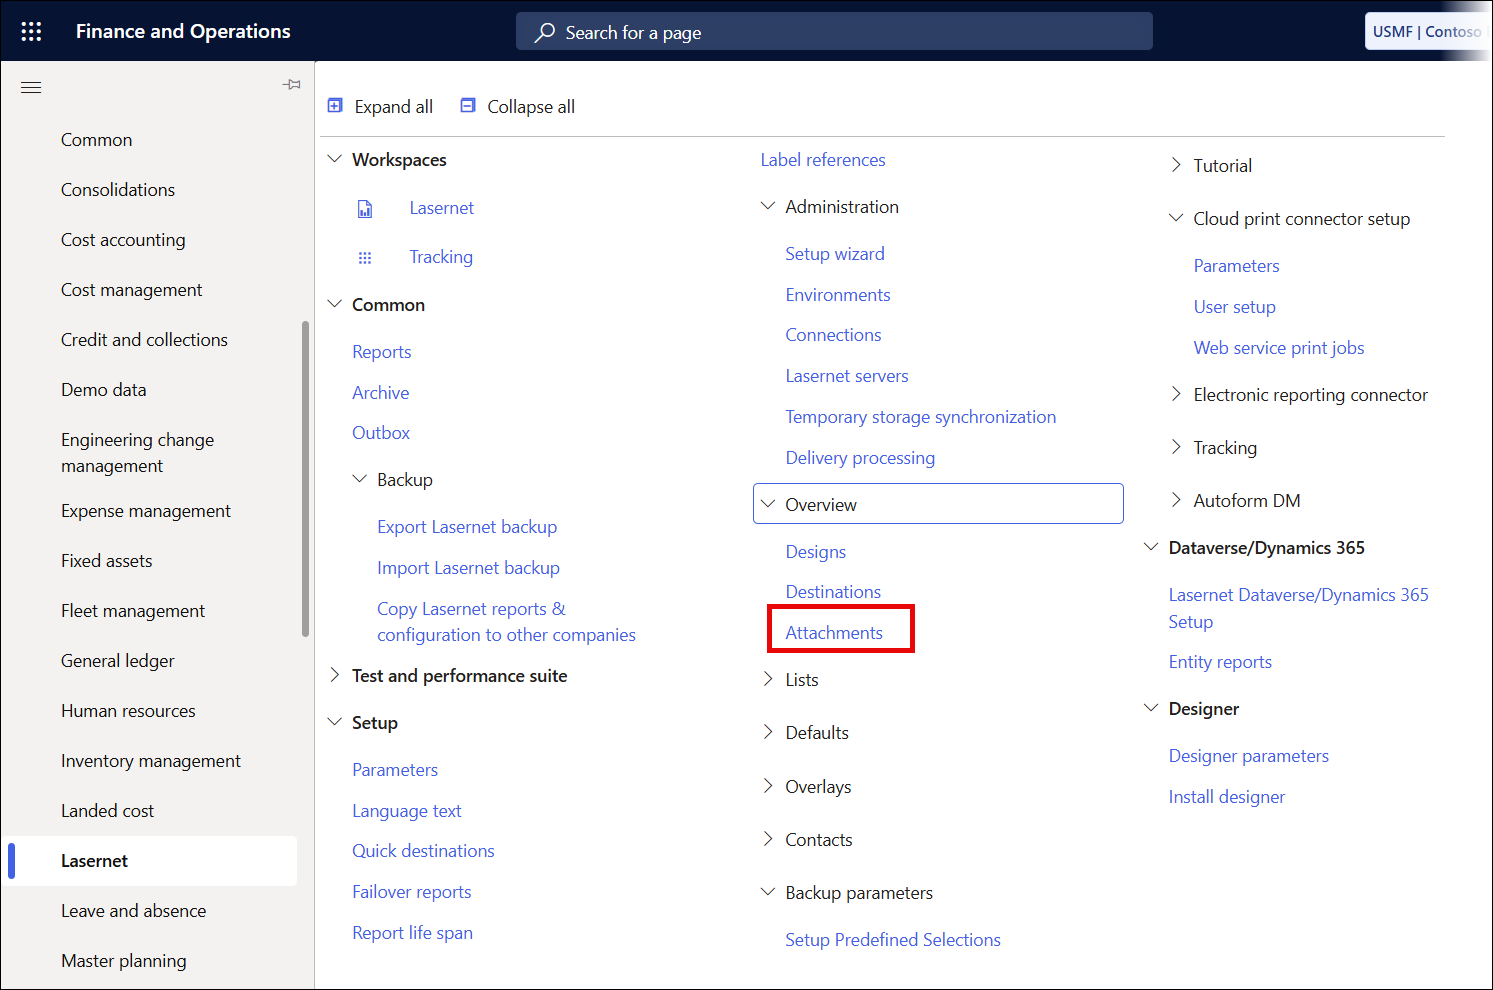
Attachment setups for all reports can be found in Lasernet > Setup > Overview > Attachments.
Attachment setups for a specific report can be found in Lasernet > Common > Reports > Setup > Attachments.

Attachments can be used for various reports; for instance, terms of delivery and terms of sales can be attached to the Sales Confirmation report.
The following example illustrates how an attachment can be set up:

Skip Generic Attachments
Use the Skip generic attachments toggle button to define whether generic attachments are used for the current report (toggle to Yes) or not (toggle to No).
Report Attachments
Attachment From

From attachments: Will add the attachments (DocuRef/DocuValue) from the table specified in Attachment reference table.
From archive: Useful when needing to add existing documents from the Archive.
Reserved: Used with context methods and does not require/respect any setup for the attachments, as this is managed through the context method itself.
Attach

All: Will add all attachments or documents from the Archive that meet the specified criteria (Restriction, Type, and Condition) for the table specified in Attachment reference table only.
Last: Will add the last attachments or document from the Archive that meets the specified criteria (Restriction, Type, and Condition) for the table specified in Attachment reference table only.
First: Will add the first attachments or document from the Archive that meets the specified criteria (Restriction, Type, and Condition) for the table specified in Attachment reference table only.
Command | Description |
|---|---|
Attachment reference table | This table serves as a reference for the attached documents that must be printed with the report. Use this field to define a related source for a report. |
Restriction | Internal: Attachments are restricted to internal use only. External: Attachments are restricted to external use only. |
Type | Identification of document type. Use this field to define a document type: Image, File, Note, URL. |
| Add custom fields. |
Document type | Description of current document type. Use this field to add a description of the document type defined in the Type field, which is relevant for using overlays: All types, Original, Copy, Pro forma, Pro forma copy. |
Add the attached document if the delivery destination is Screen or Email. Not applicable for the Lasernet Screen option. | |
Printer | Add the attached document if the delivery destination is Print. |
Fax | Add the attached document if the delivery destination is Fax. |
Custom port | Add the attached document if the delivery destination is Custom. |
Description | Use this field to provide a meaningful description of an attachment. |
Deliver as Base64 | Use this field if you want to embed the document into the XML file as Base64. |

Condition
A condition can be used to further control when an attachment should be picked up.
None: No condition.
Query: Can use query filters and ranges. If the query filters or ranges are met, this attachment setup will be processed; otherwise, it will be skipped.
Code: Can use an expression. Will process this attachment setup if the code condition expression is True or 1, and skip this attachment setup if the code condition expression is False or 0.
Attachments via URL vs. Base64
The Lasernet server handles attachments. There are two ways the Lasernet server processes attachments: they can be embedded in the XML file, or retrieved from a URL.
The following is an example of an XML file available from a URL in the Azure Storage:

This, instead, is an example of an embedded XML file:

How to Set Up Attachments for a Query Report - Example
Identify the table to which you will attach the file.
Navigate to the Dynamics 365 FO form where the attachment is located. In this example, we want to add attachments to the Sales Confirmation journal, so we will navigate to Sales and Marketing > Sales Orders > Order Confirmation > Sales Order Confirmations.
Click the Attachment icon on the Menu bar.

On the Attachments form that opens, right-click anywhere on the form to bring up the Form Information menu. Select Form Name: DocuView.

A Form information form will open. Scroll down to the Query Statement field in the Administration FastTab. Copy the value for RefTableId. This is the reference table ID.

You will need to identify the table name from the ID. For more information, reference our article How Do I Find a Table Name Using the Table ID for Docuref and Attachments?. In this example, the reference table ID corresponds to the CustConfirmJour table:

Navigate to the report in Lasernet > Common > Reports.
Select the report query from the list and then click Query wizard from the Action pane.

In the Query Wizard, add the reference table identified in the previous steps.

Click Finish on the Query Wizard and then click Attachments from the Action pane.

Add a new record and select the Attachment reference table. This is the reference table we have identified and added through the Query Wizard. In our example, table CustConfirmJour.

Select From attachments in the Attachment from field. This will add the attachments from the table specified in Attachment reference table.

Select All in the Attach field to add all attachments that meet the specified criteria (Restriction, Type, and Condition).
Specify the Restriction, Type, Document Type, and enable PDF, Printer, Fax, and Custom Port as shown below. We will leave Deliver as Base64 disabled.

Close the Attachments form, navigate to Sales and Marketing > Sales Orders > Order Confirmation > Sales Order Confirmations, and identify your sales order confirmation with attachments.
Note
This example assumes you have already added the needed attachments in Dynamics 365 Finance and Operations. If you have not already added the attachments, review our Document Handling documentation.


Send the report to a Lasernet destination other than Lasernet Screen.

If archiving is enabled, navigate to Lasernet > Common > Archive and preview the XML. Notice that the XML contains attachment details in the JobInfo section. Lasernet processes this information to retrieve the attachments.

The report is sent along with its attachment.
