Alternate Rows (Other Properties)
- 06 Mar 2026
- 2 Minutes to read
- Contributors


- Print
- PDF
Alternate Rows (Other Properties)
- Updated on 06 Mar 2026
- 2 Minutes to read
- Contributors
- Print
- PDF
Article summary
Did you find this summary helpful?
Thank you for your feedback
Applies to: Lasernet 9
In this exercise, you can learn how to apply the Alternating tool to detect available pattern(s), so you can design a table in the output by highlighting odd and even rows (which are actually instance(s) of a pattern) by setting a background color and borders.
The Alternating option allows you to detect a pattern in one of the following ways:
Odd/Even – To alternate all available instances belonging to a pattern as odd and even.
Odd/Even but not in the Same Pattern – To alternate the current instance as odd and even but only if the previous one belongs to another pattern.
Same As Previous Pattern – To keep instances without alternating.
Note
This article describes a software version that is no longer supported. Although the software will no longer receive updates or technical support, existing documentation, such as this article, will be retained for reference purposes but will no longer be updated. If you have any questions, contact Lasernet Support.
Exercise
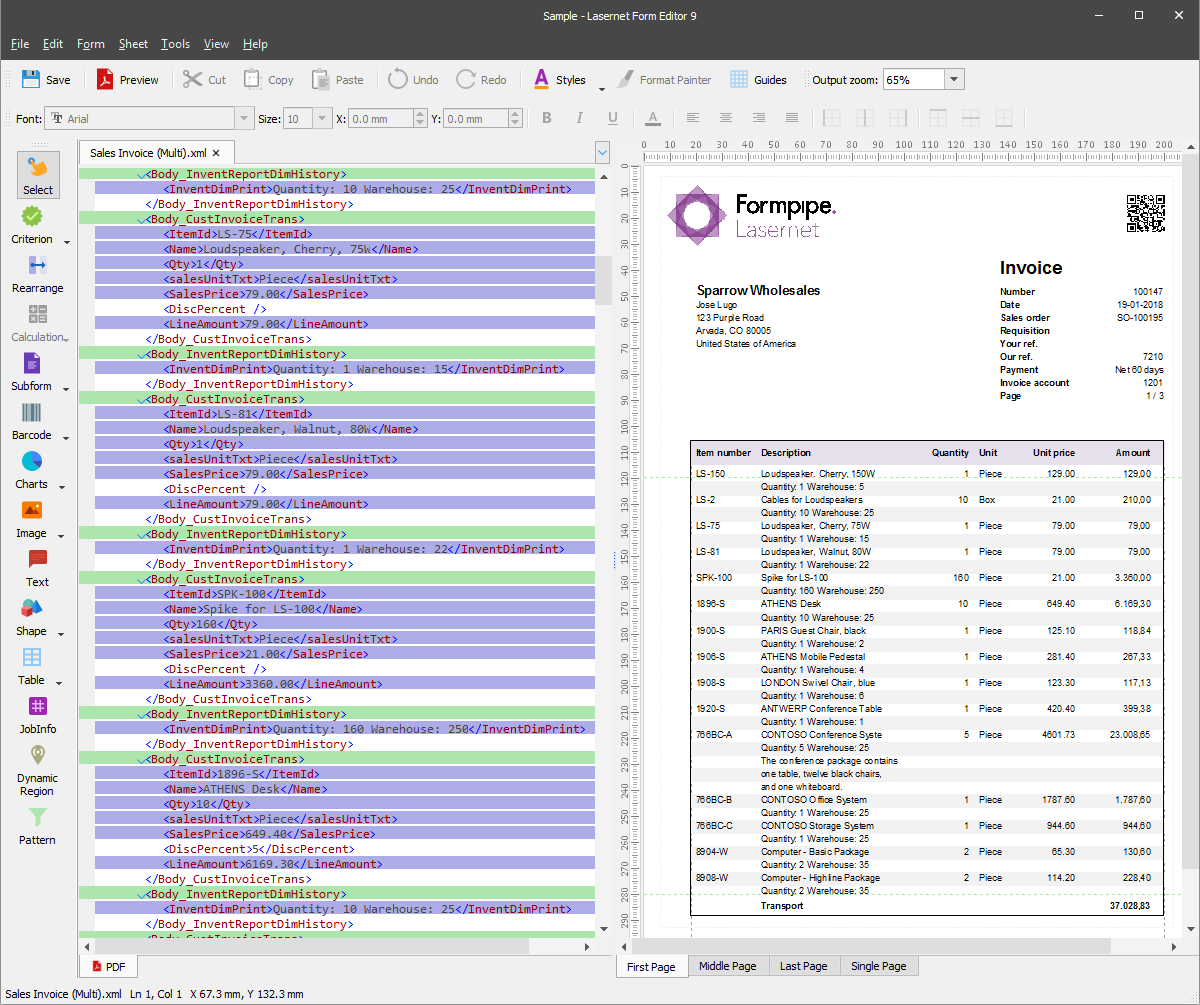
Download and import the attached configuration called 34. Alternate Rows (Other Properties) in Lasernet Developer 9. Afterward, navigate to the Forms section and open the Sample form.
In the input, select the Body_CustInvoiceTrans pattern, right-click the item, and then select Properties in the context menu that appears, or double-click the item. As a result, the Pattern Properties dialog opens.

Switch to the Alternating tab. From the Detect pattern drop-down box, select Odd/Even.
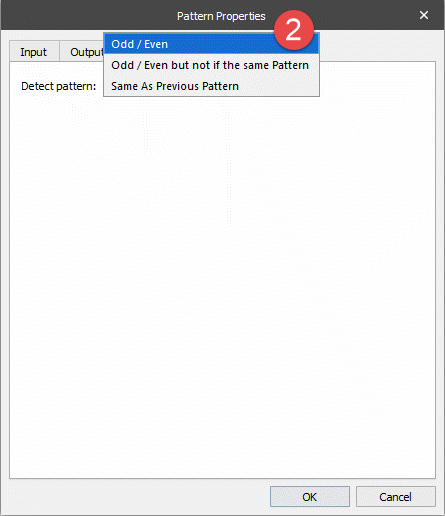
Apply the same setting for the Body_InventReportDimHistory and Body_CustInvoiceDescription patterns.
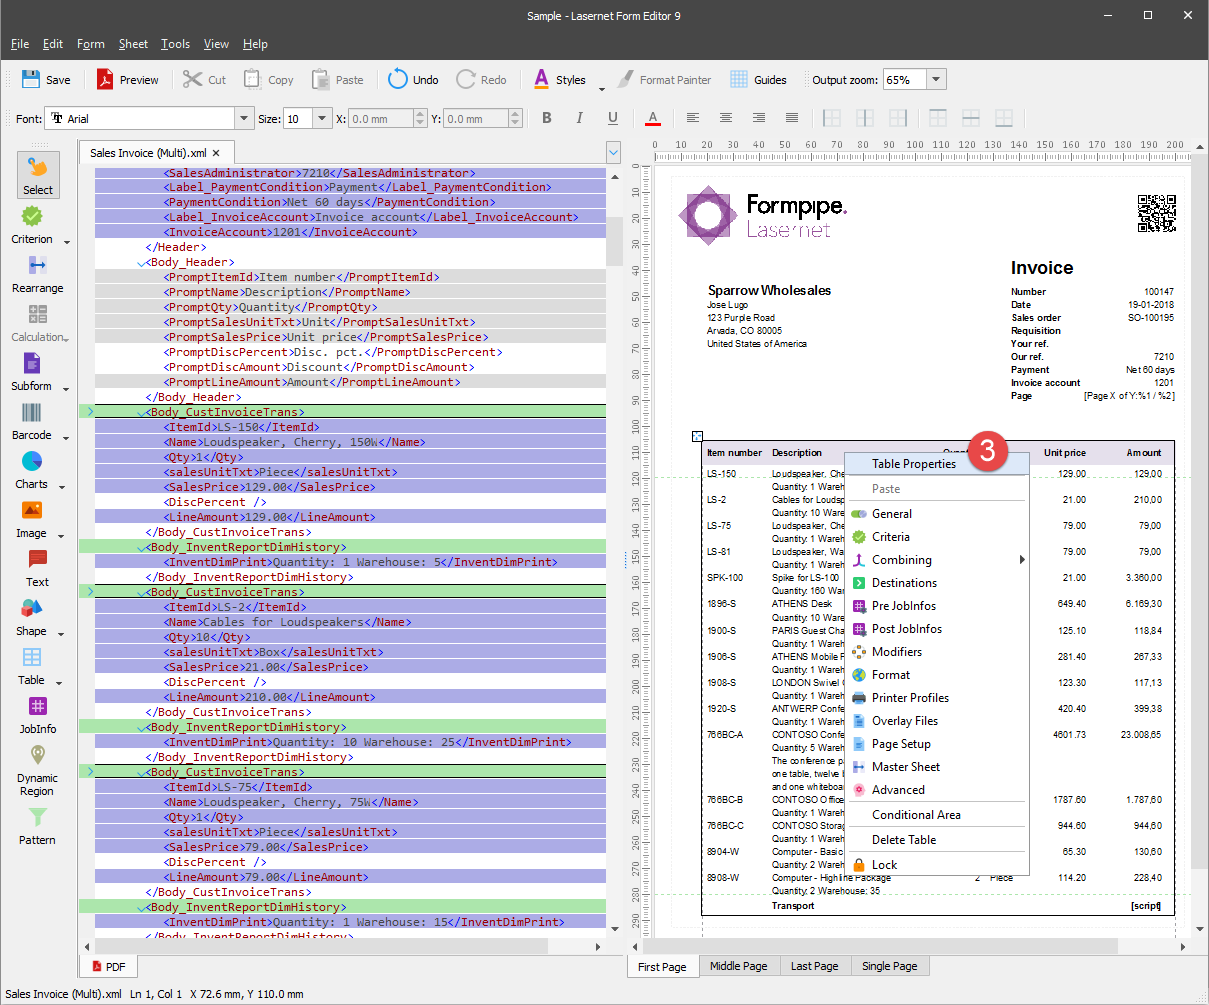
In the output, open the Table Properties dialog on the Body tab.
To apply the Alternating option, use controls of the Fill group box. Start by selecting the First radio button in the Current page group box, and then select the grey color in the Even color drop-down box as well as select No color in the Bottom margin drop-down box. Leave the rest settings of the Fill group box unchanged.

Apply the same Fill settings for a middle page and then for the last and single ones by selecting the required radio button in the Current page group box.
Note
You are proposed to specify the Fill settings for each page separately as the rest settings of the table body differ for each page. Otherwise, you can specify the Fill settings for the first page, for example, and then click the Apply to all pages button to apply settings to all pages, but then you need to change the Top margin value for the middle and last pages, as well as the Bottom border value for the last and single pages, to restore their initial values.
Once you are done, click the OK button.
Note
If you want to preview a table in the output with settings you have specified but not applying them, click the Preview button.
The following image illustrates the table body with the applied settings: