Add a New Rearrange
- 06 Mar 2026
- 2 Minutes to read
- Contributors

- Print
- PDF
Add a New Rearrange
- Updated on 06 Mar 2026
- 2 Minutes to read
- Contributors
- Print
- PDF
Article summary
Did you find this summary helpful?
Thank you for your feedback
Applies to: Lasernet 9
In this exercise, you can learn how to rearrange data from the XML data view to the output view. When we talk about rearranging a text, we refer to the process of defining how data contained in the input grab file is represented/manipulated in the final form.
Being added, an output rearrange acquires a default font and font size. Otherwise, the last used font and size are applied. The height and width of a rearrange is automatically calculated based on number/height of lines and length/size of the text.
Note
This article describes a software version that is no longer supported. Although the software will no longer receive updates or technical support, existing documentation, such as this article, will be retained for reference purposes but will no longer be updated. If you have any questions, contact Lasernet Support.
Exercise
To start, download and import the attached configuration called 03. Add a new Rearrange in Lasernet Developer 9. Afterward, navigate to the Forms section and then open the Sample form.
Once you are done, follow these steps:
On the Developer toolbar, select the Rearrange tool.
Once the mouse cursor has changed to a cross, click the /Report/Text input node.
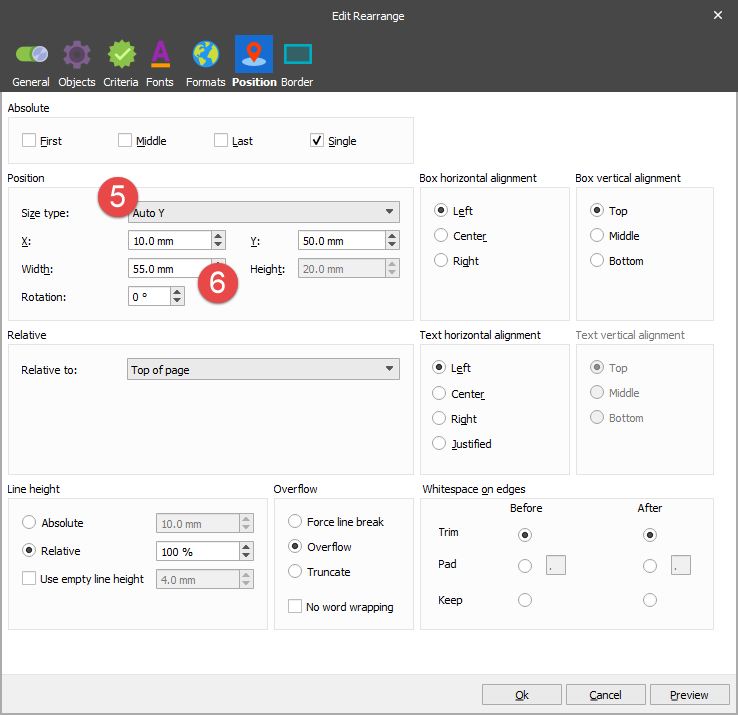
On the Property bar, set a position for X to 10 mm to specify the left position of the Rearrange, and set a position for Y to 50 mm. The Y position is a baseline of the first line in the Rearrange.

To set properties for a Rearrange, either double-click the object and then switch to the Position tab or right-click the object and then select Position in the context menu. As a result, the Edit Rearrange dialog opens with the Position tab.
On the Position tab, set Size type to Auto Y.
Set Width to 55 mm, and click Ok to apply settings.
The width of the Rearrange object is now defined. If the last word does not fit the width of the Rearrange, it is shown outside the box frames. It is a default behavior.
Add a copy of the Rearrange to the clipboard. To this end, right-click the Rearrange, and then select Copy in the context menu. Otherwise, on the Menu bar, click Edit, and then click Copy.
Afterward, you can paste a copy of the Rearrange from the clipboard. To this end, right-click anywhere in the output view and then select Paste in the context menu. As a result, the Rearrange is inserted at the selected point. Edit now properties of the new Rearrange object: set a position for X to 80 mm and a position for Y to 50 mm.

Note
If you paste an object via the Menu bar by clicking Edit, and then clicking Paste, the object is exactly pasted to the position of the object being copied. Two objects with the same contents at the same position contain a text string which is darker than the other objects.
Edit properties of the added Rearrange.

Set Rotation to 45 degrees.
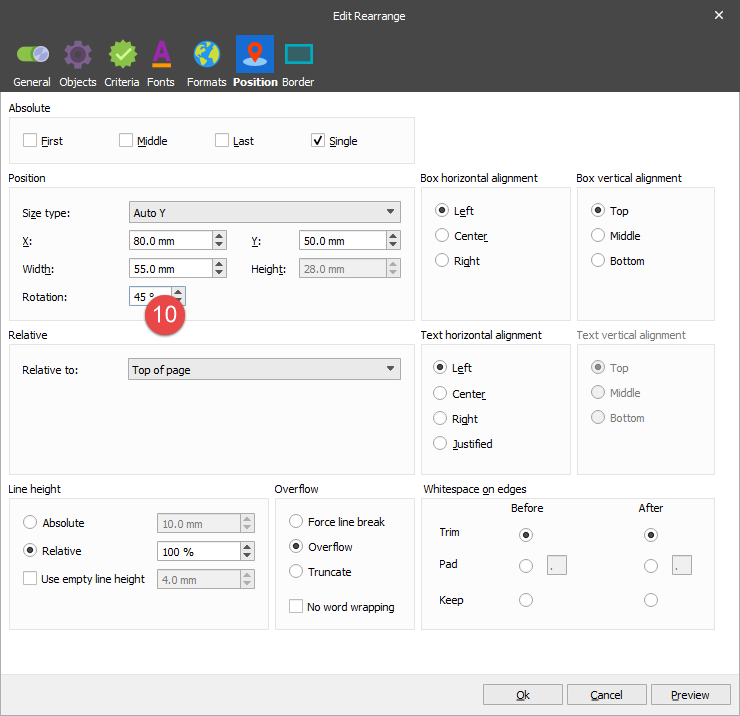
Thus, you add a text rotation to the Rearrange object.
