- Print
- PDF
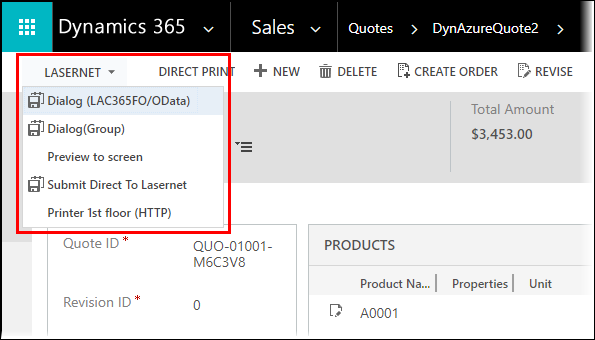
This article describes how to add and configure a flyout in Dynamics 365 Customer Engagement. A flyout is a CRM control that enables you to group actions such as print, preview, or email. Once you add this control, it shows in Customer Engagement. Clicking the flyout shows a list of actions, such as:
OData Dialogs
OData Direct Submit
HTTP Methods
Note
The actions stated above can only be used when Finance and Operations is connected to Customer Engagement. OData Dialogs is an action button to open a print dialog. Here you can choose a printer, a number of copies, etc. Data is received from the Customer Engagement entities. The button is used when Customer Engagement is not connected to Finance and Operations, or if you want to use a logic app. OData Direct Submit is an action button configured within Customer Engagement. It has a predefined destination configured in Lasernet FO Connector. Data is received from the Customer Engagement entities. HTTP Methods is an action button that allows executing an API Post triggering a logic app.
Prerequisites
To execute the following steps listed, you require:
Administrative access to the Customer Engagement environment.
An endpoint address that complies with the environment to send the call from Customer Engagement.
Note
An endpoint address can be either an entry point for the logic app or a corresponding URL in Finance and Operations.
Steps
Follow these instructions:
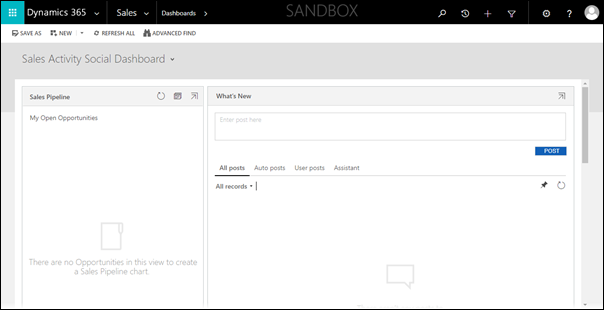
Log in to the Customer Engagement environment where Lasernet CE Connector has been deployed as a managed solution.
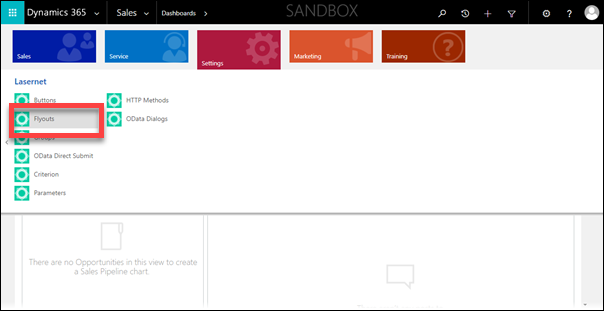
On the Sales menu, click the down-pointing arrow to open the navigation menu. Under the Settings flyout, locate the Lasernet list, and then click Flyouts.
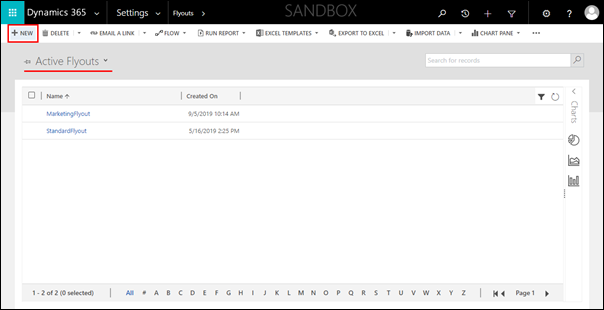
On the Flyouts page that opens, click the New button to create a new flyout.
Enter a descriptive name for the flyout you are adding, and then click Save.
On the Sales menu, click the down-pointing arrow to open the navigation menu. Under the Settings flyout, locate the Lasernet list, and then click Groups.
As a result, the Groups page opens:
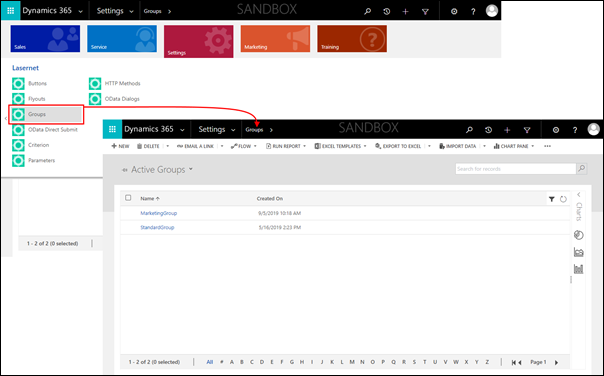
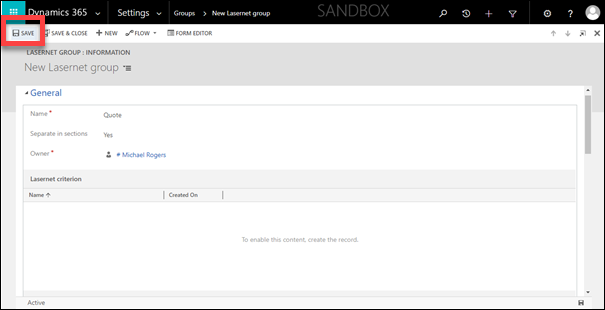
Click the New button to add a new group.
Enter a descriptive name, and then click Save.
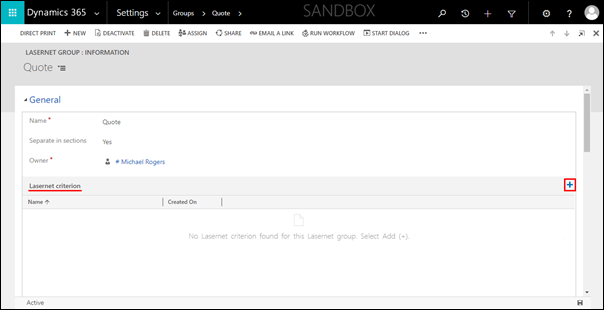
Scroll down to the Lasernet criterion section and click the plus sign to add criterion/criteria to the group.
Note
Criteria display rules for your group. A criterion allows either displaying or hiding your group on different entity pages.
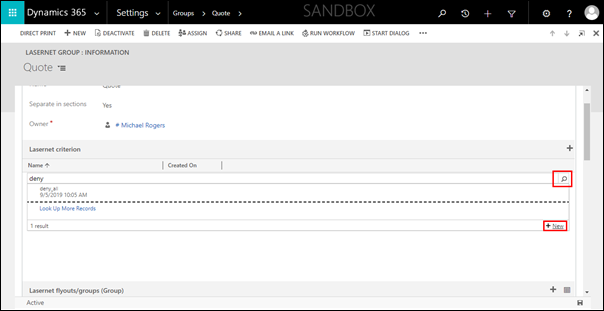
Use the Search functionality to find the required criteria. To this end, type a name in the search text box and then click the magnifying glass icon, or click the magnifying glass icon without typing the criterion name. Once the list is populated with available criteria, click the criterion you need to add it.
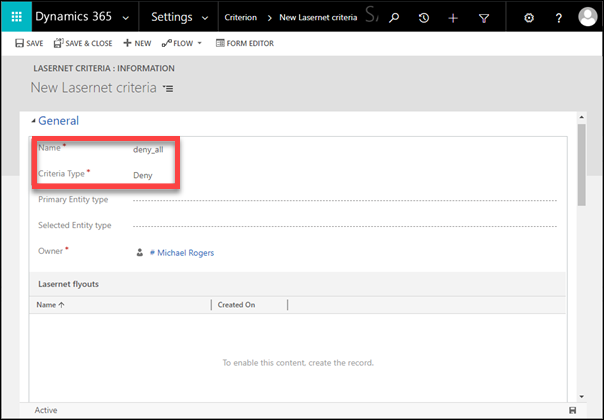
Select at least the deny_all criterion to prevent the group from showing up for every entity in Customer Engagement except for the one for which you create a flyout. If the deny_all criterion has not been created yet, ensure to create one (see the following steps).
If this is a new installation, no criteria are present in the system. Therefore, you must create them first. To this end, click the New button while searching for a criterion.
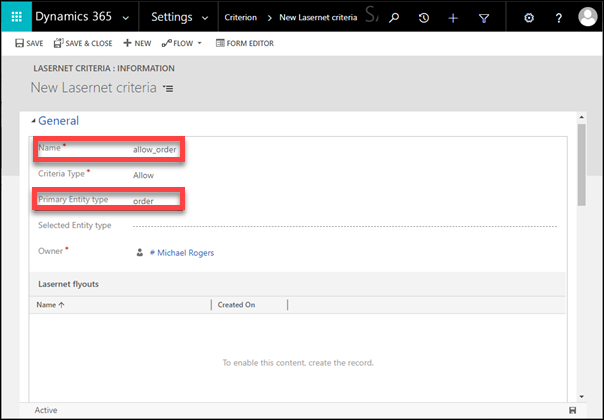
As a result, the New Lasernet Criteria window opens. In the window, define a name, a criterion type, and a primary entity type value. Once you are done, click the Save & Close button.
Info
To find out what entity types are available in the system, you need to access the Entities list. To this end, on the Sales menu, click the down-pointing arrow to show the navigation menu. Under the Settings flyout, locate the Customization list, and then click Customizations. On the Customization page that opens, click Customize the system. As a result, a new window opens. To access the Entities list, on the Default Solution pane, expand the Entities component.
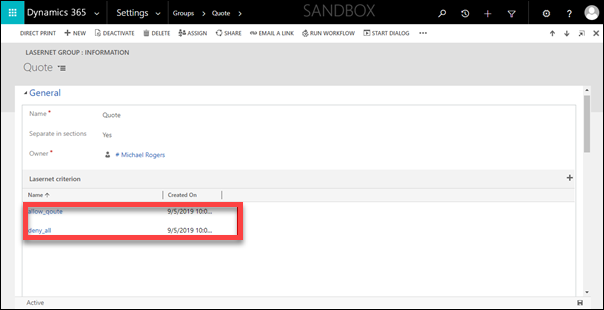
Navigate back to the group and verify that you have added all the required criteria. In the following screenshot, these are deny_all and allow_quote. By defining criteria, you add a group to the entity you require.
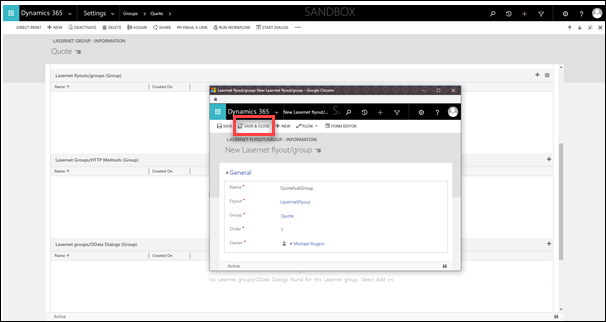
Scroll down to the Lasernet flyout/groups section, and add a new group by clicking the plus sign to link the group to the required flyout.
In the New Lasernet flyout/group window that opens, fill in the required fields, and then click the Save & Close button.
In addition, you can add the HTTP method record as well as the OData Dialog and OData Direct Submit records by clicking the plus sign in the corresponding section of the group.
In the New Lasernet group window that opens, search for the required record and select it. If you cannot locate the required record or no records are available in the system, it is possible to add a new one. To this end, click the New button while searching for a record (HTTP Method, OData Dialog, or OData Direct Submit). Otherwise, you can add a new record to the system in advance:
Click here to find step-by-step instructions on how to add a new OData Dialog record.
Click here to find step-by-step instructions on how to add a new HTTP Method record.
Click here to find step-by-step instructions on how to add a new OData Direct Submit record.
Once you are done, click the Save icon in the bottom right-hand corner of the window to save all the changes.
As a result, the flyout and all the actions you have defined are now available for the configured entity.

